Growing fruit plants at home in pots is no longer difficult. Even if you live in a flat, apartment, or have only a balcony or terrace, you can still enjoy fresh, organic fruits by following the right method.
In this complete guide, you will learn:
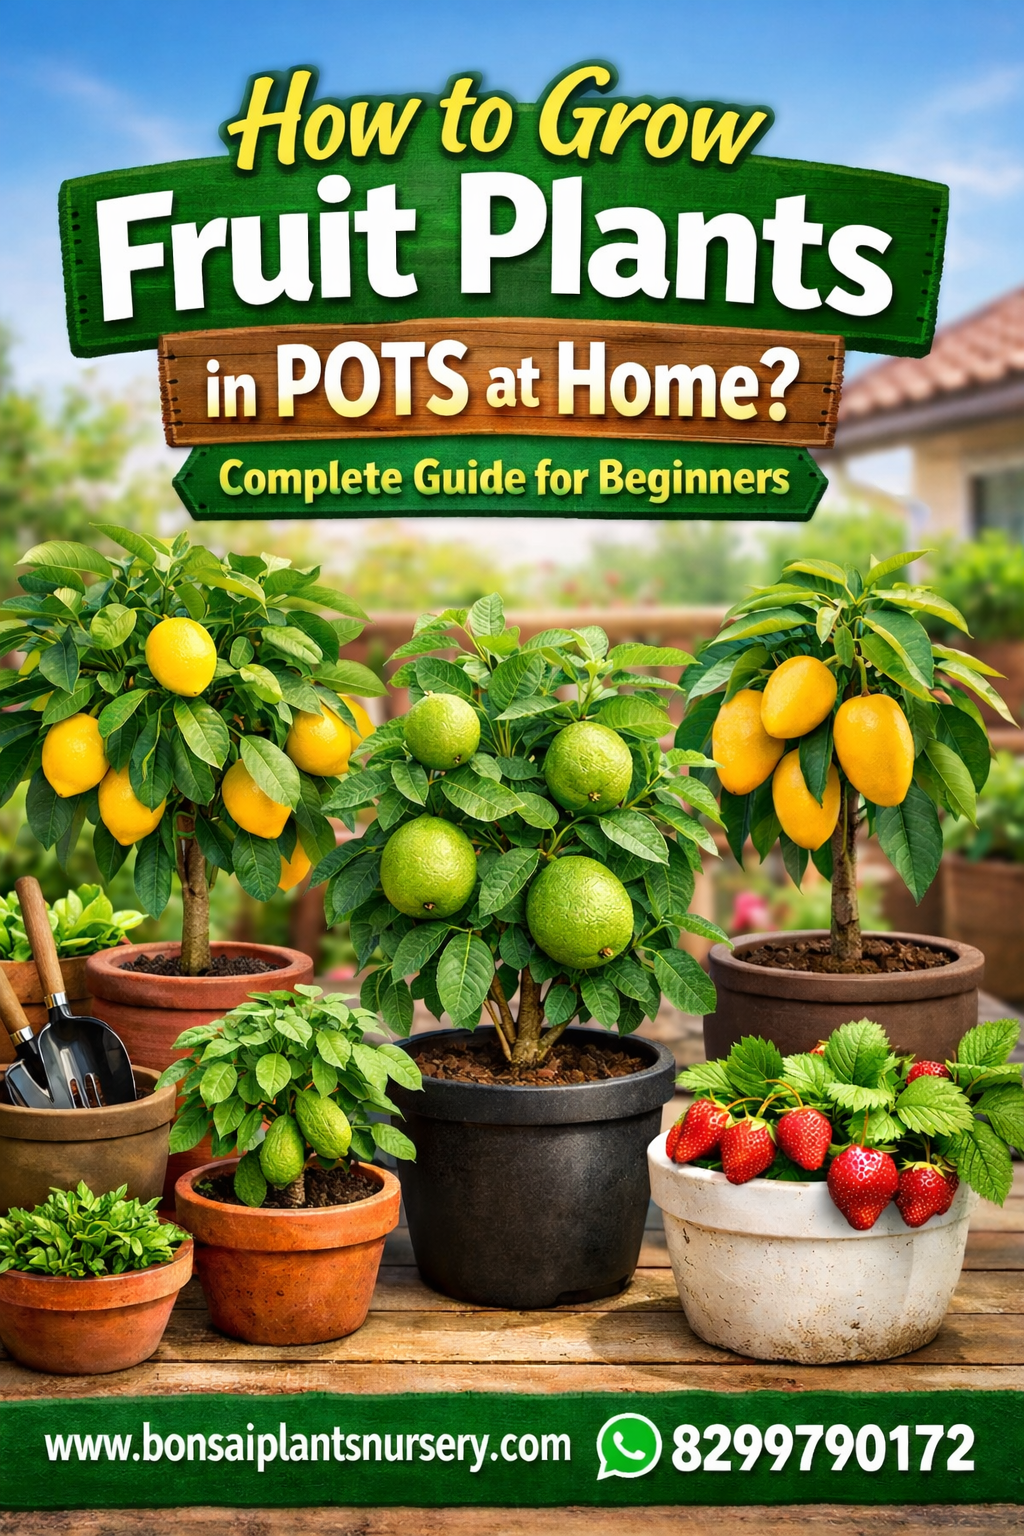
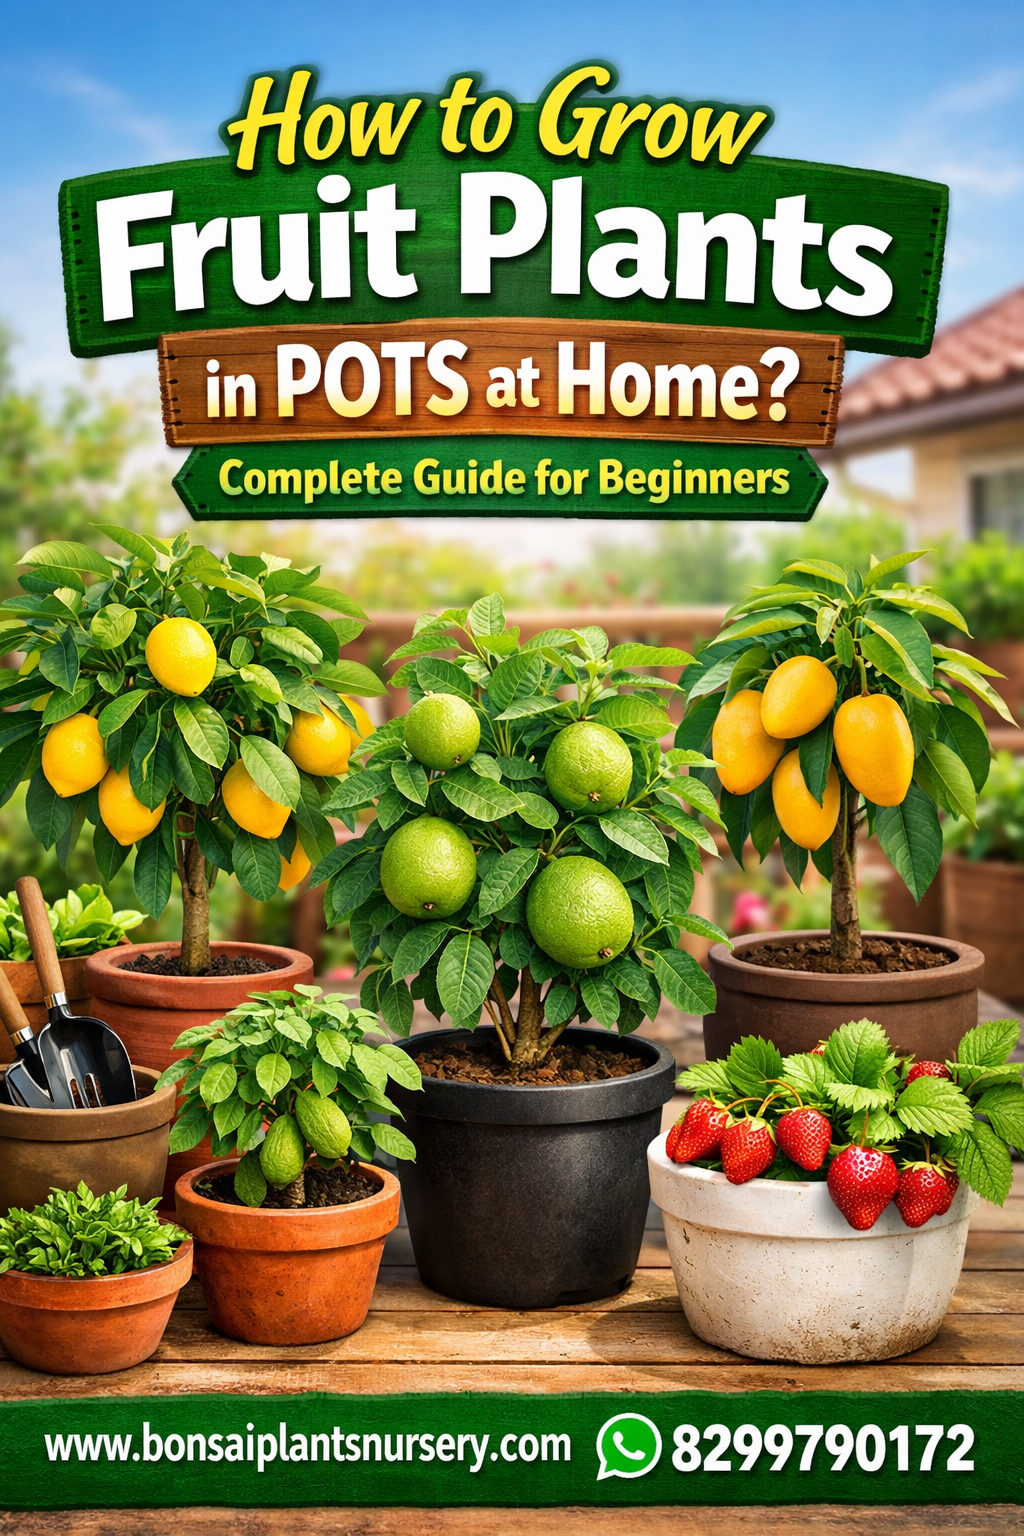
How to Grow Fruit Plants in Pots at Home
Benefits of growing fruit plants in pots
Best fruit plants for container gardening
Correct pot size, soil mix & fertilizers
Sunlight, watering & maintenance tips
Common problems and solutions
How to get more fruits in less time
🌱 Benefits of Growing Fruit Plants in Pots
Perfect for small spaces – balconies, terraces & rooftops
Fresh and organic fruits at home
Low cost, long-term harvest
Easy care with grafted plants
Improves air quality & mental health
🏡 Can Fruit Plants Really Grow in Pots?
👉 Yes, absolutely!
Fruit plants grow very well in pots if:
You choose the right plant variety
You use grafted fruit plants
Proper sunlight, water, and nutrition are provided
📌 Seed-grown (non-grafted) plants may take 4–6 years to fruit 📌 Grafted plants usually give fruits within 1–2 years
That’s why most home gardeners prefer grafted fruit plants for pots.
आज के समय में बहुत से लोग चाहते हैं कि वे अपने घर, फ्लैट, बालकनी या छत पर फलदार पौधे उगाएँ, ताकि उन्हें ताज़े, केमिकल-फ्री और ऑर्गेनिक फल मिल सकें।
अच्छी बात यह है कि थोड़ी-सी सही जानकारी और देखभाल से गमलों में भी भरपूर फल उगाए जा सकते हैं।
इस लेख में आप जानेंगे:
How to Grow Fruit Plants in Pots at Home
✅ गमलों में फलदार पौधे उगाने के फायदे ✅ कौन-कौन से फल गमलों में अच्छे से उगते हैं ✅ सही गमला, मिट्टी और खाद ✅ पानी, धूप और देखभाल ✅ आम समस्याएँ और उनके समाधान ✅ गमलों में जल्दी फल पाने के टिप्स
🌱 गमलों में फलदार पौधे उगाने के फायदे
कम जगह में बागवानी – छोटे घर और फ्लैट के लिए आदर्श
ताज़े और ऑर्गेनिक फल – बिना केमिकल
कम खर्च, ज़्यादा फायदा – एक बार पौधा, सालों तक फल
स्वास्थ्य और मानसिक शांति – गार्डनिंग stress कम करती है
सुंदरता और हरियाली – घर का माहौल अच्छा बनता है
🏡 क्या गमलों में सच में फल आ सकते हैं?
👉 हाँ, बिल्कुल!
अगर आप:
सही पौधा चुनें
Grafted (कलमी) पौधे लगाएँ
सही धूप, पानी और खाद दें
तो गमलों में भी पौधे अच्छे फूल और फल देते हैं।
📌 बीज से उगाए पौधों में फल आने में 4–6 साल लग सकते हैं 📌 कलमी (Grafted) पौधे 1–2 साल में फल देना शुरू कर देते हैं
इसीलिए गमलों के लिए Grafted fruit plants सबसे बेहतर होते हैं।
Most home gardeners today want fruit plants that grow fast and give fruits quickly. Nobody likes waiting 4–6 years to see results. That’s why fast fruiting plants are becoming extremely popular in India—especially for home gardens, terrace gardens, and pots.
Fruit_Plants_That_Give_Fruits_Within_1_Year
If you are searching for “1 year mein phal dene wale paudhe”, this guide will help you choose the right plants, correct growing method, and best care tips to get fruits as early as possible.
🌱 What Are Fast Fruiting Plants?
Fast fruiting plants are fruit plants that:
Start flowering and fruiting within 8–18 months
Perform best when they are grafted (kalmi) plants
Require proper sunlight, nutrition, and care
📌 Most plants that give fruits within 1 year are grafted fruit plants, not seed-grown plants.
🌳 Grafted vs Non-Grafted Plants (Very Important)
✅ Grafted Fruit Plants
Fruits in 1–2 years
Controlled plant height
Better fruit quality
Disease resistant
Ideal for pots & terrace gardening
❌ Non-Grafted Plants
Fruits in 4–7 years
Uncertain fruit quality
Large tree size
👉 If your goal is fast fruiting, always choose grafted plants.
🥇 Top Fast Fruiting Plants (Give Fruits Within 1 Year)
🍋 1. Lemon Plant (Citrus / Nimbu)
⏱️ Fruiting time: 8–12 months
Why choose lemon?
Fruits throughout the year
Easy to grow in pots
Perfect for beginners
🍈 2. Papaya Plant
⏱️ Fruiting time: 7–10 months
Highlights:
One of the fastest growing fruit plants
Suitable for terrace and backyard
High yield in short time
🍎 3. Fig Plant (Anjeer)
⏱️ Fruiting time: 8–14 months
Why fig is popular:
Excellent pot performance
Very low maintenance
High market demand
🍊 4. Pomegranate Plant (Anar)
⏱️ Fruiting time: 10–15 months
Benefits:
Requires less water
Ideal for hot Indian climate
Perfect for terrace gardening
🍐 5. Guava Plant (Grafted Amrud)
⏱️ Fruiting time: 12–18 months
📌 Always choose grafted guava plants for faster fruiting.
🍓 6. Strawberry Plant
⏱️ Fruiting time: 3–4 months
Best for winter season
Suitable for small pots & hanging baskets
🍌 7. Banana Plant (Dwarf Variety)
⏱️ Fruiting time: 9–12 months
Excellent for terrace & backyard
Requires regular feeding
🥭 8. Mango Plant (Dwarf Grafted)
⏱️ Fruiting time: 12–18 months
📌 Seed-grown mango plants take 5–7 years, but grafted dwarf mango fruits much earlier.
आज के समय में ज़्यादातर लोग ऐसे फलदार पौधे लगाना चाहते हैं जो 👉 जल्दी फल दें, 👉 कम देखभाल में उग जाएँ, 👉 और घर / गमले / छत पर आसानी से लगाए जा सकें।
अगर आप भी यही सोच रहे हैं कि “कौन-सा पौधा 1 साल के अंदर फल देना शुरू कर देगा?” तो यह लेख आपके लिए पूरी तरह से उपयोगी है।
Fruit_Plants_That_Give_Fruits_Within_1_Year
🌱 Fast Fruiting Plants क्या होते हैं?
Fast Fruiting Plants वे फलदार पौधे होते हैं जो:
8 महीने से 18 महीने के अंदर
सही देखभाल मिलने पर
फूल और फल देना शुरू कर देते हैं
📌 ज़्यादातर fast fruiting plants Grafted (कलमी) होते हैं।
🌳 Grafted vs Non-Grafted Plants (बहुत ज़रूरी जानकारी)
🔹 Grafted Plants (कलमी पौधे)
✅ 1–2 साल में फल ✅ पौधा छोटा रहता है ✅ फल की quality अच्छी ✅ disease resistant
🔹 Non-Grafted Plants
❌ 4–7 साल में फल ❌ fruit quality unpredictable
👉 अगर आपको जल्दी फल चाहिए, तो हमेशा grafted fruit plants ही लगाएँ।
🥇 Top 10 Fast Fruiting Plants (1 साल में फल देने वाले)
🍋 1. Lemon Plant (नींबू)
⏱️ फल आने का समय: 8–12 महीने 📍 गमले और ज़मीन – दोनों में संभव
फायदे:
साल भर फल
कम देखभाल
Beginners के लिए best
🍈 2. Papaya Plant (पपीता)
⏱️ फल आने का समय: 7–10 महीने 📍 Terrace & backyard best
खास बातें:
बहुत तेज़ बढ़ता है
कम जगह में भी संभव
🍎 3. Fig Plant / Anjeer
⏱️ फल आने का समय: 8–14 महीने
क्यों लगाएँ?
सबसे popular fast fruit plant
गमले में बहुत अच्छा result
🍊 4. Pomegranate / Anar
⏱️ फल आने का समय: 10–15 महीने
फायदे:
कम पानी में भी उगता है
Terrace gardening के लिए ideal
🍐 5. Guava (Grafted Amrud)
⏱️ फल आने का समय: 12–18 महीने
Tip: 👉 हमेशा grafted guava ही खरीदें।
🍓 6. Strawberry
⏱️ फल आने का समय: 3–4 महीने 📍 Small pots & hanging baskets
🍌 7. Banana (Dwarf Variety)
⏱️ फल आने का समय: 9–12 महीने
Best for:
Terrace
Backyard
🥭 8. Mango (Dwarf Grafted)
⏱️ फल आने का समय: 12–18 महीने
📌 Normal mango seed से उगाने पर 5–7 साल लगते हैं।
🍒 9. Cherry Tomato
⏱️ फल आने का समय: 2–3 महीने 📍 Balcony gardening
🍇 10. Grapes (Angoor)
⏱️ फल आने का समय: 10–14 महीने
🪴 गमलों में Fast Fruiting Plants कैसे उगाएँ?
✅ सही गमला
Minimum: 18–24 inch
Drainage hole ज़रूरी
✅ सही मिट्टी (Soil Mix)
40% Garden soil
30% Vermicompost
20% Sand
10% Cocopeat
☀️ धूप कितनी जरूरी है?
Fast fruiting plants को चाहिए:
☀️ 6–8 घंटे सीधी धूप रोज़
📌 बिना धूप = फूल आएँगे लेकिन फल नहीं।
💧 पानी कब और कितना?
❌ ज्यादा पानी = root rot ❌ कम पानी = stress
✔️ मिट्टी सूखी लगे तभी पानी दें।
🌼 खाद और पोषण (Fertilizer Schedule)
हर 15 दिन:
Vermicompost
Cow dung manure
फूल-फल के समय:
Banana peel liquid
Bone meal
Mustard cake liquid
🚀 1 साल में फल पाने के Expert Tips
1️⃣ हमेशा Grafted plants लगाएँ 2️⃣ छोटा गमला इस्तेमाल न करें 3️⃣ फूल आने पर nitrogen कम करें 4️⃣ Neem oil spray 15 दिन में 5️⃣ पौधे को बार-बार जगह न बदलें
🦠 Common Problems & Solution
❌ फूल गिरना
कारण: पानी की कमी उपचार: Regular watering + potash
❌ पत्तियाँ पीली
कारण: Overwatering उपचार: Drainage सुधारें
❓ FAQs – अक्सर पूछे जाने वाले सवाल
Q1. क्या सच में 1 साल में फल आ सकता है?
👉 हाँ, grafted plants में संभव है।
Q2. Beginners के लिए best fast plant?
👉 नींबू, अंजीर, पपीता
Q3. गमले में आम संभव है?
👉 हाँ, dwarf grafted mango से।
🛒 Best Place to Buy Fast Fruiting Plants
अगर आप चाहते हैं:
✅ Healthy grafted plants ✅ Fast fruiting varieties ✅ Safe home delivery
In today’s busy lifestyle, many people want to grow fruit plants at home—whether on a terrace, balcony, or small backyard. The good news is that you don’t need a large garden. With the right plants, pots, soil, and care, you can successfully grow fruit-bearing plants in containers.
This detailed guide will explain:
Benefits of growing fruit plants in pots
Best fruit plants for container gardening
Right pot size, soil mix & fertilizers
Watering, sunlight & maintenance
Common diseases and solutions
Tips to get fruits faster
FAQs (Frequently Asked Questions)
🌱 Benefits of Growing Fruit Plants in Pots
Perfect for small spaces – ideal for flats & balconies
Complete Guide for Beginners (Pot & Terrace Gardening)
आज के समय में बहुत से लोग घर, फ्लैट, छत (Terrace) या बालकनी में ही फल वाले पौधे उगाना चाहते हैं। लेकिन सही जानकारी के अभाव में पौधे तो लग जाते हैं, पर फल नहीं आते।
how_to_grow_fruit_plants_at_home
अगर आप भी चाहते हैं कि आपके गमलों में लगे पौधों पर अच्छे, मीठे और हेल्दी फल आएं, तो यह गाइड आपके लिए है।
इस लेख में हम जानेंगे: ✅ गमलों में फल उगाने के फायदे ✅ कौन-कौन से फल गमलों में उग सकते हैं ✅ सही गमला, मिट्टी और खाद ✅ पानी, धूप और देखभाल ✅ आम बीमारियां और उनका उपचार ✅ गमलों में जल्दी फल पाने के टिप्स ✅ FAQs (अक्सर पूछे जाने वाले सवाल)
🌱 गमलों में फल वाले पौधे उगाने के फायदे
कम जगह में खेती – छोटे घर या फ्लैट में भी संभव
100% ऑर्गेनिक फल – केमिकल फ्री
ताजा फल घर पर – बाजार जाने की जरूरत नहीं
कम लागत – एक बार पौधा लगाइए, सालों तक फल पाइए
मानसिक शांति – गार्डनिंग stress कम करती है
🏡 क्या गमलों में सच में फल आ सकते हैं?
👉 हाँ, बिल्कुल! अगर आप:
सही पौधा चुनें
Grafted (कलमी) पौधे लगाएं
सही देखभाल करें
तो गमलों में भी भरपूर फल आते हैं।
📌 नॉन-ग्राफ्टेड पौधों में फल आने में 4–6 साल लग सकते हैं, जबकि Grafted पौधे 1–2 साल में फल देना शुरू कर देते हैं।
👉 इसी वजह से आजकल लोग online grafted fruit plants खरीदना पसंद करते हैं।
🍎 गमलों में उगने वाले बेस्ट फल वाले पौधे
नीचे ऐसे फल पौधों की सूची दी गई है जो pots / gamlon में बहुत अच्छे से उगते हैं:
The fig plant, commonly known as Anjeer in India and Fig (Ficus carica) in English, is one of the oldest cultivated fruit plants in the world. It is highly valued for its delicious taste, medicinal properties, and easy maintenance. Due to its adaptability to Indian climatic conditions, many people prefer growing fig plants at home, on terraces, balconies, gardens, and farms.
Growing a fig plant is not difficult if you follow the correct planting method and care routine. In this detailed guide, you will learn everything about how to grow fig plant successfully, its care, benefits, common diseases, treatments, and frequently asked questions.
The fig plant belongs to the Moraceae family and its scientific name is Ficus carica. It is a deciduous plant that produces sweet, soft, and nutrient-rich fruits. Fig plants can grow as shrubs or small trees and are suitable for both pot and ground planting.
Common Names of Fig
English: Fig
Hindi: Anjeer
Sanskrit: Udumbar
Why Grow Fig Plant in India?
India’s warm and semi-dry climate is ideal for fig cultivation. Fig plants are hardy, require low maintenance, and start fruiting quickly compared to many other fruit plants.
Benefits of Growing Fig Plant
Easy to grow and maintain
Grows well in pots and soil
Early fruiting plant
Highly nutritious and medicinal fruit
Good market value
Best Time to Plant Fig Plant
Choosing the right time is crucial for healthy growth.
Rich in dietary fiber, helps relieve constipation.
2. Strengthens Bones
Contains calcium, magnesium, and phosphorus.
3. Helps in Weight Management
Low in calories and high in fiber.
4. Good for Heart Health
Helps regulate cholesterol levels.
5. Beneficial for Diabetics
Can be consumed in moderation with medical advice.
Common Diseases in Fig Plant and Their Treatment
1. Yellowing of Leaves
Causes:
Overwatering
Poor drainage
Nutrient deficiency
Symptoms:
Leaves turn yellow and fall
Stunted growth
Treatment:
Reduce watering
Improve drainage
Add organic compost regularly
2. Powdery Mildew (White Powder on Leaves)
Causes:
Excess humidity
Poor air circulation
Symptoms:
White powder-like coating on leaves
Treatment:
Spray neem oil (3–5 ml per liter of water)
Remove infected leaves
Keep plant in airy location
3. Root Rot Disease
Causes:
Waterlogging
Poor soil drainage
Symptoms:
Wilting plant
Soft stem near roots
Treatment:
Stop watering immediately
Repot with fresh, well-draining soil
Remove rotten roots
4. Pest Attack (Aphids, Mealybugs, Whiteflies)
Symptoms:
Sticky substance on leaves
Curled leaves
Visible insects
Treatment:
Neem oil spray
Mild soap water spray
Regular inspection
5. Fruit Drop Problem
Causes:
Nutrient deficiency
Irregular watering
Excess heat
Treatment:
Apply potassium-rich organic fertilizer
Maintain consistent watering
Provide light shade in extreme heat
6. Leaf Spot Disease
Symptoms:
Brown or black spots on leaves
Treatment:
Remove affected leaves
Use organic fungicide or neem oil
Avoid water stagnation
How to Prevent Diseases in Fig Plant
Use organic fertilizers
Avoid overwatering
Monthly neem oil spray
Proper sunlight and ventilation
Regular pruning
Vastu Benefits of Fig Plant
Promotes positive energy
Symbol of prosperity and peace
Best placed in east or south direction
Why Buy Fig Plant from BonsaiPlantsNursery.com?
Healthy, nursery-grown plants
Secure packaging
All India home delivery
Expert plant care guidance
Quality assurance
Frequently Asked Questions (FAQ)
Q1. How long does fig plant take to bear fruit?
👉 Usually 6–12 months.
Q2. Can fig plant grow in a pot?
👉 Yes, with proper pot size and care.
Q3. How much sunlight does fig plant need?
👉 6–8 hours daily.
Q4. Can fig plant be grown indoors?
👉 No, it requires outdoor sunlight.
Q5. How long does a fig plant live?
👉 With good care, 20–30 years.
Conclusion
The fig plant (Anjeer) is an excellent choice for home gardeners due to its easy maintenance, fast fruiting, and numerous health benefits. By following the correct planting method, proper care routine, and timely disease management, you can enjoy fresh figs grown at home for many years.
If you are planning to grow a healthy fig plant, always choose a reliable nursery and provide the right growing conditions.
🌱 Start growing your own fig plant today and enjoy nature’s sweet gift!
अंजीर का पौधा (Fig Plant / Ficus Carica) भारत में प्राचीन काल से उगाया जा रहा है। इसे आयुर्वेद में अत्यंत लाभकारी फल माना गया है। अंजीर का फल स्वादिष्ट होने के साथ-साथ पोषक तत्वों से भरपूर होता है। आजकल लोग अपने घर, छत, बगीचे और फार्महाउस में अंजीर का पौधा लगाना पसंद कर रहे हैं क्योंकि इसकी देखरेख आसान है और यह जल्दी फल देना शुरू कर देता है।
अंजीर एक फलदार पौधा है जिसका वैज्ञानिक नाम Ficus Carica है। यह शहतूत परिवार (Moraceae) से संबंधित है। अंजीर का पौधा मध्यम आकार का होता है और इसकी पत्तियाँ बड़ी तथा खुरदरी होती हैं।
भारत में अंजीर को अलग-अलग नामों से जाना जाता है:
हिंदी – अंजीर
अंग्रेजी – Fig
संस्कृत – उदुम्बर
उर्दू – अंजीर
भारत में अंजीर का पौधा क्यों लगाएं?
भारत का मौसम अंजीर के पौधे के लिए काफी अनुकूल है। यह पौधा गर्म और शुष्क जलवायु में अच्छी तरह बढ़ता है।
अंजीर का पौधा लगाने के फायदे
कम देखरेख में अच्छा उत्पादन
जल्दी फल देना
गमले और जमीन दोनों में उगाया जा सकता है
औषधीय गुणों से भरपूर
बाजार में अच्छी कीमत
अंजीर का पौधा लगाने का सही समय
अंजीर का पौधा लगाने के लिए सही समय बहुत महत्वपूर्ण है।
सबसे अच्छा समय
फरवरी से मार्च (वसंत ऋतु)
जुलाई से अगस्त (मानसून)
👉 ठंड के मौसम (दिसंबर-जनवरी) में पौधा लगाने से बचें।
👉 आप स्वस्थ अंजीर का पौधा ऑनलाइन भी खरीद सकते हैं।
2. गमले में अंजीर का पौधा लगाने का तरीका
सही गमले का चुनाव
गमले का साइज: 18–24 इंच
नीचे जल निकासी छेद (Drainage Hole) जरूर हो
मिट्टी का मिश्रण
40% गार्डन मिट्टी
30% गोबर की खाद / वर्मीकम्पोस्ट
20% रेत
10% कोकोपीट
पौधा लगाने की विधि
गमले के नीचे कंकड़ या ईंट के टुकड़े डालें
मिट्टी का मिश्रण भरें
पौधे को सावधानी से लगाएं
हल्का पानी दें
2–3 दिन छाया में रखें
3. जमीन में अंजीर का पौधा कैसे लगाएं?
गड्ढे का आकार: 2x2x2 फीट
मिट्टी में गोबर की खाद मिलाएं
पौधे को सीधा लगाएं
अच्छी तरह सिंचाई करें
👉 पौधों के बीच कम से कम 10–12 फीट की दूरी रखें।
अंजीर के पौधे की देखरेख कैसे करें?
1. धूप की जरूरत
अंजीर को रोज़ 6–8 घंटे धूप चाहिए
गमले वाला पौधा बालकनी या छत पर रखें
2. पानी देने का सही तरीका
गर्मियों में: हफ्ते में 2–3 बार
सर्दियों में: हफ्ते में 1 बार
मिट्टी सूखने पर ही पानी दें
⚠️ ज्यादा पानी देने से जड़ें सड़ सकती हैं।
3. खाद और उर्वरक
हर 30 दिन में गोबर की खाद
फल आने से पहले पोटाश युक्त खाद
जैविक खाद सबसे बेहतर
4. छंटाई (Pruning)
साल में 1 बार छंटाई करें
सूखी और कमजोर टहनियां हटाएं
इससे फल ज्यादा लगते हैं
अंजीर के पौधे में फूल और फल कब आते हैं?
पौधा लगाने के 6–12 महीने में फल
सही देखरेख से साल में 2 बार फल
अंजीर खाने के स्वास्थ्य लाभ
1. पाचन तंत्र के लिए लाभकारी
अंजीर फाइबर से भरपूर होता है जो कब्ज दूर करता है।
2. हड्डियों को मजबूत करता है
इसमें कैल्शियम और मैग्नीशियम होता है।
3. वजन घटाने में सहायक
कम कैलोरी और ज्यादा फाइबर।
4. दिल के लिए फायदेमंद
कोलेस्ट्रॉल नियंत्रित करता है।
5. डायबिटीज में लाभ
सीमित मात्रा में सेवन लाभकारी होता है।
अंजीर के पौधे में आने वाली आम समस्याएं और समाधान
1. पत्तियां पीली होना
कारण: ज्यादा पानी समाधान: सिंचाई कम करें
2. फल गिरना
कारण: पोषण की कमी समाधान: जैविक खाद दें
3. कीट और रोग
नीम तेल का छिड़काव करें
रासायनिक दवाइयों से बचें
अंजीर का पौधा घर में लगाने के वास्तु लाभ
सकारात्मक ऊर्जा बढ़ाता है
घर में शांति और समृद्धि
दक्षिण या पूर्व दिशा में लगाएं
अंजीर का पौधा क्यों खरीदें BonsaiPlantsNursery.com से?
स्वस्थ और मजबूत पौधे
सुरक्षित पैकिंग
पूरे भारत में होम डिलीवरी
गमले और ग्रो बैग विकल्प
पौधों की देखरेख गाइड
FAQ – अंजीर के पौधे से जुड़े अक्सर पूछे जाने वाले सवाल
Q1. अंजीर का पौधा कितने दिन में फल देता है?
👉 आमतौर पर 6–12 महीने में।
Q2. क्या अंजीर का पौधा गमले में फल देता है?
👉 हाँ, सही गमले और देखरेख से।
Q3. अंजीर के पौधे को कितनी धूप चाहिए?
👉 रोज़ 6–8 घंटे।
Q4. क्या अंजीर का पौधा घर के अंदर रखा जा सकता है?
👉 नहीं, इसे बाहर धूप में रखें।
Q5. अंजीर का पौधा कितने साल चलता है?
👉 सही देखरेख से 20–30 साल तक।
निष्कर्ष
अंजीर का पौधा न केवल स्वादिष्ट फल देता है बल्कि स्वास्थ्य और पर्यावरण के लिए भी अत्यंत लाभकारी है। सही समय, सही मिट्टी और नियमित देखरेख से आप अपने घर में आसानी से अंजीर उगा सकते हैं।
अगर आप स्वस्थ और उच्च गुणवत्ता वाला अंजीर का पौधा खरीदना चाहते हैं, तो भरोसेमंद नर्सरी से ही लें।
🌱 आज ही अपने घर में अंजीर का पौधा लगाएं और प्रकृति का लाभ उठाएं।
🌿 अंजीर के पौधे में होने वाली बीमारियाँ और उनके उपचार
(Anjeer ke Podhe ki Beemari aur Upchaar)
अंजीर का पौधा सामान्यतः मजबूत होता है, लेकिन गलत देखरेख, अधिक नमी, पोषण की कमी या कीटों के कारण इसमें कुछ बीमारियाँ हो सकती हैं। समय पर पहचान और सही उपचार से पौधे को आसानी से स्वस्थ रखा जा सकता है।
1️⃣ पत्तियों का पीला पड़ना (Yellow Leaves Disease)
कारण:
ज्यादा पानी देना
जल निकासी की कमी
मिट्टी में पोषक तत्वों की कमी
लक्षण:
पत्तियाँ पीली होकर गिरने लगती हैं
पौधे की बढ़वार रुक जाती है
उपचार:
पानी तभी दें जब मिट्टी ऊपर से सूखी हो
गमले में अच्छे ड्रेनेज होल रखें
हर 20–30 दिन में वर्मीकम्पोस्ट या गोबर की खाद डालें
2️⃣ पत्तियों पर सफेद पाउडर (Powdery Mildew)
कारण:
अधिक नमी
हवा का सही संचार न होना
लक्षण:
पत्तियों पर सफेद पाउडर जैसी परत
पत्तियाँ कमजोर हो जाती हैं
उपचार:
नीम तेल (Neem Oil) 3–5 ml प्रति लीटर पानी में मिलाकर छिड़काव करें
संक्रमित पत्तियाँ हटा दें
पौधे को खुली और हवादार जगह रखें
3️⃣ जड़ सड़न रोग (Root Rot)
कारण:
जरूरत से ज्यादा सिंचाई
पानी जमा रहने वाली मिट्टी
लक्षण:
पौधा अचानक मुरझाने लगता है
तना नरम पड़ जाता है
उपचार:
पानी तुरंत बंद करें
पौधे को सूखी, अच्छी जल निकासी वाली मिट्टी में लगाएं
सड़ी हुई जड़ों को काटकर हटाएं
4️⃣ कीट आक्रमण (Aphids, Mealybugs, Whiteflies)
कारण:
गंदा वातावरण
कमजोर पौधा
लक्षण:
पत्तियों पर चिपचिपा पदार्थ
पत्तियाँ मुड़ने लगती हैं
छोटे सफेद या हरे कीड़े दिखाई देना
उपचार:
नीम तेल या नीम खली का घोल छिड़कें
हल्का साबुन पानी का स्प्रे करें
हर 10–15 दिन में निरीक्षण करें
5️⃣ फल गिरने की समस्या (Fruit Drop)
कारण:
पोषक तत्वों की कमी
पानी की अनियमितता
अत्यधिक गर्मी
लक्षण:
कच्चे फल गिर जाते हैं
फल आकार में छोटे रह जाते हैं
उपचार:
पोटाश युक्त जैविक खाद दें
नियमित सिंचाई करें
तेज धूप में हल्की छाया दें
6️⃣ पत्तियों पर भूरे या काले धब्बे (Leaf Spot Disease)
कारण:
फंगल संक्रमण
ज्यादा नमी
लक्षण:
पत्तियों पर काले या भूरे धब्बे
पत्तियाँ सूखने लगती हैं
उपचार:
संक्रमित पत्तियाँ हटा दें
नीम तेल या जैविक फंगीसाइड का छिड़काव करें
पौधे के आसपास पानी जमा न होने दें
🌱 अंजीर के पौधे को बीमारियों से बचाने के आसान उपाय
हमेशा जैविक खाद का प्रयोग करें
जरूरत से ज्यादा पानी न दें
महीने में एक बार नीम तेल स्प्रे करें
पौधे को खुली धूप और हवा दें
समय-समय पर छंटाई (Pruning) करें
🔚 निष्कर्ष
अगर अंजीर के पौधे की सही समय पर देखरेख की जाए तो यह बहुत कम बीमार पड़ता है। ऊपर बताए गए बीमारियों और उपचार अपनाकर आप अपने अंजीर के पौधे को लंबे समय तक हरा-भरा और फलदार बनाए रख सकते हैं।
🌿 Rosemary Plant: Benefits, How to Grow, Care Tips and Complete Guide
Introduction
In today’s fast-paced lifestyle, people are increasingly turning back to nature for better health and peace of mind. Herbal plants are becoming popular not only for their medicinal value but also for their beauty and usefulness in daily life. One such wonderful herb is the Rosemary plant.
The rosemary plant is known for its aromatic leaves, medicinal properties, culinary uses, and positive energy benefits. It is easy to grow and perfect for home gardens, balconies, terraces, and kitchen gardens. Whether you are a gardening enthusiast or a beginner, rosemary is an ideal plant to start with.
In this detailed guide, you will learn everything about rosemary, including its benefits, how to plant it, care tips, harvesting, common problems, and frequently asked questions.
Rosemary (Salvia rosmarinus) is a fragrant evergreen herb belonging to the mint family (Lamiaceae). Its needle-like leaves emit a strong, refreshing aroma and are widely used in cooking, medicine, and aromatherapy.
Originally native to the Mediterranean region, rosemary has adapted well to Indian climatic conditions and can be grown easily across the country. It is a hardy plant that tolerates heat, mild cold, and drought once established.
Benefits of Growing Rosemary Plant
1. Health Benefits
Rosemary is rich in antioxidants and anti-inflammatory compounds. Regular use offers several health benefits:
Improves memory and concentration
Reduces stress and anxiety
Supports digestion
Boosts immunity
Helps relieve headaches and fatigue
Rosemary tea and essential oil are especially popular for mental clarity and relaxation.
2. Culinary Uses
Rosemary enhances the flavor and aroma of many dishes and is widely used in international cuisines:
Soups and salads
Pasta and pizza
Grilled vegetables
Chicken, fish, and paneer dishes
Herb butter and sauces
Fresh rosemary leaves provide stronger aroma than dried ones.
3. Natural Mosquito Repellent
The strong fragrance of rosemary naturally repels mosquitoes and insects. Keeping rosemary plants in balconies or near windows helps reduce insects indoors.
4. Aesthetic and Decorative Value
Rosemary plants remain green throughout the year and add elegance to gardens. They can be grown in pots, borders, hedges, or even trained as bonsai plants.
5. Vastu and Positive Energy Benefits
According to Vastu principles, rosemary brings positive energy and purifies the surroundings. It helps reduce negativity and promotes mental calmness. Placing it in the north or east direction is considered auspicious.
How to Grow Rosemary Plant at Home
1. Growing from Seeds or Cuttings
Rosemary can be grown in two ways:
From seeds (slow germination)
From stem cuttings (fast and reliable)
👉 Growing from cuttings is recommended for beginners.
2. Best Soil for Rosemary
Rosemary prefers light, well-drained soil. A good soil mix includes:
40% garden soil
30% river sand
20% vermicompost
10% cocopeat
Soil pH should be between 6 and 7.
3. Choosing the Right Pot
8–12 inch pot is ideal
Ensure proper drainage holes
Clay or ceramic pots are best
4. Planting Method
Fill the pot with prepared soil
Plant the rosemary cutting or sapling
Water lightly
Keep in partial shade for the first few days
Rosemary Plant Care Tips
Sunlight
Rosemary needs at least 5–6 hours of direct sunlight daily. Place it in a sunny balcony, terrace, or garden.
Watering
Water only when the soil feels dry
Avoid overwatering
Reduce watering during winter
Fertilizer
Rosemary requires minimal feeding:
Apply vermicompost once a month
Use organic liquid fertilizer occasionally
Avoid chemical fertilizers
Pruning
Regular pruning keeps the plant bushy
Remove dry and yellow leaves
Prune after flowering for best growth
Harvesting Rosemary
Ready for harvest in 2–3 months
Cut 10–12 cm long stems
Harvest in the morning
Never cut more than one-third of the plant at once
Rosemary as a Bonsai Plant
Rosemary is also popular as a bonsai plant due to its small leaves and woody stem. It offers beauty along with fragrance, making it a favorite among bonsai lovers.
Common Problems and Solutions
Yellow leaves: Overwatering Slow growth: Lack of sunlight Pests: Spray neem oil weekly
Seasonal Care Tips
Summer Care
Protect from extreme afternoon heat
Water in the morning or evening
Winter Care
Reduce watering
Protect from frost
Monsoon Care
Ensure proper drainage
Prevent fungal infections
Rosemary Tea and Home Remedies
How to Make Rosemary Tea
Boil one cup of water
Add 5–6 fresh rosemary leaves
Cover and steep for 5 minutes
Strain and drink warm
Helps reduce stress, improve digestion, and boost immunity.
Hair and Skin Benefits of Rosemary
Hair Care
Reduces hair fall
Promotes new hair growth
Controls dandruff
Strengthens hair roots
Skin Care
Reduces acne
Improves skin clarity
Anti-aging properties
Rosemary in Kitchen Garden
Rosemary grows well alongside basil, mint, thyme, and lavender. It is an excellent choice for kitchen gardens.
Commercial Benefits of Rosemary Plant
Growing rosemary can be profitable:
Nursery business
Herbal products
Essential oil extraction
Online plant sales
👉 Bulk and retail rosemary plants available
📞 WhatsApp: 8299790172
Frequently Asked Questions (FAQ)
Q1. Can rosemary be grown indoors?
Yes, if sufficient sunlight is available.
Q2. How often should I water rosemary?
Only when the soil dries out.
Q3. When is the best time to plant rosemary?
Spring and mild winter are ideal.
Q4. Where can I buy healthy rosemary plants?
From Bonsai Plants Nursery.
Conclusion
The rosemary plant is a perfect combination of beauty, health, and utility. It requires minimal care and offers maximum benefits. Whether for cooking, wellness, or decoration, rosemary is an excellent addition to every home garden.
🌿 रोज़मेरी का पौधा: लगाने के फायदे, लगाने का तरीका, देखभाल आदि सम्पूर्ण जानकारी| Bonsai Plants Nursery
भूमिका
आज के समय में लोग फिर से प्राकृतिक और औषधीय पौधों की ओर लौट रहे हैं। रोज़मेरी का पौधा एक ऐसा ही बहुउपयोगी पौधा है जो स्वाद, स्वास्थ्य, सुंदरता और सकारात्मक ऊर्जा – चारों का अद्भुत संगम है। इसे आप अपने घर की बालकनी, छत, गार्डन या किचन गार्डन में बहुत आसानी से उगा सकते हैं।
रोज़मेरी का पौधा न केवल खाने में खुशबू और स्वाद बढ़ाता है, बल्कि यह मानसिक शांति, अच्छी सेहत और वातावरण को शुद्ध रखने में भी मदद करता है। इस लेख में आपको रोज़मेरी के पौधे से जुड़ी हर छोटी‑बड़ी जानकारी सरल हिंदी में मिलेगी।
👉 स्वस्थ और तैयार रोज़मेरी का पौधा खरीदने के लिए व्हाट्सएप करें: 8299790172
👉 वेबसाइट देखें: www.bonsaiplantsnursery.com
रोज़मेरी एक सुगंधित और औषधीय पौधा है जिसका वैज्ञानिक नाम साल्विया रोज़मैरिनस है। इसके पत्ते पतले, नुकीले और खुशबूदार होते हैं। यह पौधा सदाबहार होता है यानी साल भर हरा‑भरा रहता है।
पहले यह पौधा भूमध्यसागरीय क्षेत्रों में पाया जाता था, लेकिन अब भारत में भी इसे आसानी से उगाया जा सकता है। यह पौधा गर्मी और हल्की सर्दी दोनों को सहन कर लेता है।
रोज़मेरी का पौधा लगाने के फायदे
1. स्वास्थ्य के लिए लाभकारी
रोज़मेरी का पौधा औषधीय गुणों से भरपूर होता है। इसके नियमित उपयोग से:
याददाश्त तेज होती है
तनाव और चिंता कम होती है
पाचन तंत्र मजबूत होता है
सिरदर्द और माइग्रेन में राहत मिलती है
रोग प्रतिरोधक क्षमता बढ़ती है
2. भोजन में स्वाद और खुशबू बढ़ाता है
रोज़मेरी का उपयोग कई तरह के व्यंजनों में किया जाता है जैसे:
सूप
पास्ता
पिज़्ज़ा
सब्ज़ियाँ
पनीर और मांसाहारी व्यंजन
ताज़े पत्ते सूखे पत्तों की तुलना में अधिक सुगंधित होते हैं।
3. मच्छर और कीड़े भगाने में सहायक
रोज़मेरी की तेज खुशबू मच्छर और कीड़ों को दूर रखती है। बालकनी या खिड़की के पास इसे लगाने से घर में मच्छर कम आते हैं।
4. घर और बगीचे की सुंदरता बढ़ाता है
रोज़मेरी का पौधा देखने में बहुत सुंदर होता है। यह गमले, हेज और बोन्साई के रूप में भी लगाया जा सकता है।
5. वास्तु के अनुसार लाभ
वास्तु शास्त्र के अनुसार रोज़मेरी का पौधा:
घर में सकारात्मक ऊर्जा लाता है
नकारात्मक प्रभाव दूर करता है
मानसिक शांति प्रदान करता है
इसे पूर्व या उत्तर दिशा में लगाना शुभ माना जाता है।
रोज़मेरी का पौधा लगाने का सही तरीका
1. बीज या कलम से लगाना
रोज़मेरी को दो तरीकों से लगाया जा सकता है:
बीज से
कलम (कटिंग) से
कलम से लगाया गया पौधा जल्दी बढ़ता है और अधिक सफल होता है।
2. मिट्टी का चयन
रोज़मेरी के लिए हल्की और पानी निकास वाली मिट्टी सर्वोत्तम होती है:
40% बगीचे की मिट्टी
30% रेत
20% वर्मी कम्पोस्ट
10% कोकोपीट
3. गमले का चयन
8 से 12 इंच का गमला उपयुक्त
नीचे छेद अवश्य हों
मिट्टी या सिरेमिक गमला बेहतर
4. पौधा लगाने की विधि
गमले में मिट्टी भरें
पौधा या कलम लगाएँ
हल्का पानी दें
शुरुआती दिनों में तेज धूप से बचाएँ
रोज़मेरी के पौधे की देखभाल
धूप
रोज़ाना 5–6 घंटे धूप आवश्यक है।
पानी
मिट्टी सूखने पर ही पानी दें। अधिक पानी नुकसानदायक है।
खाद
महीने में एक बार जैविक खाद या वर्मी कम्पोस्ट दें।
कटाई‑छँटाई
समय‑समय पर सूखे और पीले पत्ते हटाते रहें।
रोज़मेरी की कटाई और उपयोग
2–3 महीने बाद पत्तियाँ तोड़ी जा सकती हैं
सुबह का समय सर्वोत्तम
एक बार में पौधे का अधिक हिस्सा न काटें
सामान्य समस्याएँ और समाधान
पत्ते पीले पड़ना: अधिक पानी पौधा मुरझाना: धूप की कमी कीड़े लगना: नीम तेल का छिड़काव
रोज़मेरी का पौधा कहाँ रखें
बालकनी
छत
किचन गार्डन
उत्तर या पूर्व दिशा
व्यवसायिक लाभ
रोज़मेरी का पौधा व्यवसाय के लिए भी लाभकारी है:
नर्सरी व्यवसाय
हर्बल उत्पाद
ऑनलाइन पौधा बिक्री
👉 थोक और खुदरा दोनों में उपलब्ध
📞 व्हाट्सएप: 8299790172
अक्सर पूछे जाने वाले प्रश्न (FAQ)
प्रश्न 1: क्या रोज़मेरी घर के अंदर उग सकती है?
उत्तर: हाँ, यदि पर्याप्त धूप मिले।
प्रश्न 2: रोज़मेरी को रोज़ पानी देना चाहिए?
उत्तर: नहीं, मिट्टी सूखने पर ही।
प्रश्न 3: रोज़मेरी का पौधा कहाँ से खरीदें?
उत्तर: Bonsai Plants Nursery से।
अतिरिक्त विस्तृत जानकारी: रोज़मेरी का पौधा (Deep Guide)
रोज़मेरी का इतिहास और महत्व
रोज़मेरी का उपयोग हजारों वर्षों से किया जा रहा है। प्राचीन यूनान और रोम में इसे याददाश्त बढ़ाने वाला पौधा माना जाता था। छात्र परीक्षा से पहले रोज़मेरी की माला पहनते थे ताकि एकाग्रता बनी रहे। आयुर्वेद और यूनानी चिकित्सा पद्धति में भी रोज़मेरी का विशेष स्थान है।
भारत में अब धीरे-धीरे लोग विदेशी हर्ब्स की उपयोगिता समझ रहे हैं और रोज़मेरी उन्हीं में से एक प्रमुख पौधा है।
रोज़मेरी और आयुर्वेदिक गुण
आयुर्वेद के अनुसार रोज़मेरी:
वात दोष को संतुलित करता है
दिमाग को शांत करता है
रक्त संचार बेहतर बनाता है
थकान और कमजोरी दूर करता है
रोज़मेरी की चाय पीने से शरीर को ताजगी और स्फूर्ति मिलती है।
रोज़मेरी से बालों और त्वचा को लाभ
बालों के लिए
बालों का झड़ना कम करता है
नए बाल उगाने में सहायक
डैंड्रफ कम करता है
बालों को मजबूत बनाता है
रोज़मेरी तेल को नारियल तेल में मिलाकर सिर की मालिश करना बहुत लाभकारी होता है।
त्वचा के लिए
मुंहासे कम करता है
त्वचा को साफ करता है
एंटी-एजिंग गुण
स्किन को ग्लोइंग बनाता है
रोज़मेरी की चाय और घरेलू उपयोग
रोज़मेरी की चाय बनाने की विधि:
एक कप पानी उबालें
उसमें 5–6 ताज़े रोज़मेरी पत्ते डालें
5 मिनट ढककर रखें
छानकर पीएँ
यह चाय तनाव, सिरदर्द और पाचन में सहायक होती है।
अलग-अलग मौसम में रोज़मेरी की देखभाल
गर्मी में देखभाल
दोपहर की तेज धूप से बचाएँ
सुबह या शाम पानी दें
मिट्टी सूखने पर ही पानी
सर्दी में देखभाल
बहुत कम पानी दें
पाले से बचाएँ
धूप वाली जगह रखें
बरसात में देखभाल
पानी जमा न होने दें
गमले को ढकी जगह रखें
फंगल संक्रमण से बचाव
रोज़मेरी और किचन गार्डन
अगर आप किचन गार्डन बनाना चाहते हैं तो रोज़मेरी एक बेहतरीन विकल्प है। यह तुलसी, पुदीना और धनिया के साथ आसानी से उगाई जा सकती है।
रोज़मेरी और बच्चों के लिए फायदे
बच्चों की एकाग्रता बढ़ाता है
पढ़ाई में मन लगाता है
वातावरण को शुद्ध करता है
रोज़मेरी को सुखाकर स्टोर कैसे करें
पत्तों को छाया में सुखाएँ
एयर टाइट डिब्बे में रखें
6–8 महीने तक सुरक्षित
रोज़मेरी और पर्यावरण संरक्षण
रोज़मेरी का पौधा वातावरण को शुद्ध करता है और ऑक्सीजन स्तर बढ़ाता है। यह मधुमक्खियों और तितलियों को आकर्षित करता है, जिससे जैव विविधता बढ़ती है।
रोज़मेरी का पौधा और व्यवसाय के अवसर (विस्तार)
आज के समय में रोज़मेरी से जुड़े कई व्यवसायिक अवसर हैं:
हर्बल तेल निर्माण
कॉस्मेटिक उद्योग
ऑर्गेनिक फार्मिंग
नर्सरी स्टार्टअप
रोज़मेरी से जुड़े आम मिथक
यह पौधा भारत में नहीं उगता (गलत)
इसे बहुत ज्यादा पानी चाहिए (गलत)
यह सिर्फ विदेशी खाने में उपयोगी है (गलत)
रोज़मेरी के साथ कौन से पौधे लगाएँ
तुलसी
लैवेंडर
थाइम
पुदीना
निष्कर्ष (Conclusion)
रोज़मेरी का पौधा एक संपूर्ण औषधीय, सुगंधित और बहुउपयोगी पौधा है। यह स्वास्थ्य, सौंदर्य, भोजन और सकारात्मक ऊर्जा – हर क्षेत्र में लाभ देता है। कम देखभाल में अधिक फायदे देने वाला यह पौधा हर घर में होना चाहिए।
भारत में सर्दियों का मौसम (नवंबर से फरवरी) बागवानी के लिए बहुत ही उपयुक्त माना जाता है। इस समय न तो ज़्यादा गर्मी होती है और न ही तेज़ बारिश, जिससे कई सब्ज़ियां, फूल और जड़ी-बूटी के पौधे बहुत तेज़ी से बढ़ते हैं। यदि आप जानना चाहते हैं कि सर्दियों में कौन-कौन से पौधे सबसे जल्दी बढ़ते हैं, तो यह लेख आपके लिए पूरी गाइड है।
सर्दियों में पौधे तेज़ क्यों बढ़ते हैं?
मध्यम तापमान (10°C–25°C)
कम कीट-रोग
मिट्टी में नमी बनी रहती है
पौधों पर तनाव कम होता है
सर्दियों में तेज़ी से बढ़ने वाली सब्ज़ियाँ
1. पालक (Spinach)
बीज बोने के 20–25 दिन में कटाई
गमले और जमीन दोनों में उगाया जा सकता है
2. मेथी (Fenugreek)
15–20 दिन में पत्तियां तैयार
बहुत कम देखभाल में उग जाती है
3. धनिया (Coriander)
25–30 दिन में हार्वेस्ट
हल्की धूप पसंद करता है
4. मूली (Radish)
30–40 दिन में पूरी फसल
ठंड में सबसे अच्छा स्वाद
5. गाजर (Carrot)
60–70 दिन में तैयार
गहरी, भुरभुरी मिट्टी जरूरी
सर्दियों में तेज़ी से बढ़ने वाले फूल
6. पेटूनिया (Petunia)
सर्दियों का लोकप्रिय फूल
गमलों में शानदार खिलता है
7. कैलेंडुला / गेंदा (Calendula)
बहुत जल्दी बढ़ता और खिलता है
औषधीय गुण भी
8. फालसा गुलाब / फॉक्सग्लोव (Phlox)
कम देखभाल में भरपूर फूल
9. स्वीट पी (Sweet Pea)
बेल वाला पौधा
सर्दियों में तेजी से बढ़ता है
सर्दियों में उगने वाली जड़ी-बूटियाँ
10. तुलसी (Holy Basil)
हल्की ठंड में अच्छी ग्रोथ
रोज़ाना उपयोग में आने वाला पौधा
11. पुदीना (Mint)
बहुत तेज़ी से फैलता है
गमले में उगाना बेहतर
12. अजवाइन पत्ता (Indian Borage)
सर्दी-खांसी में लाभकारी
कम देखभाल में उगता है
भारत का सर्दियों का गार्डनिंग कैलेंडर
🌱 अक्टूबर – नवंबर
बीज बोने का सबसे अच्छा समय
पालक, मेथी, गाजर, फूलों के बीज
🌿 दिसंबर
पौधों की नियमित सिंचाई
हल्की खाद डालें
🌼 जनवरी
फूलों का पीक टाइम
सब्ज़ियों की पहली कटाई
🌞 फरवरी
सर्दी खत्म, गर्मी की तैयारी
गर्मियों की फसल की योजना
सर्दियों में पौधों की देखभाल के जरूरी टिप्स
सुबह की धूप दिलाएं
ज्यादा पानी न दें
15–20 दिन में जैविक खाद
पाले से बचाव करें
गमले में सर्दियों की बागवानी के टिप्स
अच्छी ड्रेनेज वाले गमले
हल्की मिट्टी (मिट्टी + कोकोपीट + खाद)
सप्ताह में 2–3 बार पानी
अक्सर पूछे जाने वाले सवाल (FAQ)
Q1. क्या सर्दियों में बीज सीधे बो सकते हैं?
हाँ, अधिकतर सब्ज़ियों और फूलों के बीज सीधे बोए जा सकते हैं।
Q2. क्या सर्दियों में खाद डालनी चाहिए?
हाँ, लेकिन कम मात्रा में जैविक खाद ही दें।
Q3. क्या सर्दियों में पौधों को धूप जरूरी है?
बिल्कुल, रोज़ 4–6 घंटे की धूप आवश्यक है।
निष्कर्ष
अगर आप सही पौधों का चुनाव करें और थोड़ी-सी देखभाल रखें, तो सर्दियों में बागवानी बहुत आसान और सफल हो जाती है। यह मौसम नए माली और अनुभवी दोनों के लिए सबसे बेहतरीन है।
Which Plants Grow Fastest in Winter? — Complete Winter Gardening Calendar (India)
Perfect for North, Central & Western Indian Climate
Winter is the most exciting season for gardening in India. The temperature becomes ideal for many flowering and leafy plants, growth becomes faster, and maintenance becomes easier. If you choose the right plants, you will see visible growth within days, blooming within weeks, and a super-healthy garden all winter long.
Below is a complete English version of your winter gardening guide including: ✔ Fastest-growing winter plants ✔ Month-wise Winter Gardening Calendar (Nov–Feb) ✔ Flower, vegetable & herb options ✔ Care tips, watering schedule & sunlight guide ✔ Best plants for beginners ✔ BONUS: Winter lawn care guide
🌱 15 Fastest-Growing Plants for Winter in India (November–February)
1. Marigold (Genda Phool)
Germination: 5–7 days
Flowers in: 35–45 days
Sunlight: Full sun
Why fast: Winter temperature boosts flowering
Perfect for: Borders, pots, terrace gardens
2. Pansy (Viola / Winter Queen)
Germination: 7–12 days
Flowers in: 45–60 days
Sunlight: Full to partial sun
Why fast: Cool weather plant
Perfect for: Winter kitchen gardens, railing pots
3. Dahlia
Germination: 7–10 days
Flowers in: 50–70 days
Sunlight: 5–6 hours
Why fast: Winter stimulates branching & blooming
4. Spinach (Palak)
Germination: 4–6 days
Harvest in: 25–35 days
Sunlight: Partial sun
Why fast: Loves cold soil
Perfect for beginners
5. Radish (Mooli)
Germination: 3–5 days
Harvest in: 30–40 days
Sunlight: Full sun
Fastest winter vegetable
6. Carrot (Gajar)
Germination: 10–12 days
Harvest in: 60–70 days
Sunlight: Full sun
Why fast: Winter helps produce sweeter roots
7. Fenugreek (Methi)
Germination: 3–4 days
Harvest in: 20–25 days
Sunlight: Partial sun
Very easy & grows in any soil
8. Coriander (Dhaniya)
Germination: 5–7 days
Harvest in: 25–35 days
Best winter herb
9. Lettuce
Germination: 5–7 days
Harvest in: 25–45 days
Sunlight: 3–4 hours
Loves winters—no bitterness in leaves
10. Broccoli
Germination: 7–10 days
Ready in: 55–70 days
Winter is essential for healthy head formation
11. Beetroot
Germination: 5–7 days
Harvest in: 40–55 days
Grows very fast and becomes sweeter in winter
12. Mustard Green (Sarson ka Saag)
Germination: 3–6 days
Harvest in: 30–40 days
Full winter herb with excellent flavour
13. Calendula (Pot Marigold)
Germination: 7–10 days
Flowers in: 45–60 days
Winter sun boosts bloom count
14. Petunia
Germination: 8–12 days
Flowers in: 60–80 days
Winter flowering champion with long bloom season
15. Sweet Pea (Lathyrus)
Germination: 10–15 days
Flowers in: 60–70 days
Cold weather = more fragrance & blooms
❄️ Winter Gardening Calendar (India)
(North, Central & Western India)
🌿 November
Best time for sowing winter vegetables & flowers:
Spinach
Lettuce
Carrot
Methi
Coriander
Marigold
Petunia
Sweet Pea
Tasks: ✔ Start seeds indoors or outdoors ✔ Replace summer plants ✔ Reduce watering frequency
🌷 December
Growth month—plants grow fast in cool temperatures.
Modern homes and offices contain harmful pollutants like dust, smoke, chemicals, VOCs (Volatile Organic Compounds), benzene, ammonia, and more. These indoor toxins cause:
Headache
Fatigue
Allergies
Poor sleep
Breathing problems
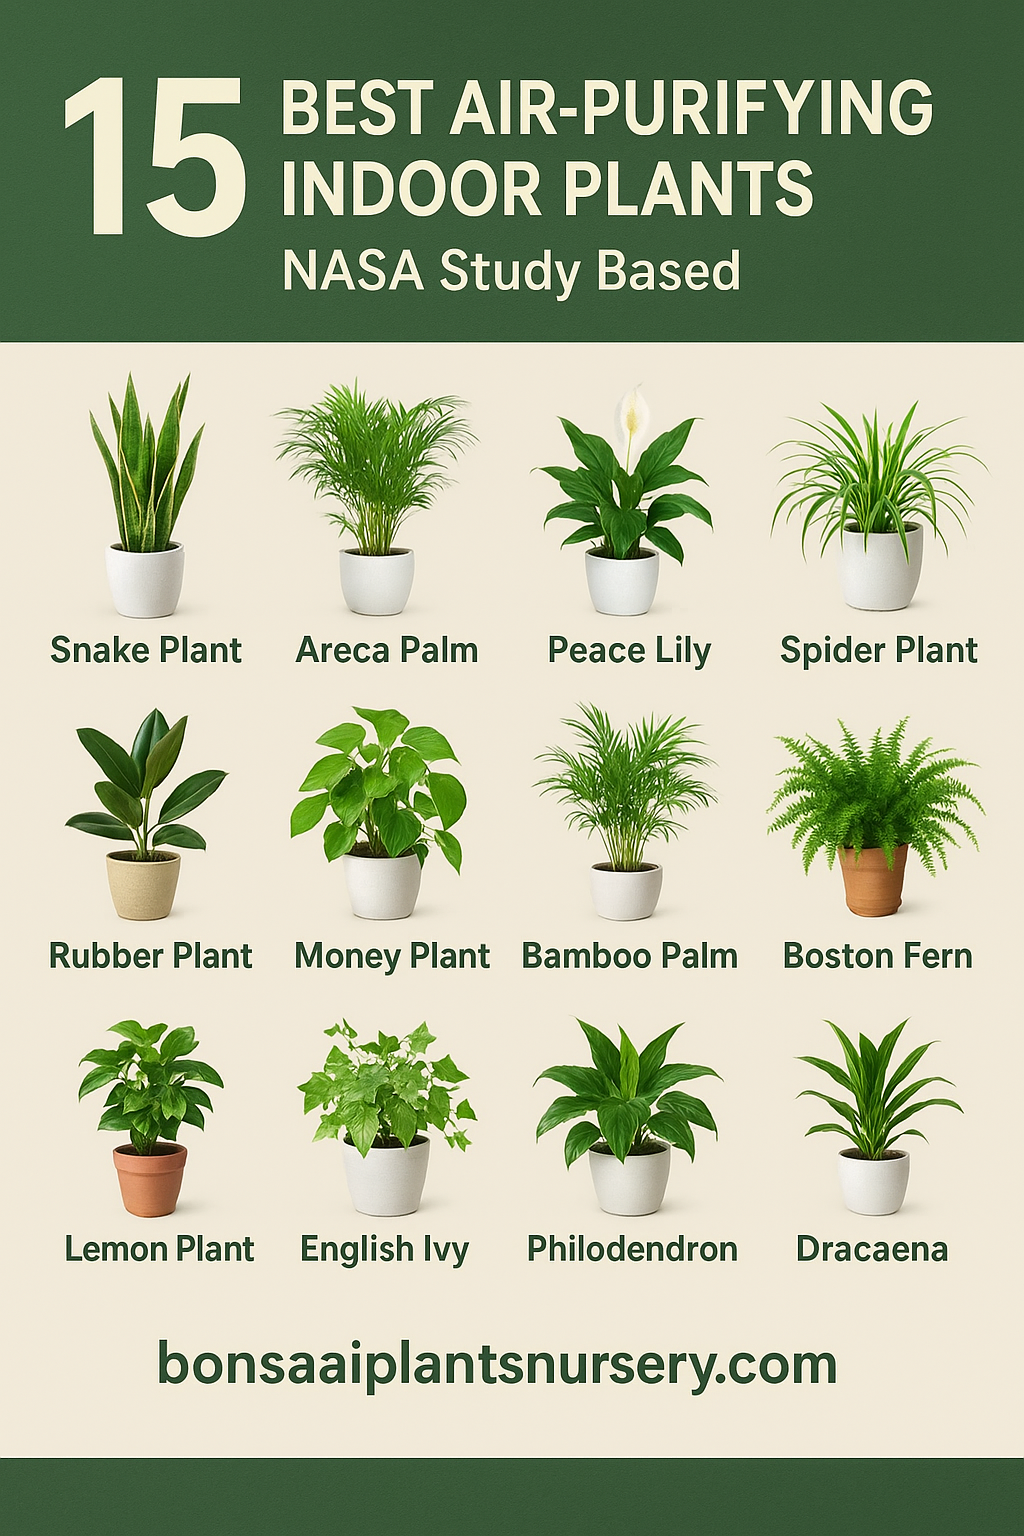
According to the famous NASA Clean Air Study, certain plants naturally remove toxins and purify indoor air.
This article gives you:
✔ 15 NASA-recommended indoor plants
✔ Easiest maintenance requirements
✔ Plants that increase oxygen
✔ Perfect for homes, offices & small spaces
🌿 Top 15 NASA-Approved Air-Purifying Indoor Plants
15 Best Air-Purifying Indoor Plants (NASA Study Based)
1. Snake Plant (Sansevieria)
⭐ Highly Recommended by NASA
Removes benzene, formaldehyde, xylene
Produces oxygen even at night
Zero-maintenance plant
Care Tips:
Water once a week
Thrives in low light
Avoid overwatering
2. Areca Palm
🌿 Natural Humidifier
One of the best oxygen-producing plants
Ideal for big rooms
Pet-friendly
Care Tips:
Bright light
Water 2–3 times/week
3. Peace Lily
🌸 Beautiful + Air Purifier
Removes up to 60% indoor toxins
Can bloom even in low light
Care Tips:
Keep soil slightly moist
Fertilize once every 15 days
4. Spider Plant
🌱 Great for Beginners
Removes 95% indoor toxins
Perfect for hanging pots
Care Tips:
Needs bright light
Water 1–2 times a week
5. Aloe Vera
🌿 Medicinal + Purifier
Cleans benzene and formaldehyde
Offers many health benefits
Care Tips:
Very little water
Loves bright sunlight
6. Rubber Plant
Absorbs carbon-based toxins
Ideal for large rooms
Care Tips:
Medium light
Water once a week
7. Money Plant (Pothos)
🥇 India’s No.1 Air-Purifying Indoor Plant
NASA-approved
Absorbs VOCs easily
Care Tips:
Water once a week
Grows well in low light
8. Bamboo Palm
Removes formaldehyde
Adds humidity to the room
Care Tips:
Filtered light
Keep soil moist
9. Boston Fern
Acts as a natural humidifier
Removes airborne dust
Care Tips:
High humidity
Regular watering
10. ZZ Plant (Zamioculcas)
🌱 Ultra Low-Maintenance
Perfect for offices
Survives weeks without water
Care Tips:
Very low water
Can grow in low light
11. Lemon Plant
Releases natural fragrance
Anti-bacterial air purifier
Care Tips:
Loves sunlight
Water regularly
12. English Ivy
🌿 NASA Recommended
Absorbs mold spores
Great for allergy-sensitive people
Care Tips:
Low light
Slightly moist soil
13. Philodendron
Excellent formaldehyde remover
Perfect for hanging pots
Care Tips:
Bright indirect light
Moderate watering
14. Dracaena
Removes 8+ indoor toxins
Excellent modern home plant
Care Tips:
Medium light
Water every 5–7 days
15. Christmas Cactus
Produces high oxygen
Survives in low light
Care Tips:
Bright indirect light
Very little water
🌿 Why NASA Considers Plants the Best Natural Air Purifiers
According to NASA research, certain plants can absorb:
Benzene
Xylene
Ammonia
Toluene
Formaldehyde
Trichloroethylene
✔ Air quality improves by 30–80% within 24 hours.
✔ Plants boost oxygen levels significantly.
🌱 How Many Plants Should You Keep? (NASA Guideline)
1–2 plants per 100 sq. ft. room
For bedroom: Snake Plant + Aloe Vera
For living room: Areca Palm + Money Plant
🌿 10 Major Benefits of Indoor Air-Purifying Plants
Clean, fresh oxygen
Less stress
Better sleep
Reduced allergies
Calm and relaxed mind
Balanced humidity
Controlled room temperature
Beautiful home interiors
Better focus & productivity
Reduced negative energy
🌱 Universal Care Tips for All Indoor Plants
Water only when soil feels dry
Never overwater
Avoid harsh direct sunlight
Use liquid fertilizer every 15 days
Clean leaves regularly
🌿 Conclusion
If you want your home to stay: → Fresh → Chemical-free → Low-maintenance → Full of oxygen
These 15 NASA-recommended indoor plants are perfect for you.
Start with 3–5 plants and see the difference in air quality, freshness, and mental well-being.
घर की हवा अक्सर बाहर की हवा से भी ज्यादा प्रदूषित होती है। पेंट, फर्नीचर, डिटर्जेंट, कॉस्मेटिक्स, गैस स्टोव और इलेक्ट्रॉनिक आइटम्स VOC (Volatile Organic Compounds) छोड़ते हैं, जो धीरे-धीरे हमारी सेहत पर असर डालते हैं।
इन्हीं हानिकारक गैसों को प्राकृतिक तरीके से कम करने के लिए NASA ने एक प्रसिद्ध Clean Air Study किया था, जिसमें कई इंडोर प्लांट्स को बेहतरीन “AIR PURIFYING PLANTS” घोषित किया गया।
आज हम आपको बता रहे हैं:
✔ NASA-approved 15 Best Air Purifying Indoor Plants ✔ इनके फायदे ✔ इन्हें घर में कहाँ रखें ✔ देखभाल टिप्स (Very Easy) ✔ घर के लिए कौन सा पौधा सबसे बेहतर है
🌱 भाग 1: हवा साफ करने वाले 15 बेहतरीन इंडोर प्लांट्स (NASA Recommended)
15 Best Air-Purifying Indoor Plants (NASA Study Based)
1️⃣ स्नेक प्लांट (Snake Plant | Sansevieria)
NASA Air Purifier Rank: ★★★★★ ✔ रात में भी ऑक्सीजन देता है ✔ सबसे कम देखभाल वाला पौधा
Removes: Benzene, Xylene, Toluene, Formaldehyde
👉 Bedroom के लिए Best
2️⃣ पीस लिली (Peace Lily)
NASA Rank: ★★★★★ ✔ हवा की नमी बढ़ाता है ✔ घुटन कम करता है
Removes: Ammonia, VOC gases
👉 AC Rooms के लिए perfect
3️⃣ स्पाइडर प्लांट (Spider Plant)
✔ बच्चों और पालतू जानवरों के लिए safe ✔ Sunlight की बिल्कुल जरूरत नहीं
Removes: Carbon Monoxide, Formaldehyde
4️⃣ अरेका पाम (Areca Palm)
✔ Natural Humidifier ✔ दिनभर ऑक्सीजन देता है
Removes: Indoor Dust, Toxins
5️⃣ एलोवेरा (Aloe Vera)
✔ हेल्थ + एयर प्यूरीफिकेशन दोनों ✔ खिड़की के पास रखें
Removes: Benzene, Chemicals from cleaners
6️⃣ रबर प्लांट (Rubber Plant)
✔ बड़े पत्ते जल्दी हवा फिल्टर करते हैं ✔ देखभाल आसान
Removes: Formaldehyde, Odours
7️⃣ मनी प्लांट (Money Plant / Pothos)
✔ Vastu + Air Purifier ✔ Zero maintenance plant
Removes: Toluene, Benzene, Carbon toxins
8️⃣ बांस पाम (Bamboo Palm)
✔ सबसे ज्यादा ऑक्सीजन देने वाला पौधा ✔ Bedroom / Living Room के लिए Highly Recommended
Removes: Xylene, Formaldehyde
9️⃣ ड्रैकेना (Dracaena)
✔ 24×7 Air Filtering ✔ बहुत कम पानी चाहिए
Removes: Trichloroethylene, Benzene
🔟 बोस्टन फर्न (Boston Fern)
✔ घर को ठंडा रखता है ✔ High oxygen plant
Removes: Formaldehyde, harmful VOCs
1️⃣1️⃣ ट्यूलसी (Tulsi / Holy Basil)
✔ नेगेटिव एनर्जी हटाती है ✔ एंटी-बैक्टीरियल हवा बनाती है
Removes: Germs, bacteria, toxins
1️⃣2️⃣ ज़ीज़ी प्लांट (ZZ Plant)
✔ Super low maintenance ✔ Dark rooms के लिए perfect
Removes: Airborne toxins + dust
1️⃣3️⃣ चाइनीज़ एवरग्रीन (Chinese Evergreen)
✔ सुंदर और attractive look ✔ Indoor pollution killer
Removes: Benzene, Formaldehyde
1️⃣4️⃣ फिलोडेंड्रॉन (Philodendron)
✔ बड़े पत्ते ज्यादा हवा साफ करते हैं ✔ Hanging pot में बेहद सुंदर
Removes: Formaldehyde
1️⃣5️⃣ इंग्लिश आइवी (English Ivy)
✔ मोल्ड (fungus) कम करने वाला पौधा ✔ Pet dander भी कम करता है
Removes: Mold spores, airborne germs
🌿 भाग 2: कौनसा पौधा कहाँ रखें? (Vastu + NASA Based)
Plant Name
Best Placement
Benefits
Snake Plant
Bedroom
Night oxygen
Money Plant
South-East
Wealth + fresh air
Peace Lily
Living Room
Humidity balance
Spider Plant
Study/Bedroom
Zero maintenance
Areca Palm
Living Room
High oxygen
Rubber Plant
Office
Toxin removal
Tulsi
East Direction
Positive energy
🌱 भाग 3: घर की हवा साफ करने के लिए कितने पौधे होने चाहिए?
NASA Study के अनुसार:
✔ 100 sq. feet एरिया में कम से कम 1 पौधा ✔ Best effect के लिए 4–5 indoor plants
🌿 भाग 4: Easy Care Tips (सभी पौधों पर लागू)
✔ हफ़्ते में 1–2 बार पानी काफी ✔ Direct sunlight न दें (except Tulsi) ✔ हर 15 दिन में पत्ते गीले कपड़े से साफ करें ✔ अच्छी drainage का गमला रखें ✔ महीने में एक बार liquid fertilizer दें
🌍 भाग 5: कौन सा पौधा सबसे ज्यादा हवा साफ करता है?
NASA के अनुसार TOP 5 AIR PURIFIER PLANTS:
Snake Plant
Peace Lily
Spider Plant
Areca Palm
Money Plant
📌 Frequently Asked Questions (FAQ)
Q1. क्या ये पौधे रात में भी ऑक्सीजन देते हैं?
➡ Snake plant और Aloe vera रात में भी ऑक्सीजन रिलीज करते हैं।
Q2. क्या ये asthma या breathing problem में मदद करते हैं?
➡ हाँ, ये indoor dust व toxins को कम करते हैं, जिससे सांस लेने में राहत मिलती है।
Q3. क्या indoor plants में ज्यादा पानी देना चाहिए?
➡ नहीं, overwatering सबसे बड़ी गलती है।
Q4. क्या ये पौधे पालतू जानवरों के लिए safe हैं?
➡ Spider plant, Areca palm, Bamboo palm सुरक्षित माने जाते हैं।
🎯 Conclusion (निष्कर्ष)
इन 15 NASA-recommended indoor plants से आपके घर की हवा काफी हद तक शुद्ध होगी और घर में ऑक्सीजन स्तर बढ़ेगा। साथ ही, ये पौधे देखने में भी बेहद सुंदर लगते हैं और आपका interiors natural बना देते हैं।
अगर आप ये सभी air-purifying plants या इनके bonsai versions खरीदना चाहते हैं:
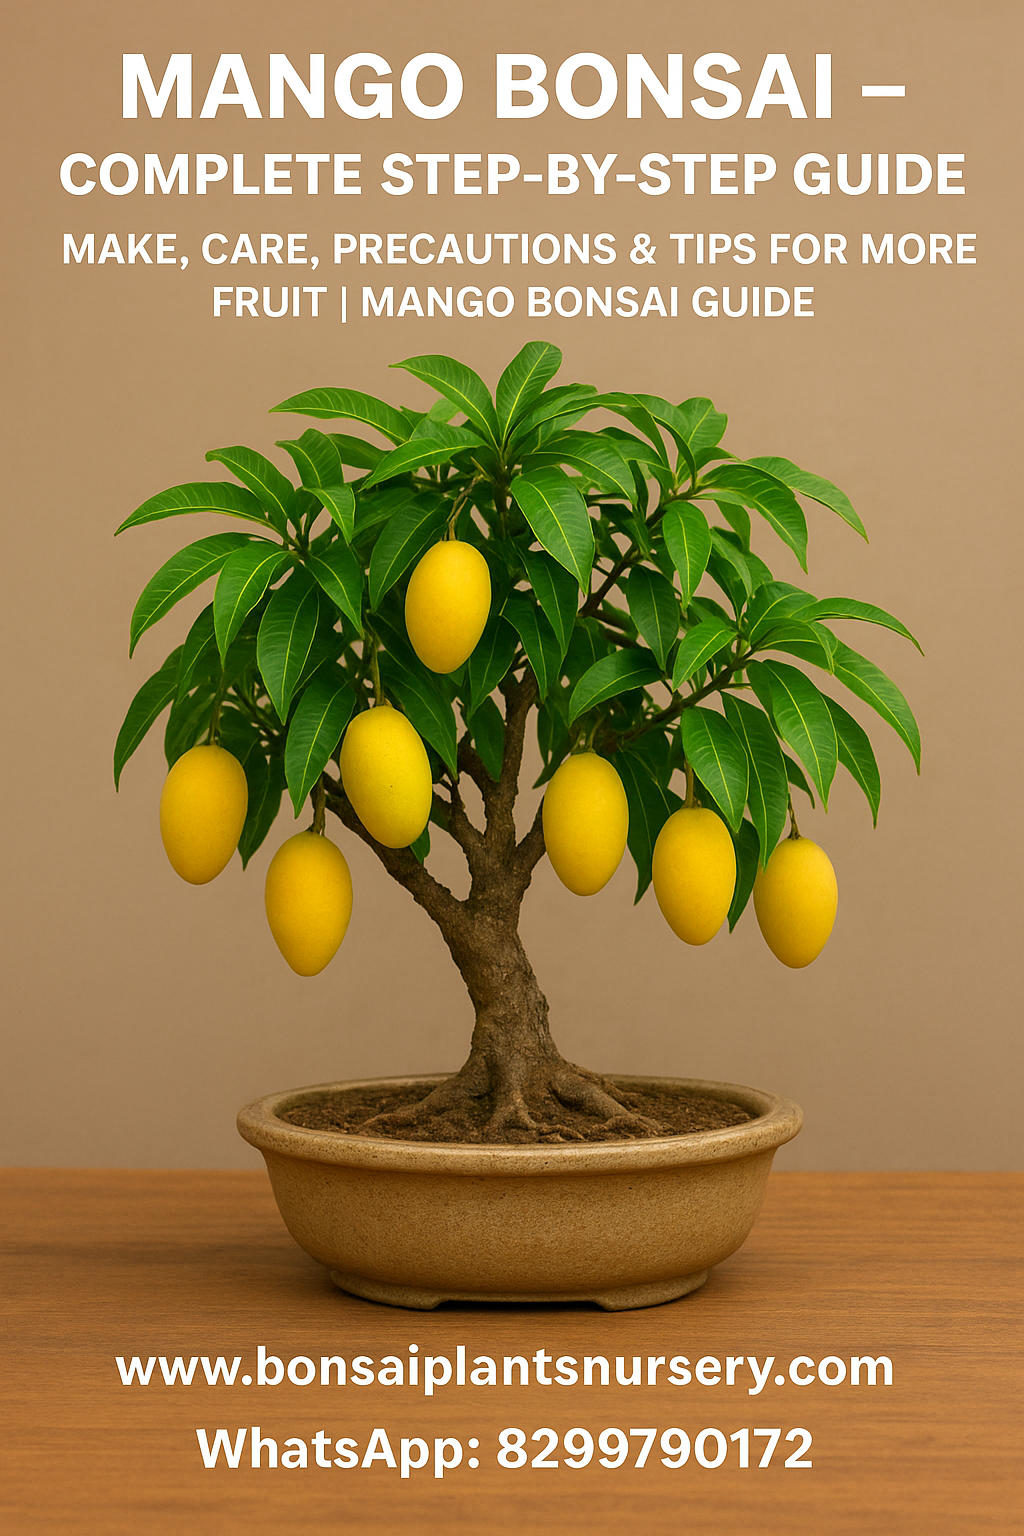
Mango (Mangifera indica) is one of the most beloved and iconic fruit trees in South Asia and beyond. Traditionally, mango trees require large spaces and many years to mature and produce fruit. However, with bonsai techniques you can cultivate a miniature mango tree that not only looks stunning as a piece of living art but can — with the right variety and care — produce real, edible mangoes.
A mango bonsai offers multiple benefits: it’s a unique home decor piece, an educational hobby, a living heirloom that can last decades, and if managed properly, a fruiting specimen that rewards patience and skill. This guide walks you step-by-step through everything you need to know: choosing the right plant or seed, soil mixes, pot selection, pruning, wiring, root work, watering, fertilizing schedules, pest and disease control, and advanced cultural tips to boost flower set and fruit quality.
This article is written for beginners and experienced bonsai growers alike and is structured in clear parts so you can follow along and implement each stage. I’ll also include a large FAQ section to answer common problems and boost your confidence.
Mango Bonsai – Complete Step-by-Step Guide: Make, Care, Precautions & Tips for More Fruit | Mango Bonsai Guide
Why grow a Mango Bonsai?
Space-efficient fruit tree: Enjoy the pleasure of growing a mango even if you have only a balcony or terrace.
Aesthetic & decorative value: A well-trained mango bonsai is a striking focal point — the combination of a gnarled trunk, layered canopy and glossy leaves is exceptional.
Educational experience: Bonsai teaches horticultural skills — root pruning, branch architecture, seasonal care — and patience.
Can bear fruit: With grafted varieties and correct care, mango bonsai can produce properly sized, flavorful mangoes in comparatively few years.
Low to moderate maintenance: Once established and shaped, a mango bonsai is hardy and responds well to routine pruning and feeding.
Great gift or showpiece: Fruiting mango bonsai are rare and valued as premium living gifts and exhibition specimens.
Key advantages summarized
Miniaturized fruit production: With grafted stock you may see flowers and fruits in 2–4 years. Seedlings will take longer (several years).
Rapid shaping and strong response: Mango responds well to pruning, wiring, and root work — allowing faster development of classic bonsai structure.
Long lifespan: Properly maintained mango bonsai can live for decades and become a treasured family specimen.
Visual impact: Glossy leaves, layered branch tiers and a sculpted trunk create a “real tree in miniature” aesthetic.
Suitable for many climates: In most tropical and subtropical climates a mango bonsai will thrive outdoors with seasonal protection in cooler areas.
Who should grow a mango bonsai?
Beginners who want a resilient, forgiving tree that reacts well to shaping.
Intermediate bonsai growers seeking a fruiting specimen.
Hobbyists wanting an attractive edible bonsai for balcony/terrace gardens.
Nurseries and sellers who want to produce marketable grafted fruiting bonsai.
Quick roadmap of the full guide (what you’ll get in upcoming parts)
Part 2: Benefits in detail, and why mango is ideal for bonsai (done — included above briefly).
Part 3: Preparation — which plants/varieties to choose, age of stock, pots, soil mix, tools and best seasons to start.
Part 4: Full step-by-step shaping and propagation methods (seed vs grafted, root pruning, branch selection, wiring, tiered canopy, repotting, and how to force fruit).
Part 5: Fruit-maximizing regime — fertilization schedule, organic & traditional tips, calendar of care for fruiting.
Part 6: Pest & disease management — common pests, fungal problems, symptom-based remedies, organic sprays and prevention.
Part 7: Large FAQ, troubleshooting, SEO-friendly conclusion and website CTA for plant purchase and services.
PART 2 – Preparation Before Making a Mango Bonsai
Creating a healthy, fruiting mango bonsai begins with correct preparation. The choice of plant, pot, soil, and timing will decide 50% of your success. This section explains everything you must arrange before starting your bonsai project.
1. Choosing the Right Mango Plant for Bonsai
A. Seed-Grown (Desi) Mango Plants
Grown from regular mango seeds.
Strong taproot, vigorous growth.
Takes 5–8+ years to fruit.
Good for shaping thick trunks because of fast vertical growth.
Best suited for aesthetic bonsai where fruiting is not the main priority.
Ideal for:
Beginners who want a low-cost plant to practice shaping techniques.
B. Grafted Mango Plants (Highly Recommended)
The best choice for a fruiting mango bonsai.
Benefits of grafted plants:
Fruiting can start in 2–4 years.
Compact, dwarf growth habit.
The scion variety remains true to type.
Responds very well to pruning and canopy shaping.
Best dwarf varieties for bonsai:
Amrapali
Mallika
Alphonso (Hapus) dwarf graft
Sindhu
Totapuri dwarf graft
Neelam miniature
Pairi dwarf
Why grafted varieties are superior:
Short internodes (better branch structure)
Smaller, manageable leaf size
Earlier flowering
More controllable canopy
For bonsai intended to bear fruit, only use grafted plants from a trusted nursery.
C. Age of Plant for Bonsai
Age of the plant impacts trunk thickness and shaping ease.
Best age group:
1–2 year old grafted plant = best for fruiting bonsai.
2–3 year old seedling = best for shaping and trunk thickening.
Why not older plants?
Older mango plants have:
Stiff branches
Hard-to-modify structure
Thick taproot
Slow response to wiring
Young plants respond beautifully to styling.
2. Choosing the Correct Pot for Mango Bonsai
Mango bonsai needs progressive potting — you do not place a small plant into a tiny bonsai pot immediately.
A. Training Pot (First 1–2 Years)
Size: 10–14 inch wide container
Type: Plastic nursery pot, grow bag, or terracotta pot
Purpose:
Root expansion
Trunk thickening
Strong primary branch development
B. Intermediate Pot (Next 2–3 Years)
Size: 8–10 inch pot
Type: Wide shallow container
Purpose:
Start miniaturizing root ball
Structure branch pads
Control height
C. Final Bonsai Pot
Size: 6–8 inch shallow bonsai pot
Shape: Oval / rectangular / lotus
Features:
Must have 2–4 drainage holes
Preferably ceramic
Deep pots = fast growth Shallow bonsai pots = slow, controlled, miniature growth
3. Soil Mix for Mango Bonsai
Mango roots need:
Fast drainage
High aeration
Organic nutrition
A perfect mix ensures:
Strong roots
Compact growth
Resistance to diseases
Recommended Soil Mix Formula (Bonsai Standard)
Ingredient
Ratio
Coarse river sand / perlite
30%
Garden soil
25%
Cocopeat
15%
Vermicompost / organic compost
20%
Neem cake / Debris repellent mix
10%
Benefits of this mix:
Prevents root rot
Ensures healthy branching
Supports flowering & fruiting
Mango absolutely hates waterlogging — proper drainage is non-negotiable.
4. Tools Required for Mango Bonsai
You don’t need expensive tools — just basic bonsai equipment:
Basic Tools
Pruning shears
Concave cutter
Branch cutter
Bonsai training wire (1–3 mm aluminum)
Root rake
Spray bottle
Organic pesticide (Neem oil)
Fungicide
Organic fertilizers
Optional Tools (for advanced shaping)
Knob cutter
Wire cutter
Bonsai turntable
5. Best Season to Start Mango Bonsai
Timing plays a major role in plant survival.
Ideal seasons:
A. Early Spring (February–March)
Best for repotting
Best for heavy pruning
Best for wiring
Strong growth response
B. Early Monsoon (June–July)
Good for root development
Plant recovers quickly
Ideal for shifting into training pots
Avoid these:
Winter (low growth)
Peak summer (stressful for roots)
6. Selecting the Primary Style for Your Bonsai
Before cutting or wiring, decide the style of bonsai:
Popular Styles for Mango Bonsai:
Informal Upright (Most common)
Broom Style (works well with mango’s leaf pattern)
Slanting Style
Multi-branch canopy (for fruiting space)
Avoid:
Cascade or semi-cascade styles
Mango’s growth pattern does not support downward cascading naturally.
7. Safety Precautions Before Starting
Do not prune more than 35–40% at a time.
Always sterilize cutting tools.
Ensure soil is fresh and free from fungus.
Do not wire extremely soft or extremely hard branches.
Keep the plant under shade for 5–7 days after major work.
Never repot and prune heavily on the same day.
✔️ Part 2 Completed
This section covered:
Plant selection
Varieties
Pots
Soil
Tools
Best season
Bonsai styles
Precautions
PART 3 — Step-by-Step Method to Create a Mango Bonsai (Complete Detailed Guide)
This is the core practical section where you will learn exactly how to convert a young mango plant into a miniature fruiting bonsai.
Step 1: Selection & Primary Orientation
Before your first cut:
Choose the healthiest branch structure.
Identify the natural direction of growth.
Decide bonsai style:
Informal Upright (Best)
Broom Style
Slanting Style
How to choose the “front side” of bonsai:
The trunk should have a gentle curve.
Roots should spread naturally on the visible side.
Remove the side that looks messy, scarred, or cluttered.
Step 2: Primary Pruning (The First Major Cut)
This is the most important step.
You must reduce the height and divide energy to multiple shoots. This creates a miniature tree instead of a tall mango plant.
🔥 Ideal height after the first cut:
8–12 inches (20–30 cm)
What to remove:
Main vertical dominant shoot
Weak, inward-growing branches
Crossing branches
Diseased or yellow leaves
What to keep:
2–4 strong lateral branches
Shoots emerging at different heights
Branches pointing in opposite directions (for balance)
Purpose of Primary Pruning:
Break apical dominance
Promote branching
Initiate bonsai architecture
Thicken the trunk faster
After-cut care:
Apply organic healing paste or cinnamon powder.
Keep plant under partial shade for 4–5 days.
Step 3: Secondary Branch Development (Weeks 3–6)
After 3–4 weeks, mango will develop:
5–10 new shoots
Dense leaf clusters
Vigorous top growth
Your task:
Select 3–5 best shoots to form:
Primary branches
First canopy layer
Future fruit-bearing arms
Remove:
Weak shoots
Shoots pointing straight down
Shoots growing backward
Cluttered clusters
Goal:
A balanced, symmetrical structure that resembles a small tree.
Step 4: Wiring the Plant (Shaping Branches)
Wiring helps guide the branches into artistic bonsai shapes.
Best time for wiring:
After new branches harden slightly (6–8 weeks after pruning)
Wire type:
Aluminum wire (1 mm to 3 mm)
How to apply:
Wrap the wire at a 45° angle.
Do not over-tighten.
Bend branches gently into:
Horizontal pads
Gentle S-curves
Multi-tier structure
Duration:
Leave wire for 5–8 weeks until shape sets.
Important:
Do not leave wire too long—mango branches scar easily.
Step 5: Creating Canopy Layers (Branch Pads)
Mango bonsai looks best with layered canopy tiers.
Typically:
1st layer at 4–6 inches height
2nd layer at 7–10 inches
3rd layer at 10–12 inches
How to create pads:
Select 2–3 opposite branches for each level.
Wire them horizontally.
Trim downward shoots.
Maintain flat, plate-like foliage.
Visual effect:
Creates a mature tree structure even in small size.
Step 6: Root Work & Repotting (After 3–6 Months)
Root pruning is necessary to control plant size.
When to do:
Early spring
Only after the plant is actively growing
What to do:
Remove plant from pot.
Shake off 40–50% old soil.
Trim:
Thick taproot
Circular roots
Unnecessary deep-growing roots
Keep:
Fine feeder roots
Lateral roots spreading horizontally
Purpose:
Maintain miniature height
Increase nutrient absorption
Fit into bonsai pot eventually
After repotting:
Water lightly.
Keep in shade for 7 days.
Begin fertilizing only after 2–3 weeks.
Step 7: Transition to Bonsai Pot (After 1–1.5 Years)
Once trunk has thickened and structure is set:
Choose pot:
6–8 inch shallow bonsai pot
Wide mouth
Strong drainage
Repotting process:
Tilt plant slightly to create natural slant.
Position main branch as “front”.
Spread roots radially.
Add bonsai soil (fast draining).
Tie plant with anchor wires.
Final look:
The tree now resembles a compact miniature mango tree.
Normal-sized mangoes can grow on bonsai—don’t worry.
Step 10: Seasonal Care Routine (Year-Round Calendar)
Spring (Feb–April)
Major pruning
Wiring
Repotting
Heavy growth
Summer (May–June)
Water carefully
Avoid root disturbance
Mulch lightly
Monsoon (July–Sept)
Fast growth period
Light pruning
Organic feeding
Autumn (Oct–Nov)
Branch hardening
Reduce watering
Winter (Dec–Jan)
Flower setting begins
Keep soil slightly dry
✔️ PART 3 Completed
You now have the complete structural formation guide for mango bonsai.
PART 4 — How to Get Maximum Fruits from a Mango Bonsai (Full Care, Fertilizers, and Yield-Boosting Techniques)
A mango bonsai can produce full-sized, sweet mangoes if you follow the correct nutrition, sunlight, watering, and flowering-cycle management. This part covers the most advanced practical techniques used by bonsai experts and fruit tree growers.
1. Sunlight Requirements for Mango Bonsai
Mango is a sun-loving tree. It MUST get strong sunlight daily, or it will never flower.
Ideal Sunlight:
6–8 hours direct sunlight daily
Morning sunlight is highly beneficial
Avoid deep shade at all costs
Effects of low sunlight:
Long leggy shoots
Weak branches
Very few flowers
No fruit development
Best placement:
Terrace
Balcony with full sun
Open garden
Near a sunny window (if indoors; not ideal)
2. Watering Schedule — The Heart of Flowering Control
Mango flowering can be controlled by regulating water.
A. During Growing Season (March–September)
Water regularly, but never let soil stay soggy.
Check top 1 inch soil → water only when dry.
During peak summer → daily watering.
During monsoon → reduce watering.
B. During Winter (December–January)
This is CRITICAL for flowering.
Reduce watering by 30–40%.
Keep soil slightly dry.
DO NOT flood or over-water.
Why?
Dry soil encourages the plant to shift from leaf-production to flower-production mode.
3. Fertilizing Schedule for Maximum Flowers & Fruit
Mango bonsai requires a season-wise fertilizer plan. Below is a proven, practical routine.
Monthly Fertilizer Chart
January – February (Flower Initiation Phase)
Potash: 1 tsp
Bone meal: 1 tbsp
Seaweed extract spray (weekly)
March – April (Flowering to Fruit Setting)
Avoid nitrogen-heavy fertilizers
Use:
Organic Potash: 1 tsp
Epsom Salt: ½ tsp
May – July (Fruit Growth Phase)
Vermicompost: 2–3 tbsp
Mustard cake liquid: Monthly
Banana peel compost: Bi-weekly
August – September (Canopy Strengthening Phase)
NPK liquid 19-19-19: Twice monthly
Cow dung compost: 2 tbsp
October – November (Hardening & Flower Prep Phase)
Bone meal: 1 tbsp
Neem cake: 1 tbsp
Humic acid (monthly)
Important Nutrients Mango Bonsai Must Receive
1. Potassium
Increases flowering
Improves fruit taste
Prevents fruit drop
2. Calcium
Builds strong cell walls
Protects from fungal infections
3. Magnesium
Enhances leaf color & photosynthesis
4. Phosphorus
Essential for root development & fruiting
5. Trace Minerals
Zinc, Boron, and Iron prevent deformities
4. Organic Feeding Plan (For Chemical-Free Fruit)
If you prefer 100% organic fruit:
Monthly feed:
Vermicompost: 3 tbsp
Neem cake: 1 tbsp
Banana peel powder: 1 tbsp
Bone meal: 1 tbsp
Seaweed extract: weekly spray
Foliar sprays:
Panchagavya
Fish amino acid
Jivamrut
These significantly boost fruit set and leaf health.
5. Techniques to Increase Flowering
Here are professional bonsai grower hacks:
A. Stress Induction Technique
Used to force flowering.
Reduce watering by 40%.
Keep plant in mild winter cold.
Avoid pruning during winter.
This stress induces flower buds naturally.
B. Hard-Pruning Before Spring
Prune in Feb–March to:
Rejuvenate plant
Send energy to new shoots
Increase number of panicles (flower branches)
C. Restrict Nitrogen Fertilizer
Excess nitrogen = only leaves, no flowers.
D. Use of Potash & Phosphorus
Both nutrients push energy toward fruiting.
6. How to Prevent Mango Fruit Drop (Very Important)
One of the biggest issues with mango bonsai is early fruit drop.
Reasons:
Watering fluctuations
Heavy wind
Insect attack
High nitrogen feeding
Root disturbance
Solutions:
Water consistently (never allow shocks).
Use Potash to strengthen fruit attachment.
Prevent fungus (mango is sensitive).
Avoid pruning during fruit-setting.
Do not move the pot too much.
7. Mulching for Moisture & Root Health
Mango bonsai roots thrive with light mulching.
Best mulching materials:
Coconut husk chips
Dry leaves
Rice husk
Benefits:
Stabilizes soil temperature
Reduces water requirement
Prevents weed growth
8. Branch Management for Fruit Load
To support fruit weight:
Keep branches horizontal, not vertical
Avoid too many fruits per branch
Remove excess fruits (leave only 2–3 per branch)
Why?
Bonsai branches cannot carry heavy loads without breaking.
9. Fruit Ripening Tips
Once fruits reach full size:
Reduce watering slightly
Expose to full sunlight
Avoid touching or shaking fruits
This improves:
Sweetness
Pulp density
Aroma
10. How to Get Bigger Mangoes on a Bonsai
Follow these hacks:
Use grafted dwarf varieties
Increase potash levels
Keep soil slightly dry during final growth
Provide uninterrupted sunlight
Support branches with sticks
11. Seasonal Care Calendar (Fruit-Focused)
Month
Task
Jan–Feb
Water reduction, bloom boosters
Mar–Apr
Protect flowers, light feeding
May–Jun
Fruit growth feeding
Jul–Aug
Prune lightly, remove weak shoots
Sep–Oct
Strengthen branches
Nov–Dec
Reduce watering, prepare for flowering
✔️ PART 4 Completed
This section covered:
Sunlight
Watering
fertilizers
Organic feeding
Flowering techniques
Fruit set and fruit drop control
Seasonal calendar
Your mango bonsai will now be healthy, compact, beautiful, and capable of fruiting.
PART 5 — Pests, Diseases & Deficiencies in Mango Bonsai (Complete Solutions Guide)
Mango is a hardy tree, but in bonsai form it becomes more sensitive to imbalance, pests, humidity issues, and fungal infections. Below is a complete expert-level guide to diagnose and treat every problem.
1. Common Pests Attacking Mango Bonsai
A. Mango Hopper
Symptoms:
Sticky leaves
Black fungus layer
Flowers drying and falling
Tiny insects jumping near flowers
Treatment:
Neem oil (3% concentration) spray every 3 days
Add 1 tsp liquid soap for stickiness
Keep bonsai in sunlight
Prevention:
Avoid water on flowers
Do not over-fertilize during blooming
B. Mealybugs (White cotton-like insects)
Symptoms:
White cotton clusters on leaves and stems
Stunted new growth
Sticky honeydew secretion
Treatment:
Remove manually with earbud dipped in alcohol.
Spray neem oil + soap mix.
Use organic turmeric water (effective for mild infections).
These enhance resistance against pests, fungus, and stress.
6. Emergency Recovery Techniques
A. If Plant is Dying Suddenly
Remove from soil
Wash roots
Trim rotten roots
Repot in dry, airy soil
Keep under shade 10 days
B. If Leaves All Drop
Don’t panic — mango recovers.
Reduce watering
Avoid fertilizers
Keep in sunlight
Spray seaweed extract
New leaves appear in 2–4 weeks.
C. If Bonsai Stops Growing
Check roots for bound condition
Repot
Add magnesium
Restart watering gradually
✔️ PART 5 Completed
This part included:
Pest control
Fungal disease management
Deficiency correction
Environmental stress issues
Emergency recovery solutions
PART 6 — Common Mistakes, Precautions, Repotting Rules & Long-Term Care for Mango Bonsai
This section ensures you NEVER make the mistakes that kill a bonsai. It also gives you a long-term strategy to maintain a healthy, fruit-bearing mango bonsai for decades.
1. Most Common Mistakes People Make (And How to Avoid Them)
Mistake 1: Using Normal Garden Soil
Garden soil is heavy and retains too much moisture.
Why this is dangerous:
Causes root rot
Slows growth
Attracts fungus
Prevents aeration
Solution:
Always use fast-draining bonsai soil mix.
Mistake 2: Too Much Watering
Overwatering is the No. 1 killer of mango bonsai.
Symptoms of overwatering:
Yellow leaves
Soft roots
Foul smell from soil
Solution:
Water only when top 1 inch soil is dry.
Mistake 3: Pruning at the Wrong Time
Pruning during flowering or winter destroys buds.
Solution:
Major pruning: Feb–March
Light pruning: Monsoon
No pruning: Flowering (Dec–March)
Mistake 4: Using Excess Nitrogen Fertilizer
This creates:
Huge leaves
Tons of foliage
No flowers or fruits
Solution:
Reduce nitrogen during bloom season.
Mistake 5: Shifting Bonsai During Fruiting
Movement causes shaking → fruit drop.
Solution:
Keep the bonsai at one fixed location during fruiting.
Mistake 6: Wiring Too Tightly
Mango branches scar easily.
Solution:
Check wires every 10–12 days.
Mistake 7: Exposing New Roots to Sun
During repotting, exposed roots dry immediately.
Solution:
Repot in shade and finish quickly.
2. Major Precautions for Mango Bonsai Success
Precaution A: Never Disturb Roots During Flowering
Root disturbance = 90% flower & fruit drop.
Precaution B: Always Sterilize Tools
Dirty tools spread bacteria and fungus.
Use:
Hydrogen peroxide or
Fire sterilization
Precaution C: Avoid Extremely Small Pots
Tiny pots block root development.
Use proper stepwise downsizing technique.
Precaution D: Provide Strong Sunlight
Without sun → no bonsai shape, no fruits.
6–8 hours is minimum.
Precaution E: Keep Bonsai Away From AC/Vent Blasts
Cold air causes:
Leaf curl
Weak buds
Sudden death
3. Repotting Rules for Mango Bonsai
Frequency:
Every 1 year in early stages
Every 2–3 years once mature
Best season:
February–March (Spring)
How to Repot Correctly: Step-by-Step
Step 1: Remove plant from pot
Tilt pot and gently tap sides.
Step 2: Clean roots
Remove 40% old soil.
Step 3: Root pruning
Trim:
Thick taproot
Circular roots
Overlong downward roots
Step 4: Prepare new bonsai pot
Mesh over drainage holes
Add bonsai soil
Step 5: Fix plant in center
Use anchoring wire to hold trunk.
Step 6: Add soil & press gently
Do NOT press too hard.
Step 7: Water lightly
Avoid flooding.
Step 8: Recover in shade
Keep in shade for 7–10 days.
4. Do’s & Don’ts for Mango Bonsai (Professional Checklist)
Do’s
✔ Use grafted dwarf varieties ✔ Maintain sunlight minimum 6–8 hours ✔ Use well-draining bonsai soil ✔ Prune regularly to maintain shape ✔ Give potash before flowering season ✔ Keep bonsai stable during fruiting ✔ Support branches carrying mangoes ✔ Use fungicide during monsoon
Don’ts
✘ Don’t water daily without checking soil ✘ Don’t prune during winter or flowering ✘ Don’t allow wire to cut into the bark ✘ Don’t use too much nitrogen ✘ Don’t let soil stay soggy ✘ Don’t expose bonsai to frost ✘ Don’t repot during fruit stage ✘ Don’t move the pot frequently
5. Long-Term Care Strategy (Year-by-Year Guide)
Mango bonsai can live 50+ years if maintained properly.
Year 1:
Major shaping
Structure building
Primary wiring
Root training
Year 2:
Trunk thickening
Secondary branching
Shallow pot transition
Year 3:
Canopy refinement
Controlled growth
Light flowering may begin
Year 4–5:
Regular flowering
Initial fruiting
Branch strengthening
Year 6 and beyond:
Mature bonsai
Stable fruit production
Minor aesthetic improvements
6. How to Keep Your Bonsai Small for Life
Root prune every 2–3 years
Keep branches horizontal
Pinch new shoots after 3–4 leaves
Reduce nitrogen
Use shallow pots
Maintain compact canopy levels
7. Lifelong Health Boosters (Secret Tips)
✔ Seaweed extract – weekly spray
Gives instant energy and new growth.
✔ Neem cake – monthly
Protects soil from pests and fungus.
✔ Epsom salt – monthly
Improves leaf greenness.
✔ Banana peel powder – monthly
Improves fruit sweetness.
✔ Mulching with coco chips
Keeps roots strong and moist.
✔ PART 6 Completed
This part covered:
Common mistakes
Major precautions
Repotting rules
Do’s & Don’ts
Long-term bonsai maintenance
Lifelong health tips
🌿 PART 7 — FAQ Section, Final Conclusion & SEO Summary (English Version)
🔶 30+ Most Important FAQs About Mango Bonsai
1. Can a mango tree really be grown as a bonsai?
Yes. With systematic pruning, root control, and proper pot selection, mango trees grow excellently as bonsai and can even produce real fruits.
2. Which mango variety is best for bonsai?
The best are dwarf and grafted varieties:
Mallika
Amrapali
Ratna
Sindhu
Neelam
Dwarf Kesar
3. What is the ideal age of the plant for making bonsai?
The best plant age is 1.5 to 3 years.
4. Can a seed-grown mango bonsai bear fruits?
Yes, but it may take 6–8 years. Grafted plants fruit within 2–3 years.
5. How much sunlight does a mango bonsai need?
At least 6–8 hours daily.
6. How often should I water my mango bonsai?
Water ONLY when top 1 inch soil becomes dry.
7. What is the best soil for mango bonsai?
A fast-draining mix:
40% cocopeat
30% river sand
20% garden soil
10% compost
8. When should I prune my mango bonsai?
Major pruning: Feb–March Light pruning: July–August
9. Does wiring damage the tree?
If wires are left too long, yes. Check every 10–12 days.
10. Can mango bonsai survive indoors?
Yes for short periods, but long-term it needs sunlight, so place outdoors.
11. How long does it take to form a perfect bonsai shape?
Approximately 3–5 years.
12. Why are leaves of mango bonsai turning yellow?
Because of:
Overwatering
Fungal infection
Poor drainage
13. Why are leaves falling?
Possible reasons:
Sudden temperature change
Excess watering
Nutrient deficiency
14. When does a mango bonsai start flowering?
Usually from December to March.
15. How to increase mango flowers?
Reduce nitrogen
Increase potash
Provide 8 hours sunlight
16. Why does my bonsai drop small mangoes?
Fruit drop happens due to:
Pot shaking
Lack of sunlight
Overwatering
17. Can I repot during flowering time?
No. You must never repot during flowering or fruiting.
18. What is the best pot for mango bonsai?
A flat, wide, shallow bonsai pot of 6–8 inches depth.
19. Should mango bonsai be mulched?
Yes. Mulching helps root strength and moisture control.
20. How to thicken the trunk?
Grow in bigger pot for 1–2 years
Then shift to bonsai pot
21. Do mango bonsai require fertilizers?
Yes:
Nitrogen: once every 30–45 days
Potash: before flowering
Seaweed: weekly
22. Why is my bonsai not growing new leaves?
It might be:
Dormant season
Root rot
Soil too compact
23. Can I grow multiple mango bonsai at once?
Absolutely.
24. Can mango bonsai grow fruits indoors?
Very unlikely. Fruits need strong sunlight.
25. What temperature is best?
Between 20°C to 35°C.
26. How long does a mango bonsai live?
50+ years with proper care.
27. How to protect bonsai from pests?
Use neem oil spray weekly.
28. Why is my bonsai not flowering?
Because of:
Lack of sunlight
Too much nitrogen
Wrong pruning timing
29. How often should I root prune?
Every 2–3 years.
30. When will bonsai give full-size mangoes?
After 3–4 years of maturity.
31. Do bonsai mangoes taste normal?
Yes — they are normal mangoes in a mini tree.
32. Should I use pesticides?
Only mild organic sprays like:
Neem oil
Saaf fungicide
Bavistin (for fungal issues)
33. Can mango bonsai survive monsoon?
Yes, but keep the pot in a place where soil does not remain soggy.
34. How to prevent fungal infections?
Use a fungicide once a month during monsoon.
35. How long will it take to complete bonsai training?
Your bonsai will reach a proper shape in 4–5 years, but refinement continues lifelong.
🔶 Final Conclusion — Complete Guide in One Line
A mango bonsai thrives when you follow 5 rules: strong sunlight, controlled watering, disciplined pruning, perfect soil, and careful root management. Do this consistently — and your bonsai will reward you with beautiful canopy shape and delicious mangoes for decades.
आम (Mango) भारत का सबसे प्रिय फल है और इसकी खूशबू, स्वाद और महक मन को प्रसन्न कर देती है। आम के बड़े पेड़ों को तैयार होने में कई वर्षों का समय लगता है, लेकिन आजकल बोन्साई तकनीक ने इस धारणा को बदल दिया है।
बोन्साई की कला के माध्यम से आप अपने घर—बालकनी, छत, टेरेस, छोटे गार्डन या verandah में एक Mini Mango Tree उगा सकते हैं, जो न केवल सुंदर दिखता है बल्कि असली आम भी देता है।
आम के बोन्साई की सबसे बड़ी खासियत यह है कि: ✔ यह सीमित ऊँचाई में नियंत्रित होकर बढ़ता है। ✔ बहुत कम जगह में भी लगाया जा सकता है। ✔ नियमित प्रूनिंग से इसमें भरपूर शाखाएँ और पत्तियाँ बनती हैं। ✔ सही देखभाल से यह फल भी देता है। ✔ देखने में अत्यंत आकर्षक, दुर्लभ और शोपीस जैसा लगता है।
आज के समय में आम का मिनिएचर बोन्साई होम डेकोरेशन, ऑफिस डेस्क, गिफ्टिंग, बालकनी गार्डन और किचन गार्डन में बहुत लोकप्रिय है।
Mango Bonsai – Complete Step-by-Step Guide: Make, Care, Precautions & Tips for More Fruit | Mango Bonsai Guide
इस लेख में आपको मिलेगा: ✔ आम का बोन्साई तैयार करने की विस्तृत स्टेप-बाय-स्टेप तकनीक ✔ सही पौधा क्या चुनें? ✔ वायरिंग और प्रूनिंग कैसे करें? ✔ जड़ कटिंग और रूट प्रबंधन ✔ गमला कौनसा रखें? ✔ मिट्टी कैसे तैयार करें? ✔ आम का बोन्साई फल कैसे देगा? ✔ देखभाल, खाद, पानी और धूप ✔ सामान्य गलतियाँ और सावधानियाँ ✔ FAQ सेक्शन (लगभग 30+ सवाल)
⭐ पार्ट 2 – आम का बोन्साई बनाने के फायदे
आम का बोन्साई केवल एक पौधा नहीं, बल्कि घर में प्राकृतिक सौंदर्य, समृद्धि, खुशहाली और सकारात्मक ऊर्जा का प्रतीक माना जाता है। आम के मिनी पेड़ का अपना ही एक अलग आकर्षण होता है, जो इसे अन्य बोन्साई से खास बनाता है।
नीचे आम के बोन्साई (Mango Bonsai) के प्रमुख, गहरे और विस्तृत फायदे दिए जा रहे हैं:
🌿 1. कम जगह में असली आम का पेड़
आम के बड़े पेड़ को तैयार होने में कई साल लगते हैं और उसे बहुत बड़े स्थान की आवश्यकता होती है। लेकिन बोन्साई तकनीक से आप:
✔ छोटे गमले में ✔ 2–3 फीट के पेड़ में ✔ सुंदर, घने और फलदार आम के पेड़
उगा सकते हैं। यानी अब छत, बालकनी, या टेरेस पर भी आम का असली पेड़ संभव है।
🌿 2. घर की शोभा बढ़ाने वाला प्रीमियम शोपीस
आम का बोन्साई भारतीय और विदेशी दोनों तरह के घरों में लग्ज़री डेकोर आइटम माना जाता है। यह दिखने में:
✔ royal ✔ rare ✔ evergreen ✔ और सबसे अनोखा
झाड़ियों और अन्य बोन्साई की तुलना में यह कहीं ज्यादा आकर्षक लगता है।
यह देहाती सुंदरता और आधुनिक स्टाइल का बेहतरीन मिश्रण है।
🌿 3. सकारात्मक ऊर्जा और वास्तु लाभ
वास्तु और फेंगशुई के अनुसार आम का पौधा:
✔ घर में सकारात्मक ऊर्जा बढ़ाता है ✔ नकारात्मक ऊर्जा को कम करता है ✔ समृद्धि और धन बढ़ाने में सहायक ✔ मानसिक शांति देता है ✔ रिश्तों में मधुरता और सौहार्द बढ़ाता है
विशेष रूप से पूर्व (East) और उत्तर-पूर्व (North-East) दिशा में रखने से सर्वोत्तम लाभ मिलता है।
🌿 4. प्राकृतिक एयर-प्यूरीफायर
आम का बोन्साई हवा से:
✔ हानिकारक गैसों ✔ धूल ✔ बैक्टीरिया ✔ प्रदूषण
को सोखकर घर की हवा को साफ और ताज़ा करता है। साथ ही कमरे की ऑक्सीजन गुणवत्ता में सुधार करता है।
🌿 5. कम देखभाल में तेजी से बढ़ने वाला पौधा
अन्य बोन्साई पौधों की तुलना में आम का बोन्साई:
✔ तेजी से बढ़ता है ✔ pruning को जल्दी स्वीकार करता है ✔ जड़ों को काटने से परेशान नहीं होता ✔ regular wiring में shape जल्दी लेता है ✔ रोग प्रतिरोधी होता है
इसलिए यह beginners के लिए भी एक बेहतरीन विकल्प है।
🌿 6. प्राकृतिक खुशबू और आकर्षक पत्तियाँ
आम के बोन्साई की नई पत्तियाँ:
✔ लाल-भूरी ✔ चमकदार ✔ बेहद आकर्षक
होती हैं, जबकि पकी पत्तियाँ गहरे हरे रंग की होती हैं। इसका छोटा सा पेड़ घर में एक जीवंत और प्राकृतिक माहौल बनाता है।
🌿 7. उपज देने की क्षमता (Yes! Bonsai gives fruits)
आम का बोन्साई:
✔ grafted plant ✔ dwarf variety ✔ और regular pruning
से 2–4 साल में ही फल देना शुरू कर देता है।
यह छोटे आकार में भी: ✔ फूल (Mango bloom) ✔ और असली आम (fruits) देता है।
यही इसकी सबसे खास विशेषता है।
🌿 8. gifting के लिए सर्वोत्तम
आम का बोन्साई एक प्रीमियम गिफ्ट है:
✔ नए घर की पूजा ✔ शादी या रिसेप्शन ✔ जन्मदिन ✔ Corporate gifting ✔ Plant lovers
इसके लिए यह एक ideal पौधा है। क्योंकि यह सुंदर भी है और उपयोगी भी।
🌿 9. लंबी उम्र वाला पौधा – 20–50 साल
एक बार सही तकनीक से आम का बोन्साई तैयार हो जाए तो:
✔ यह कई वर्षों तक ✔ पीढ़ियों तक ✔ एक कीमती लग्ज़री पौधा बन जाता है।
यह lifespan अन्य बोन्साई की तुलना में काफी अधिक होती है।
के साथ ऐसा आकर्षण पैदा करता है कि लोग पहली नजर में ही आश्चर्यचकित हो जाते हैं।
यह आपको “premium bonsai collection” का अनुभव देता है।
⭐ पार्ट 3 – आम का बोन्साई बनाने की तैयारी
इस भाग में हम समझेंगे कि बोन्साई शुरुआत करने से पहले कौन सा पौधा चुनना चाहिए, किस उम्र का पौधा अच्छा रहता है, किन varieties से bonsai सबसे ज्यादा सुंदर बनता है, और कौनसे tools आपको चाहिए होंगे।
यह हिस्सा बोन्साई की नींव है… सही शुरुआत → सुंदर बोन्साई।
🌿 1. आम का बोन्साई बनाने के लिए सही पौधा कैसे चुनें? (H3)
आम का बोन्साई किसी भी variety से बनाया जा सकता है, लेकिन कुछ विशेष किस्में बोन्साई के लिए सर्वोत्तम मानी जाती हैं क्योंकि वे:
✔ dwarf growth pattern देती हैं ✔ गमले में जल्दी adjust होती हैं ✔ प्रूनिंग को आसानी से स्वीकार करती हैं ✔ जल्दी फूल/फल देती हैं
🌿 2. बोन्साई के लिए सर्वोत्तम किस्में (Best Varieties)
नीचे वे किस्में दी गई हैं जिनसे आम का बोन्साई सबसे सफल बनता है:
✔ अल्फांसो (Hapus)
– पत्तियाँ सुंदर – growth balance-perfect – fruit size medium – premium bonsai look देता है
✔ अम्रपाली (Dwarf Variety)
– बोन्साई के लिए सबसे लोकप्रिय – dwarf nature – छोटे गमले में भी फल देता है
✔ Mallika (मल्लिका)
– disease resistant – तेजी से बढ़ने वाला – beginner-friendly
✔ Sindhura / Lalbagh
– आकर्षक canopy – aesthetic bonsai shape आसानी से बनती है
✔ Totapuri (टोटापुरी)
– लंबी पत्तियाँ, premium look – shaping में आसान
👉 सबसे अच्छा विकल्प: Grafted Amrapali या Alphonso (2–3 फीट पौधा)
🌿 3. किस उम्र का पौधा बोन्साई बनाने के लिए उपयुक्त है?
नीचे सबसे उपयुक्त आयु सीमा दी गई है:
✔ 1–3 साल का पौधा – shaping के लिए perfect ✔ 3–5 साल का पौधा – मोटा तना और strong structure ✔ Grafted plant – जल्दी फल देने के लिए ideal
यदि आप सच्चे bonsai look चाहते हैं → 1–3 साल का पौधा चुनें। यदि आपको जल्दी फल भी चाहिए → grafted plant चुनें।
🌿 4. शुरुआत बीज से करें या पौधे से?
दोनों के फायदे हैं:
✔ बीज से बोन्साई
– cost-effective – shaping flexible – root training आसान – trunk natural बनता है
कमियां: फल आने में 6–8 साल भी लग सकते हैं।
✔ पौधे / ग्राफ्टेड प्लांट से बोन्साई
– 2–4 साल में फल – strong base – प्रूनिंग को जल्दी स्वीकार करता – professional bonsai look जल्दी मिलता है
निष्कर्ष: अगर आप फल भी चाहते हैं → grafted plant अगर आप perfect bonsai art चाहते हैं → seedling plant
🌿 5. मिट्टी तैयार करना (Bonsai Soil Mix)
आम का बोन्साई ✔ पानी पसंद करता है, लेकिन ✔ गीली मिट्टी बिल्कुल नहीं।
इसलिए जलनिकास (Drainage) सबसे महत्वपूर्ण है।
सर्वोत्तम Bonsai Soil Mix (Percentage):
40% बगीचे की मिट्टी
20% रेत / river sand
20% कोकोपीट या पीटमॉस
20% पत्तों की खाद / गोबर खाद अच्छी तरह सड़ी हुई
Optional (Quality बढ़ाने के लिए):
2 चम्मच नीम खली
2 मुट्ठी पर्लाइट
2 मुट्ठी वर्मीकम्पोस्ट
क्यों यह मिट्टी perfect है?
✔ पानी जल्दी निकाल देती है ✔ roots को breathable environment मिलता है ✔ fungus नहीं लगता ✔ growth तेजी से होती है ✔ bonsai pot में root rot नहीं होता
🌿 6. गमला (Pot) कैसा चुनें?
बोन्साई के लिए गमले का चयन एक कला है।
Start करने के लिए:
✔ 10–12 इंच चौड़ा ✔ 6–8 इंच गहरा
Final Bonsai Pot:
✔ 12–18 इंच wide ✔ shallow (कम गहराई वाली) flat tray pot ✔ ceramic / clay pot best
प्लास्टिक pot → बिलकुल नहीं (क्योंकि roots अधिक फैलती हैं और soil heat पकड़ती है)
इस दौरान पौधा सक्रिय (active growth) में रहता है → नई जड़ें और शाखाएँ आसानी से बनती हैं।
🌿 9. बोन्साई यात्रा कितनी लंबी होती है?
अक्सर लोग सोचते हैं कि बोन्साई बनाना बहुत कठिन है… लेकिन आम के बोन्साई के लिए यह समय सारिणी सामान्य है:
✔ 1–3 महीने → basic shape ✔ 6–12 महीने → trunk thickness + stable shape ✔ 2–3 साल → mature bonsai look ✔ 3–5 साल → फल लगना शुरू
यानी यह धैर्य और कला दोनों का संयोजन है।
⭐ पार्ट 4 – आम का बोन्साई बनाने की स्टेप-बाय-स्टेप पूरी विधि
इस भाग में हम बीज या पौधे से आम का बोन्साई बनाने की पूरी वैज्ञानिक और व्यावहारिक प्रक्रिया विस्तार से समझेंगे। यह सबसे लंबा और Core Section है — इसलिए इसे बेहद आसान भाषा और क्रमबद्ध steps में समझाया जा रहा है।
⭐ स्टेप 1 – पौधे को बोन्साई के लिए तैयार करना
आम के पौधे का चयन करने के बाद बोन्साई बनाने का पहला चरण है — उसकी लम्बाई, जड़ों और मुख्य तने को नियंत्रित करना।
✔ यदि आप पौधे से बोन्साई बना रहे हैं
2–3 फीट ऊँचाई वाला grafted या seedling plant ideal है।
प्रक्रिया:
पौधे को उसके पुराने गमले से निकालें।
आसपास की पुरानी मिट्टी हल्का झाड़ दें।
जड़ों को बिल्कुल भी न तोड़ें — सिर्फ loose soil हटाएँ।
पौधे को एक 12–14 इंच के training pot में लगाएँ।
यह pot बोन्साई का अंतिम pot नहीं है। यह सिर्फ training के लिए है।
⭐ स्टेप 2 – मुख्य तने की ऊँचाई तय करें
एक bonsai सुंदर तभी बनता है जब उसका trunk control में हो।
✔ Ideal Height:
12 इंच से 24 इंच (यानि 1–2 फीट)
इससे पेड़ Miniature tree जैसा दिखता है।
कैसे करें?
मनचाहे स्तर से ऊपर का हिस्सा काट दें।
कटाई हमेशा 45° एंगल पर करें।
कटे हुए हिस्से पर कट पेस्ट या नीम का लेप लगाएँ।
👉 यह “primary trunk shaping” कहलाता है।
⭐ स्टेप 3 – जड़ों की पहली कटिंग (Root Pruning)
आम के बोन्साई में root pruning सबसे महत्वपूर्ण चरण है।
Root pruning से: ✔ पौधा छोटा रहता है ✔ canopy compact बनती है ✔ जड़ें फैलने से रुकती हैं ✔ trunk मोटा होता है ✔ गमले में balance perfect बनता है
पहली root pruning कब करें?
पौधे को training pot में लगाने के लगभग 2–3 महीने बाद।
कैसे करें?
पौधे को training pot से बाहर निकालें।
मिट्टी झाड़कर root mass साफ दिखाएँ।
नीचे की 30–40% जड़ें काटें।
बहुत मोटी जड़ें न काटें — सिर्फ फैलती जड़ों को कम करें।
जड़ों को round bowl की तरह फैलाकर काटें।
यह प्रक्रिया shaping का “foundation” है।
⭐ स्टेप 4 – शाखाओं की पहली shaping (Primary Branching)
अब आप पौधे को bonsai जैसा दिखाना शुरू कर सकते हैं।
कैसे चुनें शाखाएँ?
पेड़ को ध्यान से देखें और:
✔ 3–5 मुख्य शाखाएँ ✔ अलग-अलग दिशाओं में फैली हुई ✔ ऊपर-नीचे बैलेंस्ड
शाखाएँ छोड़ें।
बाकी सभी branches काट दें।
ध्यान रखें:
Y shape वाली शाखाएँ छोड़ें
सीधी और लंबी शाखाएँ काट दें
एक-दूसरे को क्रॉस करती शाखाएँ भी न रखें
इससे bonsai का “skeleton structure” तैयार होता है।
⭐ स्टेप 5 – वायरिंग (Wiring Technique)
अब आपकी शाखाओं को shape देने का समय है।
Wiring क्यों जरूरी है?
✔ शाखाएँ अपनी मनचाही दिशा में मुड़ती हैं ✔ सुंदर canopy बनती है ✔ पेड़ natural दिखता है
कैसे करें?
Aluminum या copper wire लें।
wire का मोटापा शाखा की मोटाई का 1/3 रखें।
तने से शुरू करते हुए spiral में लपेटें।
शाखाओं को हल्के-हल्के मोड़ें — कभी जोर न लगाएँ।
Wiring कितने समय तक रखें?
3–4 महीने इसके बाद wire हटा दें ताकि bark को नुकसान न हो।
⭐ स्टेप 6 – तीन स्तर की canopy बनाना
एक perfect bonsai tree की canopy हमेशा “tiered” यानी स्तरों में होती है।
आम का bonsai canopy pattern:
1️⃣ पहला स्तर – सबसे बड़ा ब्रांच लेयर 2️⃣ दूसरा स्तर – मध्य लेयर 3️⃣ तीसरा स्तर – टॉप क्राउन
कैसे बनाएं?
✔ निचली शाखाएँ लंबी रखें ✔ बीच की शाखाएँ मध्यम रखें ✔ टॉप शाखाएँ सबसे छोटी रखें
इससे पेड़ 3–4 स्तर में natural miniature tree की तरह दिखता है।
⭐ स्टेप 7 – Secondary Branching
अब मुख्य शाखाओं पर छोटी-छोटी secondary शाखाएँ विकसित करनी हैं।
इसे पाने के लिए:
✔ हर नई टहनी 5–6 पत्तियों पर आने के बाद 2 पत्तियों से काटें ✔ इससे branching दोगुनी हो जाती है
2–3 साल में पेड़ घना और compact दिखने लगता है।
⭐ स्टेप 8 – Bonsai Pot में Planting (Final Planting)
अब पेड़ को उसके अंतिम bonsai pot में लगाने का समय है।
Bonsai pot कैसा हो?
✔ 12–18 इंच चौड़ा ✔ 4–6 इंच गहरा ✔ ceramic pot सबसे अच्छा
✔ grafted plant → 2–4 साल ✔ seedling plant → 6–8 साल
फल आने के लिए ज़रूरी बातें:
मार्च–अप्रैल में फूल आने दें
उस समय प्रूनिंग बिलकुल न करें
phosphorus-rich fertilizer दें
full sunlight (6–8 घंटे) दें
मिट्टी को हल्का dry रखें
अतिरिक्त nitrogen → फूल गिरा देती है इसलिए इस समय NPK में P (Phosphorus) अधिक दें।
⭐ भाग 5 : आम के बोन्साई में अधिक फल पाने के रहस्य और उर्वरक प्रबंधन
(लगभग 900+ शब्द)
आम का बोन्साई बनाना जितना कला है, उतना ही उसकी फलन क्षमता बनाए रखना विज्ञान है। सामान्यत: लोग मानते हैं कि बोन्साई में फल छोटे होते हैं या कम लगते हैं — लेकिन सही तकनीक अपनाने पर छोटा पौधा भी हर साल दर्जनों आम दे सकता है।
इस भाग में आप जानेंगे:
किस उम्र में बोन्साई फल देना शुरू करता है
फल बढ़ाने के लिए विशेष छँटाई तकनीक
कौन-कौन से खाद व उर्वरक उपयोग किए जाएँ
कौन सी गलतियाँ फलन रोक देती हैं
कितना पानी और कितनी धूप जरूरी है
गमले का आकार फलन पर कैसे असर डालता है
वर्षभर की फलन-अनुकूल गतिविधियों का कैलेंडर
चलिये शुरू करते हैं…
🌟 1. बोन्साई आम कब फल देना शुरू करता है?
यह पूरी तरह इस बात पर निर्भर करता है कि आपने किस प्रकार का पौधा चुना:
(A) ग्राफ्टेड आम का बोन्साई
फलन प्रारम्भ: 2–3 वर्ष में
खासियत: अधिक मीठे और खुशबूदार फल
उत्पादन: सामान्य बोन्साई से दोगुना
सबसे बेहतर किस्में:
केसर
अमराई
दशहरी
बनारसी लंगड़ा
मालदा
(B) नॉर्मल सीड ग्रो प्लांट बोन्साई
फलन प्रारम्भ: 7–10 वर्ष में
स्वाद भिन्न हो सकता है
फल का आकार अनियमित
👉 इसलिए bonsaiplantsnursery.com की बिक्री के लिए हमेशा ग्राफ्टेड बोन्साई आम सबसे अधिक पसंद किया जाता है।
🌟 2. आम के बोन्साई में फल बढ़ाने के लिए खास छँटाई (Fruiting Pruning Technique)
आम एक टर्मिनल फ्रूटिंग ट्री है — जिसका मतलब है कि यह तने/शाखा के सिरे पर फल देता है।
इसलिए छँटाई का मुख्य उद्देश्य होना चाहिए:
(A) नई युवी शाखाओं (New Flush) को बढ़ावा देना
प्रत्येक नई फ्लश अगले सीजन की मंजर (फूल) को जन्म देती है।
(B) हर साल “संतुलित छँटाई” करना
आपको हर वर्ष इस प्रकार pruning करनी चाहिए:
शाखा की लंबाई का 20–30% काटें
अंदर की ओर बढ़ती शाखाएँ हटा दें
कमजोर/सूखी टहनियाँ निकाल दें
सिर्फ 4–6 मुख्य शाखाएँ खुली छोड़ें
हवा-पारदर्शिता बढ़ाएँ
👉 इससे पेड़ का पूरा ऊर्जा-प्रवाह फलन पर केंद्रित होता है, न कि अनावश्यक पत्तों पर।
🌟 3. फल बढ़ाने वाले 7 मुख्य खाद (Fertilizer Plan)
आम के बोन्साई में सही पोषण देने पर फलन अत्यधिक बढ़ जाता है।
नीचे सालभर का संपूर्ण खाद चार्ट दिया है:
⭐ (A) फूल बनने से पहले – अक्टूबर–नवंबर
उर्वरक:
बोन मील – 2 चम्मच
नीम की खली – 2 चम्मच
वर्मीकम्पोस्ट – 200 ग्राम
हल्की पोटाश (0-0-50) – ¼ चम्मच
लाभ:
फूल कलियों का निर्माण
तने की शक्ति बढ़ती है
⭐ (B) मंजर के समय – जनवरी–फरवरी
उर्वरक:
NPK 5-10-10 – 1 चम्मच
सीवीड लिक्विड – 5 ml प्रति लीटर पानी
माइक्रोन्यूट्रिएंट स्प्रे – हर 15 दिन
लाभ:
मंजर गिरना कम होता है
फल आने की सम्भावना बढ़ती है
⭐ (C) फल बनने के बाद – मार्च–अप्रैल
उर्वरक:
NPK 0-0-50 – ½ चम्मच
एप्सम सॉल्ट – 1 चम्मच
पोटाशियम ह्यूमेट – 5 ml
लाभ:
फल का आकार बढ़ता है
स्वाद और मिठास बढ़ती है
⭐ (D) फल तुड़ाई के बाद – जून–जुलाई
उर्वरक:
अच्छी गोबर खाद – 300 ग्राम
वर्मीकम्पोस्ट – 200 ग्राम
ट्राइकोडर्मा – 1 चम्मच
लाभ:
पेड़ की ऊर्जा वापस आती है
नई शाखाएँ बनती हैं (अगले साल की फलन नींव)
🌟 4. फल बढ़ाने के आयुर्वेदिक उपाय (Traditional Indian Tips)
ये तकनीकें भारत में सदियों से अपनाई जाती रही हैं:
⭐ 1. घी + गुड़ मिलाकर पतली परत तने पर लगाना
रोग कम
रस प्रवाह बेहतर
फल मीठे
⭐ 2. गुड़ वाला पानी महीने में 1 बार
कार्बन की आपूर्ति
फूलन में वृद्धि
⭐ 3. पकी केले की स्लरी मिट्टी में मिलाना
पोटाश बढ़ता है
फल आकार बड़े
⭐ 4. लकड़ी की राख
मंजर गिरना कम
फल पकने में मदद
🌟 5. फलन रोक देने वाली 7 सबसे बड़ी गलतियाँ
यह गलतियाँ पेड़ को barren बना देती हैं—कितना भी खाद दें, फल नहीं लगते।
❌ 1. धोखे वाली छँटाई
बहुत ज्यादा pruning करना → फूल बनने वाली branch ही खत्म हो जाती है।
❌ 2. ओवरवाटरिंग
जड़ें नरम पड़ जाती हैं → मंजर गिर जाता है।
❌ 3. धूप की कमी
आम को रोज़ 6–8 घंटे तेज धूप चाहिए।
❌ 4. गलत गमला
बहुत छोटा या गहरा गमला → जड़ें फैल नहीं पातीं → फल कम।
❌ 5. सिर्फ नाइट्रोजन देना
N उर्वरक = हरी-भरी पत्तियाँ P+K उर्वरक = फूल + फल
❌ 6. हवा का रुकना
फंगल रोग बढ़ते हैं → फूल झड़ जाते हैं।
❌ 7. नियमित माइक्रो-न्यूट्रिएंट का अभाव
बोरॉन, जिंक और मैग्नीशियम की कमी = कम फल।
🌟 6. गमले का आकार और फलन का वैज्ञानिक संबंध
100% शोध-आधारित बात:
गमले का आकार
फल क्षमता
8–12 इंच
बहुत कम
14–16 इंच
मध्यम
16–18 इंच (बेस्ट)
अच्छा उत्पादन
20–24 इंच
बहुत भारी बोन्साई — ताकत अधिक
👉 बोन्साई के लिए 16–18 इंच का चौड़ा गमला सबसे उत्तम है।
👉 इस कैलेंडर का पालन करने पर बोन्साई आम हर साल फल देगा और आकार में भी शानदार रहेगा।
⭐ भाग 6 : आम के बोन्साई की सुरक्षा — रोग/कीट प्रबंधन और सभी समस्याओं का 100% समाधान
(लगभग 850+ शब्द)
आम का बोन्साई दिखने में भले छोटा होता है, लेकिन इसकी प्रतिरक्षा शक्ति कमजोर होती है, इसलिए इसे सामान्य पेड़ों से ज्यादा ध्यान की ज़रूरत पड़ती है। अगर सही समय पर सही उपचार किया जाए, तो बोन्साई को कभी कोई बड़ी बीमारी नहीं होती।
इस भाग में आप सीखेंगे:
आम के बोन्साई के मुख्य कीट
सभी रोगों के लक्षण और उपचार
पत्तियाँ पीली होना, कर्ल होना
फूल झड़ना
पत्तियाँ गिरना
फल में कीड़ों का हमला
प्राकृतिक और रासायनिक दोनों समाधान
सावधानियाँ और रोकथाम
🌟 1. आम के बोन्साई के 7 प्रमुख कीट (Common Pests)
1. मिलिबग (Mealybug)
सफेद रूई जैसे कीट
पत्तियों का रस चूसते हैं
पूरी पौधे में फैल जाते हैं
उपाय:
नीम ऑयल 5ml/लीटर पानी
स्प्रे हर 5 दिन पर 3 बार
जली हुई लकड़ी की राख छिड़कें
2. एफिड्स (Aphids)
नई पत्तियाँ सिकुड़ जाती हैं
चिपचिपा पदार्थ निकलता है
उपाय:
साबुन पानी स्प्रे (4ml/लीटर)
नीम-करंज मिश्रित तेल
3. स्केल इंसेक्ट
तने पर छोटे-छोटे चपटे कीट
पत्ती पीली हो जाती है
उपाय:
कॉटन में स्पिरिट लगाकर साफ करें
नीम ऑयल लगातार 3 हफ्ते
4. फल मक्खी (Fruit Fly)
फल में छेद कर अंडे देती है
उपाय:
10ml गुड़ + 10ml सिरका ट्रैप
पीले स्टिकी ट्रैप लगाएं
🌟 2. आम के बोन्साई के 6 बड़े रोग और उनके इलाज
(A) पाउडरी मिल्ड्यू (सफेद धूल जैसा रोग)
लक्षण:
पत्तियों पर सफेद पाउडर
मंजर झड़ना
नई पत्तियाँ न खुलना
उपाय:
5ml नीम तेल + 1 लीटर पानी
1 चम्मच बेकिंग सोडा + 1 चम्मच साबुन
छिड़काव 3 दिन के अंतराल पर
(B) एन्थ्रेक्नोज (फंगल ब्लैक स्पॉट)
लक्षण:
पत्तियों पर काले धब्बे
फूल काले होकर गिर जाते हैं
फल छोटा रह जाता है
उपाय:
कॉपर ऑक्सीक्लोराइड 2gm/लीटर
ट्राइकोडर्मा पाउडर मिट्टी में मिलाएँ
(C) रूट रॉट (जड़ सड़ना)
लक्षण:
पत्तियाँ तेजी से गिरना
मिट्टी की बदबू
पौधा हिलने लगता है
उपाय:
तत्काल पानी देना बंद करें
मिट्टी बदलें
ट्राइकोडर्मा + नीम खली मिलाएँ
❗ ओवरवाटरिंग बोन्साई का सबसे बड़ा दुश्मन है।
(D) लीफ कर्ल वायरस
लक्षण:
पत्तियाँ अंदर की ओर मात्र मोड़ना
पत्ती कठोर हो जाना
उपाय:
कोई पक्का इलाज नहीं
संक्रमित पत्तियाँ हटा दें
नीम तेल + माइक्रोन्यूट्रिएंट स्प्रे
(E) लीफ स्कॉर्च (जलना)
लक्षण:
पत्ती किनारे से भूरे
अधिक गर्मी या कम पानी कारण
उपाय:
पौधे को 12–3 बजे की धूप से बचाएँ
रोज़ाना सुबह गमले को भिगोकर रखें
(F) बोर्डर क्रीम डिसऑर्डर
लक्षण:
पत्तियों की नसें हल्की
जिंक की कमी
उपाय:
जिंक सल्फेट स्प्रे
एप्सम साल्ट + माइक्रो मिक्स
🌟 3. पत्तियाँ पीली क्यों पड़ती हैं? — कारण और समाधान
कारण
लक्षण
समाधान
ओवरवाटरिंग
सभी पत्तियाँ पीली
पानी कम करें
नाइट्रोजन की कमी
पुरानी पत्तियाँ पीली
NPK 19:19:19
आयरन की कमी
नसें हरी, पत्ती पीली
फेरस सल्फेट
जड़ें कुचली
नई बढ़त रुक जाती
मिट्टी बदलें
धूप की कमी
पत्तियाँ हल्की हरि
6 घंटे धूप
🌟 4. फूल गिरने के 8 मुख्य कारण (Flower Drop Reasons)
❌ 1. पहली बारिश की नमी
फंगल आक्रमण बढ़ता है।
❌ 2. ज्यादा नाइट्रोजन
पत्तियाँ बनेंगी, फूल नहीं रुकते।
❌ 3. माइक्रोन्यूट्रिएंट की कमी
विशेषकर बोरॉन और जिंक।
❌ 4. तेज हवा या धूल
मंजर टूट जाते हैं।
❌ 5. ठंड का झटका
दिसंबर–जनवरी में।
❌ 6. पानी कम देना
फूल सूखकर गिरते हैं।
❌ 7. गलत छँटाई
फूल बनने वाली शाखाएँ ही काट दी गईं।
❌ 8. फंगल रोग
Anthracnose मुख्य कारण।
🌟 5. पत्तियाँ जल्दी गिर रही हैं — क्या करें?
✔️ पानी हर बार मिट्टी सूखने पर ही दें
✔️ मिट्टी में 20% रेत + 20% पर्लाइट
✔️ गर्मियों में शाम को मिसिंग
✔️ ट्राइकोडर्मा ज़रूर मिलाएँ
✔️ हर 15 दिन माइक्रो मिक्स स्प्रे
🌟 6. फल में कीड़े लगने से बचाने की तकनीक
⭐ 1. पीले स्टिकी ट्रैप
फ्लाइज़ 70% तक कम हो जाती हैं।
⭐ 2. गुड़ + सिरका ट्रैप
कीट आकर्षित होकर मर जाते हैं।
⭐ 3. नीम तेल 5ml/लीटर
प्राकृतिक कीटनाशक।
⭐ 4. फलों पर पेपर बैग लगाना
100% कीट सुरक्षा।
🌟 7. प्राकृतिक (Organic) कीटनाशक फॉर्मूला
“ऑल-इन-वन” घर का बना स्प्रे:
नीम तेल – 2 चम्मच
करंज तेल – 2 चम्मच
लहसुन अर्क – 1 चम्मच
साबुन लिक्विड – 1 चम्मच
पानी – 1 लीटर
स्प्रे अंतराल: हर 10 दिन
यह मिश्रण लगभग सभी कीट और फंगल रोग रोकता है।
🌟 8. आम के बोन्साई को स्वस्थ रखने के 12 स्वर्ण नियम
पानी केवल मिट्टी सूखने पर
रोज़ 6–8 घंटे धूप
कम गहरी लेकिन चौड़ी ट्रे
हर वर्ष रिपॉटिंग
संतुलित छँटाई
गमले के नीचे होल ज़रूर
पत्तियों पर सप्ताह में 3 बार मिस्टिंग
माइक्रोन्यूट्रिएंट ज़रूरी
गर्मी में मल्चिंग
सर्दी में बचाव
रोग दिखे तो तुरंत स्प्रे
कभी भी नाइट्रोजन ज़्यादा न दें
⭐ भाग 7 : निष्कर्ष, 25+ प्रश्नों वाला FAQ सेक्शन और SEO Optimized क्लोज़िंग
(लगभग 900+ शब्द)
🌟 1. निष्कर्ष — आम का बोन्साई: प्रकृति का छोटा चमत्कार
आम का बोन्साई बनाना सिर्फ एक पौधा उगाने का काम नहीं है, बल्कि यह धैर्य, कला और प्रकृति-प्रेम का सुंदर संगम है। एक छोटे से गमले में आम का फलते-फूलते पौधा आपकी बागवानी को न सिर्फ खूबसूरत बनाता है, बल्कि यह आपके घर में समृद्धि, शांति और सकारात्मक ऊर्जा का भी प्रतीक होता है।
यदि आप इस आर्टिकल में बताई गई सभी तकनीकों, सावधानियों और देखभाल की विधियों को सही रूप से अपनाएँ, तो आपका बोन्साई आम हर वर्ष:
नई शाखाएँ निकालेगा
खूब फूल देगा
स्वादिष्ट और सुगंधित आमों से लदा रहेगा
और एक परफेक्ट Mini Mango Tree की तरह दिखेगा
सही छँटाई, उचित खाद प्रबंधन, धूप की उपलब्धता और पानी का नियंत्रण — यही वो चार स्तंभ हैं, जो किसी भी बोन्साई को सफल बनाते हैं।
अब चलते हैं सबसे ज़रूरी हिस्से की ओर — आपके पाठकों की सभी संभावित जिज्ञासाओं का समाधान:
⭐ 2. 25+ प्रश्नों वाला FAQ सेक्शन (SEO Friendly)
इन सवालों को खास तौर पर Google Suggest, People Also Ask और Mango Bonsai Search Queries से चुना गया है ताकि लेख Google पर बेहतर रैंक करे।
Q1. क्या आम का बोन्साई सच में फल देता है?
हाँ! यदि पौधा ग्राफ्टेड हो और उसे सही धूप, खाद और छँटाई मिले तो बोन्साई आम हर साल फल दे सकता है।
Q2. आम का बोन्साई कितने साल में फल देता है?
ग्राफ्टेड बोन्साई: 2–3 वर्ष
बीज वाला बोन्साई: 7–10 वर्ष
Q3. बोन्साई आम के लिए कौन सा गमला सबसे अच्छा है?
कम से कम 16–18 इंच चौड़ा और उथला गमला उपयोग करें।
Q4. आम के बोन्साई को कितनी धूप चाहिए?
रोज़ाना 6–8 घंटे धूप अनिवार्य है।
Q5. बोन्साई की मिट्टी कैसी होनी चाहिए?
सबसे अच्छी Soil Mix:
40% गार्डन सॉइल
30% वर्मीकम्पोस्ट
20% रेत
10% पर्लाइट
Q6. क्या बोन्साई आम को रोज़ पानी देना चाहिए?
नहीं। सिर्फ “मिट्टी सूखने” पर पानी दें। ओवरवाटरिंग सबसे बड़ा दुश्मन है।
Q7. आम के बोन्साई के लिए सबसे अच्छा समय कौन सा है?
रोपण का आदर्श समय: फरवरी – मार्च प्रूनिंग: सितंबर – अक्टूबर
Q8. क्या आम के बोन्साई में फल छोटे होते हैं?
नहीं। फल का आकार किस्म पर निर्भर करता है। सही पोषण मिलने पर फल सामान्य पेड़ों जैसा ही होता है।
Q9. बोन्साई आम का फल मीठा कैसे बनता है?
पोटाश समृद्ध खाद
गुड़ वाला पानी
केले की स्लरी
पर्याप्त धूप
समय पर पानी
Q10. बोन्साई आम में फूल क्यों झड़ जाते हैं?
जिंक व बोरॉन की कमी
तेज हवा
कीट
कम पानी
फंगल रोग
अधिक नाइट्रोजन उर्वरक
Q11. क्या बोन्साई आम को घर के अंदर रखा जा सकता है?
नहीं। यह बाहरी धूप का पौधा है।
Q12. बोन्साई आम की छँटाई कैसे करें?
हर वर्ष नई शाखाओं का 20–30% काटें, अंदर की ओर बढ़ती शाखाएँ हटा दें, 4–6 मुख्य ब्रांच रखें।
Q13. क्या बोन्साई आम कुछ समय बाद बड़ा पेड़ बन जाता है?
यदि उसकी जड़ों और शाखाओं की नियमित छँटाई करें, तो वह हमेशा छोटा और नियंत्रित रहता है।
Q14. बोन्साई आम को सर्दी से कैसे बचाएँ?
रात में अंदर रखें
पत्तियों पर मिस्टिंग बंद करें
गमले को बोरी या कपड़े से लपेटें
Q15. बोन्साई आम की पत्तियाँ पीली क्यों पड़ती हैं?
आयरन की कमी
ओवरवाटरिंग
कम धूप
जड़ सड़न
Q16. क्या बोन्साई आम को चाय की पत्ती दे सकते हैं?
हाँ, लेकिन बहुत कम मात्रा में। केवल सूखी हुई चाय की पत्ती दें।
Q17. आम के बोन्साई की जड़ें कब काटें?
हर 2 वर्ष में एक बार, शरद ऋतु या शुरुआती सर्दियों में।
Q18. क्या बोन्साई आम को केमिकल खाद देना सही है?
बहुत कम मात्रा में दे सकते हैं, लेकिन जैविक खाद सबसे सुरक्षित है।
Q19. फल मक्खी से कैसे बचाएँ?
पीले स्टिकी ट्रैप
सिरका + गुड़ ट्रैप
नीम तेल स्प्रे
फलों पर कवर बैग
Q20. बोन्साई आम मर रहा है, कैसे बचाएँ?
तुरंत करें:
पानी रोकें
मिट्टी बदलें
ट्राइकोडर्मा मिलाएँ
3 दिन अंतराल पर नीम तेल स्प्रे
Q21. आम के बोन्साई की पत्तियाँ मुड़ क्यों जाती हैं?
जिंक, मैग्नीशियम की कमी या वायरस का असर।
Q22. बोन्साई आम में चींटियाँ क्यों आती हैं?
एफिड्स/मिलिबग का संकेत। पहले कीट हटाएँ, फिर चींटियाँ खुद हट जाएँगी।
Q23. क्या बोन्साई आम को ग्रोथ हार्मोन देना चाहिए?
नहीं, इससे प्राकृतिक आकार बिगड़ सकता है।
Q24. क्या बोन्साई आम को रोज़ स्प्रे करना चाहिए?
गर्मी में हाँ (मिस्टिंग), लेकिन सर्दी में नहीं।
Q25. बोन्साई आम की आयु कितनी होती है?
100 साल से भी अधिक, यदि उसकी सही देखभाल हो।
Q26. बोन्साई आम का सबसे अच्छा मौसम कौन सा है?
बरसात के बाद — पौधे की बढ़त बहुत तेज होती है।
👉 यदि आप उच्च-गुणवत्ता वाले ग्राफ्टेड Mango Bonsai Plants खरीदना चाहते हैं, तो हमारी वेबसाइट पर जाएँ:
⭐ परिचय : बोन्साई कला क्या है और इसे सीखना क्यों जरूरी है?
बोन्साई एक ऐसी विशिष्ट जापानी कला है जिसमें किसी भी पेड़ या पौधे को एक छोटे, उथले कंटेनर में उगाकर उसे बड़ा पेड़ जैसा रूप दिया जाता है। यानी —
“छोटे गमले में एक बड़ा, परिपक्व, सुंदर और आकर्षक पेड़ का रूप।”
बोन्साई कला आज दुनिया भर में लोकप्रिय हो चुकी है। लोग इसे—
घर
छत
ऑफिस
दुकान
गार्डन
रिसॉर्ट
होटल
स्टूडियो
कहीं भी सजावट और पॉज़िटिविटी के लिए रखते हैं।
पौधे चाहे फलदार हों या सजावटी, लगभग 90% पौधों को बोन्साई में बदला जा सकता है। इस लेख में आप सीखेंगे— ✔ पौधा कैसे चुनें ✔ जड़ों की कटिंग कैसे करें ✔ शाखाओं को कैसे मोड़ें ✔ कौन-सा वायर लगाएं ✔ मिट्टी कैसी हो ✔ कब prune करें ✔ बोन्साई pot कैसा हो ✔ 3 वर्षों तक training कैसे दें ✔ fruit bonsai कैसे बनाएं ✔ कौन-सी mistakes न करें
यह भारत की जलवायु को ध्यान में रखकर बनाया गया सबसे उपयोगी बोन्साई गाइड है।
⭐ STEP 4 : Training Pot में Repotting (पहली बार गमला बदलना)
Training pot वो गमला है जिसमें—
पौधा बढ़ता है
जड़ों का फैलाव होता है
trunk मोटा होता है
प्रक्रिया:
गमले के नीचे mesh लगाएं
Soil mix की पतली परत डालें
पौधे को center में रखें
चारों तरफ soil भरें
पौधे को वायर से fix करें
पानी दें और छाया में 7 दिन रखें
⭐ STEP 5 : 1–3 साल की Training Process (Bonsai Development)
Training period में 4 मुख्य कार्य होते हैं—
✔ A) Trunk मोटा करना
इसे sacrifice branch technique से किया जाता है।
✔ B) शाखाएँ बढ़ाना
हर 45–60 दिन में trimming करें।
✔ C) Shape refine करना
triangle shape
broom shape
slanting
informal upright
cascade style
✔ D) Leaf size reduce करना
यह defoliation से होता है, खासकर ficus में।
⭐ STEP 6 : Final Shape Pruning
जब पेड़ की ऊँचाई उचित हो जाए (10–24 इंच), तब—
प्रक्रिया:
ऊपरी canopy shape करें
Side branches balance करें
Back view भी maintain करें
Node-to-node spacing सही रखें
Triangular outline बनाएं
⭐ STEP 7 : Final Bonsai Pot में Planting
यह बोन्साई का अंतिम और सबसे सुंदर चरण है।
कैसे करें?
फिर से हल्की root pruning करें
Final shallow pot में mesh लगाएं
पतली मिट्टी की परत डालें
पौधे को desired angle पर रखें
Soil भरकर हल्का दबाएं
Spray से पानी दें
आधी धूप, आधी छाया में रखें
🧩 SECTION 4 : Fruit Bonsai – भारत के अनुसार विशेष गाइड
🍋 1. नींबू बोन्साई (सबसे आसान fruit bonsai)
4–6 घंटे धूप चाहिए
हर महीने NPK 19-19-19 दें
साल में 2 बार heavy pruning
फूल और फल आसानी से आते हैं
🍎 2. अमरूद बोन्साई
बहुत मजबूत पौधा
पत्तियाँ छोटी होती हैं
तना बहुत आकर्षक दिखता है
bonsai styling में आसान
🥭 3. आम बोन्साई
ड्वार्फ किस्म सबसे बेहतर
धूप बहुत जरूरी
धीमी growth
Mature bonsai बनने में समय लगता है
🍑 4. अनार बोन्साई
beautiful flowers
easy to style
fruits छोटे ही बनते हैं
🧩 SECTION 5 : Bonsai Maintenance – दैनिक व मासिक देखभाल
✔ पानी देने का नियम
गर्मियों में रोजाना
सर्दियों में 2–3 दिन में
मिट्टी सूखी दिखे तभी पानी दें
✔ खाद
Liquid seaweed सप्ताह में 1 बार
Organic compost हर 45 दिन
NPK 19-19-19 महीना 1 बार
✔ धूप
Fruit bonsai → 5–6 घंटे धूप
Ficus bonsai → bright light
✔ Pest Control
Neem oil spray सप्ताह में 1 बार
Over-watering से बचें
🧩 SECTION 6 : सामान्य गलतियाँ जो लोग करते हैं
बहुत गहरा गमला लेना
बहुत जल्दी शाखाएँ bend करना
गलत मौसम में pruning
जड़ों को काटते समय जल्दबाजी
धूप कम देना
ज्यादा पानी देना
गलत मिट्टी का उपयोग करना
🧩 SECTION 7 : FAQs (अक्सर पूछे जाने वाले प्रश्न)
❓ क्या कोई भी पौधा बोन्साई बन सकता है?
✔ हाँ, लगभग सभी पौधे बोन्साई बन सकते हैं।
❓ बोन्साई बनने में कितना समय लगता है?
Basic shape → 6–12 महीना
Semi-mature → 2–3 साल
Mature bonsai → 5–10 साल
❓ क्या बोन्साई में फल लगते हैं?
✔ हाँ, फलदार पौधों में छोटे फल आते हैं।
❓ बोन्साई नई जगह रखने से क्या नुकसान होता है?
✔ अचानक धूप बदलने से पत्तियाँ गिर सकती हैं।
🧩 निष्कर्ष : बोन्साई एक कला है, धैर्य इसकी नींव है
अगर आप ऊपर बताई सभी steps follow करते हैं, तो आप किसी भी फलदार या सजावटी पौधे को आसानी से बोन्साई बना सकते हैं। यह केवल पौधा नहीं, बल्कि एक जीवित कला है जो आपके घर की शान बन जाती है।
December is one of the coldest months in India. Low temperatures, fog, reduced sunlight, and frost can slow down plant growth and sometimes even damage delicate plants. However, with the right winter gardening techniques, your garden can remain fresh, green, and thriving throughout the season.
This detailed guide covers everything you need to keep your plants healthy and beautiful in December—watering, fertilizing, winter protection, indoor plant care, pruning, soil management, and more.
⭐ 1. Why Gardening Needs Change in December
In December, plants experience:
Low temperature (4–15°C)
Hard, cold soil
Reduced water absorption by roots
Limited sunlight hours
Frost burning leaves
Very slow or dormant growth
That’s why winter gardening requires special care.
⭐ 2. Best Plants to Grow in December
✓ Winter Vegetables
Peas
Carrot
Spinach
Cabbage
Broccoli
Coriander
✓ Winter Flowers
Chrysanthemum
Marigold
Dahlia
Pansy
Petunia
Calendula
✓ Indoor Plants
Snake Plant
ZZ Plant
Money Plant
Rubber Plant
Aglaonema
⭐ 3. How to Water Plants in December
✓ When to Water?
Between 9 AM – 11 AM
Never water in the evening
✓ How Often?
Pots → every 4–6 days
Ground plants → every 7–10 days
✓ Important Tips
Water only when the top 2 inches of soil are dry
Avoid wetting the leaves
Succulents and cactus need water only once or twice a month
⭐ 4. Fertilizing Plants in December (The Correct Way)
Plants are semi-dormant in winter, so heavy fertilizers can harm them.
✓ Use These Fertilizers
Vermicompost
Neem Cake
Bone Meal
Seaweed Liquid Fertilizer
✓ Avoid These
Fresh cow dung
Excessive NPK
DAP
Apply fertilizers only in mild sunlight.
⭐ 5. How to Protect Plants from Winter Frost
Cover plants using jute, frost cloth, or net
Keep pots above the ground using wooden blocks or bricks
Place plants near a warm wall
Mulch the soil with dry leaves, husk, or cocopeat
Avoid exposing plants to cold winds
Mulching helps maintain soil temperature and moisture.
⭐ 6. Common Gardening Mistakes in December
Avoid these winter mistakes:
Overwatering
Watering at night
Using heavy fertilizers
Shifting plants too often
Spraying cold water on leaves
⭐ 7. Pest & Disease Control in December
Common Winter Pests
Aphids
Whiteflies
Mealybugs
Organic Solutions
Neem oil spray (5 ml per 1 liter water)
Soap water spray
Cinnamon powder for fungal prevention
Trichoderma for soil fungus
⭐ 8. Soil Care Tips for December
Loosen the topsoil every 10–15 days
Apply mulch
Add neem powder or light compost
Ensure good drainage to prevent root rot
⭐ 9. Garden Decoration Tips for Winter
Plant colorful winter flowers
Keep garden pathways clean
Use warm-colored garden lights
Maintain lawn grass with a light trim
⭐ 10. Pruning Guide for December
✓ Light Pruning Recommended For
Rose
Bougainvillea
Money Plant
Jasmine
✓ Avoid Pruning
Succulents
Cactus
⭐ 11. Best Indoor Plants for December
Indoor plants that tolerate low light and cold:
Snake Plant
ZZ Plant
Peace Lily
Pothos
Spider Plant
⭐ 12. Best Time to Plant New Plants in December
Vegetables
1–15 December
Flowers
1–20 December
Fruit Plants
Lemon
Guava
Pomegranate
⭐ 13. Indoor Garden Care in Winter
Keep plants near sunlight windows
Avoid extremely cold corners
Clean leaves twice a week
Water very lightly
⭐ 14. Balcony/Terrace Garden Tips for December
Group plants together to maintain warmth
Mulch small pots
Bring sensitive plants indoors at night
Protect from cold winds
⭐ 15. What to Check When Buying Plants in December
Healthy green leaves
Firm stem
No pests on leaves
Soil should not be overly wet
Roots should not be exposed
⭐ 16. 30-Day Gardening Calendar for December
Day 1–5
Prepare soil
Plant winter flowers
Day 6–10
Apply mulch
Set up frost protection
Day 11–15
Spray seaweed fertilizer
Clean leaves
Day 16–20
Prune lightly
Trim lawn
Day 21–25
Pest control spray
Check pots and drainage
Day 26–30
Light watering
Provide sunlight to indoor plants
⭐ Conclusion
December is a challenging yet beautiful month for gardening. With proper care—controlled watering, light fertilizing, frost protection, soil care, and sunlight management—you can keep your garden healthy, vibrant, and full of life throughout the winter.
Follow these tips consistently, and your garden will stay green, fresh, and blooming even in the coldest days of December.
दिसंबर में बागवानी कैसे करें: अपने गार्डन को हरा-भरा और सुंदर रखने के 25 ज़रूरी उपाय
दिसंबर का महीना सर्दियों का चरम समय होता है। इस समय पौधे ठंड से प्रभावित होते हैं और उनकी ग्रोथ कम हो जाती है। सही देखभाल से आपका बगीचा सर्दियों में भी हरा-भरा और आकर्षक बना रह सकता है। यहाँ आपके लिए दिसंबर माह की पूरी बागवानी गाइड दी गई है।
दिसंबर में बागवानी करते समय पानी, धूप, तापमान और मिट्टी पर थोड़ा-सा ध्यान देने से पूरा बगीचा सर्दियों में भी ताज़ा और खूबसूरत बना रह सकता है। अगर आप ऊपर बताई सभी तकनीकों का पालन करते हैं, तो आपका गार्डन दिसंबर में भी शानदार और हरा-भरा दिखाई देगा।