Posted on Leave a comment

Complete Outdoor Gardening Guide (Beginner to Expert) | Transform Your Home into a Green Paradise

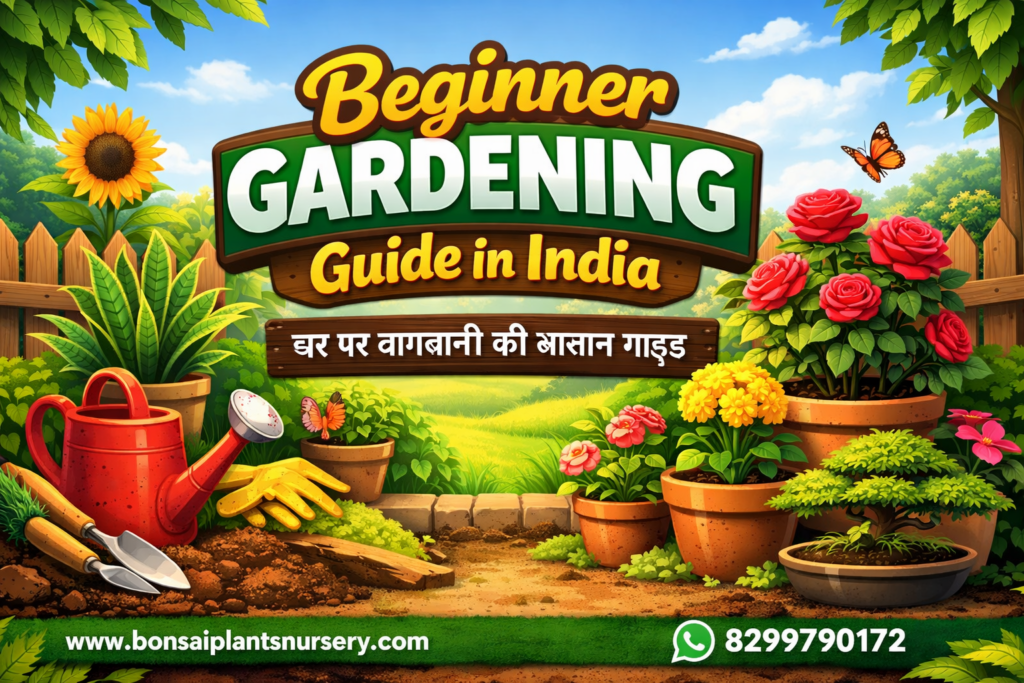
Outdoor gardening is one of the most rewarding and peaceful activities you can start at home. Whether you have a large garden, a small balcony, or just a terrace, growing plants outdoors can completely transform your space. It not only enhances beauty but also improves air quality, reduces stress, and brings you closer to nature.

In this detailed guide, you will learn everything about outdoor gardening, including how to choose the right plants, how to care for them, and how to build a beautiful garden step by step.

Complete_Outdoor_Gardening_Guide

🌱 What is Outdoor Gardening?

Outdoor gardening refers to growing plants in open environments such as:

  • Home gardens
  • Terraces (Terrace gardening)
  • Balconies
  • Backyards

These plants grow under natural sunlight, fresh air, and seasonal conditions, which help them thrive better compared to indoor plants.


🌼 Types of Outdoor Plants

1. 🌸 Flowering Plants

Flowering plants add color and life to your garden.

Examples:

  • Rose
  • Hibiscus
  • Marigold
  • Petunia

These plants are perfect for decoration and festive use.


2. 🌿 Decorative Plants

These plants enhance the visual appeal of your garden.

Examples:

  • Croton
  • Ficus
  • Palm plants

3. 🌳 Shade Plants

These plants provide shade and help maintain a cool environment.


4. 🌵 Low Maintenance Plants

Perfect for busy people who want greenery with less effort.

Examples:

  • Cactus
  • Succulents
  • Money Plant

🌞 How to Choose the Right Plants?

Choosing the right plants is very important for successful gardening.

Consider These Factors:

  • Climate of your area
  • Availability of sunlight
  • Water supply
  • Space available

For example, if your garden gets full sunlight, plants like rose and hibiscus will grow well.


🏡 Step-by-Step Guide to Create a Garden

Step 1: Choose the Right Location

Select a place where plants get enough sunlight.


Step 2: Prepare the Soil

Healthy soil leads to healthy plants.

Ideal Soil Mix:

  • 50% garden soil
  • 30% organic compost
  • 20% sand

Step 3: Planting

  • Maintain proper spacing
  • Use pots or plant directly in the ground

Step 4: Watering

  • Water regularly but avoid overwatering
  • Too much water can damage roots

Step 5: Maintenance

  • Remove dry leaves
  • Add fertilizers regularly

🌿 Expert Tips for Plant Care

💧 Proper Watering

  • Water plants in the morning or evening
  • Avoid watering during hot afternoons

🌞 Importance of Sunlight

Different plants need different sunlight levels:

  • Flowering plants need more sunlight
  • Decorative plants need moderate sunlight

🌱 Fertilizers

  • Use organic fertilizers every 15 days
  • Compost is highly recommended

✂️ Pruning

  • Helps plants grow faster
  • Encourages new flowers

🌦️ Seasonal Plant Guide

🌞 Summer Plants

  • Hibiscus
  • Rose

❄️ Winter Plants

  • Petunia
  • Calendula

🌧️ Rainy Season Plants

  • Money Plant
  • Bamboo

🌿 Smart Ideas for Small Gardens

  • Vertical gardening
  • Hanging pots
  • Multi-layer plant arrangements

Even with limited space, you can create a beautiful green area.


❌ Common Gardening Mistakes to Avoid

  • Overwatering
  • Choosing wrong plants
  • Ignoring sunlight needs
  • Not using fertilizers

🌿 Benefits of Outdoor Gardening

🧠 Mental Relaxation

Gardening reduces stress and improves mood.

🌬️ Clean Air

Plants purify the air around your home.

🏡 Better Home Aesthetics

A garden makes your home more attractive.


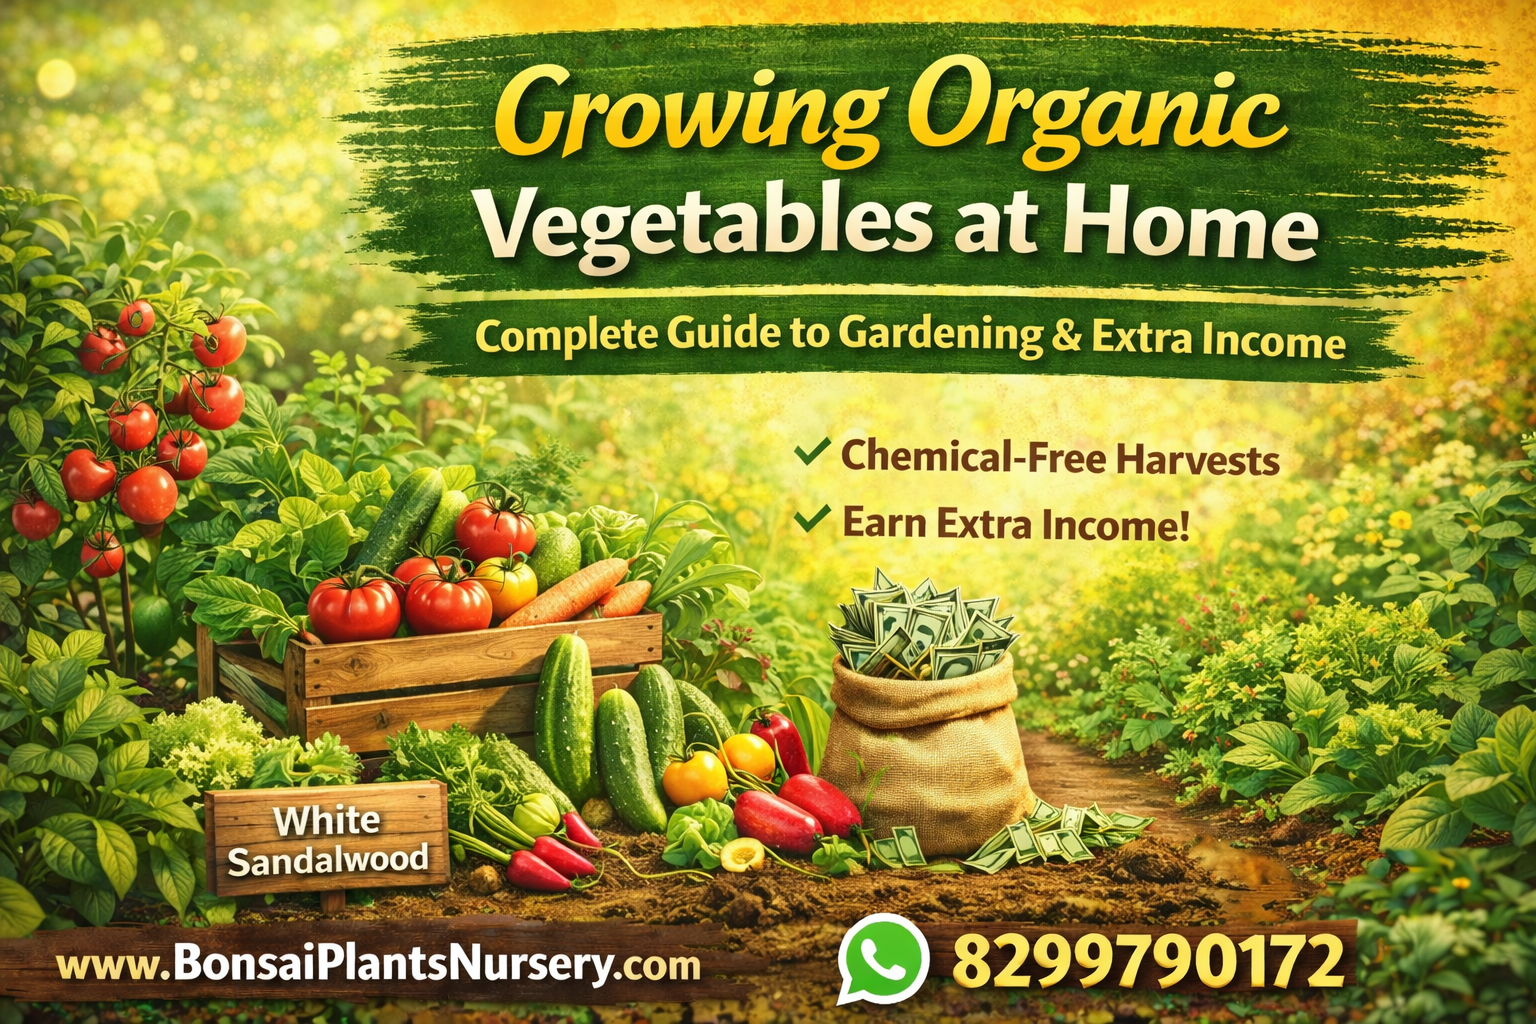
🛒 Where to Buy Outdoor Plants?

If you are looking for healthy and affordable outdoor plants, you can easily purchase them from our website.

👉 Website: www.bonsaiplantsnursery.com
📞 Contact Number: 8299790172

We offer:

  • Bonsai plants
  • Outdoor plants
  • Indoor plants
  • Flowering plants

🌟 Bonus Gardening Tips

  • Neem water helps protect plants from pests
  • Used tea leaves can be used as fertilizer
  • Eggshells provide calcium to plants

🌿 Conclusion

Outdoor gardening is not just a hobby—it is a lifestyle. With the right knowledge, proper plant selection, and regular care, you can turn your home into a green paradise.

Start your gardening journey today and bring nature closer to your home.


Posted on Leave a comment

🌿 आउटडोर गार्डनिंग की पूरी गाइड (Beginner से Expert तक) | अपने घर को बनाएं हराभरा स्वर्ग

अगर आप अपने घर के बाहर एक सुंदर, ताजगी से भरा और आकर्षक गार्डन बनाना चाहते हैं, तो आउटडोर गार्डनिंग आपके लिए सबसे बेहतरीन विकल्प है। आज के समय में लोग सिर्फ सजावट के लिए नहीं बल्कि मानसिक शांति, हेल्थ और पॉजिटिव एनर्जी के लिए भी पौधे लगाते हैं।

इस विस्तृत ब्लॉग में आप जानेंगे:

  • आउटडोर पौधों के प्रकार
  • सही पौधे कैसे चुनें
  • गार्डन बनाने का पूरा तरीका
  • पौधों की देखभाल के एक्सपर्ट टिप्स
  • मौसम के अनुसार पौधों का चयन
  • और बहुत कुछ
Complete_Outdoor_Gardening_Guide

🌱 आउटडोर गार्डनिंग क्या है?

आउटडोर गार्डनिंग का मतलब है खुले वातावरण में पौधों को उगाना जैसे:

  • घर का गार्डन
  • छत (Terrace Garden)
  • बालकनी
  • आंगन

यह पौधे प्राकृतिक धूप, हवा और बारिश के संपर्क में रहते हैं, जिससे उनकी ग्रोथ बेहतर होती है।


🌼 आउटडोर पौधों के प्रकार

1. 🌸 फूल वाले पौधे (Flowering Plants)

ये आपके गार्डन को रंगीन और आकर्षक बनाते हैं।

उदाहरण:

  • गुलाब
  • गुड़हल
  • गेंदे का फूल
  • पेटूनिया

👉 ये पौधे सजावट और त्योहारों के लिए भी उपयोगी होते हैं।


2. 🌿 सजावटी पौधे (Decorative Plants)

इनका उपयोग गार्डन को डिजाइन और आकर्षक बनाने के लिए किया जाता है।

उदाहरण:

  • क्रोटन
  • फाइकस
  • पाम पौधे

3. 🌳 छायादार पौधे (Shade Plants)

ये पौधे धूप से बचाव करते हैं और ठंडक प्रदान करते हैं।


4. 🌵 कम देखभाल वाले पौधे (Low Maintenance Plants)

अगर आप व्यस्त हैं तो ये पौधे आपके लिए सही हैं।

उदाहरण:

  • कैक्टस
  • सक्यूलेंट
  • मनी प्लांट

🌞 सही पौधे कैसे चुनें?

सही पौधे चुनना सबसे जरूरी है। गलत पौधे लगाने से गार्डन खराब हो सकता है।

ध्यान देने वाली बातें:

  • आपके क्षेत्र का मौसम
  • धूप की उपलब्धता
  • पानी की व्यवस्था
  • गार्डन की जगह

👉 उदाहरण: अगर आपके गार्डन में ज्यादा धूप आती है तो गुलाब और गुड़हल अच्छे विकल्प हैं।


🏡 गार्डन कैसे बनाएं? (Step-by-Step Guide)

Step 1: जगह का चयन करें

ऐसी जगह चुनें जहां पर्याप्त धूप आती हो।

Step 2: मिट्टी तैयार करें

अच्छी मिट्टी = अच्छी ग्रोथ

मिट्टी मिश्रण:

  • 50% गार्डन सॉयल
  • 30% गोबर खाद
  • 20% रेत

Step 3: पौधे लगाएं

  • सही दूरी रखें
  • गमले या जमीन दोनों में लगा सकते हैं

Step 4: पानी देना

  • रोजाना हल्का पानी दें
  • ज्यादा पानी से जड़ें सड़ सकती हैं

Step 5: देखभाल करें

  • सूखे पत्ते हटाएं
  • समय पर खाद डालें

🌿 पौधों की देखभाल के एक्सपर्ट टिप्स

💧 पानी देने का सही तरीका

  • सुबह या शाम पानी दें
  • दोपहर में पानी देने से बचें

🌞 धूप का महत्व

हर पौधे की धूप की जरूरत अलग होती है:

  • फूल वाले पौधे = ज्यादा धूप
  • सजावटी पौधे = मध्यम धूप

🌱 खाद (Fertilizer)

  • हर 15 दिन में खाद डालें
  • ऑर्गेनिक खाद बेहतर होती है

✂️ प्रूनिंग (कटाई-छंटाई)

  • पौधे की ग्रोथ बढ़ती है
  • नया फूल आता है

🌦️ मौसम के अनुसार पौधे

🌞 गर्मी के पौधे

  • गुड़हल
  • गुलाब

❄️ सर्दी के पौधे

  • पेटूनिया
  • कैलेंडुला

🌧️ बारिश के पौधे

  • मनी प्लांट
  • बांस

🌿 छोटे गार्डन के लिए स्मार्ट आइडिया

  • Vertical Gardening
  • Hanging Pots
  • Multi-layer Pots

👉 कम जगह में भी आप शानदार गार्डन बना सकते हैं।


🌱 सामान्य गलतियां (Avoid These Mistakes)

  • ज्यादा पानी देना
  • गलत पौधा चुनना
  • धूप का ध्यान न रखना
  • खाद न डालना

🌿 गार्डनिंग के फायदे

🧠 मानसिक शांति

पौधे तनाव कम करते हैं।

🌬️ शुद्ध हवा

पौधे हवा साफ करते हैं।

🏡 सुंदरता

घर आकर्षक बनता है।


🛒 पौधे कहां से खरीदें?

अगर आप अच्छे, स्वस्थ और सस्ते पौधे खरीदना चाहते हैं, तो आप हमारी वेबसाइट से आसानी से खरीद सकते हैं।

👉 Website: www.bonsaiplantsnursery.com
📞 Contact: 8299790172

हमारे यहां उपलब्ध हैं:

  • बोनसाई पौधे
  • आउटडोर पौधे
  • इनडोर पौधे
  • फूल वाले पौधे

🌟 बोनस टिप्स (Pro Gardening Secrets)

  • नीम का पानी कीड़ों से बचाता है
  • चाय की पत्ती खाद के रूप में उपयोग करें
  • अंडे के छिलके से कैल्शियम मिलता है

🌿 निष्कर्ष

आउटडोर गार्डनिंग सिर्फ एक शौक नहीं बल्कि एक जीवनशैली है। सही जानकारी, सही पौधों और सही देखभाल के साथ आप अपने घर को एक सुंदर ग्रीन स्पेस में बदल सकते हैं।

👉 आज ही शुरुआत करें और अपने घर को प्रकृति के करीब लाएं।

Posted on Leave a comment

How to Care for Plants in April – Complete Guide 2026 | Fruit & Flower Plant Care Guide

April marks a seasonal transition in India, where winter fully fades and summer begins to set in. During this time, temperatures start rising steadily, which directly impacts plant growth and health. Proper care in April is essential to ensure your plants remain healthy, productive, and vibrant.

In this detailed guide, you’ll learn how to take care of plants in April, especially fruit and flowering plants. Whether you’re a beginner or an experienced gardener, this guide will help you maintain a thriving garden.


🌱 Understanding April Weather and Its Impact on Plants

In April, temperatures can range from 25°C to 40°C. This leads to:

  • Faster drying of soil
  • Increased water requirements
  • Higher chances of pests and diseases
  • Rapid plant growth

That’s why proper care and attention during this month are crucial.


💧 1. Proper Watering Techniques

Watering is the most important aspect of plant care in April.

✔ How often should you water?

  • Small potted plants: Daily watering
  • Larger plants: Every 1–2 days
  • Best time: Early morning or evening

❌ What to avoid:

  • Avoid watering during midday heat
  • Overwatering can cause root rot
  • Always water slowly and deeply

🌿 2. Soil Care and Mulching

Due to rising heat, soil loses moisture quickly. Maintaining soil moisture is essential.

✔ Benefits of mulching:

  • Retains soil moisture
  • Prevents weed growth
  • Protects plant roots from heat

✔ Mulching materials:

  • Dry leaves
  • Coconut husk
  • Straw
  • Wood chips

🌼 3. Care for Flowering Plants

April is an important month for flowering plants.

🌸 What should you do?

  • Remove dried flowers (deadheading)
  • Ensure adequate sunlight
  • Apply fertilizer every 10–15 days

🌸 Popular flowering plants to focus on:

  • Rose
  • Hibiscus
  • Marigold
  • Petunia

🌸 Pro Tip:

Use potassium-rich fertilizers to boost flowering.


🍋 4. Care for Fruit Plants

Fruit plants show active growth and fruiting during this time.

🍊 What should you do?

  • Water regularly
  • Apply organic fertilizers
  • Protect plants from pests

🍊 Common fruit plants:

  • Lemon
  • Mango
  • Guava
  • Pomegranate

🍊 Pro Tip:

Avoid excessive nitrogen fertilizer, as it promotes leafy growth instead of fruiting.


🧪 5. Fertilizers and Nutrition

Plants need proper nutrition during April.

✔ Best fertilizers:

  • Cow dung manure
  • Vermicompost
  • Neem cake
  • Bone meal

✔ Frequency:

  • Once every 15–20 days

❌ Important:

  • Do not over-fertilize
  • Always water after applying fertilizer

🐛 6. Pest and Disease Control

Pest activity increases in warmer temperatures.

🐜 Common pests:

  • Aphids
  • Mealybugs
  • Spider mites

✔ Solutions:

  • Spray neem oil
  • Use mild soap solution
  • Remove infected leaves

✂️ 7. Pruning (Trimming)

Light pruning can be done in April.

✔ What to do:

  • Remove dead or diseased branches
  • Shape the plant properly

❌ Avoid:

  • Heavy pruning
  • Be careful with fruiting plants

🌞 8. Sunlight and Shade Balance

Sunlight becomes intense in April.

✔ Best practices:

  • Provide morning sunlight
  • Offer partial shade in the afternoon
  • Use shade nets if necessary

🪴 9. Care for Potted Plants

Potted plants require extra attention.

✔ Tips:

  • Ensure proper drainage holes
  • Keep soil loose and aerated
  • Repot when necessary

🌾 10. Best Plants to Grow in April

April is suitable for planting certain crops and herbs.

✔ Recommended plants:

  • Tulsi (Holy Basil)
  • Chili
  • Tomato
  • Eggplant (Brinjal)

📞 Need Help with Gardening?

If you need assistance with plant care, buying plants, or gardening tips, feel free to contact us:

🌐 Website: www.bonsaiplantsnursery.com
📱 WhatsApp: 8299790172


🔚 Conclusion

April can be a challenging yet rewarding month for plant care. With the right watering, fertilizing, and protection techniques, your plants can thrive beautifully.

Follow the tips in this guide to keep your garden healthy, green, and full of flowers and fruits.


❓ Frequently Asked Questions (FAQs)

1. How often should I water plants in April?

Most plants require daily watering or watering every alternate day.

2. Is fertilizing necessary in April?

Yes, plants need nutrients during this growth phase.

3. Which fertilizer is best?

Organic fertilizers like cow dung manure and vermicompost are ideal.

4. Should plants be kept in sun or shade?

Morning sunlight with partial afternoon shade is best.


If you found this guide helpful, don’t forget to share it with fellow gardening enthusiasts 🌱

Posted on Leave a comment

अप्रैल के महीने में पौधों की देखभाल कैसे करें – संपूर्ण गाइड 2026 | फल और फूल के पौधों की देखरेख की पूरी जानकारी

अप्रैल का महीना भारत में मौसम के बदलाव का समय होता है। इस समय ठंड पूरी तरह समाप्त हो चुकी होती है और गर्मी धीरे-धीरे बढ़ने लगती है। ऐसे में पौधों की देखभाल का तरीका भी बदलना जरूरी हो जाता है। यदि आप सही समय पर सही देखभाल नहीं करते हैं, तो पौधे कमजोर पड़ सकते हैं, फूल और फल आना कम हो सकता है, और कई बार पौधे सूख भी जाते हैं।

इस विस्तृत गाइड में हम आपको बताएंगे कि अप्रैल के महीने में पौधों की देखभाल कैसे करें, खासकर फल और फूल वाले पौधों की। यह गाइड शुरुआती और अनुभवी दोनों गार्डनर्स के लिए उपयोगी है।


🌱 अप्रैल का मौसम और पौधों पर इसका प्रभाव

अप्रैल में तापमान 25°C से 40°C तक पहुंच सकता है। इस समय:

  • मिट्टी जल्दी सूखने लगती है
  • पौधों में पानी की जरूरत बढ़ जाती है
  • कीट और बीमारियां बढ़ने लगती हैं
  • नई ग्रोथ तेज होती है

इसलिए इस महीने में पौधों की सही देखभाल बहुत जरूरी है।


💧 1. पानी देने का सही तरीका

अप्रैल में सबसे जरूरी काम है पौधों को सही मात्रा में पानी देना।

✔ कितनी बार पानी दें?

  • छोटे गमलों में लगे पौधों को रोज पानी दें
  • बड़े पौधों को 1-2 दिन के अंतराल में पानी दें
  • सुबह या शाम के समय ही पानी दें

❌ किन बातों से बचें?

  • दोपहर में पानी न दें
  • ज्यादा पानी देने से जड़ें सड़ सकती हैं
  • पानी हमेशा धीरे-धीरे डालें

🌿 2. मिट्टी की देखभाल और मल्चिंग

गर्मी में मिट्टी जल्दी सूखती है, इसलिए मिट्टी की नमी बनाए रखना जरूरी है।

✔ मल्चिंग क्यों जरूरी है?

  • मिट्टी की नमी बनी रहती है
  • खरपतवार कम होते हैं
  • जड़ें सुरक्षित रहती हैं

✔ मल्चिंग के लिए क्या उपयोग करें?

  • सूखे पत्ते
  • नारियल का छिलका
  • भूसा
  • लकड़ी का बुरादा

🌼 3. फूल वाले पौधों की देखभाल

अप्रैल फूलों के पौधों के लिए महत्वपूर्ण महीना होता है।

🌸 क्या करें?

  • सूखे फूलों को हटाएं (डेडहेडिंग)
  • पौधों को धूप में रखें
  • हर 10-15 दिन में खाद दें

🌸 किन फूलों पर ध्यान दें?

  • गुलाब
  • गुड़हल
  • गेंदा
  • पेटुनिया

🌸 खास टिप:

फूलों के पौधों में पोटाश वाली खाद देने से फूल ज्यादा आते हैं।


🍋 4. फल वाले पौधों की देखभाल

फल वाले पौधों में इस समय नई ग्रोथ होती है और कुछ में फल लगने शुरू हो जाते हैं।

🍊 क्या करें?

  • पौधों को नियमित पानी दें
  • जैविक खाद डालें
  • कीटों से बचाव करें

🍊 कौन से पौधे ध्यान दें?

  • नींबू
  • आम
  • अमरूद
  • अनार

🍊 खास टिप:

फल वाले पौधों में ज्यादा नाइट्रोजन देने से पत्तियां बढ़ती हैं, फल कम आते हैं। इसलिए संतुलित खाद दें।


🧪 5. खाद और उर्वरक

अप्रैल में पौधों को पोषण देना बहुत जरूरी है।

✔ कौन सी खाद दें?

  • गोबर की खाद
  • वर्मीकम्पोस्ट
  • नीम खली
  • बोन मील

✔ कितनी बार खाद दें?

  • हर 15-20 दिन में एक बार

❌ ध्यान रखें:

  • ज्यादा खाद न डालें
  • खाद डालने के बाद पानी जरूर दें

🐛 6. कीट और रोग नियंत्रण

गर्मी में कीट तेजी से बढ़ते हैं।

🐜 आम कीट:

  • एफिड्स
  • मिलीबग
  • स्पाइडर माइट

✔ समाधान:

  • नीम तेल स्प्रे करें
  • साबुन पानी का उपयोग करें
  • प्रभावित पत्तियों को हटा दें

✂️ 7. प्रूनिंग (कटाई-छंटाई)

अप्रैल में हल्की प्रूनिंग की जा सकती है।

✔ क्या करें?

  • सूखी और बीमार शाखाएं काटें
  • पौधे को आकार दें

❌ क्या न करें?

  • ज्यादा प्रूनिंग न करें
  • फल वाले पौधों में सावधानी रखें

🌞 8. धूप और छाया का संतुलन

अप्रैल में धूप तेज होती है।

✔ क्या करें?

  • सुबह की धूप दें
  • दोपहर में हल्की छाया दें
  • शेड नेट का उपयोग करें

🪴 9. गमलों की देखभाल

गमलों में लगे पौधों को ज्यादा देखभाल की जरूरत होती है।

✔ ध्यान रखने वाली बातें:

  • ड्रेनेज होल सही हो
  • मिट्टी ढीली रखें
  • समय-समय पर रिपोटिंग करें

🌾 10. नए पौधे लगाने का सही समय

अप्रैल में कुछ पौधे लगाए जा सकते हैं।

✔ कौन से पौधे लगाएं?

  • तुलसी
  • मिर्च
  • टमाटर
  • बैंगन

📞 पौधों से जुड़ी किसी भी सहायता के लिए

यदि आपको पौधों की देखभाल, पौधे खरीदने या गार्डनिंग से जुड़ी किसी भी जानकारी की जरूरत हो, तो आप हमसे संपर्क कर सकते हैं:

🌐 वेबसाइट: www.bonsaiplantsnursery.com
📱 व्हाट्सएप: 8299790172


🔚 निष्कर्ष

अप्रैल का महीना पौधों के लिए चुनौतीपूर्ण लेकिन सही देखभाल के साथ बहुत फायदेमंद हो सकता है। यदि आप सही समय पर पानी, खाद, और देखभाल करते हैं, तो आपके पौधे स्वस्थ रहेंगे और अच्छे फूल और फल देंगे।

इस गाइड में बताए गए सभी टिप्स को अपनाकर आप अपने गार्डन को हरा-भरा और सुंदर बना सकते हैं।


❓ अक्सर पूछे जाने वाले सवाल (FAQs)

1. अप्रैल में पौधों को कितनी बार पानी देना चाहिए?

ज्यादातर पौधों को रोज या एक दिन छोड़कर पानी देना चाहिए।

2. क्या अप्रैल में खाद देना जरूरी है?

हाँ, इस समय पौधों को पोषण की जरूरत होती है।

3. कौन सी खाद सबसे अच्छी है?

जैविक खाद जैसे गोबर खाद और वर्मीकम्पोस्ट सबसे बेहतर हैं।

4. पौधों को धूप में रखें या छाया में?

सुबह धूप और दोपहर में हल्की छाया सबसे अच्छा विकल्प है।


यदि आपको यह जानकारी उपयोगी लगी हो, तो इसे अपने दोस्तों और गार्डनिंग प्रेमियों के साथ जरूर शेयर करें 🌱

Posted on Leave a comment

10 Best Free Homemade Fertilizers That Will Fill Your Plants with Flowers and Fruits

🌱 Introduction

Gardening has become extremely popular in recent years. Many people are growing fruit plants, flowering plants, vegetables, and bonsai plants in their homes and gardens.

However, many gardeners face common problems such as:

• Plants growing slowly
• Lack of flowers and fruits
• Yellowing leaves
• Weak plant growth

In most cases, these issues occur because the soil lacks essential nutrients.

Many people buy expensive chemical fertilizers from the market, but excessive use of chemical fertilizers can sometimes harm plants and soil health.

The good news is that you can make powerful organic fertilizers at home for free using simple household materials.

These natural fertilizers improve soil fertility and help plants grow stronger, healthier, and more productive.

In this detailed guide, you will learn:

• 10 best homemade fertilizers
• How to prepare them easily at home
• Which plants benefit the most
• When and how to apply fertilizers

10_Best_Homemade_Fertilizers

🌿 Why Homemade Fertilizers Are Better

Homemade fertilizers are natural, eco-friendly, and cost-effective.

Benefits include:

• Improve soil fertility
• Strengthen plant roots
• Increase flower and fruit production
• Encourage beneficial microorganisms in soil
• Reduce environmental pollution

Using organic fertilizers regularly can make your garden much healthier.


🌱 1. Kitchen Waste Compost

Kitchen compost is one of the easiest and most effective fertilizers.

How to Make It

Use these materials:

• Vegetable peels
• Fruit peels
• Used tea leaves
• Dry leaves

Place these materials in a container and cover them with soil.

After about 20–30 days, the waste decomposes and becomes nutrient-rich compost.

Benefits

• Improves soil fertility
• Promotes faster plant growth


🌿 2. Used Tea Leaves Fertilizer

Tea leaves contain a good amount of nitrogen, which helps plant growth.

How to Use

• Wash used tea leaves to remove sugar and milk
• Mix them into the soil

Benefits

• Boosts plant growth
• Improves soil structure


🌱 3. Banana Peel Fertilizer

Banana peels are rich in potassium, which is essential for flowering and fruiting plants.

How to Use

• Cut banana peels into small pieces
• Bury them in the soil near plants

Benefits

• Increases flower production
• Helps fruit plants produce better yield


🌿 4. Eggshell Fertilizer

Eggshells are an excellent source of calcium.

How to Use

• Dry the eggshells
• Crush them into powder
• Mix them into the soil

Benefits

• Strengthens plant roots
• Prevents calcium deficiency


🌱 5. Jaggery Water Fertilizer

Jaggery acts as a natural energy source for beneficial microorganisms in soil.

How to Prepare

Mix:

• 1 teaspoon jaggery
• 1 liter water

Stir well and apply to the soil.

Benefits

• Boosts soil microbes
• Improves nutrient absorption


🌿 6. Rice Washing Water

Water used to wash rice contains starch and minerals.

How to Use

Simply pour the water into the soil around plants.

Benefits

• Provides nutrients
• Improves plant growth


🌱 7. Cow Dung Manure

Cow dung manure is considered one of the best organic fertilizers.

Benefits

• Improves soil structure
• Enhances plant growth
• Supplies essential nutrients

It is widely used in organic farming.


🌿 8. Vermicompost

Vermicompost is made using earthworms that convert organic waste into nutrient-rich compost.

Benefits

• Extremely rich in nutrients
• Boosts plant growth rapidly
• Improves soil aeration

It is one of the most powerful organic fertilizers.


🌱 9. Wood Ash Fertilizer

Wood ash contains potassium and phosphorus, which are essential for plant development.

How to Use

Sprinkle a small amount around plants.

Benefits

• Promotes flowering
• Strengthens plant structure

Use in moderation.


🌿 10. Mustard Cake Fertilizer

Mustard cake fertilizer is a powerful organic fertilizer widely used by gardeners.

How to Use

• Soak mustard cake in water for 2 days
• Dilute the mixture with water
• Apply to the soil

Benefits

• Encourages rapid plant growth
• Improves flowering and fruiting


🌱 How to Apply Fertilizers Properly

Follow these tips when applying fertilizers:

• Do not apply excessive amounts
• Apply fertilizer once or twice per month
• Water plants after applying fertilizer

Proper application ensures better results.


🌿 Best Plants for These Organic Fertilizers

These homemade fertilizers work especially well for:

• Roses
• Hibiscus
• Jasmine
• Tomato plants
• Chili plants
• Eggplant
• Mango plants
• Lemon plants

These plants respond very well to organic nutrition.


🌱 How to Increase Flower and Fruit Production

To encourage more flowers and fruits:

• Provide sufficient sunlight
• Use organic fertilizers regularly
• Water plants properly
• Prune plants when necessary

Healthy soil leads to productive plants.


🌿 Where to Buy Healthy Plants

To grow a beautiful garden, it is important to buy healthy and high-quality plants.

You can purchase plants from:

🌿 www.bonsaiplantsnursery.com

Available plants include:

• Fruit plants
• Bonsai plants
• Flowering plants
• Decorative garden plants

📞 WhatsApp Orders: 8299790172

Order today and start building a beautiful garden.


🌼 Conclusion

Homemade organic fertilizers are one of the best ways to maintain a healthy garden.

They improve soil quality, promote plant growth, and increase the number of flowers and fruits naturally.

By using these simple fertilizers regularly, your plants can grow stronger, greener, and more productive.

Visit:

🌿 www.bonsaiplantsnursery.com

📞 WhatsApp: 8299790172

Start your gardening journey with healthy plants and natural fertilizers.


❓ Frequently Asked Questions (FAQ)

1. What is the best natural fertilizer for plants?

Cow dung manure and vermicompost are among the best organic fertilizers.


2. Can kitchen waste be used as fertilizer?

Yes. Kitchen waste such as vegetable and fruit peels can be converted into compost.


3. How often should fertilizer be applied?

Generally, fertilizers should be applied once or twice a month.


4. Are tea leaves good for plants?

Yes. Tea leaves contain nitrogen which supports plant growth.


5. How can banana peels be used for plants?

Banana peels can be buried in the soil or used to make liquid fertilizer.


6. What benefits do eggshells provide to plants?

Eggshells provide calcium which strengthens plant roots.


7. Can rice washing water be used for plants?

Yes. It contains nutrients and starch beneficial for plants.


8. Is wood ash good for plants?

Yes, but it should be used in small quantities.


9. What is vermicompost?

Vermicompost is nutrient-rich fertilizer produced by earthworms.


10. Where can I buy good quality plants?

You can buy healthy plants from:

🌿 www.bonsaiplantsnursery.com
📞 WhatsApp: 8299790172

Posted on Leave a comment

10 सबसे अच्छी घर में बनाई जाने वाली मुफ्त खाद जिससे पौधे फल और फूलों से भर जाएंगे

🌱 प्रस्तावना

आजकल बागवानी (Gardening) का शौक तेजी से बढ़ रहा है। लोग अपने घरों में फलदार पौधे, फूलों के पौधे, सब्जियां और बोन्साई पौधे लगा रहे हैं।

लेकिन कई बार लोग शिकायत करते हैं कि उनके पौधे:

  • अच्छी तरह बढ़ नहीं रहे

  • फूल नहीं आ रहे

  • फल कम लग रहे हैं

  • पत्तियां पीली हो रही हैं

अक्सर इसका कारण होता है मिट्टी में पोषक तत्वों की कमी

कई लोग बाजार से महंगी केमिकल खाद खरीदते हैं, लेकिन यह हमेशा सुरक्षित नहीं होती और कई बार पौधों को नुकसान भी पहुंचा सकती है।

अच्छी बात यह है कि आप घर पर ही कई तरह की मुफ्त ऑर्गेनिक खाद बना सकते हैं, जो पौधों के लिए बेहद फायदेमंद होती हैं।

इस लेख में हम जानेंगे:

✔ घर पर बनने वाली 10 सबसे अच्छी मुफ्त खाद
✔ खाद बनाने का तरीका
✔ किस पौधे में कौन सी खाद डालनी चाहिए
✔ खाद डालने का सही समय

10_Best_Homemade_Fertilizers

🌿 घर की बनी खाद क्यों बेहतर होती है?

घर में बनी खाद पूरी तरह प्राकृतिक और सुरक्षित होती है।

इसके फायदे:

✔ मिट्टी की उर्वरता बढ़ाती है
✔ पौधों की जड़ों को मजबूत बनाती है
✔ फूल और फल ज्यादा आते हैं
✔ मिट्टी में अच्छे सूक्ष्मजीव बढ़ते हैं
✔ पर्यावरण के लिए सुरक्षित


🌱 1️⃣ किचन वेस्ट कम्पोस्ट

यह सबसे आसान और लोकप्रिय खाद है।

बनाने का तरीका

इन चीजों का उपयोग करें:

  • सब्जियों के छिलके

  • फल के छिलके

  • चाय की पत्ती

  • सूखे पत्ते

इन सबको एक डिब्बे में डालकर मिट्टी से ढक दें।

20–30 दिन में यह बेहतरीन कम्पोस्ट बन जाती है।

फायदे

✔ मिट्टी की उर्वरता बढ़ती है
✔ पौधे तेजी से बढ़ते हैं


🌿 2️⃣ चाय पत्ती की खाद

चाय पत्ती में नाइट्रोजन भरपूर मात्रा में होता है।

उपयोग कैसे करें

  • इस्तेमाल की हुई चाय पत्ती धो लें

  • मिट्टी में मिला दें

यह पौधों की वृद्धि में मदद करती है।


🌱 3️⃣ केले के छिलके की खाद

केले के छिलके पोटाशियम का बहुत अच्छा स्रोत हैं।

बनाने का तरीका

केले के छिलकों को:

  • छोटे टुकड़ों में काटें

  • मिट्टी में दबा दें

फायदे

✔ फूल ज्यादा आते हैं
✔ फलदार पौधों के लिए बेहद लाभकारी


🌿 4️⃣ अंडे के छिलकों की खाद

अंडे के छिलकों में कैल्शियम होता है।

उपयोग

  • छिलकों को सुखाकर पीस लें

  • मिट्टी में मिला दें

यह पौधों की जड़ों को मजबूत बनाता है।


🌱 5️⃣ गुड़ का घोल

गुड़ पौधों के लिए एक बेहतरीन ऊर्जा स्रोत है।

बनाने का तरीका

1 चम्मच गुड़
1 लीटर पानी

अच्छी तरह मिलाकर पौधों में डालें।

यह मिट्टी में अच्छे बैक्टीरिया को बढ़ाता है।


🌿 6️⃣ चावल धोने का पानी

चावल धोने का पानी पौधों के लिए बहुत फायदेमंद होता है।

इसमें:

✔ स्टार्च
✔ मिनरल्स

होते हैं।

इसे सप्ताह में 1–2 बार पौधों में डाल सकते हैं।


🌱 7️⃣ गोबर खाद

गोबर खाद को सबसे उत्तम प्राकृतिक खाद माना जाता है।

फायदे:

✔ मिट्टी को उपजाऊ बनाती है
✔ पौधों की वृद्धि तेज करती है


🌿 8️⃣ वर्मी कम्पोस्ट

केंचुओं की मदद से बनाई गई खाद।

इसमें बहुत सारे पोषक तत्व होते हैं।

यह पौधों की वृद्धि को बहुत तेज कर देती है।


🌱 9️⃣ लकड़ी की राख

लकड़ी की राख में:

✔ पोटाश
✔ फॉस्फोरस

होते हैं।

यह फूलों और फलदार पौधों के लिए बहुत अच्छी होती है।


🌿 🔟 सरसों खली की खाद

सरसों की खली पौधों के लिए बहुत शक्तिशाली खाद है।

उपयोग

  • 2 दिन पानी में भिगोकर रखें

  • पतला करके पौधों में डालें

यह पौधों में जबरदस्त वृद्धि करती है।


🌱 खाद डालने का सही तरीका

खाद डालते समय ध्यान रखें:

✔ बहुत ज्यादा मात्रा में न डालें
✔ महीने में 1–2 बार डालें
✔ खाद डालने के बाद हल्का पानी दें


🌿 किन पौधों में यह खाद ज्यादा फायदेमंद है?

यह खाद विशेष रूप से इन पौधों के लिए बहुत अच्छी है:

  • गुलाब

  • मोगरा

  • गुड़हल

  • टमाटर

  • मिर्च

  • बैंगन

  • आम

  • नींबू


🌱 पौधे ज्यादा फल और फूल कैसे देंगे?

इन बातों का ध्यान रखें:

✔ सही खाद
✔ पर्याप्त धूप
✔ नियमित पानी
✔ समय-समय पर छंटाई


🌿 पौधे और खाद से जुड़े जरूरी टिप्स

✔ केमिकल खाद से बचें
✔ मिट्टी को ढीला रखें
✔ समय-समय पर जैविक खाद डालें
✔ पौधों की नियमित जांच करें


🌱 पौधे कहाँ से खरीदें?

यदि आप अपने घर के बगीचे के लिए स्वस्थ और अच्छी क्वालिटी के पौधे खरीदना चाहते हैं तो विश्वसनीय नर्सरी से खरीदना जरूरी है।

आप खरीद सकते हैं:

🌿 www.bonsaiplantsnursery.com

हमारे यहाँ उपलब्ध:

✔ फलदार पौधे
✔ बोन्साई पौधे
✔ फूलों के पौधे
✔ सजावटी पौधे

📞 WhatsApp Order: 8299790172

आज ही अपने गार्डन के लिए पौधे ऑर्डर करें।


🌼 निष्कर्ष

घर में बनी प्राकृतिक खाद पौधों के लिए बहुत फायदेमंद होती है। यह न केवल मिट्टी को उपजाऊ बनाती है बल्कि पौधों को स्वस्थ भी रखती है।

यदि आप नियमित रूप से इन प्राकृतिक खादों का उपयोग करते हैं तो आपके पौधे फूलों और फलों से भर जाएंगे।


❓ FAQ (Frequently Asked Questions)

1️⃣ घर में सबसे अच्छी प्राकृतिक खाद कौन सी है?

गोबर खाद और वर्मी कम्पोस्ट सबसे अच्छी प्राकृतिक खाद मानी जाती है।


2️⃣ क्या किचन वेस्ट से खाद बन सकती है?

हाँ, सब्जियों और फलों के छिलकों से आसानी से कम्पोस्ट बनाया जा सकता है।


3️⃣ पौधों में खाद कितनी बार डालनी चाहिए?

आमतौर पर महीने में 1–2 बार खाद डालना पर्याप्त होता है।


4️⃣ क्या चाय पत्ती पौधों के लिए अच्छी है?

हाँ, चाय पत्ती में नाइट्रोजन होता है जो पौधों की वृद्धि में मदद करता है।


5️⃣ केले के छिलके का उपयोग कैसे करें?

छिलकों को काटकर मिट्टी में दबा सकते हैं या पानी में भिगोकर घोल बना सकते हैं।


6️⃣ अंडे के छिलके पौधों को क्या फायदा देते हैं?

यह कैल्शियम प्रदान करते हैं जिससे पौधों की जड़ें मजबूत होती हैं।


7️⃣ क्या चावल का पानी पौधों में डाल सकते हैं?

हाँ, इसमें पोषक तत्व होते हैं जो पौधों के लिए फायदेमंद हैं।


8️⃣ क्या लकड़ी की राख पौधों में डाल सकते हैं?

हाँ, लेकिन सीमित मात्रा में।


9️⃣ वर्मी कम्पोस्ट क्या है?

केंचुओं की मदद से तैयार की गई जैविक खाद।


🔟 अच्छे पौधे कहाँ से खरीदें?

🌿 www.bonsaiplantsnursery.com
📞 WhatsApp: 8299790172

Posted on Leave a comment

Complete Guide to Growing Organic Vegetables in Open Soil at Home and Turning It into a Source of Extra Income

🌱 Introduction

In recent years, people have become much more conscious about their health and food quality. Vegetables available in markets are often grown using chemical fertilizers and pesticides, which can affect our health over time.

This is why the demand for organic vegetables is increasing rapidly.

If you have even a small area of bare soil around your house, you can easily grow organic vegetables at home.

A small kitchen garden can provide many benefits:

• Fresh and chemical-free vegetables
• Healthier food for your family
• Enjoyable gardening activity
• Opportunity to earn extra income

Many people today are turning their home gardens into small organic vegetable businesses and earning additional income every month.

In this detailed guide you will learn:

• How to grow organic vegetables at home
• How to prepare soil naturally
• Which vegetables are easiest to grow
• Natural pest control methods
• How to turn a kitchen garden into a source of income

Organic_Vegetable_Gardening

🌿 Benefits of Growing Organic Vegetables at Home

1. Chemical-Free Food

Homegrown vegetables are fresh, safe, and free from harmful chemicals.


2. Cost Savings

Growing vegetables at home reduces your monthly grocery expenses.


3. Mental Relaxation

Gardening is a great activity that helps reduce stress and anxiety.


4. Extra Income Opportunity

If you grow more vegetables than you consume, you can sell the surplus and earn money.


🌱 Choosing the Right Location for a Kitchen Garden

If you have open soil in your house area, you can create a kitchen garden in places such as:

• Backyard garden
• Side yard
• Vacant plot
• Farm area
• Open ground near house

Important conditions:

• At least 5–6 hours of sunlight daily
• Easy water availability
• Well-drained fertile soil


🌿 Preparing Soil for Organic Vegetable Gardening

Soil preparation is one of the most important steps for healthy plant growth.

Ideal Soil Mixture

A good organic soil mix includes:

• 50% garden soil
• 30% cow dung manure
• 20% compost

You can also add vermicompost to improve fertility.

Healthy soil leads to strong plants and higher vegetable production.


🌱 Making Organic Compost at Home

You can easily make organic fertilizer at home using kitchen waste.

Materials for Compost

• Vegetable peels
• Fruit peels
• Dry leaves
• Tea leaves
• Food scraps

These materials decompose naturally and become nutrient-rich compost for your garden.

Compost improves soil fertility and helps plants grow faster.


🌿 Easy Vegetables for Beginners

If you are new to gardening, start with vegetables that grow easily.

Some beginner-friendly vegetables include:

• Tomato
• Chili
• Okra
• Bottle gourd
• Spinach
• Coriander
• Brinjal (Eggplant)
• Radish
• Fenugreek
• Cucumber

These vegetables grow quickly and require minimal care.


🌱 How to Plant Vegetable Seeds

Follow these simple steps:

  1. Loosen the soil properly

  2. Create small planting beds

  3. Sow seeds at proper spacing

  4. Cover seeds lightly with soil

  5. Water gently

Within a few days, small seedlings will start emerging.


🌿 Caring for Vegetable Plants

Proper care ensures healthy plants and good harvest.

Watering

• Summer – daily watering
• Winter – every 2–3 days


Fertilization

Add organic compost or manure every 20–25 days.


Weeding

Remove unwanted weeds regularly to prevent competition for nutrients.


🌱 Natural Pest Control Methods

Pests are common in vegetable gardens, but they can be controlled naturally.

Neem Oil Spray

Mix neem oil with water and spray on plants.

Neem oil is one of the most effective organic pest control solutions.


Garlic and Chili Spray

Blend garlic and chili with water and spray on plants.

This helps repel insects naturally.


Wood Ash

Sprinkling wood ash around plants can help prevent pest attacks.


🌿 How to Turn Your Kitchen Garden into an Extra Income Source

If you have a slightly larger garden area, you can turn it into a small organic vegetable business.


1. Sell Vegetables in Your Neighborhood

Many people prefer buying fresh organic vegetables directly from gardeners.


2. Sell in Local Markets

Local vegetable markets often have demand for organic produce.


3. Sell Through WhatsApp or Social Media

You can promote your vegetables through:

• WhatsApp groups
• Facebook
• Local community groups


4. Weekly Organic Vegetable Boxes

Create weekly vegetable baskets and supply them to families.

Many urban families prefer subscription-based organic vegetable boxes.

This can become a steady monthly income source.


🌱 Tips for a Successful Kitchen Garden

• Grow vegetables according to season
• Maintain soil fertility
• Water regularly
• Monitor pests early
• Use organic fertilizers

Consistency and proper care will give excellent results.


🌿 Where to Buy Vegetable Plants and Garden Plants

To start a successful kitchen garden, it is important to purchase healthy and high-quality plants.

You can buy plants from a trusted nursery such as:

🌿 www.bonsaiplantsnursery.com

Available plants include:

• Fruit plants
• Vegetable plants
• Bonsai plants
• Decorative garden plants

📞 WhatsApp Orders: 8299790172

Start your organic garden today and enjoy fresh vegetables at home.


🌼 Conclusion

Growing organic vegetables at home is simple, rewarding, and highly beneficial.

A small kitchen garden can provide:

• Fresh healthy food
• Gardening satisfaction
• Reduced grocery costs
• Extra monthly income

By starting today, you can create a green and productive garden space around your home.

🌿 Visit:
www.bonsaiplantsnursery.com

📞 WhatsApp: 8299790172

Order quality plants and start your organic gardening journey today.


❓ Frequently Asked Questions (FAQ)

1. Is it easy to grow organic vegetables at home?

Yes. With proper soil preparation and regular care, anyone can grow organic vegetables successfully.


2. How much space is required for a kitchen garden?

Even 50–100 square feet of space is enough to grow several vegetables.


3. Which vegetables grow fastest?

Spinach, fenugreek, coriander, and radish grow very quickly.


4. How can I make organic fertilizer at home?

You can make compost using kitchen waste, vegetable peels, fruit peels, and dry leaves.


5. How can pests be controlled naturally?

Use neem oil spray, garlic-chili spray, and wood ash as natural pest control methods.


6. Can I earn money from a kitchen garden?

Yes. Selling extra vegetables locally or through social media can generate additional income.


7. How much sunlight do vegetable plants need?

Most vegetable plants require 5–6 hours of sunlight daily.


8. Can vegetables be grown on rooftops?

Yes. Vegetables can be grown in pots, grow bags, or containers on rooftops.


9. What is the best fertilizer for vegetables?

Organic fertilizers such as cow dung manure and vermicompost are best.


10. Where can I buy quality vegetable plants?

You can buy healthy plants from:

🌿 www.bonsaiplantsnursery.com
📞 WhatsApp: 8299790172

Posted on Leave a comment

घर में कच्ची जमीन पर ऑर्गेनिक तरीके से सब्जियाँ उगाने की सम्पूर्ण जानकारी – और इसे अतिरिक्त कमाई का स्रोत कैसे बनाएं

🌱 प्रस्तावना

आजकल लोग स्वास्थ्य को लेकर पहले से ज्यादा जागरूक हो गए हैं। बाजार में मिलने वाली सब्जियों में अक्सर रासायनिक खाद और कीटनाशक का उपयोग होता है, जिससे स्वास्थ्य पर बुरा प्रभाव पड़ सकता है।

इसी कारण आजकल ऑर्गेनिक सब्जियों की मांग तेजी से बढ़ रही है।

यदि आपके घर में थोड़ी सी भी कच्ची जमीन है, तो आप वहां पर आसानी से ऑर्गेनिक तरीके से सब्जियां उगा सकते हैं।

घर पर सब्जियां उगाने के फायदे:

✔ ताजी और शुद्ध सब्जियां
✔ परिवार का स्वास्थ्य बेहतर
✔ बागवानी का आनंद
✔ अतिरिक्त आय का स्रोत

कई लोग आज छोटे किचन गार्डन से हर महीने हजारों रुपये की अतिरिक्त आय भी कमा रहे हैं।

इस लेख में हम विस्तार से जानेंगे:

  • घर में ऑर्गेनिक सब्जियां कैसे उगाएं

  • मिट्टी कैसे तैयार करें

  • कौन-कौन सी सब्जियां उगाना आसान है

  • कीटों से बचाव के घरेलू तरीके

  • किचन गार्डन से कमाई कैसे करें

Organic_Vegetable_Gardening

🌿 घर में ऑर्गेनिक सब्जियां उगाने के फायदे

1️⃣ रसायन मुक्त भोजन

घर में उगाई गई सब्जियां पूरी तरह ऑर्गेनिक और सुरक्षित होती हैं।

2️⃣ खर्च की बचत

घर में सब्जियां उगाने से बाजार से खरीदने का खर्च कम हो जाता है।

3️⃣ मानसिक शांति

बागवानी एक बहुत अच्छा stress relief activity भी है।

4️⃣ अतिरिक्त आय

यदि आपके पास थोड़ी ज्यादा जगह है तो आप अतिरिक्त सब्जियां बेचकर अच्छी कमाई कर सकते हैं।


🌱 घर में सब्जियां उगाने के लिए जगह का चयन

यदि आपके घर में कच्ची जमीन है तो आप निम्न स्थानों पर किचन गार्डन बना सकते हैं:

  • घर का पिछला आंगन

  • बगीचा

  • खाली प्लॉट

  • खेत का छोटा हिस्सा

स्थान चुनते समय ध्यान रखें:

✔ रोज 5–6 घंटे धूप
✔ पानी की सुविधा
✔ मिट्टी उपजाऊ हो


🌿 मिट्टी तैयार करने का सही तरीका

अच्छी फसल के लिए मिट्टी तैयार करना बहुत जरूरी है।

मिट्टी का मिश्रण

सबसे अच्छा मिश्रण:

  • 50% गार्डन मिट्टी

  • 30% गोबर खाद

  • 20% कम्पोस्ट

आप इसमें वर्मी कम्पोस्ट भी मिला सकते हैं।


🌱 ऑर्गेनिक खाद कैसे बनाएं

घर पर आसानी से खाद बनाई जा सकती है।

किचन वेस्ट कम्पोस्ट

इन चीजों से खाद बन सकती है:

  • सब्जियों के छिलके

  • फल के छिलके

  • सूखे पत्ते

  • चाय की पत्ती

यह खाद मिट्टी को बहुत उपजाऊ बनाती है।


🌿 शुरुआती लोगों के लिए आसान सब्जियां

यदि आप पहली बार सब्जियां उगा रहे हैं तो ये सब्जियां लगाएं:

✔ टमाटर
✔ मिर्च
✔ भिंडी
✔ लौकी
✔ पालक
✔ धनिया
✔ बैंगन
✔ मूली
✔ मेथी
✔ खीरा

ये सब्जियां आसानी से उग जाती हैं।


🌱 बीज लगाने की सही विधि

  1. मिट्टी को अच्छी तरह ढीला करें

  2. छोटी क्यारियां बनाएं

  3. बीज हल्के से दबाएं

  4. हल्का पानी दें

कुछ ही दिनों में अंकुर निकलने लगेंगे।


🌿 पौधों की देखभाल कैसे करें

पानी देना

  • गर्मियों में रोज

  • सर्दियों में 2–3 दिन में

खाद देना

हर 20–25 दिन में कम्पोस्ट डालें।

निराई-गुड़ाई

समय-समय पर खरपतवार निकालते रहें।


🌱 कीटों से बचाव के ऑर्गेनिक तरीके

सब्जियों में कीड़े लगना सामान्य बात है, लेकिन रासायनिक दवाइयों के बजाय घरेलू उपाय अपनाएं।

नीम का स्प्रे

नीम का तेल पानी में मिलाकर स्प्रे करें।

लहसुन मिर्च स्प्रे

लहसुन और मिर्च पीसकर पानी में मिलाकर छिड़काव करें।

राख

लकड़ी की राख भी कीटों को दूर रखती है।


🌿 किचन गार्डन से कमाई कैसे करें

यदि आपके पास थोड़ी ज्यादा जगह है तो आप इसे छोटा बिजनेस बना सकते हैं।

1️⃣ पड़ोस में सब्जियां बेचना

लोग ताजी ऑर्गेनिक सब्जियां खरीदना पसंद करते हैं।

2️⃣ लोकल मार्केट

स्थानीय सब्जी मंडी में बेच सकते हैं।

3️⃣ ऑनलाइन बिक्री

WhatsApp और सोशल मीडिया से भी बिक्री की जा सकती है।

4️⃣ ऑर्गेनिक सब्जी बॉक्स

साप्ताहिक सब्जी बॉक्स बनाकर लोगों को दे सकते हैं।

इससे हर महीने अच्छी अतिरिक्त आय हो सकती है।


🌱 सफल किचन गार्डन के लिए टिप्स

✔ मौसम के अनुसार सब्जियां लगाएं
✔ मिट्टी को हमेशा उपजाऊ रखें
✔ नियमित पानी दें
✔ कीट नियंत्रण करें


🌿 पौधे और बीज कहाँ से खरीदें

यदि आप अपने किचन गार्डन के लिए अच्छी क्वालिटी के पौधे और बीज खरीदना चाहते हैं तो विश्वसनीय नर्सरी से खरीदना जरूरी है।

आप यहाँ से खरीद सकते हैं:

🌿 www.bonsaiplantsnursery.com

हमारे यहाँ उपलब्ध:

✔ फलदार पौधे
✔ सब्जियों के पौधे
✔ बोन्साई पौधे
✔ सजावटी पौधे

📞 WhatsApp Order: 8299790172

आज ही अपना किचन गार्डन शुरू करें।


🌼 निष्कर्ष

घर में ऑर्गेनिक तरीके से सब्जियां उगाना बहुत आसान और लाभदायक है। इससे न केवल आपको ताजी और स्वस्थ सब्जियां मिलती हैं बल्कि यह अतिरिक्त आय का स्रोत भी बन सकता है।

यदि आप आज ही शुरुआत करते हैं तो कुछ ही महीनों में आपका किचन गार्डन हरी-भरी सब्जियों से भर जाएगा।

🌿 पौधे खरीदने के लिए विजिट करें:
www.bonsaiplantsnursery.com

📞 WhatsApp: 8299790172


❓ FAQ (Frequently Asked Questions)

1️⃣ क्या घर में ऑर्गेनिक सब्जियां उगाना आसान है?

हाँ, थोड़ी देखभाल और सही मिट्टी के साथ यह बहुत आसान है।


2️⃣ किचन गार्डन के लिए कितनी जगह चाहिए?

कम से कम 50–100 वर्ग फीट जगह में भी अच्छा किचन गार्डन बन सकता है।


3️⃣ कौन सी सब्जियां सबसे जल्दी उगती हैं?

पालक, मेथी, धनिया और मूली जल्दी तैयार हो जाती हैं।


4️⃣ ऑर्गेनिक खाद कैसे बनाएं?

किचन वेस्ट, सूखे पत्ते और गोबर से आसानी से कम्पोस्ट बनाया जा सकता है।


5️⃣ सब्जियों में कीड़े लगने से कैसे बचाएं?

नीम तेल स्प्रे और लहसुन-मिर्च स्प्रे उपयोग करें।


6️⃣ क्या किचन गार्डन से कमाई हो सकती है?

हाँ, अतिरिक्त सब्जियां बेचकर अच्छी आय हो सकती है।


7️⃣ सब्जियों को कितनी धूप चाहिए?

अधिकतर सब्जियों को 5–6 घंटे धूप चाहिए।


8️⃣ क्या छत पर भी सब्जियां उगा सकते हैं?

हाँ, गमलों और ग्रो बैग में छत पर भी उगा सकते हैं।


9️⃣ सब्जियों के लिए सबसे अच्छी खाद कौन सी है?

गोबर खाद और वर्मी कम्पोस्ट सबसे अच्छे माने जाते हैं।


🔟 सब्जियों के पौधे कहाँ से खरीदें?

आप खरीद सकते हैं:

🌿 www.bonsaiplantsnursery.com
📞 WhatsApp: 8299790172

Posted on Leave a comment

Complete Guide to Growing Sandalwood Tree at Home, Caring for It, and Earning High Income in the Future

Introduction

Sandalwood is one of the most valuable trees in the world. For centuries it has been highly prized for its fragrance, medicinal properties, and valuable wood.

Because of its high value, sandalwood is often called “Green Gold.”

Today many people are planting sandalwood trees not only for gardening but also as a long-term green investment.

If you have a small area of bare soil in your home garden, backyard, farm, or vacant plot, you can grow a sandalwood tree successfully.

Advantages of growing sandalwood:

• Requires very little space
• Needs moderate maintenance
• Value increases significantly with age
• Can become a long-term financial asset

Many people are now planting 5–10 sandalwood trees at home as a future wealth-building strategy.

In this complete guide you will learn:

• How to grow sandalwood at home
• Difference between red sandalwood and white sandalwood
• How to care for the plant properly
• Legal considerations
• Potential income from a single tree
• How selling branches periodically may generate income

growing_sandalwood_tree_at_home

What is a Sandalwood Tree?

Sandalwood is a fragrant tree whose wood and oil are extremely valuable.

Its wood is widely used for:

• Perfume industry
• Incense sticks
• Religious rituals
• Ayurvedic medicines
• Cosmetics and skincare products

Two main types of sandalwood are grown in India:

  1. White Sandalwood

  2. Red Sandalwood


White Sandalwood (Santalum Album)

White sandalwood is the most famous and traditional sandalwood variety.

It produces highly aromatic wood and oil.

Common uses:

• Perfume production
• Incense sticks
• Essential oil extraction
• Ayurvedic medicine
• Religious ceremonies

White sandalwood oil is considered one of the most expensive essential oils in the world.


Red Sandalwood (Pterocarpus Santalinus)

Red sandalwood is another highly valuable tree species.

Unlike white sandalwood, it is mainly valued for its deep red colored wood rather than fragrance.

Uses of red sandalwood:

• Luxury furniture
• Musical instruments
• Ayurvedic medicine
• Decorative wood carvings

Because of its rarity and demand, red sandalwood is also called “Red Gold.”


Why Red Sandalwood is Highly Valuable

Red sandalwood is extremely valuable due to:

• Limited natural availability
• High demand in international markets
• Use in premium furniture and medicine
• Beautiful natural red wood color

This makes red sandalwood one of the most expensive tree species in the world.


Benefits of Growing Sandalwood at Home

Growing sandalwood trees at home offers several advantages.

1. Long-Term Financial Investment

A mature sandalwood tree can be worth thousands or even lakhs of rupees depending on quality and age.


2. Low Maintenance Tree

Once the tree becomes established, it requires minimal care.


3. Environment Friendly

Sandalwood trees improve biodiversity and contribute to a healthier ecosystem.


4. Increases Property Value

Planting valuable trees like sandalwood can increase the overall value of your land.


Where to Plant Sandalwood at Home

If you want to grow sandalwood at home, selecting the right location is important.

Ideal places include:

• Backyard garden
• Open soil area around house
• Farm boundary
• Vacant plot
• Farmhouse garden

Important conditions:

• Good sunlight
• Well-drained soil
• No water stagnation


Best Time to Plant Sandalwood

The best seasons to plant sandalwood in India are:

Monsoon (July – September)

or

Late Winter to Early Spring (February – March)

Monsoon planting is ideal because soil moisture helps young plants establish faster.


Step-by-Step Guide to Planting Sandalwood

Step 1: Prepare the Pit

Dig a pit of about:

2 ft × 2 ft × 2 ft

Fill the pit with:

• Garden soil
• Organic compost or cow dung manure
• Some sand for drainage


Step 2: Plant the Sapling

Place the sandalwood sapling carefully in the center of the pit and cover it with soil.


Step 3: Water the Plant

Give light watering immediately after planting.


Why Sandalwood Needs a Host Plant

Sandalwood is a semi-parasitic tree.

This means its roots attach to nearby plants and absorb some nutrients from them.

Therefore it is beneficial to plant host plants nearby.

Common host plants include:

• Pigeon pea (Arhar)
• Neem tree
• Tulsi
• Pongamia (Karanj)

These plants help the sandalwood tree grow better.


Caring for Sandalwood Plants

Proper care during the first 2–3 years is important.

Watering

• Summer: 2–3 times per week
• Winter: once per week


Fertilizer

Apply organic manure twice a year.


Protection

Protect young plants from animals by installing fencing or tree guards.


How Long Does Sandalwood Take to Grow?

Sandalwood grows slowly but becomes very valuable over time.

Typical growth timeline:

5 years – good tree structure
10 years – heartwood begins forming
15–20 years – high-quality sandalwood wood


Potential Income from One Sandalwood Tree

The value of a sandalwood tree depends on:

• Age of the tree
• Quality of heartwood
• Market demand

On average:

A mature tree may be worth between

₹50,000 to ₹5,00,000 or more

in the future.


Can You Earn by Selling Branches?

Once the tree becomes mature and develops multiple branches, some pruning may produce usable wood.

In legal and regulated systems, trimmed wood pieces may have value because sandalwood is highly priced.

However, harvesting and selling sandalwood wood usually requires compliance with local forestry laws and regulations, so always check rules in your state before selling.


Legal Considerations for Growing Sandalwood

Earlier sandalwood cultivation was heavily restricted in India.

Today many states allow private sandalwood cultivation.

However:

• Cutting trees may require government permission
• Selling wood must follow forestry regulations
• Documentation may be required

Always check with your local forest department before harvesting or selling sandalwood.


Where to Buy Genuine Sandalwood Plants

To grow a healthy sandalwood tree, it is important to purchase authentic and disease-free plants.

You can buy quality plants from:

🌿 www.bonsaiplantsnursery.com

Available plants include:

• Sandalwood plants
• Fruit plants
• Bonsai plants
• Decorative garden plants

📞 WhatsApp Orders: 8299790172

Posted on Leave a comment

घर में कच्ची जमीन पर चंदन का पेड़ उगाने, देखरेख करने और भविष्य में लाखों की कमाई करने की सम्पूर्ण जानकारी

🌳 प्रस्तावना

भारत में चंदन का पेड़ (Sandalwood Tree) सदियों से अत्यंत मूल्यवान माना जाता है। इसकी लकड़ी, खुशबू और औषधीय गुणों के कारण इसे “Green Gold” भी कहा जाता है।

आज के समय में लोग केवल खेती के लिए ही नहीं बल्कि लॉन्ग-टर्म इन्वेस्टमेंट (Long Term Investment) के रूप में भी चंदन का पेड़ लगा रहे हैं।

यदि आपके घर में थोड़ी सी भी कच्ची जमीन है — जैसे कि बगीचा, खाली प्लॉट, खेत का कोना या फार्महाउस — तो आप आसानी से चंदन का पेड़ लगा सकते हैं।

यह पेड़:

  • ज्यादा जगह नहीं लेता

  • कम देखभाल में भी बढ़ता है

  • समय के साथ बहुत अधिक मूल्यवान हो जाता है

कई लोग आज घर के बगीचे में 5–10 चंदन के पेड़ लगाकर भविष्य के लिए लाखों रुपये की संपत्ति बना रहे हैं।

इस विस्तृत लेख में हम जानेंगे:

✔ घर में चंदन का पेड़ कैसे लगाएं
✔ लाल चंदन और सफेद चंदन का अंतर
✔ पौधे की देखभाल कैसे करें
✔ कानूनी नियम
✔ एक पेड़ से कितनी कमाई हो सकती है
✔ एक शाखा बेचकर हर महीने आय कैसे संभव है

growing_sandalwood_tree_at_home

🌱 चंदन का पेड़ क्या होता है?

चंदन (Sandalwood) एक सुगंधित लकड़ी वाला वृक्ष है जिसकी लकड़ी से तेल, इत्र, अगरबत्ती, धार्मिक सामग्री और आयुर्वेदिक दवाइयाँ बनाई जाती हैं।

भारत में मुख्य रूप से दो प्रकार के चंदन होते हैं:

1️⃣ सफेद चंदन (White Sandalwood)

वैज्ञानिक नाम: Santalum Album

यह सबसे प्रसिद्ध चंदन है जिसकी खुशबू बहुत तेज होती है।

उपयोग:

  • इत्र

  • अगरबत्ती

  • पूजा सामग्री

  • आयुर्वेदिक दवाइयाँ

  • कॉस्मेटिक उद्योग


2️⃣ लाल चंदन (Red Sandalwood)

वैज्ञानिक नाम: Pterocarpus Santalinus

यह गहरे लाल रंग की लकड़ी वाला पेड़ होता है।

उपयोग:

  • औषधीय उत्पाद

  • लक्जरी फर्नीचर

  • संगीत वाद्य

  • सजावटी लकड़ी


🔴 लाल चंदन क्यों ज्यादा मूल्यवान माना जाता है?

लाल चंदन की अंतरराष्ट्रीय बाजार में बहुत ज्यादा मांग है।

इसके मुख्य कारण:

✔ लकड़ी का सुंदर लाल रंग
✔ उच्च गुणवत्ता
✔ औषधीय उपयोग
✔ सीमित उत्पादन

इसी वजह से कई लोग लाल चंदन को Green Gold Tree भी कहते हैं।


🌿 घर में चंदन का पेड़ लगाने के फायदे

1️⃣ भविष्य में बड़ा आर्थिक लाभ

एक परिपक्व चंदन का पेड़ लाखों रुपये का हो सकता है।

2️⃣ कम देखभाल

एक बार पौधा स्थापित हो जाए तो ज्यादा देखभाल की जरूरत नहीं होती।

3️⃣ पर्यावरण के लिए अच्छा

चंदन के पेड़ पर्यावरण को शुद्ध करते हैं।

4️⃣ जमीन की कीमत बढ़ती है

यदि आपके प्लॉट में चंदन के पेड़ हों तो उसकी कीमत भी बढ़ जाती है।


🌱 घर में चंदन का पेड़ कहाँ लगाएं?

यदि आप घर में चंदन लगाना चाहते हैं तो स्थान का चयन महत्वपूर्ण है।

उपयुक्त स्थान:

  • घर का बगीचा

  • खाली प्लॉट

  • खेत की मेड़

  • फार्महाउस

  • बाउंड्री लाइन

ध्यान रखें:

✔ पर्याप्त धूप मिले
✔ पानी जमा न हो
✔ मिट्टी ढीली और उपजाऊ हो


🌳 चंदन का पौधा लगाने का सही समय

भारत में चंदन लगाने का सबसे अच्छा समय:

🌧 मानसून (जुलाई – सितंबर)

या

🌱 फरवरी – मार्च

मानसून में पौधा जल्दी बढ़ता है क्योंकि मिट्टी में नमी रहती है।


🌿 चंदन का पौधा कैसे लगाएं (Step by Step Guide)

Step 1 – गड्ढा तैयार करें

गड्ढा आकार:

2×2×2 फीट

गड्ढे में डालें:

  • मिट्टी

  • गोबर खाद

  • थोड़ी रेत


Step 2 – पौधा लगाना

पौधे को सावधानी से गड्ढे में लगाएं और मिट्टी से दबाएं।


Step 3 – पानी देना

पहले दिन हल्का पानी दें।


🌱 चंदन के साथ Host Plant क्यों जरूरी है?

चंदन एक Semi-Parasitic Tree है।

इसका मतलब है कि यह पास के पौधों की जड़ों से कुछ पोषक तत्व लेता है।

इसलिए इसके पास ये पौधे लगाना अच्छा रहता है:

✔ अरहर
✔ करंज
✔ नीम
✔ तुलसी


🌿 चंदन के पौधे की देखभाल

पहले 2–3 साल देखभाल जरूरी होती है।

पानी

  • गर्मियों में: 2–3 बार सप्ताह में

  • सर्दियों में: 1 बार सप्ताह में

खाद

  • साल में 2 बार गोबर खाद

सुरक्षा

पशुओं से बचाने के लिए जाली लगाएं।


🌳 चंदन का पेड़ कितने साल में तैयार होता है?

चंदन धीरे-धीरे बढ़ता है।

समय:

  • 5 साल → अच्छा आकार

  • 10 साल → लकड़ी विकसित

  • 15–20 साल → उच्च गुणवत्ता चंदन


💰 एक चंदन के पेड़ से कितनी कमाई हो सकती है?

यह कई बातों पर निर्भर करता है:

  • पेड़ की उम्र

  • लकड़ी की गुणवत्ता

  • बाजार की कीमत

औसतन:

एक पेड़ की कीमत

₹50,000 से ₹5,00,000+ तक हो सकती है।


🌿 एक शाखा बेचकर हर महीने कमाई कैसे संभव है?

जब चंदन का पेड़ बड़ा हो जाता है तो उसमें कई शाखाएं होती हैं।

यदि कोई किसान:

  • हर साल कुछ शाखाओं की कटाई करे

  • कानूनी तरीके से बेचें

तो समय-समय पर एक शाखा बेचकर भी अच्छी आय प्राप्त हो सकती है

चंदन की लकड़ी की कीमत बहुत ज्यादा होती है इसलिए छोटे टुकड़े भी हजारों रुपये के बिक सकते हैं।


🌳 चंदन की खेती के कानूनी नियम

भारत में पहले चंदन की खेती पर सख्त नियम थे।

अब कई राज्यों में निजी जमीन पर चंदन उगाने की अनुमति है।

लेकिन:

✔ पेड़ काटने से पहले अनुमति जरूरी हो सकती है
✔ लकड़ी बेचने के लिए सरकारी नियम लागू होते हैं

इसलिए स्थानीय वन विभाग की जानकारी जरूर लें।


🌿 चंदन का पौधा कहाँ से खरीदें?

असली और स्वस्थ पौधा खरीदना बहुत जरूरी है।

आप उच्च गुणवत्ता वाले पौधे यहाँ से खरीद सकते हैं:

🌿 www.bonsaiplantsnursery.com

हमारे यहाँ उपलब्ध:

✔ चंदन के पौधे
✔ फलदार पौधे
✔ बोन्साई पौधे
✔ सजावटी पौधे

📞 WhatsApp Order: 8299790172

आज ही अपने घर के बगीचे के लिए पौधे ऑर्डर करें।


🌼 निष्कर्ष

चंदन का पेड़ लगाना केवल बागवानी नहीं बल्कि भविष्य के लिए एक स्मार्ट निवेश है।

यदि आप आज अपने घर की जमीन में 5–10 चंदन के पौधे लगाते हैं तो आने वाले वर्षों में यह लाखों रुपये की संपत्ति बन सकते हैं।

इसलिए देर न करें।

आज ही अपने बगीचे में चंदन का पौधा लगाएं।

🌿 पौधे खरीदने के लिए विजिट करें
www.bonsaiplantsnursery.com

📞 WhatsApp: 8299790172


❓ Frequently Asked Questions (FAQ)

Q1. क्या घर में चंदन का पेड़ लगाया जा सकता है?

हाँ, यदि आपके घर में कच्ची जमीन और धूप वाला स्थान है तो चंदन का पेड़ आसानी से लगाया जा सकता है।


Q2. चंदन का पेड़ कितने साल में तैयार होता है?

लगभग 15–20 साल में उच्च गुणवत्ता की लकड़ी तैयार होती है।


Q3. क्या चंदन के पेड़ को ज्यादा पानी चाहिए?

नहीं। यह मध्यम पानी में भी अच्छी तरह बढ़ता है।


Q4. क्या चंदन के पेड़ के पास दूसरा पौधा लगाना जरूरी है?

हाँ, क्योंकि चंदन एक Semi-Parasitic पौधा है।


Q5. लाल चंदन और सफेद चंदन में कौन ज्यादा महंगा है?

अंतरराष्ट्रीय बाजार में लाल चंदन अधिक मूल्यवान माना जाता है।


Q6. क्या चंदन की खेती कानूनी है?

कई राज्यों में निजी जमीन पर चंदन उगाना अनुमति है, लेकिन कटाई और बिक्री के नियम अलग हो सकते हैं।


Q7. चंदन का पौधा कहाँ से खरीदें?

आप विश्वसनीय नर्सरी से खरीद सकते हैं जैसे:

🌿 www.bonsaiplantsnursery.com

📞 WhatsApp: 8299790172

Posted on Leave a comment

🐛 Home Remedies to Kill Pests on Plants – 12 Powerful Natural Solutions

🌱 Introduction

Pest attacks are one of the most common problems in gardening. Whether you grow bonsai, fruit plants, flowering plants, or indoor plants, insects can damage leaves, stop plant growth, cause flower drop, and even kill the plant if not treated on time.

The good news is that most plant pests can be controlled using natural home remedies without harmful chemicals.

In this guide, you will learn safe, affordable, and effective ways to protect your garden naturally.

Home_Remedies_to_Kill_Pests_on_Plants

🐜 Common Pests Found on Plants

Before treatment, it’s important to identify the pest:

  1. Aphids

  2. Mealybugs

  3. Whiteflies

  4. Spider Mites

  5. Thrips

  6. Caterpillars

Each pest damages plants differently, but most can be treated with organic solutions.


🌿 12 Powerful Home Remedies for Plant Pest Control


1️⃣ Neem Oil Spray (Most Effective)

How to Prepare:

  • 5 ml neem oil

  • 1 liter water

  • 2–3 drops liquid soap (to mix properly)

How to Use:

  • Spray early morning or evening

  • Repeat every 7 days

✔ Works on most soft-bodied pests
✔ Safe for bonsai and fruit plants


2️⃣ Garlic Spray

Preparation:

  • Crush 8–10 garlic cloves

  • Mix in 1 liter water

  • Keep for 24 hours

  • Strain and spray

✔ Effective against aphids and mealybugs


3️⃣ Soap Water Spray

  • 1 teaspoon liquid soap

  • 1 liter water

Spray directly on pests.

⚠ Do not use excessive soap.


4️⃣ Chili + Garlic Spray

  • 1 teaspoon red chili powder

  • 1 teaspoon garlic paste

  • 1 liter water

Best for caterpillars and chewing insects.


5️⃣ Buttermilk Spray

  • 1 part buttermilk

  • 2 parts water

Useful for fungal problems and small pests.


6️⃣ Tobacco Solution (Use Carefully)

Soak tobacco in water, strain, and spray.

⚠ Avoid frequent use on edible plants.


7️⃣ Neem Leaf Extract

Boil neem leaves in water, cool, strain, and spray.


8️⃣ Baking Soda Spray

  • ½ teaspoon baking soda

  • 1 liter water

Helps control fungal infections.


9️⃣ Turmeric Water Spray

Mild antibacterial properties for plant protection.


🔟 Wood Ash

Sprinkle lightly around soil to reduce ants and insects.


1️⃣1️⃣ Sticky Traps

Use yellow sticky cards for whiteflies.


1️⃣2️⃣ Manual Removal

For large insects, remove by hand and wash leaves with water.


⚠ Important Precautions While Spraying

✔ Never spray during direct sunlight
✔ Always test on one leaf first
✔ Spray in early morning or evening
✔ Repeat treatment 2–3 times for best results


🌿 Special Pest Control Tips for Bonsai

  • Use light spray only

  • Avoid overwatering

  • Inspect weekly

  • Maintain good air circulation

Bonsai need extra care because they grow in small containers.


❓ Frequently Asked Questions (FAQ)

Q1. Does neem oil work on all pests?

Yes, it works effectively on most soft-bodied insects.

Q2. How long does it take to see results?

You may see improvement within 3–7 days.

Q3. Are home remedies safe?

Yes, when used in correct quantities.

Q4. How often should I spray?

Once every 7–10 days depending on infestation level.


🌼 Conclusion

Pests are a natural part of gardening, but with timely action and natural remedies, you can protect your plants without harmful chemicals. Regular inspection, proper watering, and preventive sprays can keep your garden healthy all year round.

For healthy, pest-free bonsai, fruit plants, and decorative plants, visit:

🌿 www.bonsaiplantsnursery.com
📞 WhatsApp Orders: +91 8299790172

Posted on Leave a comment

🐛 पौधों में कीड़े मारने के घरेलू उपाय – 12 असरदार प्राकृतिक तरीके

🌱 प्रस्तावना

पौधों में कीड़े लगना एक आम समस्या है। चाहे आपके पास बोन्साई हो, फलदार पौधे हों या इंडोर प्लांट्स – कीट (pests) पत्तियों को नुकसान पहुंचाते हैं, फूल गिरा देते हैं और पौधे की वृद्धि रोक देते हैं।

अच्छी बात यह है कि ज्यादातर कीड़े घरेलू और प्राकृतिक उपायों से नियंत्रित किए जा सकते हैं – बिना महंगे केमिकल के।

Home_Remedies_to_Kill_Pests_on_Plants

🐜 पौधों में लगने वाले आम कीड़े

  1. एफिड (Aphids)

  2. मिलीबग (Mealybugs)

  3. व्हाइटफ्लाई (Whitefly)

  4. स्पाइडर माइट (Spider Mites)

  5. थ्रिप्स (Thrips)

  6. कैटरपिलर (इल्ली)


🌿 12 असरदार घरेलू उपाय


1️⃣ नीम तेल स्प्रे (सबसे असरदार)

कैसे बनाएं?

  • 5 ml नीम तेल

  • 1 लीटर पानी

  • 2–3 बूंद लिक्विड साबुन (मिक्स करने के लिए)

कैसे इस्तेमाल करें?

  • सुबह या शाम स्प्रे करें

  • हर 7 दिन में दोहराएं

✔ लगभग सभी कीड़ों पर असरदार


2️⃣ लहसुन का स्प्रे

विधि:

  • 8–10 लहसुन की कलियां पीस लें

  • 1 लीटर पानी में मिलाकर 24 घंटे रखें

  • छानकर स्प्रे करें

✔ मिलीबग और एफिड पर प्रभावी


3️⃣ साबुन वाला पानी

  • 1 चम्मच लिक्विड साबुन

  • 1 लीटर पानी

हल्के कीटों पर बहुत असरदार
⚠ ज्यादा साबुन न डालें


4️⃣ मिर्च + लहसुन स्प्रे

  • 1 चम्मच लाल मिर्च पाउडर

  • 1 चम्मच लहसुन पेस्ट

  • 1 लीटर पानी

कैटरपिलर और चबाने वाले कीटों के लिए उपयोगी


5️⃣ छाछ स्प्रे

  • 1 भाग छाछ

  • 2 भाग पानी

फंगल रोग और छोटे कीटों के लिए अच्छा


6️⃣ तंबाकू घोल (सावधानी से)

  • तंबाकू पानी में भिगोकर छान लें
    ⚠ खाने वाले पौधों पर कम प्रयोग करें


7️⃣ नीम की पत्ती का काढ़ा

नीम की पत्तियां उबालकर ठंडा करें और स्प्रे करें।


8️⃣ बेकिंग सोडा स्प्रे

  • 1/2 चम्मच बेकिंग सोडा

  • 1 लीटर पानी

फंगल संक्रमण में उपयोगी


9️⃣ हल्दी पानी

हल्का एंटी-बैक्टीरियल असर


🔟 राख (Wood Ash)

मिट्टी में हल्की राख डालें
चींटी और कीट कम होते हैं


1️⃣1️⃣ चिपचिपे ट्रैप (Sticky Traps)

पीले कार्ड पर तेल लगाकर लटकाएं
व्हाइटफ्लाई के लिए उपयोगी


1️⃣2️⃣ हाथ से सफाई

बड़े कीटों को हाथ से हटाएं
प्रभावी और सुरक्षित तरीका


⚠ स्प्रे करते समय ध्यान रखें

✔ दोपहर में स्प्रे न करें
✔ पहले एक पत्ती पर टेस्ट करें
✔ बारिश से पहले स्प्रे न करें
✔ लगातार 3–4 बार उपयोग करें


🌿 बोन्साई में कीड़े हटाने के खास टिप्स

  • हल्का स्प्रे करें

  • जड़ों में पानी जमा न होने दें

  • सप्ताह में निरीक्षण करें


❓ FAQ

Q1. क्या नीम तेल सभी कीड़ों पर काम करता है?

हाँ, अधिकांश soft-body pests पर प्रभावी है।

Q2. कितने दिन में असर दिखता है?

3–7 दिन में फर्क दिखने लगता है।

Q3. क्या घरेलू उपाय सुरक्षित हैं?

हाँ, सही मात्रा में उपयोग करने पर।


🌼 निष्कर्ष

पौधों में कीड़े लगना सामान्य है, लेकिन सही समय पर प्राकृतिक उपाय अपनाकर आप बिना केमिकल के अपने गार्डन को स्वस्थ रख सकते हैं।

यदि आप स्वस्थ और रोगमुक्त बोन्साई, फलदार और सजावटी पौधे खरीदना चाहते हैं, तो विजिट करें:

🌿 www.bonsaiplantsnursery.com
📞 WhatsApp ऑर्डर: +91 8299790172

Posted on Leave a comment

How to Take Care of Plants in Summer? – Complete 5000+ Words Guide (Summer Plant Care Guide)

Introduction

Summer in India can be extremely harsh for plants. With temperatures ranging from 35°C to even 48°C in many regions, intense sunlight, hot winds (loo), and low humidity can severely stress plants. Leaves may turn yellow, flowers may drop, fruits may fall prematurely, and in extreme cases, plants can completely dry out.

Whether you grow bonsai, fruit plants, flowering plants, or indoor plants, summer care requires a strategic approach.

In this complete guide, you will learn:

  • The correct way to water plants in summer
  • How to keep soil cool and moist
  • Mulching techniques
  • How to protect plants from harsh sunlight
  • Special care tips for bonsai, fruit plants, and indoor plants
  • Heatwave emergency care plan
  • Organic tonics and growth boosters
  • Professional nursery summer techniques
  • Month-wise summer care calendar

If you want your garden to stay green and healthy even in peak summer, this guide is for you.

How_to_Take_ Care_of_Plants_in_Summer

1. Why Summer Is Dangerous for Plants?

During summer:

  • Soil dries very quickly
  • Roots can overheat
  • Transpiration rate increases
  • Flowers and buds start dropping
  • Leaf scorch becomes common

High temperatures disturb plant cell balance. When water loss exceeds water absorption, plants become stressed and start wilting.


1A. Heatwave (Loo) Emergency Plant Care Plan

When temperature crosses 42°C, normal care is not enough. Follow this emergency plan:

✔ Deep watering early morning (4:30–6:30 AM)
✔ Light misting in evening
✔ Temporary shade using cloth or shade net
✔ Avoid keeping pots directly on hot floor
✔ Group plants together to create a micro‑climate

During heatwaves, follow this rule: Less fertilizer, more moisture, minimal stress.


2. Correct Watering Method in Summer

(A) Best Time to Water

✔ Between 5 AM – 8 AM
✔ After 6 PM in evening

Avoid watering during afternoon because water evaporates quickly and may shock roots.

(B) How Much Water to Give?

  • Small pots: Light watering daily
  • Large containers: Deep watering every 1–2 days
  • Fruit plants: Thorough root-zone watering

Important Tip: Always water until it drains from the bottom holes.


2A. Scientific Method to Check Soil Moisture

Instead of guessing, check soil moisture properly:

Finger Test

Insert finger 2 inches into soil:

  • Dry → Water immediately
  • Slightly moist → Wait 1 day

Wooden Stick Test

Insert a wooden stick into soil. If soil sticks to it, moisture is adequate.


3. Keeping Soil Cool – Mulching Guide

Mulching is one of the most effective summer techniques.

Materials for Mulching:

  • Dry leaves
  • Straw
  • Coconut husk
  • Wood chips

Benefits:

  • Retains moisture
  • Keeps roots cool
  • Reduces weeds
  • Improves soil health

Apply 1–2 inch thick mulch layer around plants.


3A. Ideal Summer Soil Mix Formula

Use light and well-draining soil mix.

Recommended Mix:

  • 40% Garden soil
  • 30% Vermicompost
  • 20% Cocopeat
  • 10% Sand or Perlite

This keeps roots cool and prevents waterlogging.


4. How to Protect Plants from Harsh Sunlight?

(A) Use Green Shade Net

50% shade net is ideal for terrace gardens.

(B) Relocate Pots

Move pots near walls or semi-shaded areas.

(C) Double Pot Technique

Place smaller pot inside a bigger pot to reduce heat exposure.


4A. Identifying and Treating Leaf Burn

Symptoms:

  • Brown leaf edges
  • White/yellow patches
  • Curled new leaves

Treatment:

  • Shift plant to partial shade
  • Prune damaged leaves
  • Apply seaweed tonic spray

5. Fertilizing During Summer

Avoid heavy chemical fertilizers in extreme heat.

Use:

  • Vermicompost
  • Cow dung manure
  • Liquid organic fertilizers

Apply light feeding every 20–25 days.


5A. Organic Tonics & Growth Boosters

(1) Buttermilk Spray

1 part buttermilk + 2 parts water (prevents fungal issues)

(2) Jaggery Solution

10g jaggery + 1 liter water (boosts microbial activity)

(3) Banana Peel Solution

Rich in potassium for flowering and fruiting

Use every 15 days in mild quantity.


6. Special Care for Fruit Plants (Mango, Lemon, Guava)

  • Avoid overwatering during flowering
  • Use potassium-rich fertilizer
  • Provide afternoon shade
  • Deep watering instead of frequent shallow watering

6A. Terrace Garden vs Ground Plants Care

Terrace Garden:

  • More heat exposure
  • Daily moisture check
  • Shade net essential

Ground Plants:

  • Deep irrigation
  • Thick mulch layer
  • Water 2–3 times per week

7. Indoor Plant Summer Care

  • Keep away from direct sunlight
  • Water 1–2 times per week
  • Light misting
  • Ensure air circulation

8. Bonsai Summer Care Guide

Bonsai dry out faster due to small pots.

✔ Water twice daily
✔ Keep tray with water below
✔ Maintain 50% shade
✔ Avoid heavy pruning


9. Pest & Fungus Control in Summer

Neem Oil Spray (Weekly)

5ml neem oil + 1 liter water

Buttermilk Spray

Natural fungal prevention

Spray only during early morning or evening.


10. Should You Repot in Summer?

Generally, avoid repotting.

If necessary: ✔ Repot in evening
✔ Keep in shade for 3–4 days
✔ Apply seaweed tonic


11. Professional Nursery Summer Techniques

  • Micro sprinkler systems
  • Shade house structures
  • Drip irrigation
  • Mulch sheets

You can adapt small-scale versions at home.


12. Summer Care Chart for Different Plants

Bonsai:

Twice daily watering + 50% shade

Fruit Plants:

Deep irrigation + Potassium feeding

Flowering Plants:

Morning sun, afternoon shade

Indoor Plants:

Indirect light + moderate watering


13. Summer Do’s & Don’ts

Do’s:

✔ Mulch soil
✔ Water early morning
✔ Check drainage
✔ Use neem spray

Don’ts:

❌ Fertilize at noon
❌ Spray under direct sunlight
❌ Allow water stagnation


14. Summer Care Calendar (April–June)

April:

  • Start mulching
  • Install shade nets

May:

  • Increase watering
  • Weekly neem spray

June:

  • Prepare for monsoon
  • Fungal prevention spray

Conclusion

Summer plant care is not just about watering. It is a complete management system involving proper soil mix, balanced fertilization, shade protection, mulching, and regular inspection. With the right techniques, your garden can remain green, productive, and healthy even in peak summer.

For premium quality bonsai, fruit plants, and decorative plants, visit:

🌿 www.bonsaiplantsnursery.com
📞 WhatsApp Orders: +91 8299790172

Keep your garden thriving even in the hottest months!

Posted on Leave a comment

गर्मियों में पौधों की देखभाल कैसे करें? – सम्पूर्ण 5000+ शब्दों की गाइड (Summer Plant Care Guide in Hindi)

प्रस्तावना

भारत में गर्मियों का मौसम पौधों के लिए सबसे चुनौतीपूर्ण समय होता है। तेज धूप, लू, कम नमी और अधिक तापमान के कारण पौधे जल्दी मुरझा जाते हैं, पत्तियां पीली पड़ने लगती हैं और फूल-फल गिरने लगते हैं। यदि सही देखभाल न की जाए तो स्वस्थ पौधे भी कुछ ही दिनों में कमजोर हो सकते हैं।

इस विस्तृत गाइड में हम जानेंगे:

  • गर्मियों में पानी देने का सही समय और मात्रा
  • गमले की मिट्टी को ठंडा और नम कैसे रखें
  • मल्चिंग, छाया और स्प्रे के सही तरीके
  • फलदार, इंडोर और बोन्साई पौधों की विशेष देखभाल
  • टैरेस गार्डन और ग्राउंड गार्डन के अलग-अलग उपाय
  • पौधों में झुलसन (Sunburn) की पहचान और उपचार
  • हीटवेव (लू) के दौरान इमरजेंसी केयर प्लान
  • जैविक घोल, टॉनिक और माइक्रो न्यूट्रिएंट की पूरी जानकारी
  • गर्मियों में रिपॉटिंग करनी चाहिए या नहीं?
  • प्रोफेशनल नर्सरी वाले कौन‑सी तकनीक अपनाते हैं?

यदि आप अपने पौधों को स्वस्थ, हरा‑भरा और फल‑फूल से भरपूर रखना चाहते हैं, तो यह सम्पूर्ण 5000+ शब्दों की समर केयर गाइड आपके लिए है।

How_to_Take_ Care_of_Plants_in_Summer

1A. हीटवेव (लू) के दौरान इमरजेंसी प्लांट केयर प्लान

जब तापमान 42°C से ऊपर चला जाए तो सामान्य देखभाल पर्याप्त नहीं होती। ऐसे समय में यह विशेष योजना अपनाएं:

✔ सुबह बहुत जल्दी (4:30–6:30) गहरा पानी दें
✔ शाम को हल्का फोलियर स्प्रे (सादा पानी) करें
✔ शेड नेट या कपड़े से अस्थायी छाया बनाएं
✔ गमलों को सीधे फर्श पर न रखें – नीचे लकड़ी या स्टैंड रखें
✔ पौधों को आपस में पास रखें ताकि माइक्रो-क्लाइमेट बने

हीटवेव में पौधों को “कम स्ट्रेस, ज्यादा नमी, कम खाद” का नियम अपनाएं।


2A. मिट्टी की नमी जांचने का वैज्ञानिक तरीका

अक्सर लोग अंदाज़े से पानी देते हैं जिससे या तो ओवरवॉटरिंग हो जाती है या अंडरवॉटरिंग। सही तरीका:

  1. उंगली 2 इंच मिट्टी में डालें
  2. यदि मिट्टी सूखी लगे तो पानी दें
  3. यदि हल्की नमी है तो 1 दिन रुकें

लकड़ी की स्टिक टेस्ट

एक पतली लकड़ी की स्टिक मिट्टी में डालें। बाहर निकालने पर यदि मिट्टी चिपकी है तो नमी पर्याप्त है।


3A. समर स्पेशल मिट्टी मिश्रण (Soil Mix Formula)

गर्मियों में हल्की, जल निकासी वाली मिट्टी सबसे बेहतर रहती है।

आदर्श मिश्रण:

  • 40% गार्डन सॉइल
  • 30% वर्मी कम्पोस्ट
  • 20% कोकोपीट
  • 10% रेत या परलाइट

यह मिश्रण जड़ों को ठंडा रखता है और पानी का जमाव रोकता है।


4A. झुलसन (Leaf Burn) की पहचान और इलाज

पहचान:

  • पत्तियों के किनारे भूरे होना
  • सफेद या पीले धब्बे
  • नई पत्तियां सिकुड़ना

उपचार:

  • पौधे को तुरंत आंशिक छाया में रखें
  • जली पत्तियां काट दें
  • समुद्री शैवाल (Seaweed) टॉनिक स्प्रे करें

5A. जैविक टॉनिक और ग्रोथ बूस्टर

(1) छाछ स्प्रे

1 भाग छाछ + 2 भाग पानी – फंगल रोग रोकने में सहायक

(2) गुड़ घोल

10 ग्राम गुड़ + 1 लीटर पानी – माइक्रोबियल एक्टिविटी बढ़ाता है

(3) केले के छिलके का घोल

पोटाश का अच्छा स्रोत – फूल और फल के लिए उपयोगी

हर 15 दिन में हल्का प्रयोग करें।


6A. टैरेस गार्डन vs जमीन में लगे पौधों की देखभाल

टैरेस गार्डन:

  • ज्यादा गर्मी लगती है
  • रोज नमी जांचें
  • शेड नेट आवश्यक

जमीन में पौधे:

  • गहरी सिंचाई करें
  • मोटी मल्चिंग करें
  • सप्ताह में 2–3 बार पर्याप्त पानी

7A. क्या गर्मियों में रिपॉटिंग करनी चाहिए?

सामान्यतः नहीं।
रिपॉटिंग से जड़ों को स्ट्रेस होता है। यदि बहुत जरूरी हो तो:

✔ शाम के समय करें
✔ 3–4 दिन छाया में रखें
✔ हल्का सीवीड स्प्रे करें


8A. प्रोफेशनल नर्सरी की समर केयर तकनीक

  • माइक्रो स्प्रिंकलर सिस्टम
  • शेड हाउस संरचना
  • ड्रिप इरिगेशन
  • मल्च शीट

आप छोटे स्तर पर भी इन तकनीकों को अपनाकर अपने पौधों की सुरक्षा कर सकते हैं।


9A. अलग‑अलग पौधों के लिए समर केयर चार्ट

बोन्साई:

दिन में 2 बार पानी + 50% शेड

फलदार पौधे:

गहरी सिंचाई + पोटाश खाद

फूलदार पौधे:

सुबह धूप, दोपहर छाया

इंडोर पौधे:

अप्रत्यक्ष रोशनी + कम पानी


10A. गर्मियों में पौधों के लिए Do’s & Don’ts (विस्तृत)

Do’s:

✔ मल्चिंग करें
✔ सुबह पानी दें
✔ ड्रेनेज जांचें
✔ नीम तेल स्प्रे करें

Don’ts:

❌ दोपहर में खाद न डालें
❌ पत्तियों पर धूप में स्प्रे न करें
❌ गमले में पानी जमा न होने दें


11A. समर केयर कैलेंडर (अप्रैल–जून)

अप्रैल:

  • मल्चिंग शुरू करें
  • शेड नेट लगाएं

मई:

  • पानी की मात्रा बढ़ाएं
  • साप्ताहिक नीम स्प्रे

जून:

  • मानसून की तैयारी
  • फंगल प्रिवेंशन स्प्रे

विस्तृत निष्कर्ष

गर्मियों में पौधों की देखभाल केवल पानी देने तक सीमित नहीं है। यह एक सम्पूर्ण प्रबंधन प्रक्रिया है जिसमें सही मिट्टी, संतुलित खाद, धूप से सुरक्षा, मल्चिंग और नियमित निरीक्षण शामिल है। यदि आप इन सभी चरणों का पालन करते हैं, तो आपके पौधे भीषण गर्मी में भी स्वस्थ रहेंगे और फल‑फूल देते रहेंगे।

🌿 उच्च गुणवत्ता वाले बोन्साई, फलदार और सजावटी पौधों के लिए विजिट करें:
www.bonsaiplantsnursery.com
📞 WhatsApp ऑर्डर: +91 8299790172

अपने गार्डन को इस गर्मी में भी हरा‑भरा और जीवन से भरपूर रखें!

1. गर्मियों में पौधों को सबसे ज्यादा खतरा क्यों होता है?

गर्मियों में तापमान 35°C से 48°C तक पहुंच सकता है। इस दौरान:

  • मिट्टी जल्दी सूख जाती है
  • जड़ें गर्म होकर क्षतिग्रस्त हो सकती हैं
  • पौधे का ट्रांसपिरेशन बढ़ जाता है
  • फूल और कली झड़ने लगती है

उच्च तापमान पौधों की कोशिकाओं को प्रभावित करता है। यदि पानी की कमी हो जाए तो पत्तियां झुलस सकती हैं।


2. गर्मियों में पानी देने का सही तरीका

(A) पानी देने का सही समय

✔ सुबह 5 बजे से 8 बजे के बीच
✔ शाम 6 बजे के बाद

दोपहर में पानी देने से बचें क्योंकि तेज धूप में पानी जल्दी वाष्पित हो जाता है।

(B) कितनी मात्रा में पानी दें?

  • छोटे गमले: रोजाना हल्का पानी
  • बड़े गमले: 1–2 दिन में गहराई तक पानी
  • फलदार पौधे: जड़ों तक गहरा सिंचन

महत्वपूर्ण टिप:

पानी हमेशा गमले के नीचे से निकलने तक दें।


3. मिट्टी को ठंडा रखने के उपाय (Mulching Guide)

मल्चिंग गर्मियों में सबसे प्रभावी तकनीक है।

मल्चिंग के लिए सामग्री:

  • सूखी पत्तियां
  • भूसा
  • नारियल की भूसी
  • लकड़ी का बुरादा

मल्चिंग के फायदे:

  • मिट्टी में नमी बरकरार रहती है
  • जड़ें ठंडी रहती हैं
  • खरपतवार कम उगते हैं

4. पौधों को तेज धूप से कैसे बचाएं?

(A) ग्रीन शेड नेट का उपयोग

50% ग्रीन नेट छत और टैरेस गार्डन के लिए उपयुक्त है।

(B) पौधों की जगह बदलना

गमलों को दीवार की छाया में रखें।

(C) डबल पॉट तकनीक

छोटे गमले को बड़े गमले में रखें ताकि गर्मी कम लगे।


5. गर्मियों में खाद कब और कैसे दें?

गर्मी में भारी रासायनिक खाद से बचें।

उपयोग करें:

  • वर्मी कम्पोस्ट
  • गोबर खाद
  • तरल जैविक खाद

हर 20–25 दिन में हल्की मात्रा दें।


6. पत्तियां पीली होने की समस्या

कारण:

  • अधिक पानी
  • कम पानी
  • पोषक तत्वों की कमी
  • धूप से झुलसना

समाधान:

  • ड्रेनेज सुधारें
  • नीम तेल स्प्रे करें
  • माइक्रो न्यूट्रिएंट स्प्रे करें

7. फलदार पौधों की विशेष देखभाल

आम, नींबू, अमरूद के लिए टिप्स:

  • फूल आने पर ज्यादा पानी न दें
  • पोटाश युक्त खाद दें
  • दोपहर की धूप से बचाएं

8. इंडोर पौधों की गर्मियों में देखभाल

  • सीधे धूप से दूर रखें
  • सप्ताह में 1–2 बार पानी
  • पत्तियों पर पानी का हल्का स्प्रे

9. बोन्साई पौधों की समर केयर

बोन्साई छोटे गमले में होते हैं, इसलिए जल्दी सूखते हैं।

✔ दिन में 2 बार पानी
✔ ट्रे में पानी भरकर रखें
✔ 50% शेड में रखें


10. कीड़ों और फंगस से बचाव

नीम तेल स्प्रे (हर 7 दिन में)

5ml नीम तेल + 1 लीटर पानी

छाछ स्प्रे

1 भाग छाछ + 2 भाग पानी


11. गर्मियों में लगाने योग्य पौधे

  • तुलसी
  • गेंदा
  • पुदीना
  • मिर्च
  • भिंडी

12. सामान्य गलतियां जो लोग करते हैं

❌ दोपहर में पानी देना
❌ ज्यादा खाद डालना
❌ ड्रेनेज होल बंद होना
❌ गमले को कंक्रीट पर सीधे रखना


13. टैरेस गार्डन समर केयर प्लान

  • सुबह गहरा पानी
  • मल्चिंग
  • शेड नेट
  • सप्ताह में एक बार जैविक स्प्रे

14. अक्सर पूछे जाने वाले प्रश्न (FAQ)

Q1. क्या गर्मियों में रोज पानी देना जरूरी है?

हाँ, लेकिन मिट्टी की नमी देखकर दें।

Q2. पत्तियां जल क्यों जाती हैं?

तेज धूप और पानी की कमी के कारण।

Q3. क्या दोपहर में स्प्रे कर सकते हैं?

नहीं, केवल सुबह या शाम।


निष्कर्ष

गर्मियों में पौधों की देखभाल थोड़ी अतिरिक्त मेहनत मांगती है, लेकिन सही तकनीक अपनाने से आपके पौधे पूरे सीजन हरे-भरे रहेंगे। नियमित पानी, मल्चिंग, हल्की खाद और धूप से सुरक्षा ही सफलता की कुंजी है।

यदि आप उच्च गुणवत्ता वाले बोन्साई, फलदार और सजावटी पौधे खरीदना चाहते हैं, तो विजिट करें:

🌿 www.bonsaiplantsnursery.com
📞 WhatsApp ऑर्डर: +91 8299790172

अपने गार्डन को इस गर्मी में भी हरा-भरा रखें!