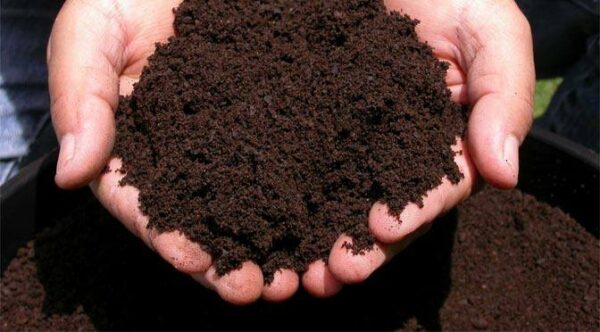
BPN 100% organic Fertilizer to Boost Fruiting and Flowering
जिस प्रकार इंसानो को संतुलित आहार, पोषक तत्वों की जरुरत होती है उसी प्रकार पौधों को भी अपनी वृद्धि, प्रजनन और विभिन्न जैविक क्रियाओं के लिए कुछ पोषक तत्वों की जरुरत होती है। अगर पौधों को वो जरुरी पोषक तत्त्व न मिलें तो उनकी वृद्धि रुक जाती है। अगर वो जरुरी पोषक तत्व पौधों को निश्चित अवधि तक न मिलें तो पौधों की मृत्यु भी हो सकती है।
-
Product on sale
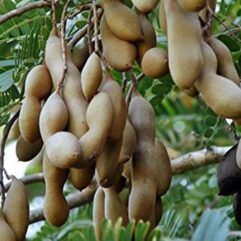 Tamarind Imli Live Plant (Imli ka paudha)Original price was: ₹890.00.₹650.00Current price is: ₹650.00.
 -
Product on sale
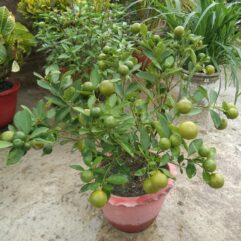 Desi Nimbu ka podha- Lemon Live plantOriginal price was: ₹800.00.₹249.00Current price is: ₹249.00.
 -
Product on sale
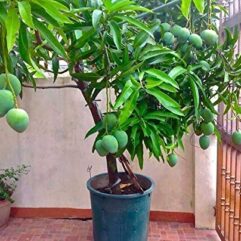 Grafted Mango Baramasi live plantOriginal price was: ₹1,050.00.₹549.00Current price is: ₹549.00.
 -
Product on sale
 Dwarf coconut live plant (narial ka podha) hybrid coconut fruit plantOriginal price was: ₹1,650.00.₹999.00Current price is: ₹999.00.
 -
Product on sale
 Bara masi mango live plant for home and garden good for potOriginal price was: ₹1,000.00.₹549.00Current price is: ₹549.00.
 -
Product on sale
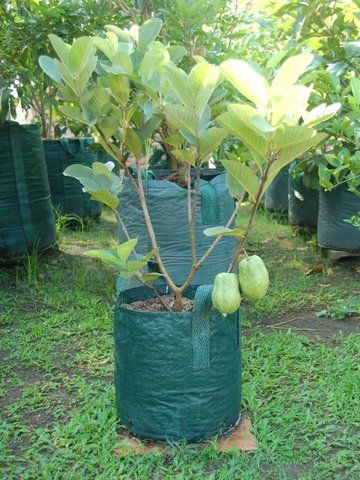
 Guava Live Plant for Home and GardenOriginal price was: ₹900.00.₹399.00Current price is: ₹399.00.
 -
Product on sale
 Grafted Blackberry Live Plant/Jaamun ka Podha for Home and GardenOriginal price was: ₹999.00.₹849.00Current price is: ₹849.00.
 -
Product on sale
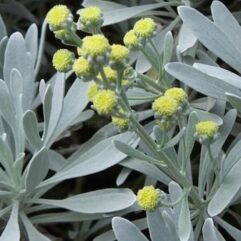 Lavender live plant – Chinese Lavender (Crossostephium artemisioides)Original price was: ₹750.00.₹650.00Current price is: ₹650.00.
 -
Product on sale
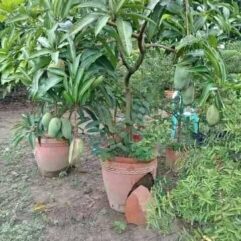 All season dwarf mango plantOriginal price was: ₹999.00.₹499.00Current price is: ₹499.00.
पौधे भूमि से जल और खनिज-लवण शोषित करके वायु से कार्बन डाई-ऑक्साइड प्राप्त करके सूर्य के प्रकाश की उपस्थिति में अपने लिए भोजन का निर्माण करते हैं। पौधों को 17 तत्वों की आवश्यकता होती है, जिनके बिना पौधों की वृद्धि-विकास और प्रजनन आदि क्रियाएँ संभव नहीं हैं लेकिन इनमें से कुछ मुख्य तत्त्व इस प्रकार है।
कार्बन
हाइड्रोजन
ऑक्सीजन
नाइट्रोजन
फास्फोरस
पोटाश
इनमें से प्रथम 3 तत्त्व पौधे वायुमंडल से ग्रहण कर लेते हैं।
पोषक तत्वों को पौधों की आवश्यकतानुसार निम्न प्रकार वर्गीकृत किया गया है –
मुख्य पोषक तत्व :- नाइटोजन, फॉस्फोरस, पोटाश
गौण पोषक तत्व :- कैल्शियम, मैग्नीशियम, सल्फर
सूक्ष्म पोषक तत्त्व :- ज़िंक, मैग्नीज, बोरान
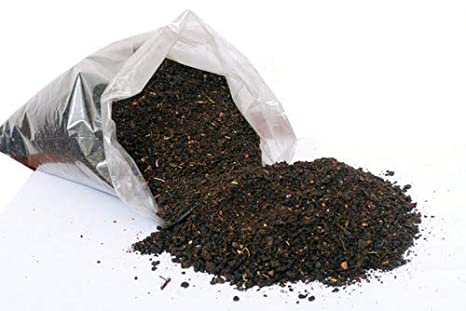
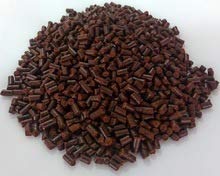
BPN Neem Khali
नाइट्रोजन
- नाइट्रोजन से प्रोटीन बनती है, जो जीव द्रव्य का अभिन्न अंग है। यह पर्ण हरित के निर्माण में भी भाग लेती है। नाइटोजन का पौधों की विकास और वृद्धि में बहुत योगदान होता है।
- यह पौधों को गहरा हरा रंग प्रदान करता है।
- वानस्पतिक वृद्धि को बढ़ावा मिलता है।
- अनाज तथा चारे वाली फसलों में प्रोटीन की मात्रा को बढ़ाता है।
- यह दानों के बनने में मदद करता है।
- सभी जीवित ऊतकों यानि जड़, तना, पत्ती की वृद्धि और विकास में सहायक है।
- क्लोरोफिल, प्रोटोप्लाज्मा प्रोटीन और न्यूक्लिक अम्लों का एक महत्वपूर्ण अवयव है।
- पत्ती वाली सब्जियों की गुणवत्ता में सुधार करता है।
नाइट्रोजन – कमी के लक्षण
- पौधों में प्रोटीन की कमी होना व हल्के रंग का दिखाई पड़ना। निचली पत्तियाँ सड़ने लगती हैं, जिसे क्लोरोसिस कहते हैं।
- पौधे की बढ़वार का रुकना, कल्ले कम बनना, फूलों का कम आना।
- फल वाले वृक्षों से फलों का गिरना। पौधों का बौना दिखाई पड़ना। फसल का जल्दी पक जाना।
फॉस्फोरस
- फॉस्फोरस की उपस्थिति में कोशा विभाजन शीघ्र होता है। यह न्यूक्लिक अम्ल, फास्फोलिपिड्स वफाइटीन के निर्माण में सहायक है। प्रकाश संश्लेषण में सहायक है।
- यह कोशा की झिल्ली, क्लोरोप्लास्ट तथा मैट्रोकांड्रिया का मुख्य अवयव है।
- फास्फोरस मिलने से पौधों में बीज स्वस्थ पैदा होता है तथा बीजों का भार बढ़ना, पौधों में रोग व कीटप्रतिरोधक क्षमता बढ़ती है।
- फास्फोरस के प्रयोग से जड़ें तेजी से विकसित तथा सुदृढ़ होती हैं। पौधों में खड़े रहने की क्षमता बढ़ती है।
फास्फोरस – कमी के लक्षण
- पौधे छोटे रह जाते हैं, पत्तियों का रंग हल्का बैगनी या भूरा हो जाता है। फॉस्फोरस गतिशील होने के कारण पहले ये लक्षण पुरानी(निचली) पत्तियों पर दिखते हैं।
- दाल वाली फसलों में पत्तियाँ नीले हरे रंग की हो जाती हैं।
- पौधों की जड़ों की वृद्धि व विकास बहुत कम होता है। कभी – कभी जड़ें सूख भी जाती हैं।
- अधिक कमी में तने का गहरा पीला पड़ना। फल व बीज का निर्माण सही न होना।
पोटेशियम
- जड़ों को मजबूत बनाता है एवं सूखने से बचाता है। फसल में कीट व रोग प्रतिरोधकता बढ़ाता है। पौधे को गिरने से बचाता है।
- स्टार्च व शक्कर के संचरण में मदद करता है। पौधों में प्रोटीन के निर्माण में सहायक है।
- अनाज के दानों में चमक पैदा करता है। फसलों की गुणवत्ता में वृद्धि करता है। आलू व अन्य सब्जियों के स्वाद में वृद्धि करता है। सब्जियों के पकने के गुण को सुधारता है। मिटटी में नाइट्रोजन के कुप्रभाव को कम करता है।
- एंजाइमों की क्रियाशीलता बढ़ाता है।
- ठण्डे और बादलयुक्त मौसम में पौधों द्वारा प्रकाश के उपयोग में वृद्धि करता है ,जिससे पौधों में ठंडक और अन्य प्रतिकूल परिस्थितियों को सहन करने की क्षमता बढ़ जाती है।
-
Product on sale
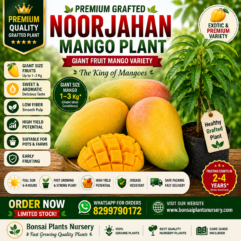 Noorjahan Mango Plant (Grafted) – Giant Fruit Mango Variety | Premium Rare Mango PlantOriginal price was: ₹1,750.00.₹1,250.00Current price is: ₹1,250.00.
 -
Product on sale
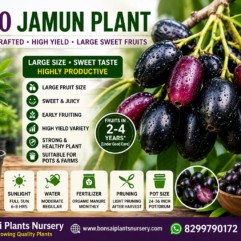 KG-10 Jamun Plant (Grafted) – High Yield Variety | Large Sweet Fruits | Fast Growing Quality PlantOriginal price was: ₹1,249.00.₹849.00Current price is: ₹849.00.
 -
Product on sale
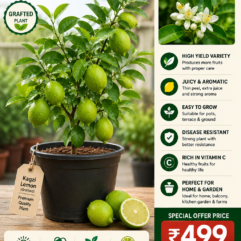 Kagzi Lemon Live Plant (Grafted) – High Yield Juicy Lemon Plant for Home & GardenOriginal price was: ₹850.00.₹499.00Current price is: ₹499.00.
 -
Product on sale
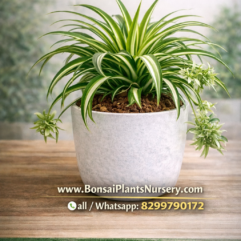 🌿 Spider Plant (Chlorophytum comosum) – Premium Indoor Air Purifying PlantOriginal price was: ₹1,250.00.₹999.00Current price is: ₹999.00.
 -
Product on sale
 Bougainvillea Bonsai Plant – Live Flowering BonsaiOriginal price was: ₹3,500.00.₹2,150.00Current price is: ₹2,150.00.
 -
Product on sale
 Bougainvillea Flowering Plant (Bogunvellia) – Live Outdoor Plant for Home, Balcony & GardenOriginal price was: ₹749.00.₹499.00Current price is: ₹499.00.
 -
Product on sale
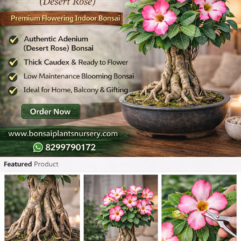 Adenium Bonsai Plant (Desert Rose) – Premium Flowering Indoor BonsaiOriginal price was: ₹4,500.00.₹2,500.00Current price is: ₹2,500.00.
 -
Product on sale
 Banyan Bonsai Plant (Ficus Benghalensis) – Premium Indoor Spiritual BonsaiOriginal price was: ₹4,700.00.₹2,500.00Current price is: ₹2,500.00.
 -
Product on sale
 Peepal Bonsai Plant (Ficus Religiosa) – Premium Spiritual Indoor Bonsai TreeOriginal price was: ₹4,500.00.₹2,500.00Current price is: ₹2,500.00.
पोटैशियम – कमी के लक्षण
- पत्तियाँ भूरी व धब्बेदार हो जाती हैं तथा समय से पहले ही गिर जाती हैं।
- पत्तियों के किनारे व सिरे झुलसे दिखाई पड़ते हैं।
- इसकी कमी से मक्का के भुट्टे छोटे, नुकीले व किनारों पर दाने कम पड़ते हैं। आलू के कंद छोटे तथा जड़ों का विकास कम हो जाता है।
BPN- NPK All Purpose Plant Feed