Website: www.bonsaiplantsnursery.com
WhatsApp: 8299790172
📌 परिचय
लीची (Litchi) भारत का एक बेहद लोकप्रिय, रसदार और मीठा फल है। पहले इसे केवल बड़े बागानों में उगाया जाता था, लेकिन अब आधुनिक गार्डनिंग तकनीकों की मदद से आप इसे गमले (Container Gardening) में भी सफलतापूर्वक उगा सकते हैं और भरपूर फल ले सकते हैं।
यह गाइड पूरी तरह हिंदी में तैयार की गई है और इसमें आपको पौधा चयन से लेकर हाई-यील्ड (अधिक फल) तक की सभी एडवांस तकनीकें मिलेंगी।
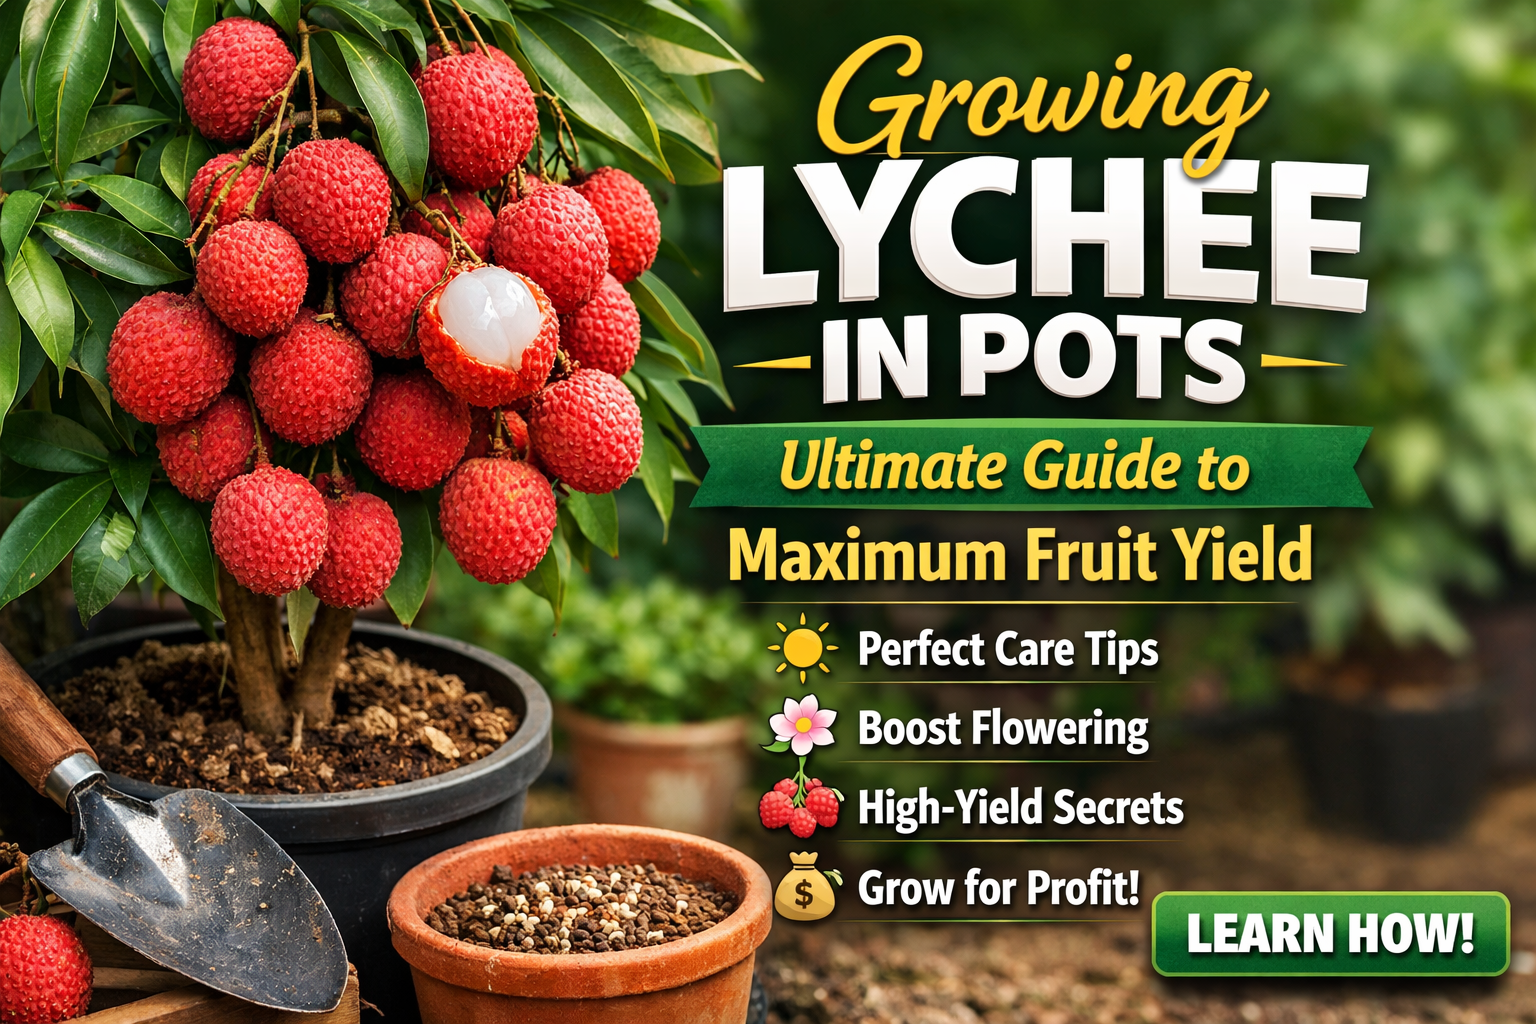
🌱 सही पौधा और किस्म का चयन
गमले में लीची उगाने के लिए हमेशा ग्राफ्टेड या गूटी (Air Layered) पौधा ही लें।
✔️ उपयुक्त किस्में:
- शाही लीची
- देहरादून लीची
- रोजा लीची
- चाइना लीची
👉 टिप: 1–2 साल पुराना, स्वस्थ और 2–3 फीट ऊंचा पौधा चुनें।
🪴 गमले का सही चयन
✔️ गमले का आकार:
- शुरुआत: 12–16 इंच
- 2–3 साल बाद: 20–24 इंच
✔️ गमले का प्रकार:
- मिट्टी का गमला (सबसे अच्छा)
- ग्रो बैग
- प्लास्टिक पॉट
👉 नीचे अच्छे ड्रेनेज होल जरूर हों।
🌿 मिट्टी की तैयारी (Best Soil Mix)
✔️ आदर्श मिश्रण:
- 30% बगीचे की मिट्टी
- 25% कोकोपीट
- 20% वर्मीकम्पोस्ट
- 15% गोबर खाद
- 5% रेत
- 5% नीम खली
👉 pH: 5.5–6.5 (हल्की अम्लीय मिट्टी सबसे अच्छी)
🌱 पौधा लगाने की विधि
- गमले के नीचे कंकड़ डालें
- मिट्टी भरें
- पौधा लगाएं
- हल्का दबाएं
- पानी दें
👉 5–7 दिन तक तेज धूप से बचाएं
☀️ धूप और स्थान
- 6–8 घंटे धूप जरूरी
- गर्मियों में हल्की छाया दें
💧 पानी देने का तरीका
- गर्मी: रोज या एक दिन छोड़कर
- सर्दी: 3–4 दिन में
- बारिश: जरूरत अनुसार
👉 ज्यादा पानी = जड़ सड़ना
🌾 खाद और पोषण प्रबंधन
✔️ ऑर्गेनिक खाद:
- गोबर खाद
- वर्मीकम्पोस्ट
- सरसों खली घोल
✔️ माइक्रोन्यूट्रिएंट:
- एप्सम साल्ट (मैग्नीशियम)
- जिंक
- बोरॉन (फल सेट के लिए)
✂️ छंटाई (Pruning)
- सूखी टहनियां हटाएं
- पौधे को खुला रखें
👉 इससे फल ज्यादा आते हैं
🌸 फूल और फल आने के टिप्स
- सर्दी में हल्की ठंड जरूरी
- नाइट्रोजन कम रखें
- फूल आने पर पानी संतुलित रखें
🍒 अधिक फल पाने के खास तरीके
- रूट प्रूनिंग
- मल्चिंग
- संतुलित खाद
- मधुमक्खियों को आकर्षित करें
🐛 कीट और रोग नियंत्रण
- नीम तेल स्प्रे
- साबुन पानी
- लहसुन-नीम घोल
📅 मौसम अनुसार देखभाल
गर्मी:
- छाया और पानी
सर्दी:
- फूल की तैयारी
बारिश:
- ड्रेनेज ध्यान रखें
⚠️ आम गलतियां
- ज्यादा पानी देना
- छोटा गमला
- गलत मिट्टी
❓ FAQ (15 महत्वपूर्ण सवाल-जवाब)
Q1: क्या गमले में लीची उग सकती है?
हाँ, सही देखभाल से पूरी तरह संभव है।
Q2: कितने साल में फल आएगा?
ग्राफ्टेड पौधा 2–4 साल में।
Q3: बीज से उगाई लीची में फल कब आता है?
6–10 साल लगते हैं।
Q4: लीची के पौधे को कितनी धूप चाहिए?
6–8 घंटे।
Q5: पत्ते पीले क्यों होते हैं?
पोषक तत्व की कमी या ज्यादा पानी।
Q6: कौन सी खाद सबसे अच्छी है?
गोबर खाद और वर्मीकम्पोस्ट।
Q7: क्या लीची को रोज पानी देना चाहिए?
गर्मी में हाँ, सर्दी में नहीं।
Q8: फूल क्यों नहीं आते?
कम ठंड, ज्यादा नाइट्रोजन।
Q9: कौन सा गमला सही है?
20–24 इंच का बड़ा गमला।
Q10: क्या छंटाई जरूरी है?
हाँ, इससे फल बढ़ते हैं।
Q11: लीची में कौन से कीट लगते हैं?
एफिड्स और मिलीबग।
Q12: क्या लीची घर की छत पर उग सकती है?
हाँ, आसानी से।
Q13: क्या इसे बोन्साई बनाया जा सकता है?
हाँ, लेकिन विशेष तकनीक चाहिए।
Q14: फल गिर क्यों जाते हैं?
पानी और पोषण असंतुलन।
Q15: पौधा कहां से खरीदें?
www.bonsaiplantsnursery.com या WhatsApp 8299790172
🌟 निष्कर्ष
गमले में लीची उगाना अब मुश्किल नहीं है। सही जानकारी और देखभाल के साथ आप अपने घर पर ही मीठी और ताजी लीची का आनंद ले सकते हैं और इससे कमाई भी कर सकते हैं।
📲 अधिक जानकारी और पौधे खरीदने के लिए:
www.bonsaiplantsnursery.com
WhatsApp: 8299790172