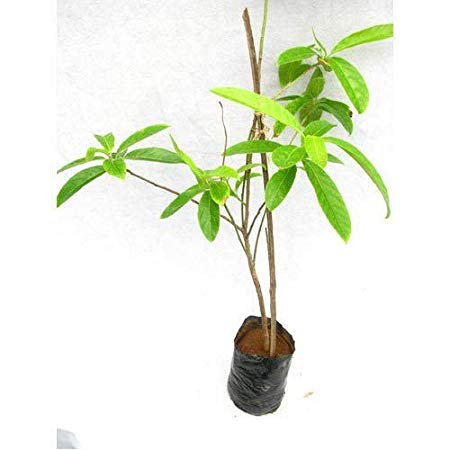
Rudraksha (रुद्राक्ष) holds a sacred and unique place in Indian culture, Ayurveda, and spirituality. It is believed that Rudraksha trees originated from the tears of Lord Shiva. The seeds are used for making malas, meditation, spiritual practices, and medicines.
In today’s time, people want to grow Rudraksha not only for religious and spiritual reasons but also for its medicinal value and positive energy. However, very few people know the correct method of planting Rudraksha and taking care of it for better fruit yield.
In this detailed guide, you will learn:
What is the Rudraksha tree and its importance
How and where to plant it
Best soil, fertilizers, and watering methods
Plant care and disease prevention
How to get maximum fruit from Rudraksha tree
Its spiritual, astrological, and medicinal values
🌿 Introduction and Importance of Rudraksha
✅ Scientific Name
Scientific Name:Elaeocarpus ganitrus
Family: Elaeocarpaceae
✅ Characteristics of Rudraksha Tree
Evergreen tree, grows tall and dense.
Height: 50–80 feet.
Leaves: Green, similar to lemon tree leaves.
Flowers: Small, white, and fragrant.
Fruits: Green when raw, turn blue when ripe.
✅ Religious Importance
Considered sacred in Hinduism, associated with Lord Shiva.
Wearing Rudraksha mala increases concentration, peace, and positivity.
Vastu Shastra suggests planting Rudraksha removes negative energies from home.
✅ Medicinal Importance
Helps reduce stress, hypertension, and heart-related diseases.
Used in Ayurveda for strengthening immunity.
Leaves, seeds, and fruits have healing properties.
🌱 Best Place and Season to Plant Rudraksha
✅ Right Season
Best Time: Rainy season (July to September).
Can also be planted in summer and winter with proper moisture management.
✅ Best Location
Open space with balanced sunlight and shade.
Ideal places: Garden, backyard, near temples, or large pots.
Needs open air and fresh environment for healthy growth.
✅ Soil Selection
Fertile loamy soil with good drainage.
Soil pH: 6.5 to 7.5.
Mixture of soil + sand + organic compost works best.
🌿 Planting Methods of Rudraksha
1. Growing from Seeds
Collect fully ripened Rudraksha fruits and dry them.
Remove seeds and soak in water for 3–4 days.
Sow seeds in a mixture of soil + sand + compost.
Germination starts within 25–30 days.
2. Planting from Saplings
Buy a 1–2 year old sapling from nursery.
Dig a pit 2 feet deep and wide.
Mix soil with organic manure and fill half.
Plant the sapling, cover with soil, and water well.
3. Planting in Pots
Choose a large pot (18–24 inches deep).
Ensure drainage holes at the bottom.
Fill with soil + sand + organic compost.
Plant and water regularly.
🌱 Care of Rudraksha Plant
✅ Watering
Daily light watering in summer.
During rainy season – water only if soil is dry.
In winter – water every 2–3 days.
✅ Fertilization
Apply organic manure or vermicompost every 2–3 months.
Avoid excess chemical fertilizers.
✅ Pruning
Cut dry or diseased branches.
Light pruning to maintain shape of the tree.
✅ Sunlight
Needs 4–5 hours of direct sunlight daily.
Partial shade is also beneficial in extreme heat.
🌿 Protection from Diseases
Fungal Infection: Use neem spray.
Leaf Fall Problem: Maintain proper watering and fertilization.
Insects: Use neem oil or organic pesticides.
Root Rot: Avoid waterlogging.
🌱 How to Get More Fruits from Rudraksha
Rudraksha starts fruiting after 6–8 years.
Regular watering and manure ensure healthy growth.
Keep surroundings clean and weed-free.
Apply organic compost before monsoon for better yield.
Expose the tree to open air and sunlight.
🌿 Religious and Astrological Importance
Wearing Rudraksha beads brings peace, health, and prosperity.
Planting Rudraksha in home removes negative energy.
Astrologically, it reduces effects of planetary doshas.
Considered a symbol of divine blessings from Lord Shiva.
🌱 FAQ (Frequently Asked Questions)
Q1. Is it auspicious to plant Rudraksha at home? 👉 Yes, it is highly auspicious and beneficial.
Q2. How many years does Rudraksha take to bear fruit? 👉 Usually 6–8 years.
Q3. Can Rudraksha be grown in pots? 👉 Yes, but the pot should be big and deep.
Q4. Is commercial cultivation of Rudraksha possible? 👉 Yes, farmers can earn good income through Rudraksha farming.
Q5. How many types of Rudraksha are there? 👉 From 1 Mukhi to 21 Mukhi varieties.
🌿 Conclusion
The Rudraksha tree is not only spiritually significant but also valuable for health and environment. If planted properly and cared for with the right techniques, it provides benefits for a lifetime – peace, positivity, and prosperity.
Plant a Rudraksha tree in your garden or home today and invite divine blessings of Lord Shiva into your life.
रुद्राक्ष (Rudraksha) को भारतीय संस्कृति, आयुर्वेद और आध्यात्मिक जगत में अत्यंत पवित्र और चमत्कारी माना गया है। कहा जाता है कि भगवान शिव के आँसुओं से रुद्राक्ष के वृक्ष उत्पन्न हुए। इसके बीज का प्रयोग माला, ध्यान, साधना और औषधीय उपयोगों में किया जाता है।
आजकल लोग न सिर्फ़ धार्मिक महत्व के कारण बल्कि इसके औषधीय गुणों और सकारात्मक ऊर्जा के लिए भी रुद्राक्ष का पौधा अपने घर या बगीचे में लगाना चाहते हैं। लेकिन बहुत कम लोग जानते हैं कि रुद्राक्ष का पेड़ सही ढंग से लगाने और उसकी देखभाल करने का विशेष तरीका होता है।
पत्तियाँ हरे रंग की और नींबू जैसी आकार की होती हैं।
इसके फूल छोटे, सफेद और सुगंधित होते हैं।
फल हरे से नीले रंग में बदलते हैं।
✅ धार्मिक महत्व
रुद्राक्ष माला को भगवान शिव का आभूषण कहा गया है।
यह पहनने वाले को मानसिक शांति, एकाग्रता और सकारात्मक ऊर्जा प्रदान करता है।
वास्तुशास्त्र के अनुसार घर में रुद्राक्ष का पौधा लगाने से नकारात्मक ऊर्जा दूर होती है।
✅ औषधीय महत्व
उच्च रक्तचाप, तनाव और हृदय रोगों में लाभकारी।
आयुर्वेद में इसके बीज, पत्ते और फल का उपयोग औषधि बनाने में होता है।
यह शरीर की रोग प्रतिरोधक क्षमता को बढ़ाता है।
🌱 रुद्राक्ष का पौधा कहाँ और कब लगाएँ
✅ सही मौसम
सबसे अच्छा समय: बरसात का मौसम (जुलाई से सितंबर)।
ग्रीष्मकाल और शीतकाल में भी लगाया जा सकता है, लेकिन नमी की सही मात्रा होनी चाहिए।
✅ स्थान का चुनाव
खुले आकाश के नीचे, धूप और छाया का संतुलन होना चाहिए।
घर के आँगन, बगीचे या मंदिर परिसर आदर्श स्थान हैं।
गमले में भी लगाया जा सकता है, लेकिन गमला बड़ा और गहरा होना चाहिए।
✅ मिट्टी का चुनाव
उपजाऊ, दोमट और जल निकासी वाली मिट्टी सबसे उत्तम है।
मिट्टी का pH स्तर 6.5 से 7.5 के बीच होना चाहिए।
मिट्टी में गोबर की खाद और रेत मिलाने से पौधे की वृद्धि तेज होती है।
🌿 रुद्राक्ष का पौधा लगाने की विधि
1. बीज से पौधा तैयार करना
पके हुए रुद्राक्ष फल को सुखाकर बीज अलग करें।
बीज को पानी में 3-4 दिन भिगोकर रखें।
बीज को मिट्टी, रेत और खाद के मिश्रण में बो दें।
25–30 दिन में अंकुर निकलने लगता है।
2. पौधे से रोपण
नर्सरी से 1–2 साल पुराना पौधा लाएँ।
गड्ढा 2 फीट गहरा और चौड़ा खोदें।
उसमें गोबर की खाद और उपजाऊ मिट्टी मिलाएँ।
पौधे को गड्ढे में लगाकर पानी दें।
3. गमले में लगाना
कम से कम 18–24 इंच का गमला लें।
नीचे छेद होना चाहिए ताकि पानी जमा न हो।
गमले में मिट्टी + बालू + जैविक खाद भरें।
पौधे को लगाकर रोज़ाना हल्का पानी दें।
🌱 पौधे की देखभाल
✅ पानी देना
गर्मी में रोज़ हल्का पानी दें।
बरसात में आवश्यकता अनुसार।
सर्दियों में 2–3 दिन के अंतराल पर।
✅ खाद डालना
हर 2–3 महीने में गोबर की खाद या वर्मी कम्पोस्ट डालें।
रासायनिक खाद से बचें, जैविक खाद बेहतर होती है।
✅ छँटाई (Pruning)
सूखी और रोगग्रस्त शाखाओं को काटें।
समय-समय पर पौधे की आकृति सही करने के लिए हल्की छँटाई करें।
✅ धूप और छाया
दिन में कम से कम 4–5 घंटे धूप मिले।
अधिक गर्मी में हल्की छाया देना लाभकारी होता है।
🌿 रुद्राक्ष के पौधे को रोगों से बचाने के उपाय
फफूंदी रोग: नीम का घोल छिड़कें।
पत्तियों का झड़ना: संतुलित पानी और खाद का ध्यान रखें।
कीड़े लगना: नीम तेल या जैविक कीटनाशक का प्रयोग करें।
जड़ सड़न: पानी भराव से बचें।
🌱 रुद्राक्ष से फल प्राप्त करने के उपाय
पौधा 6–8 साल में फल देना शुरू करता है।
नियमित सिंचाई और जैविक खाद डालें।
वृक्ष को खुले वातावरण में रखें।
अधिक फल के लिए बरसात से पहले गोबर की खाद डालें।
पौधे के आसपास घास या खरपतवार न होने दें।
🌿 रुद्राक्ष का धार्मिक और ज्योतिषीय महत्व
इसे पहनने से मानसिक शांति और एकाग्रता मिलती है।
घर में रुद्राक्ष का पौधा नकारात्मक ऊर्जा को दूर करता है।
ज्योतिष के अनुसार, रुद्राक्ष ग्रह दोष निवारण में मदद करता है।
धन, स्वास्थ्य और सफलता प्राप्त करने में सहायक माना जाता है।
🌱 FAQ (अक्सर पूछे जाने वाले प्रश्न)
Q1. क्या रुद्राक्ष का पौधा घर में लगाना शुभ है? 👉 हाँ, इसे लगाना अत्यंत शुभ माना जाता है।
Q2. रुद्राक्ष का पौधा कितने समय में फल देता है? 👉 लगभग 6–8 साल में।
Q3. क्या गमले में रुद्राक्ष का पौधा लग सकता है? 👉 हाँ, लेकिन गमला बड़ा और गहरा होना चाहिए।
Q4. क्या रुद्राक्ष की खेती व्यावसायिक रूप से की जा सकती है? 👉 जी हाँ, इसकी खेती से अच्छा मुनाफ़ा कमाया जा सकता है।
Q5. रुद्राक्ष के कितने प्रकार होते हैं? 👉 एक मुखी से 21 मुखी तक रुद्राक्ष पाए जाते हैं।
🌿 निष्कर्ष
रुद्राक्ष का पौधा न सिर्फ़ धार्मिक और आध्यात्मिक दृष्टि से बल्कि स्वास्थ्य और पर्यावरणीय दृष्टि से भी अत्यंत लाभकारी है। यदि इसे सही विधि से लगाया जाए और नियमित देखभाल की जाए, तो यह पौधा जीवनभर सकारात्मक ऊर्जा, शांति और समृद्धि प्रदान करता है।
अपने घर या बगीचे में रुद्राक्ष का पौधा अवश्य लगाएँ और भगवान शिव की कृपा प्राप्त करें।
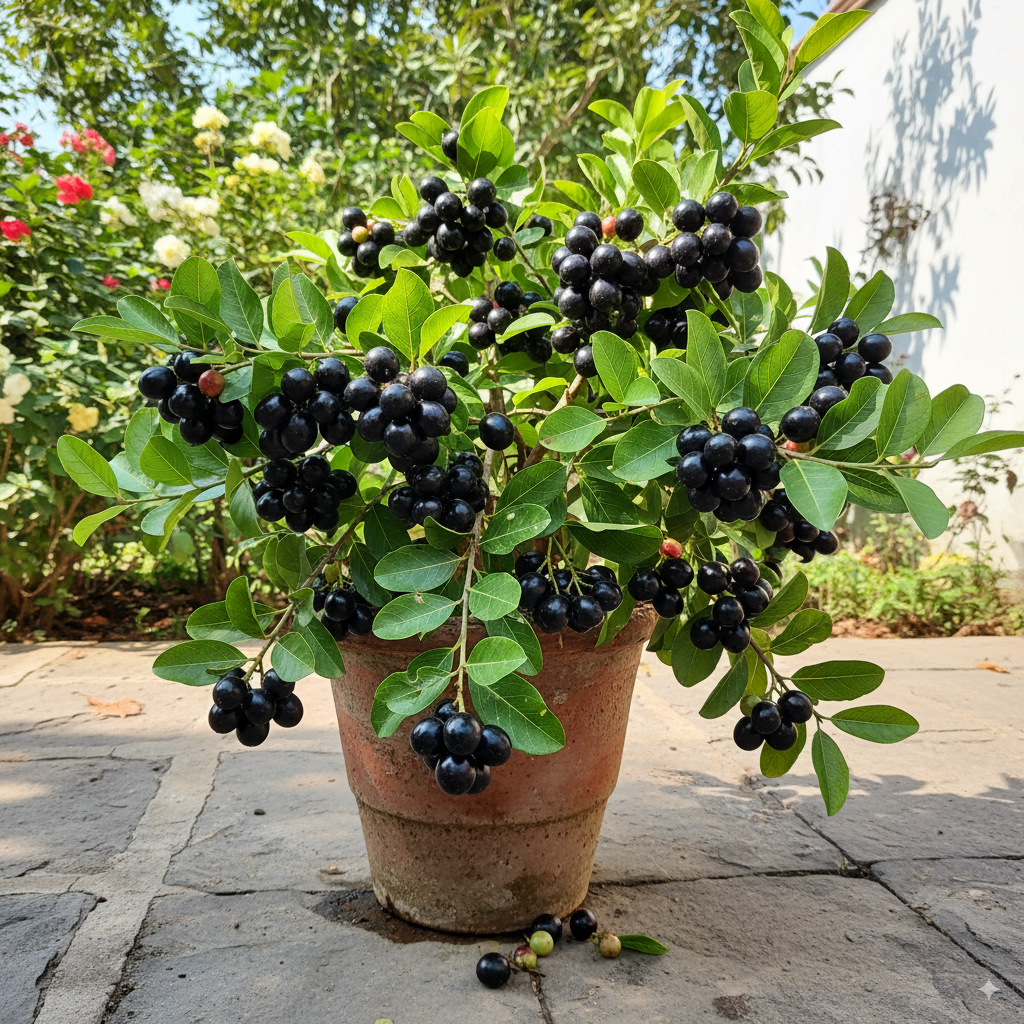
Jamun (Syzygium cumini), also known as Blackberry, Java Plum, Indian Black Plum, or Malabar Plum, is one of the most popular fruits in India. It is valued for its unique tangy-sweet taste, medicinal properties, and cultural importance.
Jamun fruit has been widely used in Ayurveda, Unani, and traditional medicine systems for treating diabetes, digestion issues, blood purification, and heart diseases. The tree is evergreen, long-living, and can grow up to 30–40 meters in height under suitable conditions.
In this article, we will cover in detail:
Ideal climate and soil for Jamun
Plantation techniques in fields and pots
Irrigation, fertilization, and care schedule
Pruning and plant management
Tips for maximizing fruiting and sweetness
Pest and disease control
Medicinal and health benefits
Vastu and cultural significance
🌱 Suitable Climate and Soil for Jamun
Climate: Jamun grows well in tropical and subtropical regions.
Temperature: 25°C to 35°C is ideal.
Rainfall: Annual rainfall of 500–2500 mm supports healthy growth.
Soil Requirements:
Sandy loam or loamy soil is best.
Soil pH: 6.0–7.5.
Proper drainage is essential to avoid root rot.
🪴 Plantation Methods
✔ In Garden or Farm
Pit Preparation: Dig pits of 3x3x3 feet.
Soil Mixture: Fill with garden soil + farmyard manure + river sand + neem cake.
Planting: Always use grafted (budded) plants for early fruiting.
Precaution: Avoid waterlogging, especially in pots.
🌿 Fertilizer and Nutrition Schedule
Season
Fertilizer
Quantity
Purpose
Every 3 months
Farmyard manure/Vermicompost
5–10 kg
Improves soil fertility
Feb–March
Nitrogen (Urea)
200 g
Boosts new shoots & leaves
June–July
DAP + Potash
200–250 g
Helps in flowering & fruit set
Aug–Sept
Micronutrients (Zinc, Boron)
Foliar spray
Enhances fruit size & sweetness
👉 Potassium and Zinc are essential for fruit quality and sweetness.
🌞 Sunlight and Temperature
Jamun requires 6–8 hours of direct sunlight daily.
Avoid shady places as they reduce fruiting.
Protect young plants from frost in colder regions.
✂️ Pruning and Maintenance
Remove dry, diseased, or broken branches regularly.
Light pruning helps in giving a balanced shape to the tree.
For potted plants, perform repotting every 2–3 years with fresh soil mix.
🌸 Flowering and Fruiting
Seed-grown plants start fruiting after 6–8 years.
Grafted/budded plants bear fruits within 4–5 years.
Flowering Season: March–April.
Harvesting Season: June–July.
Fruits are oval-shaped, purple-black, and have a unique flavor.
🍇 Tips to Maximize Fruiting
Always plant grafted plants for early and better yield.
Apply Zinc and Boron sprays during flowering.
Use Potash-rich fertilizers to reduce flower/fruit drop.
Keep the base area weed-free.
Ensure timely irrigation and fertilization.
Thin excess fruits for better quality and size.
🐛 Pest and Disease Management
Pest/Disease
Symptoms
Control
Leaf Spot
Yellow/black patches on leaves
Spray Bordeaux mixture
Fruit Drop
Immature fruits falling
Foliar spray of Zinc + Boron
Termites
Weakening of roots
Apply neem cake & neem oil
Fruit Fly
Holes and rotting fruits
Cover fruits with net bags
🌟 Medicinal and Health Benefits of Jamun
Diabetes Management: Jamun seeds are used in Ayurvedic medicine for regulating blood sugar levels.
Digestion: Improves gut health and relieves diarrhea.
Bone Health: Rich in calcium and phosphorus.
Heart Health: Maintains blood pressure and cholesterol.
Skin Benefits: Purifies blood and helps in skin disorders.
🏡 Vastu and Cultural Importance
Planting Jamun at home brings positivity, prosperity, and good health.
Considered sacred in Indian traditions and associated with Lord Krishna.
Jamun is also part of Panchavati trees along with Neem, Peepal, and Banyan.
📊 Quick Care Guide
Stage
Care
Tip
Plantation
Use grafted plants
Keep 8–10 m spacing
Watering
Summer: 7–10 days, Winter: 15–20 days
Avoid waterlogging
Fertilization
Organic compost every 3 months
Increase Potash at fruiting
Sunlight
6–8 hrs daily
Avoid shade
Fruiting
Starts in 4–5 years (grafted)
Spray micronutrients
❓ Frequently Asked Questions (FAQ)
Q1: Can Jamun grow in pots? ✔ Yes, grafted plants can grow well in large pots (20–24 inches).
Q2: How many years does Jamun take to bear fruits? ✔ Seed-grown: 6–8 years, Grafted: 4–5 years.
Q3: Which fertilizer is best for Jamun? ✔ Organic compost + Potash + Micronutrient sprays.
Q4: What is the lifespan of Jamun tree? ✔ A healthy Jamun tree can live and fruit for 50–60 years.
Q5: Is Jamun farming profitable? ✔ Yes, Jamun is highly valued for its medicinal and commercial demand.
🎯 Conclusion
Jamun is not just a delicious seasonal fruit but also a treasure of health benefits and cultural values. By planting a Jamun tree at home or farm, you can enjoy both its shade and fruits for decades.
With proper planting, irrigation, nutrition management, and pest control, you can ensure heavy harvests of sweet and medicinally rich Jamun fruits. Whether in a large farm or in a pot on your terrace, Jamun is a tree worth growing.
जामुन (Syzygium cumini) भारत का एक अत्यंत लोकप्रिय और औषधीय महत्व वाला फल है। इसे ब्लैकबेरी, जावा प्लम, या इंडियन ब्लैक प्लम भी कहा जाता है। जामुन का स्वाद खट्टा-मीठा होता है और इसमें कई प्रकार के औषधीय गुण पाए जाते हैं। आयुर्वेद में जामुन को शुगर रोगियों, पाचन तंत्र और हृदय रोगों के लिए बेहद उपयोगी माना गया है।
भारत में जामुन के पेड़ आमतौर पर गर्म और उपोष्णकटिबंधीय जलवायु में पाए जाते हैं। यह पेड़ 30–40 मीटर तक ऊँचा हो सकता है और साल में एक बार फल देता है।
इस लेख में हम विस्तार से जानेंगे:
जामुन पौधे के लिए सही जलवायु और मिट्टी
गमले और खेत में जामुन लगाने की विधि
पौधे की देखरेख और खाद-पानी का प्रबंधन
रोग और कीट नियंत्रण
अधिक फल और मिठास पाने के घरेलू उपाय
औषधीय और स्वास्थ्य लाभ
वास्तु और धार्मिक महत्व
🌱 जामुन के लिए उपयुक्त जलवायु और मिट्टी
जलवायु: जामुन का पौधा उष्णकटिबंधीय और उपोष्णकटिबंधीय क्षेत्रों में अच्छा पनपता है।
तापमान: 25°C से 35°C सर्वोत्तम है।
वर्षा: 500–2500 मिमी वार्षिक वर्षा उपयुक्त रहती है।
मिट्टी:
बलुई दोमट (sandy loam) सबसे अच्छी मानी जाती है।
pH मान: 6.0 से 7.5।
जलभराव से बचाना जरूरी है।
🪴 जामुन पौधा लगाने की विधि
✔ खेत में रोपाई
गड्ढे की तैयारी: 3x3x3 फीट के गड्ढे खोदें।
मिट्टी भरना: गड्ढे में मिट्टी + गोबर की खाद + बालू + नीमखली मिलाएँ।
पौधा लगाना: ग्राफ्टेड या कलमी पौधा लगाएँ।
दूरी: पेड़ों के बीच 8–10 मीटर की दूरी रखें।
सिंचाई: रोपाई के बाद हल्की सिंचाई करें।
✔ गमले में रोपाई
गमला आकार: 20–24 इंच गहरा और चौड़ा।
मिट्टी मिश्रण:
40% बगीचे की मिट्टी
30% गोबर की खाद/वर्मी कंपोस्ट
20% नदी की रेत
10% कोकोपीट + नीमखली
ड्रैनेज: गमले में निकास छेद अवश्य हों।
💧 सिंचाई प्रबंधन
गर्मी में हर 7–10 दिन पर पानी दें।
बरसात के समय अतिरिक्त पानी से बचाएँ।
फल बनने के समय नियमित नमी बनाए रखें।
गमले में पौधों को हल्का लेकिन नियमित पानी दें।
🌿 खाद और पोषण प्रबंधन
समय
खाद/उर्वरक
मात्रा
उद्देश्य
हर 3 माह
गोबर की खाद/वर्मी कंपोस्ट
5–10 किलो
मिट्टी उपजाऊ बनाए
फरवरी–मार्च
नत्रजन (Urea)
200 ग्राम
नई कोंपलें और पत्ते
जून–जुलाई
डीएपी + म्यूरिएट ऑफ पोटाश
200–250 ग्राम
फूल और फल सेटिंग
अगस्त–सितंबर
सूक्ष्म पोषक तत्व (जिंक, बोरॉन)
स्प्रे
फल का आकार और मिठास
👉 जामुन के अच्छे फलन के लिए पोटाश और जिंक अत्यधिक आवश्यक हैं।
🌞 धूप और तापमान
जामुन का पौधा पूर्ण सूर्यप्रकाश में लगाएँ।
रोजाना कम से कम 6–8 घंटे धूप जरूरी है।
ठंड से पौधे को बचाएँ, खासकर शुरुआती वर्षों में।
✂️ छंटाई और रख-रखाव
सूखी, टूटी और रोगग्रस्त शाखाएँ काटें।
पौधे को संतुलित आकार देने के लिए हल्की छंटाई करें।
गमले में हर 2–3 साल बाद रिपॉटिंग करें।
🌸 फूल और फलन
जामुन का पौधा 6–8 साल बाद फल देना शुरू करता है (बीज वाला)।
ग्राफ्टेड/कलमी पौधा 4–5 साल में फल देने लगता है।
फूल आने का समय: मार्च–अप्रैल।
फल पकने का समय: जून–जुलाई।
🍇 अधिक फल पाने के उपाय
ग्राफ्टेड पौधे का चुनाव करें।
समय-समय पर जिंक और बोरॉन का स्प्रे करें।
फूल गिरने से रोकने के लिए पोटाश दें।
पौधे के आसपास खरपतवार न होने दें।
सिंचाई और खाद का नियमित पालन करें।
छोटे-छोटे फलों को छाँटकर बड़े फलों को विकसित होने दें।
🐛 रोग और कीट प्रबंधन
रोग/कीट
लक्षण
समाधान
पत्तियों पर धब्बे
पत्तियों का पीला/काला होना
बोर्डो मिश्रण का छिड़काव
फूल और फल झड़ना
फूल और छोटे फल गिरना
जिंक + बोरॉन स्प्रे
दीमक
जड़ों का कमजोर होना
नीमखली और नीम तेल
फल मक्खी
फलों में छेद और सड़न
फलों को जाल बैग से ढकें
🌟 जामुन के औषधीय लाभ
डायबिटीज रोगियों के लिए उपयोगी।
पाचन तंत्र मजबूत करता है।
हड्डियों और दाँतों को मजबूत बनाता है।
रक्तचाप और हृदय रोगों में सहायक।
खून को शुद्ध करता है और त्वचा रोगों में लाभकारी।
🏡 वास्तु और धार्मिक महत्व
जामुन का पेड़ घर में लगाने से सकारात्मक ऊर्जा और समृद्धि आती है।
इसे भगवान कृष्ण से भी जोड़ा जाता है।
पीपल, नीम और जामुन को पवित्र वृक्ष माना गया है।
📊 जामुन पौधे की त्वरित देखभाल सारणी
चरण
देखभाल
मुख्य टिप्स
रोपाई
ग्राफ्टेड पौधे लगाएँ
8–10 मीटर दूरी रखें
पानी
गर्मी में 7–10 दिन पर
जलभराव से बचाएँ
खाद
हर 3 माह जैविक खाद
फल आने पर पोटाश बढ़ाएँ
धूप
6–8 घंटे रोजाना
छाँव से बचाएँ
फलन
4–5 साल बाद शुरू
फूल गिरने से रोकें
❓ अक्सर पूछे जाने वाले प्रश्न (FAQ)
Q1: क्या जामुन गमले में उग सकता है? ✔ हाँ, बड़े गमले में ग्राफ्टेड पौधा लगाकर अच्छे फल पाए जा सकते हैं।
Q2: जामुन का पौधा कितने साल में फल देता है? ✔ बीज वाला पौधा 6–8 साल में, ग्राफ्टेड 4–5 साल में फल देता है।
Q3: कौन सी खाद जामुन के लिए सबसे अच्छी है? ✔ गोबर की खाद, वर्मी कंपोस्ट और पोटाश आधारित उर्वरक।
Q4: जामुन की आयु कितनी होती है? ✔ 50–60 साल तक पौधा फल देता है।
Q5: क्या जामुन का व्यावसायिक खेती लाभकारी है? ✔ हाँ, यह औषधीय और बाजार मूल्यवान फल है।
🎯 निष्कर्ष
जामुन का पौधा लगाना न केवल स्वादिष्ट फलों के लिए लाभकारी है, बल्कि यह औषधीय, धार्मिक और पर्यावरणीय दृष्टि से भी अत्यंत महत्वपूर्ण है। यदि आप समय पर रोपाई, खाद-पानी और देखभाल करते हैं, तो जामुन से भरपूर और मीठे फल प्राप्त कर सकते हैं, चाहे पौधा गमले में हो या खेत में।
Orange (Santra) is one of the most popular citrus fruits in the world. Known for its tangy-sweet taste and juicy pulp, orange is not only delicious but also a rich source of Vitamin C, antioxidants, fiber, calcium, and potassium.
In India, oranges are mainly cultivated in Maharashtra (Nagpur Oranges), Madhya Pradesh, Punjab, Rajasthan, Assam, Uttarakhand, and Himachal Pradesh.
🌱 Suitable Climate and Soil for Orange Cultivation
Climate: Oranges thrive in tropical and subtropical climates.
Temperature: Ideal range is 15°C to 35°C.
Protect from frost and extreme cold.
Soil:
Loamy or sandy loam soil is best.
Soil pH: 5.5 to 7.5.
Well-drained soil is essential to avoid root rot.
🪴 Plantation Methods
✔ In Garden/Farm
Digging: Prepare pits of 2x2x2 feet.
Filling: Mix soil with farmyard manure, sand, and organic compost.
Planting: Use grafted (budded) orange plants for better yield.
Spacing: Maintain 12–15 feet between plants.
Watering: Give light irrigation after planting.
✔ In Pots/Containers
Pot Size: Minimum 18–24 inches deep and wide.
Soil Mix:
40% garden soil
30% organic compost/vermicompost
20% river sand
10% cocopeat + neem cake powder
Ensure proper drainage holes in the pot.
💧 Irrigation (Watering)
Summer: Every 5–7 days.
Winter: Every 10–15 days.
Keep the soil moist during fruiting stages.
Avoid waterlogging at all costs.
🌿 Fertilizer & Nutrition Schedule
Season
Fertilizer
Quantity
Purpose
Every 2–3 months
Farmyard manure/vermicompost
5–10 kg
Plant growth & strength
March–April
Nitrogen (Urea)
250 g
New shoots and leaves
July–August
DAP + Potash
200 g
Flowering & fruit setting
Oct–Nov
Micronutrient spray
As directed
Fruit sweetness & quality
👉 Oranges require high potassium and zinc for better yield and taste.
🌞 Sunlight & Temperature
Orange plants need 6–8 hours of direct sunlight daily.
Avoid shady locations, as plants become weak and fruiting reduces.
Protect from frost by covering the plant during winters.
✂️ Pruning & Maintenance
Remove dry, diseased, or broken branches regularly.
After harvesting, prune lightly to maintain shape.
Keep the plant round and balanced.
For potted plants, refresh soil every year and repot into larger containers every 2–3 years.
🌸 Flowering & Fruiting
Orange plants usually start fruiting after 3–4 years (if grafted).
Flowering season: March–April.
Harvesting season: October to December.
To ensure heavy fruiting, apply fertilizers on time and maintain proper watering.
🍊 Tips to Maximize Fruiting
Always plant grafted/budded orange plants.
Maintain regular watering schedule.
Spray potassium and zinc during fruit formation.
Keep the base area weed-free.
Perform timely pruning.
For potted plants, shift to bigger pots every 2–3 years.
Remove small fruits early so bigger fruits develop well.
🐛 Pest & Disease Management
Pest/Disease
Symptoms
Solution
Leaf spots
Yellow/black patches on leaves
Spray Bordeaux mixture
Fruit drop
Immature fruits falling
Zinc + Boron foliar spray
Termites
Weakening of roots
Apply neem cake in soil
Sap-sucking pests
Curling and drying of leaves
Spray neem oil solution
🌟 Health Benefits of Oranges
Rich in Vitamin C – boosts immunity.
Regulates blood pressure.
Improves digestion and metabolism.
Supports heart and bone health.
Provides glowing and fresh skin.
🏡 Vastu & Cultural Significance
Planting an orange tree at home brings positivity and prosperity.
Best placed in the northeast direction.
Oranges symbolize health, happiness, and good fortune.
📊 Quick Care Guide for Orange Plants
Stage
Care
Key Tip
Plantation
Use grafted plants in pits/containers
Maintain 12–15 ft spacing
Watering
Summer: 5–7 days, Winter: 10–15 days
Avoid waterlogging
Fertilization
Every 2–3 months organic compost
Add potassium & zinc for fruits
Sunlight
6–8 hours daily
Avoid shade
Fruiting
Begins after 3–4 years
Spray nutrients at flowering
❓ Frequently Asked Questions
Q1: Can orange plants grow in pots? ✔ Yes, in large pots (18–24 inches) using grafted plants.
Q2: How many years does it take for an orange tree to bear fruits? ✔ Grafted plants start fruiting in 3–4 years.
Q3: Which fertilizer is best for oranges? ✔ Organic compost, potassium, and zinc sprays are highly effective.
Q4: What is the lifespan of an orange tree? ✔ Around 30–35 years with proper care.
Q5: Is orange cultivation profitable? ✔ Yes, due to its high demand, orange farming is a profitable venture.
🎯 Conclusion
Orange plants not only provide delicious, juicy fruits but also enhance the beauty of your garden or home. With proper planting, care, timely irrigation, fertilization, and pest management, you can easily enjoy abundant harvests of sweet and tangy oranges even in pots.
👉 Whether you are a farmer or a gardening enthusiast, the orange plant brings taste, health, and prosperity to your life.
संतरा (Orange) भारत और पूरी दुनिया का एक प्रमुख सिट्रस फल (Citrus Fruit) है। इसका स्वाद खट्टा-मीठा और रस से भरपूर होता है। संतरा न केवल स्वादिष्ट है, बल्कि यह विटामिन C, फाइबर, कैल्शियम, पोटैशियम और एंटीऑक्सीडेंट्स का बेहतरीन स्रोत है।
भारत में संतरे की खेती मुख्य रूप से महाराष्ट्र (नागपुर), मध्य प्रदेश, पंजाब, राजस्थान, उत्तराखंड, असम और हिमाचल प्रदेश में की जाती है।
जलवायु: उष्णकटिबंधीय और उपोष्णकटिबंधीय जलवायु संतरे के लिए सबसे अच्छी होती है।
आदर्श तापमान: 15°C से 35°C।
ठंड और पाले से बचाना जरूरी है।
मिट्टी:
दोमट (Loamy) या बलुई दोमट (Sandy Loam)
पीएच स्तर: 5.5 से 7.5
पानी निकासी वाली मिट्टी होना चाहिए।
🪴 पौधा लगाने की विधि
✔ खेत में
गड्ढा: 2x2x2 फीट का गड्ढा खोदें।
भराई: उसमें गोबर की खाद, मिट्टी और रेत का मिश्रण डालें।
पौधा: ग्राफ्टेड (कलमी) संतरे का पौधा लगाएँ।
दूरी: पौधों के बीच 12–15 फीट।
हल्की सिंचाई करें।
✔ गमले में
गमला: 18–24 इंच गहरा और चौड़ा।
मिट्टी मिश्रण:
40% बगीचे की मिट्टी
30% गोबर की खाद/वर्मी कम्पोस्ट
20% नदी की रेत
10% कोकोपीट + नीम खली
ध्यान दें: गमले में ड्रेनेज होल जरूर हो।
💧 सिंचाई (Watering)
गर्मियों में: 5–7 दिन में एक बार।
सर्दियों में: 10–15 दिन में एक बार।
फल बनने के समय नियमित नमी बनाए रखें।
पानी का जमाव न होने दें।
🌿 खाद और पोषण
समय
खाद/उर्वरक
मात्रा
उद्देश्य
हर 2–3 महीने
गोबर की खाद/वर्मी कम्पोस्ट
5–10 किलो
वृद्धि और मजबूती
मार्च–अप्रैल
नाइट्रोजन (यूरिया)
250 ग्राम
नई शाखाएँ और पत्तियाँ
जुलाई–अगस्त
डीएपी + पोटाश
200 ग्राम
फूल और फल
अक्टूबर–नवंबर
माइक्रोन्यूट्रिएंट स्प्रे
निर्देश अनुसार
मिठास और गुणवत्ता
👉 संतरे में पोटाश और जिंक बेहद जरूरी हैं।
🌞 धूप और तापमान
पौधे को रोजाना 6–8 घंटे धूप चाहिए।
छाया में पौधा कमजोर होगा और फलन कम होगा।
पाले से बचाने के लिए पौधे को ढकें।
✂️ छंटाई और देखरेख
पौधे की सूखी, टूटी और रोगग्रस्त शाखाएँ काटें।
फल तोड़ने के बाद हल्की छंटाई करें।
पौधे का आकार गोल और संतुलित रखें।
गमले वाले पौधे में हर साल मिट्टी बदलें।
🌸 फूल और फलन
संतरे का पौधा आमतौर पर 3–4 साल में फल देना शुरू करता है।
फूल मार्च–अप्रैल में आते हैं।
फल अक्टूबर से दिसंबर तक तैयार हो जाते हैं।
अधिक फल पाने के लिए समय पर खाद और पानी दें।
🍊 अधिक फल पाने के उपाय
हमेशा ग्राफ्टेड/कलमी पौधा लगाएँ।
पौधे को नियमित सिंचाई दें।
फल बनने के समय पोटाश और जिंक स्प्रे करें।
पौधे के पास खरपतवार न उगने दें।
छंटाई समय पर करें।
गमले वाले पौधे को हर 2–3 साल बाद बड़े गमले में लगाएँ।
छोटे फलों को हटाकर बड़े फलों को बढ़ने दें।
🐛 कीट और रोग प्रबंधन
रोग/कीट
लक्षण
समाधान
पत्तियों पर धब्बे
पत्तियाँ पीली पड़ना
बोर्डो मिक्स छिड़कें
फल गिरना
छोटे फल झड़ना
जिंक + बोरॉन स्प्रे करें
दीमक
जड़ कमजोर होना
मिट्टी में नीम खली डालें
चूसक कीट
पत्तियाँ मुरझाना
नीम तेल का छिड़काव
🌟 संतरे खाने के फायदे
विटामिन C से भरपूर – इम्युनिटी मजबूत करता है।
ब्लड प्रेशर नियंत्रित रखता है।
पाचन शक्ति बढ़ाता है।
दिल और हड्डियों के लिए लाभकारी।
त्वचा को ग्लो और ताजगी प्रदान करता है।
🏡 संतरे का वास्तु और धार्मिक महत्व
संतरे का पौधा घर में लगाने से सकारात्मक ऊर्जा और समृद्धि आती है।
इसे उत्तर-पूर्व दिशा में लगाना शुभ माना जाता है।
संतरा स्वास्थ्य और सौभाग्य का प्रतीक है।
📊 संतरा पौधे की देखभाल – त्वरित गाइड
चरण
देखभाल
सुझाव
पौधा लगाना
गड्ढा/गमला तैयार कर ग्राफ्टेड पौधा लगाएँ
12–15 फीट दूरी रखें
सिंचाई
गर्मी: 5–7 दिन, सर्दी: 10–15 दिन
जलभराव न हो
खाद
हर 2–3 महीने गोबर की खाद
पोटाश और जिंक फल के लिए
धूप
6–8 घंटे रोजाना
छाया से बचाएँ
फलन
3–4 साल में शुरू
फूल आने पर स्प्रे करें
❓ FAQs
Q1: संतरे का पौधा गमले में उग सकता है? ✔ हाँ, बड़े गमले (18–24 इंच) में ग्राफ्टेड पौधा आसानी से उगाया जा सकता है।
Q2: संतरा कितने साल में फल देता है? ✔ ग्राफ्टेड पौधा 3–4 साल में फल देना शुरू करता है।
Q3: कौन-सी खाद सबसे अच्छी है? ✔ गोबर की खाद, पोटाश और जिंक स्प्रे।
Q4: संतरे का पौधा कितने साल तक जीवित रहता है? ✔ औसतन 30–35 साल तक।
Q5: क्या संतरे की खेती लाभकारी है? ✔ हाँ, संतरे की मांग हमेशा रहती है और यह लाभकारी फसल है।
🎯 निष्कर्ष
संतरे का पौधा न केवल स्वादिष्ट और स्वास्थ्यवर्धक फल देता है, बल्कि यह आपके घर और बगीचे में सुंदरता भी बढ़ाता है। सही विधि से पौधा लगाकर, उचित देखरेख और नियमित खाद-पानी देने से आप अपने बगीचे या गमले में भी ढेर सारे मीठे और रसीले संतरे प्राप्त कर सकते हैं।
👉 चाहे आप किसान हों या बागवानी प्रेमी, संतरे का पौधा आपके जीवन में स्वाद, स्वास्थ्य और समृद्धि लाएगा।
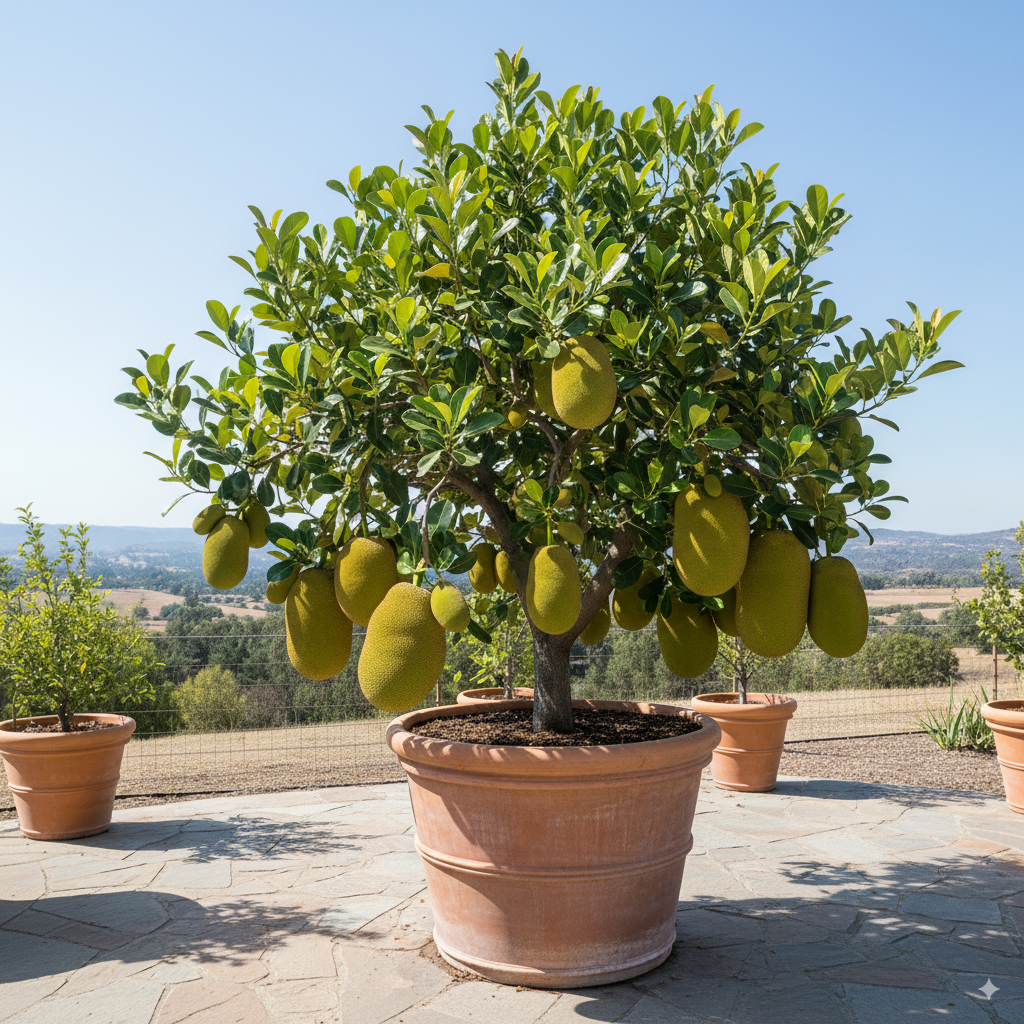
Jackfruit (Artocarpus heterophyllus) is one of the most popular, nutrient-rich tropical fruits of India and Southeast Asia. Known as the “King of Fruits”, it is unique for its size, taste, and health benefits. Jackfruit is packed with protein, fiber, vitamin A, vitamin C, potassium, calcium, and antioxidants.
The tree is large, evergreen, and provides heavy shade. With proper care, a jackfruit tree can yield 60–250 fruits per year. Nowadays, people are not only growing jackfruit in farms but also in backyard gardens and large containers (pots).
Jackfruit thrives best in tropical and subtropical climates.
Prefers warm and humid conditions.
Ideal temperature: 20°C to 35°C (68°F–95°F).
Requires 6–8 hours of direct sunlight daily.
Not suitable for regions with heavy frost or extreme cold.
🪴 Planting Methods (Garden & Pots)
✔ Planting in Open Field
Dig a 2.5 ft deep and wide pit.
Fill it with a mixture of soil + organic manure + river sand.
Place the grafted sapling carefully in the center.
Provide support with a bamboo stick.
Water lightly after planting.
👉 Spacing between plants: 8–10 meters.
✔ Growing Jackfruit in Pots
Pot Size: At least 24–30 inches deep and wide.
Soil Mix:
40% Garden Soil
30% Organic Manure (Cow dung/ Vermicompost)
20% River Sand
10% Cocopeat + Neem Cake
👉 Ensure the pot has drainage holes to prevent waterlogging.
💧 Watering Schedule
Young Plants (1–2 years): Light watering every 3–4 days.
Mature Trees: 2–3 times a week during summer, less in winter/rainy season.
During Fruiting: Maintain consistent soil moisture.
⚠ Avoid stagnant water, as it causes root rot.
🌿 Fertilization and Nutrition
Season
Fertilizer/Manure
Quantity
Purpose
Every 2–3 months
Organic manure (cow dung/vermicompost)
5–10 kg
Plant growth
March–April
Nitrogen (Urea)
250–500 g
Leaf and branch growth
July–August
DAP + Potash
200–300 g
Flower and fruit set
Oct–Nov
Bone meal + Micronutrients
250 g
Root strength & sweetness
👉 Potassium and Boron sprays are essential for fruit size and sweetness.
🌞 Sunlight & Temperature
Needs 6–8 hours of full sun daily.
Shaded areas reduce fruit production.
Protect young plants from frost and strong winds.
✂️ Pruning and Maintenance
Prune dry, diseased, and weak branches every year.
Best time for pruning: after harvesting season.
Maintain a strong, single main trunk.
Remove excess branches so that nutrients focus on fruits.
🌸 Pollination and Fruiting
Jackfruit trees bear both male and female flowers.
Pollination is mostly by wind and insects.
Keeping beehives near plantations increases fruiting.
In pots, you can use hand pollination with a brush for better results.
🍈 Tips to Maximize Fruit Production
Always plant a grafted jackfruit sapling (seed-grown trees take longer to fruit).
Provide regular watering and balanced fertilization.
During fruit set, spray Potassium & Boron nutrients.
Keep the area around the plant weed-free.
Do timely pruning to maintain healthy growth.
Thin weaker fruits early so that remaining ones grow bigger.
Protect the plant from termites, fungal infections, and stem borers.
🐛 Pest and Disease Management
Pest/Disease
Symptoms
Control
Fruit Borer
Holes in fruits, larvae inside
Spray Neem Oil every 15–20 days
Termites
Weak roots, plant drying
Apply neem cake to soil
Leaf Spot Disease
Yellow or brown patches
Spray Bordeaux mixture
Fruit Drop
Small fruits falling prematurely
Foliar spray of Boron + Zinc
🌟 Health Benefits of Jackfruit
Rich in protein – a great vegetarian meat substitute.
High fiber content improves digestion.
Calcium strengthens bones and teeth.
Potassium regulates blood pressure.
Boosts immunity and prevents infections.
Provides instant energy due to natural sugars.
🏡 Vastu and Religious Importance
Planting a jackfruit tree at home is believed to bring prosperity and good health.
Best direction: South or West side of the garden.
Symbol of abundance, nourishment, and strength.
📊 Quick Jackfruit Care Guide
Stage
Care Requirement
Tips
Planting
2.5 ft deep pit / 24–30 inch pot
Choose grafted sapling
Watering
3–4 days (young), 2–3 times weekly (mature)
Avoid waterlogging
Fertilizer
Organic manure every 2–3 months
Add Potash during fruiting
Sunlight
6–8 hrs daily
Avoid full shade
Fruiting
Starts in 3–4 years (grafted)
Support pollination
❓ Frequently Asked Questions (FAQs)
Q1: Can jackfruit be grown in pots? ✔ Yes, grafted plants grow well in large pots (24–30 inches).
Q2: How many years does it take to fruit? ✔ Seedlings take 7–8 years, while grafted plants fruit within 3–4 years.
Q3: Which fertilizer is best for jackfruit? ✔ Organic manure, Potash, and Boron sprays are highly effective.
Q4: How long does a jackfruit tree live? ✔ A healthy tree can live 40–50 years or more.
Q5: Is jackfruit farming profitable? ✔ Yes, it is a low-cost, high-profit crop with huge market demand.
🎯 Conclusion
Jackfruit is not just a delicious fruit but also a powerhouse of nutrition. With proper planting methods, regular care, and balanced feeding, you can grow jackfruit successfully in your garden or even in large pots.
Whether you are a farmer or a gardening enthusiast, planting a jackfruit tree will bring taste, health, and prosperity to your life.
कटहल (Jackfruit) भारत का एक लोकप्रिय और पोषक तत्वों से भरपूर फल है, जिसे “फलों का राजा” भी कहा जाता है। इसकी विशेषता यह है कि यह न केवल स्वादिष्ट होता है बल्कि प्रोटीन, फाइबर, विटामिन A, C, पोटैशियम, कैल्शियम और एंटीऑक्सीडेंट्स से भरपूर होता है।
कटहल का पेड़ बड़ा, सदाबहार और छायादार होता है। एक सही देखभाल के साथ यह पेड़ हर साल 60–250 तक फल दे सकता है। आजकल लोग कटहल को न केवल खेतों में बल्कि बगीचों और बड़े गमलों में भी उगा रहे हैं।
कटहल उष्णकटिबंधीय (Tropical) और उपोष्णकटिबंधीय (Subtropical) जलवायु में आसानी से उगता है।
इसे गर्म और आर्द्र वातावरण पसंद है।
उपयुक्त तापमान: 20°C से 35°C।
पेड़ को सूरज की सीधी रोशनी (कम से कम 6–8 घंटे) मिलनी चाहिए।
ज्यादा ठंड और पाले (frost) वाले क्षेत्रों में इसकी खेती कठिन है।
🪴 गमले और खेत में लगाने की विधि
✔ खेत में पौधा लगाना
2.5 फीट गहरा और चौड़ा गड्ढा खोदें।
उसमें गोबर की खाद, मिट्टी और रेत का मिश्रण डालें।
पौधे को सावधानी से गड्ढे में लगाएँ।
पौधे के पास सहारा (स्टिक) लगाएँ।
हल्का पानी दें।
👉 पौधों के बीच की दूरी: 8–10 मीटर।
✔ गमले में पौधा लगाना
गमले का आकार: कम से कम 24–30 इंच गहरा और चौड़ा।
मिट्टी का मिश्रण:
40% बाग की मिट्टी
30% गोबर की खाद/वर्मी कम्पोस्ट
20% नदी की रेत
10% कोकोपीट + नीम खली
👉 गमले में पौधा लगाते समय ध्यान दें कि ड्रेनेज होल जरूर हो, ताकि पानी जमा न हो।
💧 सिंचाई (Watering)
शुरुआती 1–2 साल पौधे को हर 3–4 दिन में हल्की सिंचाई करें।
गर्मियों में सप्ताह में 2–3 बार पानी दें।
सर्दियों और बारिश में कम पानी दें।
फल बनने के समय नियमित नमी बनाए रखना जरूरी है।
⚠ ध्यान रखें: पानी का अधिक जमाव (Waterlogging) जड़ों को सड़ा सकता है।
🌿 खाद और पोषण (Fertilization)
समय
खाद/उर्वरक
मात्रा
उद्देश्य
हर 2–3 महीने
गोबर की खाद/वर्मी कम्पोस्ट
5–10 किलो
पौधे की वृद्धि
मार्च–अप्रैल
नाइट्रोजन (Urea)
250–500 ग्राम
पत्तियों और शाखाओं की वृद्धि
जुलाई–अगस्त
डीएपी (DAP) + पोटाश
200–300 ग्राम
फूल और फल बनने के लिए
अक्टूबर–नवंबर
हड्डी की खाद + माइक्रोन्यूट्रिएंट स्प्रे
250 ग्राम
जड़ और फल की मजबूती
👉 बोरॉन और पोटाश फल के आकार और मिठास के लिए बेहद जरूरी हैं।
🌞 धूप और तापमान
पेड़ को रोजाना 6–8 घंटे सीधी धूप चाहिए।
अधिक छायादार स्थानों में फलन कम होता है।
ठंडे और पाले वाले क्षेत्रों से बचाएँ।
✂️ छंटाई और देखभाल (Pruning & Maintenance)
हर साल सूखी, रोगग्रस्त और कमजोर शाखाओं को काटें।
छंटाई फल तोड़ने के बाद की जानी चाहिए।
मुख्य तना (Main stem) को सीधा और मजबूत बनाएँ।
अतिरिक्त शाखाओं को हटाने से पौधे की ऊर्जा फलों पर केंद्रित होती है।
🌸 परागण और फल लगना (Pollination & Fruiting)
कटहल के पेड़ पर नर और मादा दोनों फूल आते हैं।
परागण हवा और कीटों से होता है।
अधिक फल पाने के लिए पास में मधुमक्खियों का छत्ता होना लाभकारी है।
गमले में लगाए गए पौधे परागण के लिए ब्रश से हाथों से परागण किया जा सकता है।
🍈 अधिक फल पाने के उपाय
हमेशा ग्राफ्टेड कटहल पौधा लगाएँ (बीज से लगे पौधे देर से फल देते हैं)।
नियमित सिंचाई और खाद दें।
फल लगने के समय पोटाश और बोरॉन स्प्रे करें।
पेड़ के नीचे खरपतवार न उगने दें।
पौधे की छंटाई समय पर करें।
फल बनने के बाद कमजोर फलों को हटा दें ताकि बाकी फल बड़े हों।
पौधे को दीमक और फफूंदी से बचाएँ।
🐛 कीट और रोग प्रबंधन
रोग/कीट
लक्षण
समाधान
फलों में छेद
फल के अंदर कीड़े
नीम तेल का छिड़काव
दीमक
जड़ कमजोर होना
मिट्टी में नीम खली डालें
पत्तियों पर धब्बे
पत्तियाँ पीली पड़ना
बोर्डो मिक्स छिड़कें
फल झड़ना
छोटे फल गिर जाना
बोरॉन + जिंक का स्प्रे
🌟 कटहल खाने के फायदे
प्रोटीन से भरपूर – शाकाहारियों के लिए बेहतरीन विकल्प।
हड्डियों और दाँतों के लिए कैल्शियम का स्रोत।
पाचन शक्ति बढ़ाता है (फाइबर से भरपूर)।
ब्लड प्रेशर और शुगर नियंत्रण में मददगार।
इम्युनिटी को मजबूत करता है।
शरीर को ऊर्जा और ताजगी प्रदान करता है।
🏡 वास्तु और धार्मिक महत्व
घर में कटहल का पौधा लगाने से सकारात्मक ऊर्जा आती है।
दक्षिण और पश्चिम दिशा में पेड़ लगाना शुभ माना जाता है।
इसे समृद्धि और स्वास्थ्य का प्रतीक माना जाता है।
📊 कटहल पौधे की देखभाल – त्वरित गाइड
चरण
देखभाल
सुझाव
पौधा लगाना
2.5 फीट गहरा गड्ढा / 24–30 इंच गमला
ग्राफ्टेड पौधा चुनें
सिंचाई
शुरुआती 3–4 दिन पर, बाद में सप्ताह में 2–3 बार
जलभराव न हो
खाद
हर 2–3 महीने ऑर्गेनिक खाद
फूल व फल में पोटाश ज़रूरी
धूप
6–8 घंटे
छाया से बचाएँ
फलन
3–4 साल में शुरू (ग्राफ्टेड पौधा)
परागण के लिए मधुमक्खी/ब्रश
❓ अक्सर पूछे जाने वाले प्रश्न (FAQs)
Q1: कटहल का पौधा गमले में उग सकता है? ✔ हाँ, बड़े गमले (24–30 इंच) में ग्राफ्टेड पौधा आसानी से उगाया जा सकता है।
Q2: कटहल का पेड़ कितने साल में फल देता है? ✔ बीज वाला पौधा 7–8 साल, जबकि ग्राफ्टेड पौधा 3–4 साल में फल देता है।
Q3: कटहल के लिए कौन-सी खाद अच्छी है? ✔ गोबर की खाद, पोटाश और बोरॉन आधारित स्प्रे।
Q4: कटहल का पेड़ कितने साल तक जीवित रहता है? ✔ 40–50 साल तक।
Q5: कटहल की खेती लाभकारी है या नहीं? ✔ हाँ, यह कम लागत और अधिक मुनाफे वाली फसल है।
🎯 निष्कर्ष
कटहल का पौधा न केवल स्वादिष्ट और पोषक फल देता है, बल्कि यह छाया, ताजगी और समृद्धि का प्रतीक भी है। सही विधि से पौधा लगाकर, नियमित देखभाल और उचित खाद-पानी देकर आप अपने बगीचे या गमले में भी ढेर सारे फल प्राप्त कर सकते हैं।
👉 चाहे आप किसान हों या बागवानी प्रेमी, कटहल का पौधा आपके जीवन में स्वाद, स्वास्थ्य और संपन्नता लाएगा।
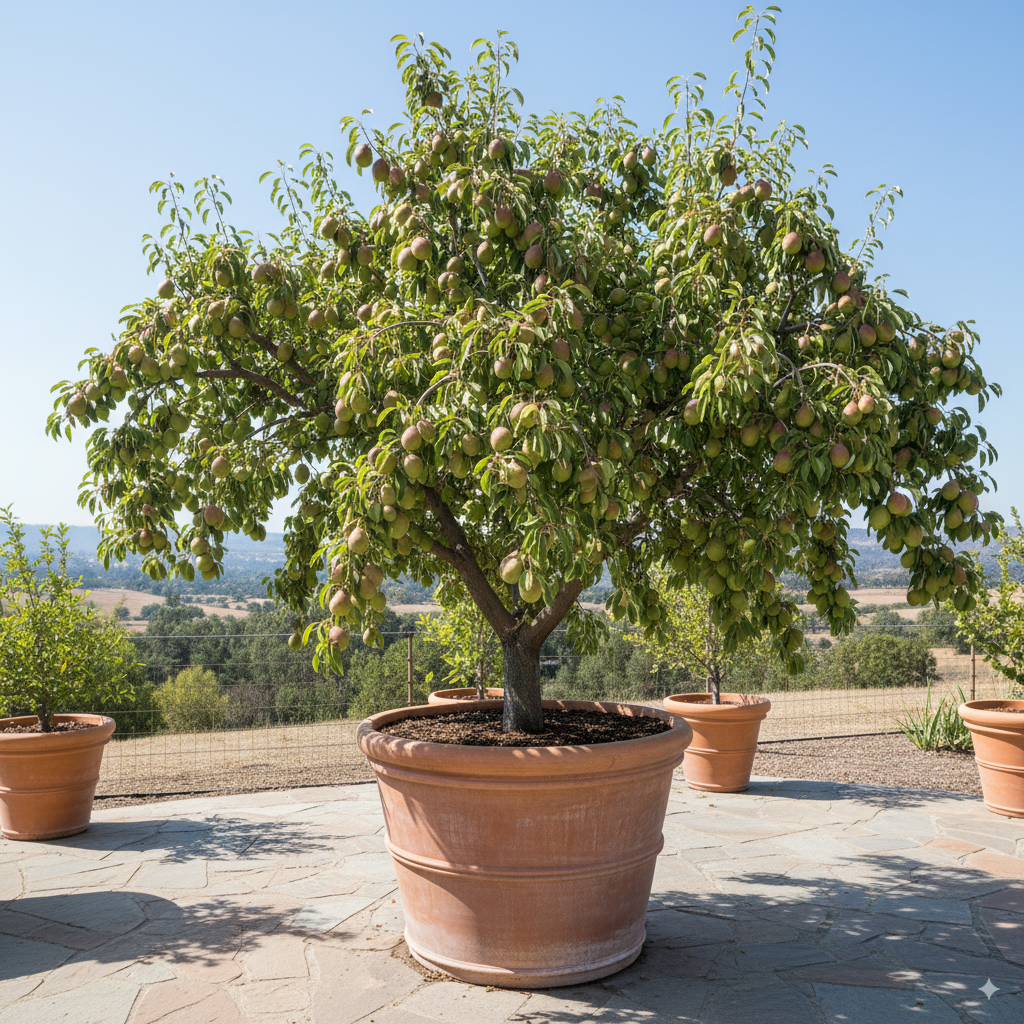
The Pear (Nashpati) is one of the most popular temperate fruits grown worldwide. Known for its sweet, juicy, and refreshing taste, it is also packed with essential nutrients like Vitamin C, potassium, dietary fiber, and antioxidants.
In India, pears are cultivated mostly in Himachal Pradesh, Jammu & Kashmir, Uttarakhand, Arunachal Pradesh, and other cold regions. Nowadays, with modern grafting techniques, pear trees can also be grown successfully in pots, terrace gardens, and backyards.
With proper planting methods and scientific care, you can enjoy abundant and high-quality pears even in limited spaces.
This article covers:
Step-by-step plantation guide for pear plants
Growing in pots vs. garden/fields
Soil, watering, fertilizer, and sunlight needs
Pruning and pollination management
Tips for boosting fruit yield
Pest and disease control
Health and Vastu benefits of pears
🪴 Plantation Method for Pear Trees
✔ Suitable Climate & Location
Pears grow best in temperate and cold climates.
Ideal temperature: 5°C – 25°C.
Require chilling hours during winter for proper flowering.
Select a location with 6–8 hours of direct sunlight daily.
✔ Choosing Container or Field Space
Pot Plantation: Use a 20–24 inch deep and wide pot/drum with drainage holes.
Field Plantation: Maintain 12–15 feet spacing between plants.
✔ Soil Preparation
Pear trees prefer well-drained sandy loam soil.
Soil Mix for Pots:
40% garden soil
30% cow dung compost or vermicompost
20% river sand
10% leaf compost/cocopeat
100 g neem cake powder (to prevent soil pests)
✔ Planting Steps
Dig a pit (2×2×2 ft) in the garden or prepare your pot.
Fill with prepared soil mixture.
Place a grafted pear plant (not seedling) in the center.
Cover roots gently, water lightly, and support the plant with a stick.
💧 Watering Schedule
First Year: Water every 3–4 days.
Established Plant: Water once a week in normal conditions.
During Fruiting: Maintain consistent soil moisture but avoid waterlogging.
⚠ Excess water causes root rot. Ensure proper drainage in pots.
🌿 Fertilization & Nutrition
Season
Fertilizer
Purpose
Every 2 months
2–3 kg compost/vermicompost
Soil fertility
March–April
50 g bone meal + neem cake
Root strengthening
July–August
100 g urea + 100 g DAP
Vegetative growth
Oct–Nov
150 g potash + micronutrient spray
Better flowering & fruit set
👉 Potassium and Boron are essential for fruit size, sweetness, and reduced fruit drop.
🌞 Sunlight & Temperature
Pear trees require full sun exposure for at least 6–8 hours.
Best suited for regions with cold winters and mild summers.
Can adapt to pots in plains with proper care.
✂️ Pruning & Maintenance
Prune annually during winter to remove dry, diseased, or weak branches.
Train the tree to an open vase shape for better sunlight and airflow.
Thin extra branches before flowering so energy goes into fruiting.
🌸 Pollination & Fruiting
Pear trees mostly need cross-pollination for better fruit yield.
Plant at least two different varieties nearby.
Honeybees are natural pollinators.
In small gardens/pots, hand pollination using a soft brush ensures fruit set.
🍎 Tips to Maximize Pear Yield
Always plant grafted pear trees (they fruit in 3–4 years).
Re-pot container plants every 2–3 years with fresh soil.
Spray potash and boron during flowering.
Use neem oil spray to control pests.
Perform fruit thinning to ensure larger and sweeter pears.
Provide adequate chilling in winter (or simulate by placing in cooler conditions in plains).
🐛 Pest & Disease Management
Problem
Symptoms
Solution
Leaf Spot
Brown/black patches on leaves
Spray copper oxychloride
Aphids
Curled, sticky leaves
Soap water/neem oil spray
Fruit Drop
Flowers/young fruits falling
Boron & zinc sprays
Root Rot
Yellow leaves, weak growth
Improve drainage, apply Trichoderma
🌟 Health Benefits of Pears
Boosts immunity due to Vitamin C.
Aids digestion with high fiber content.
Helps regulate blood pressure.
Good for diabetes patients (low GI fruit).
Improves skin glow and hair health.
Prevents heart diseases with antioxidants.
🏡 Vastu Benefits of Pear Tree
Planting pear tree in north or east direction is considered auspicious.
Brings prosperity, health, and harmony to the family.
📊 Quick Pear Care Guide
Stage
Care
Tips
Plantation
12–15 ft spacing / 20–24 inch pot
Use grafted plant
Watering
3–4 days (young), weekly (mature)
Avoid waterlogging
Fertilization
Compost every 2 months, NPK seasonally
Potash & boron vital
Sunlight
6–8 hrs daily
Open sunny spot
Fruiting
3–4 years (grafted)
Hand pollination in pots
❓ FAQs on Pear Plants
Q1: Can pears be grown in pots? ✔ Yes, with a large pot (20–24 inches), grafted pear plants grow well.
Q2: How long does it take for pears to fruit? ✔ Grafted plants start fruiting in 3–4 years.
Q3: Which fertilizer is best for pears? ✔ Organic compost, potash, and boron sprays during flowering.
Q4: How many years do pear trees live? ✔ With care, pear trees produce fruits for 25–30 years.
Q5: Is pear farming profitable in India? ✔ Yes, especially in Himachal, Kashmir, and Uttarakhand.
🎯 Conclusion
Pears are a delicious and nutritious fruit that can be grown both in gardens and pots with the right techniques. With proper soil mix, sunlight, pruning, fertilization, and pollination, you can enjoy abundant pear harvests at home.
Whether for commercial farming in cold regions or home gardening in pots, pear trees are rewarding and bring both health and prosperity.
नाशपाती (Pear) एक लोकप्रिय फल है जो स्वाद में हल्का मीठा, रसीला और पौष्टिक तत्वों से भरपूर होता है। इसे भारत में हिमाचल प्रदेश, जम्मू-कश्मीर, उत्तराखंड, अरुणाचल प्रदेश और ठंडे मौसम वाले क्षेत्रों में सफलतापूर्वक उगाया जाता है। नाशपाती में विटामिन C, फाइबर, पोटैशियम और एंटीऑक्सीडेंट भरपूर मात्रा में पाए जाते हैं।
आजकल इसे गमलों में, किचन गार्डन और छत के बगीचों में भी लगाया जा रहा है। सही तरीके से पौधा लगाने और उचित देखभाल करने से नाशपाती से अधिक और गुणवत्तापूर्ण फल प्राप्त किए जा सकते हैं।
इस लेख में हम विस्तारपूर्वक जानेंगे –
नाशपाती पौधा लगाने की सही विधि
गमले व बगीचे में रोपाई का तरीका
पानी, खाद, धूप और मिट्टी की जरूरत
छंटाई (Pruning) और पौधे की देखभाल
परागण (Pollination) और अधिक फल प्राप्त करने के उपाय
रोग एवं कीट नियंत्रण
सेहत और वास्तु लाभ
🪴 नाशपाती पौधा लगाने की विधि
✔ उपयुक्त जलवायु और स्थान
नाशपाती ठंडी व समशीतोष्ण जलवायु में अच्छी होती है।
तापमान 5°C – 25°C के बीच उपयुक्त है।
इसे ठंडी सर्दी और हल्की गर्मी वाले क्षेत्र पसंद आते हैं।
गमले में लगाने के लिए धूप वाली जगह चुनें जहां प्रतिदिन 6–8 घंटे की धूप आती हो।
✔ सही गमला या खेत की तैयारी
गमला/ड्रम – 20–24 इंच गहरा और चौड़ा होना चाहिए।
खेत – पौधों के बीच 12–15 फीट की दूरी रखें।
मिट्टी मिश्रण (Soil Mix):
40% बगीचे की मिट्टी
30% गोबर की खाद या वर्मी कम्पोस्ट
20% नदी की रेत
10% पत्तियों की सड़ी खाद / कोकोपीट
100 ग्राम नीमखली (Neem Cake) मिलाएं
✔ पौधारोपण की विधि
गड्ढा (2×2×2 फीट) तैयार करें।
उसमें तैयार मिट्टी मिश्रण भरें।
नाशपाती का ग्राफ्टेड पौधा लगाएं।
हल्का पानी दें और पौधे को सीधा बाँध दें।
💧 सिंचाई (Watering)
पहला साल: हर 3–4 दिन में हल्की सिंचाई करें।
स्थापित पौधा: हफ्ते में 1 बार पानी पर्याप्त।
फल आने के समय: मिट्टी नमीदार रखें, लेकिन पानी का जमाव न होने दें।
गमले में अतिरिक्त पानी निकासी के लिए छेद जरूर होना चाहिए।
🌿 खाद और पोषण प्रबंधन
समय
खाद की मात्रा
उद्देश्य
हर 2 महीने
2–3 किलो गोबर की खाद / वर्मी कम्पोस्ट
मिट्टी उपजाऊ बनाए रखना
मार्च–अप्रैल
50 ग्राम बोन मील + नीमखली
जड़ों को मजबूती
जुलाई–अगस्त
100 ग्राम यूरिया + 100 ग्राम डीएपी
हरी पत्तियों और शाखाओं की बढ़वार
अक्टूबर–नवंबर
150 ग्राम पोटाश + माइक्रोन्यूट्रिएंट स्प्रे
फूल और फल बनने में मदद
👉 बोरॉन और पोटाश फल सेटिंग और स्वाद सुधारने के लिए बेहद जरूरी हैं।
🌞 धूप और तापमान
रोजाना कम से कम 6–8 घंटे सीधी धूप मिलनी चाहिए।
अधिक छांव में फल नहीं लगते।
नाशपाती के लिए ठंडी सर्दी और हल्की गर्मी जरूरी है।
✂️ छंटाई और देखभाल (Pruning & Care)
हर साल सर्दियों में सूखी और कमजोर शाखाओं को काटें।
शाखाओं को ऐसा आकार दें कि धूप और हवा भीतर तक जाए।
फल आने से पहले अतिरिक्त शाखाओं को हटाएं ताकि ऊर्जा फलों में लगे।
🌸 परागण और फलन
नाशपाती में अच्छे फल के लिए क्रॉस-पोलिनेशन जरूरी है।
कम से कम 2 अलग किस्मों के पौधे पास-पास लगाएं।
मधुमक्खियां परागण में मदद करती हैं।
छोटे गार्डन में ब्रश से हाथों से परागण किया जा सकता है।
🍎 अधिक फल पाने के उपाय
ग्राफ्टेड पौधे ही लगाएं।
गमले के पौधों को हर 2–3 साल में री-पॉट करें।
फूल आने के समय पोटाश और बोरॉन का स्प्रे करें।
पौधे की छंटाई समय पर करें।
रोग और कीट से बचाने के लिए नीम तेल का छिड़काव करें।
फलों की थिनिंग करें ताकि बचे हुए फल बड़े और मीठे हों।
🐛 रोग और कीट नियंत्रण
रोग/कीट
लक्षण
उपाय
पत्तियों पर धब्बे
काले/भूरे धब्बे
कॉपर ऑक्सीक्लोराइड स्प्रे
एफिड (Aphids)
नई पत्तियों पर चिपचिपा पदार्थ
साबुन के पानी या नीम तेल का छिड़काव
फल झड़ना
फूल-फल गिरना
बोरॉन और जिंक स्प्रे
जड़ सड़न
पत्ते पीले, पौधा कमजोर
पानी निकासी सुधारें, ट्राइकोडर्मा डालें
🌟 नाशपाती खाने के फायदे
इम्यून सिस्टम मजबूत बनाती है।
पाचन तंत्र दुरुस्त करती है।
दिल की बीमारियों से बचाव।
त्वचा और बालों के लिए फायदेमंद।
शुगर रोगियों के लिए सुरक्षित फल।
🏡 वास्तु शास्त्र में नाशपाती
घर के उत्तर या पूर्व दिशा में नाशपाती का पौधा लगाना शुभ माना जाता है।
यह घर में समृद्धि, स्वास्थ्य और सौभाग्य लाता है।
📊 नाशपाती पौधा देखभाल त्वरित गाइड
चरण
देखभाल
विशेष टिप
रोपाई
12–15 फीट दूरी / 20–24 इंच गमला
ग्राफ्टेड पौधा चुनें
सिंचाई
हर 3–4 दिन (पहला साल), बाद में हफ्ते में 1 बार
पानी जमने न दें
खाद
2–3 किलो कम्पोस्ट हर 2 महीने
पोटाश और बोरॉन आवश्यक
धूप
6–8 घंटे सीधी धूप
छांव से बचाएं
फलन
3–4 साल में फल
परागण सही रखें
❓ अक्सर पूछे जाने वाले प्रश्न (FAQ)
Q1: क्या नाशपाती का पौधा गमले में लगाया जा सकता है? ✔ हाँ, बड़े गमले (20–24 इंच) में इसे आसानी से उगाया जा सकता है।
Q2: नाशपाती में फल आने में कितना समय लगता है? ✔ ग्राफ्टेड पौधों में 3–4 साल में फल लगने लगते हैं।
Q3: नाशपाती को कौन सी खाद ज्यादा चाहिए? ✔ पोटाश और बोरॉन फल सेटिंग और मिठास के लिए जरूरी हैं।
Q4: नाशपाती का पौधा कितने साल तक फल देता है? ✔ सही देखभाल करने पर 25–30 साल तक अच्छा फल देता है।
Q5: क्या नाशपाती की खेती भारत में फायदेमंद है? ✔ हाँ, खासकर हिमाचल, कश्मीर और उत्तराखंड में।
🎯 निष्कर्ष
नाशपाती एक पौष्टिक और लाभकारी फल है जिसे आप आसानी से बगीचे और गमले में उगा सकते हैं। उचित मिट्टी, खाद, धूप और देखभाल देने पर यह पौधा हर साल भरपूर फल देता है।
गमले में लगाने वाले बागबान थोड़ी अतिरिक्त देखभाल करके स्वादिष्ट और मीठी नाशपाती का आनंद ले सकते हैं। यह पौधा न केवल सेहत के लिए लाभकारी है बल्कि घर में शुभता और सौंदर्य भी बढ़ाता है।
Almonds (Prunus dulcis) are one of the world’s most popular and expensive dry fruits, widely consumed for their rich taste and high nutritional value. They are packed with protein, vitamin E, calcium, magnesium, and antioxidants, making them a superfood.
California almonds are globally famous for their high yield, quality, and commercial importance. In India, grafted California almond plants are now easily available in nurseries. With the right planting and care, you can successfully grow them both in your garden or large pots and enjoy abundant yields.
In this detailed guide, we will cover:
The correct method of planting grafted almond trees
Soil preparation, watering, sunlight, and fertilization needs
Pruning and plant management techniques
Growing almonds in pots vs. fields
Tips to maximize fruiting and almond quality
Common pests and disease control
Nutritional and health benefits of almonds
🪴 Plantation Method for Grafted California Almond Plant
✔ Choosing the Right Plant
Always buy a grafted plant, not seed-grown. Grafted plants bear fruit in just 3–4 years, while seed-grown take 7–8 years with poor yield.
Select a healthy 1–2 feet tall sapling from a reputed nursery.
✔ Selecting Location: Garden or Pot
Field/Garden Plantation: Keep a spacing of 15×15 feet between plants.
Pot Plantation: Use a minimum 24–30 inch wide and 30 inch deep pot. Ensure good drainage holes.
✔ Soil Preparation
The ideal soil for almonds is well-drained sandy loam. Soil mix for pot plantation:
40% garden soil
30% river sand
20% cow dung manure or vermicompost
10% cocopeat or leaf compost
Add 100 g neem cake powder for pest protection
✔ Plantation Steps
Dig a pit (2×2×2 ft) in the field or prepare your pot.
Fill it with the prepared soil mixture.
Place the grafted almond plant and cover roots carefully.
Water lightly and place in a full sunlight location.
💧 Watering Schedule
First Year: Water every 2–3 days in summer, every 5–7 days in winter.
Mature Plant: Once established, water once a week in normal seasons.
During Fruiting: Keep the soil slightly moist, avoid overwatering.
👉 Potassium and Boron are the most important nutrients for almond fruiting.
🌞 Sunlight & Temperature Needs
Almond plants require 6–8 hours of direct sunlight daily.
Optimum temperature: 15–30°C.
Best suited for cold and dry climates (like Himachal, Kashmir, Uttarakhand).
Can also grow well in pots in moderate climates with proper care.
✂️ Pruning & Maintenance
Prune lightly every 6 months to remove dry, weak, or diseased branches.
Shape the plant after 2–3 years for proper airflow and sunlight penetration.
Before flowering, remove extra shoots so energy goes into fruiting.
🌸 Pollination in Almonds
Almond trees require cross-pollination. Male and female flowers are separate.
Honeybees are the best natural pollinators.
In small gardens, artificial hand pollination can be done for better yield.
🍎 Tips to Maximize Almond Yield
Always grow grafted almond plants.
Re-pot container plants every 3 years with fresh soil and compost.
Spray boron and potassium during the flowering stage.
Use neem oil sprays to keep pests away.
Apply micronutrient sprays to prevent flower drop.
Perform fruit thinning so remaining almonds grow larger and better quality.
🐛 Pests & Diseases
Pest/Disease
Symptoms
Control
Mealybug
White cotton-like layer on leaves
Neem oil spray
Aphids
Curled and sticky new leaves
Soap water spray
Leaf Spot
Brown/black spots on leaves
Copper oxychloride spray
Root Rot
Yellowing, weak plant
Improve drainage, use Trichoderma
🌟 Health Benefits of Almonds
Boosts brain function and memory.
Strengthens bones and teeth.
Controls blood pressure and diabetes.
Helps in weight management and energy boost.
Reduces risk of heart diseases.
Improves skin glow and hair growth.
📊 Quick Almond Plant Care Guide
Stage
Care
Tips
Plantation
15×15 ft spacing in field, 24–30 inch pot
Choose grafted plant only
Watering
2–3 days (1st year), weekly later
Avoid overwatering
Fertilization
Compost every 2 months, NPK thrice yearly
Potash & boron essential
Sunlight
6–8 hrs direct sun
Open sunny location
Fruiting
3–4 years in grafted plants
Spray nutrients during flowering
❓ FAQs on Grafted Almond Plants
Q1: Can almond plants grow in pots? ✔ Yes, grafted almond plants can be grown in large pots and yield fruits in 3–4 years.
Q2: How long can almonds survive in pots? ✔ With proper care, potted almond plants can live 12–15 years.
Q3: Should I grow almonds from seeds? ✔ No, seed-grown plants take 7–8 years to fruit with poor yield. Always prefer grafted plants.
Q4: How to increase almond fruiting? ✔ Apply boron and potassium sprays during flowering, and prune excess branches.
Q5: Is almond farming possible in India? ✔ Yes, especially in colder states like Himachal Pradesh, Jammu & Kashmir, Uttarakhand, and also in pots across India.
🎯 Conclusion
Grafted California almond plants are a valuable addition to any home garden or orchard. With proper soil, watering, sunlight, fertilizers, and pruning, you can enjoy a healthy almond harvest in just 3–4 years.
Growing almonds not only provides nutritious and high-value dry fruits but also enhances the beauty of your garden. Whether in large fields or big pots, with the right care you can get maximum yield and top-quality almonds at home.
कैलिफ़ोर्निया बादाम (California Almond) दुनिया का सबसे प्रसिद्ध और महँगा ड्राई फ्रूट है। बादाम न केवल स्वादिष्ट होता है बल्कि इसमें मौजूद प्रोटीन, कैल्शियम, विटामिन E और फाइबर इसे स्वास्थ्य के लिए बेहद लाभकारी बनाते हैं।
भारत में अब ग्राफ्टेड कैलिफ़ोर्निया बादाम पौधे आसानी से उपलब्ध हैं, जिन्हें सही विधि से लगाकर आप अपने बगीचे या गमले में भी बादाम के पेड़ उगा सकते हैं और अच्छी पैदावार पा सकते हैं।
हमेशा ग्राफ्टेड पौधा लें, बीज से उगाया पौधा देर से और कम फल देता है।
नर्सरी से 1–2 फीट ऊँचा स्वस्थ पौधा खरीदें।
✔ गमले / खेत का चुनाव
खेत में लगाने के लिए 15×15 फीट दूरी पर पौधे लगाएँ।
गमले में लगाने के लिए कम से कम 24–30 इंच चौड़ा और 30 इंच गहरा गमला चुनें।
गमले में जल निकासी के छेद होना आवश्यक है।
✔ मिट्टी की तैयारी
बादाम के लिए दोमट या रेतीली मिट्टी सबसे अच्छी रहती है।
मिट्टी का मिश्रण:
40% बगीचे की मिट्टी
30% नदी की बालू
20% गोबर की खाद / वर्मी कम्पोस्ट
10% कोकोपीट या पत्तों की खाद
100 ग्राम नीमखली पाउडर मिलाएँ
✔ पौधा रोपण (Plantation)
गड्ढा (2×2×2 फीट) खोदें।
उसमें मिट्टी का मिश्रण भरें।
ग्राफ्टेड पौधा लगाकर हल्की सिंचाई करें।
पौधे को धूप वाली जगह पर रखें।
💧 सिंचाई (Watering)
पहले वर्ष: हर 2–3 दिन पर हल्का पानी दें।
गर्मी में: रोज़ाना या एक दिन छोड़कर पानी दें।
सर्दी में: 5–7 दिन में एक बार।
फल बनने पर: मिट्टी में नमी बनाए रखें। ⚠️ ओवरवॉटरिंग से जड़ों में सड़न हो सकती है।
🌿 खाद और पोषण (Fertilization)
समय
खाद की मात्रा
लाभ
हर 2 महीने
1–2 किलो वर्मी कम्पोस्ट / गोबर की खाद
मिट्टी उपजाऊ बनाए
मार्च–अप्रैल
50 ग्राम बोन मील + नीमखली
जड़ों की मजबूती
जुलाई–अगस्त
50 ग्राम यूरिया + 50 ग्राम डीएपी
पत्तियों की बढ़वार
अक्टूबर–नवंबर
100 ग्राम पोटाश + माइक्रोन्यूट्रिएंट्स
फूल और फल बनने में मदद
👉 बादाम में पोटाश और बोरॉन सबसे महत्वपूर्ण पोषक तत्व हैं।
🌞 धूप और तापमान
बादाम का पौधा 6–8 घंटे सीधी धूप चाहता है।
तापमान 15–30°C उपयुक्त है।
ठंडे और शुष्क क्षेत्रों में पैदावार अच्छी मिलती है।
✂️ छँटाई और देखभाल (Pruning & Maintenance)
हर 6 महीने में हल्की छँटाई करें।
सूखी और पीली पत्तियाँ हटा दें।
फल आने से पहले अतिरिक्त शाखाएँ काटें।
3 साल बाद पौधे को आकार दें ताकि हवा और धूप सही तरह से अंदर तक पहुँचे।
🌸 परागण (Pollination)
बादाम के पेड़ में नर और मादा फूल अलग-अलग होते हैं।
मधुमक्खियों द्वारा परागण सबसे अच्छा होता है।
छोटे बगीचों में कृत्रिम परागण (Artificial Pollination) किया जा सकता है।
🍎 अधिक फल पाने के उपाय (Tips for Maximizing Fruiting)
केवल ग्राफ्टेड पौधा लगाएँ।
गमले में लगाने पर हर 3 साल में री-पॉटिंग करें।
फूल आने पर बोरॉन और पोटाश का स्प्रे करें।
समय-समय पर नीम तेल का छिड़काव करें।
फूल गिरने से रोकने के लिए पत्तों पर माइक्रोन्यूट्रिएंट स्प्रे करें।
फल पतले करें (Fruit Thinning) ताकि बड़े और उच्च गुणवत्ता वाले बादाम मिलें।
🐛 रोग और कीट नियंत्रण
रोग/कीट
लक्षण
समाधान
मिलीबग
पत्तियों पर सफेद परत
नीम तेल का छिड़काव
एफिड्स
नई पत्तियों का मुड़ना
साबुन पानी का स्प्रे
लीफ स्पॉट
पत्तियों पर काले धब्बे
कॉपर ऑक्सीक्लोराइड का छिड़काव
जड़ सड़न
पौधा पीला और कमजोर
जल निकासी सही रखें
🌟 बादाम खाने के फायदे (Health Benefits of Almonds)
मस्तिष्क को तेज करता है।
हड्डियों और दाँतों को मजबूत बनाता है।
रक्तचाप और शुगर नियंत्रण में सहायक।
वजन घटाने और ऊर्जा बढ़ाने में मददगार।
दिल की बीमारियों का जोखिम कम करता है।
त्वचा और बालों के लिए फायदेमंद।
📊 Quick Care Chart for Almond Plant
स्टेज
देखभाल
सुझाव
पौधा लगाना
15×15 फीट दूरी (खेत), 24–30 इंच गमला
हमेशा ग्राफ्टेड पौधा चुनें
पानी देना
2–3 दिन (पहले साल), 5–7 दिन (सर्दी)
ओवरवॉटरिंग से बचें
खाद
हर 2 महीने कम्पोस्ट, साल में 3 बार NPK
पोटाश और बोरॉन आवश्यक
धूप
6–8 घंटे
खुली जगह रखें
फल पाना
3–4 साल (ग्राफ्टेड पौधा)
फूल आने पर स्प्रे ज़रूरी
❓ अक्सर पूछे जाने वाले प्रश्न (FAQ)
Q1: क्या बादाम का पौधा गमले में फल देगा? ✔ हाँ, ग्राफ्टेड पौधा गमले में 3–4 साल में फल देना शुरू कर देता है।
Q2: गमले में बादाम कितने साल तक चल सकता है? ✔ सही देखभाल से 12–15 साल तक।
Q3: क्या बीज से बादाम लगाना ठीक है? ✔ बीज से पौधा उगेगा लेकिन 7–8 साल बाद फल देगा और गुणवत्ता अच्छी नहीं होगी।
Q4: अधिक फल कैसे पाएँ? ✔ पोटाश और बोरॉन युक्त खाद दें और फूल आने पर स्प्रे करें।
Q5: क्या बादाम को भारत में उगाया जा सकता है? ✔ हाँ, हिमाचल, कश्मीर और उत्तर भारत के ठंडे क्षेत्रों में और गमले में घर पर भी।
🎯 निष्कर्ष
ग्राफ्टेड कैलिफ़ोर्निया बादाम का पौधा न केवल पौष्टिक फल देता है बल्कि आपके बगीचे और घर की सुंदरता भी बढ़ाता है। यदि आप इसे सही मिट्टी, धूप, खाद और पानी की देखभाल के साथ लगाते हैं, तो आप 3–4 साल में ही अपने घर के बगीचे या गमले से उच्च गुणवत्ता वाले बादाम प्राप्त कर सकते हैं।
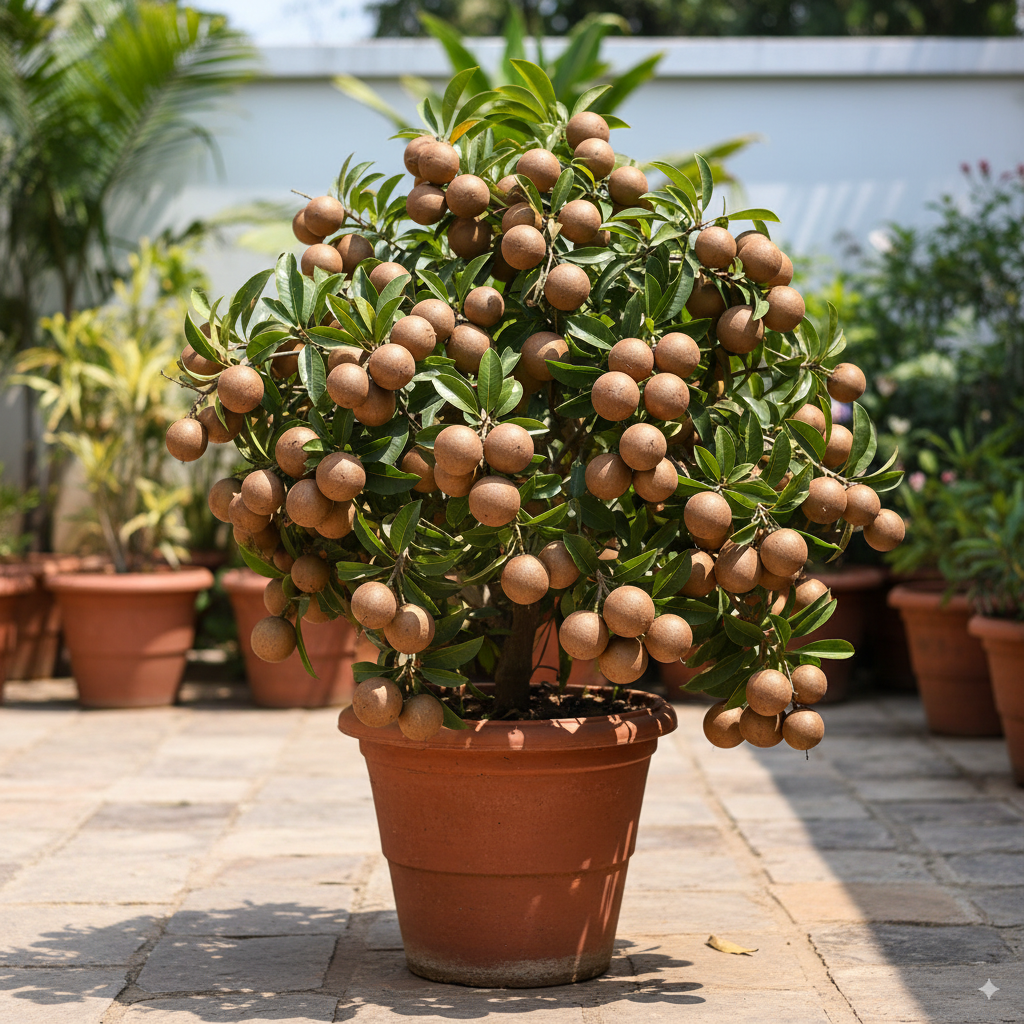
Chiku (also known as Sapota or Sapodilla) is a tropical fruit loved for its sweetness and nutritional benefits. Rich in vitamins A, C, iron, calcium, and dietary fiber, it is considered one of the healthiest fruits for children and adults alike.
While traditionally grown in orchards and farmlands, Chiku can also be successfully cultivated in pots and containers with the right plantation method and care. This makes it possible for urban gardeners and plant lovers to enjoy fresh homegrown Chikus even in balconies and terraces.
Use a pot or drum at least 22–30 inches in diameter and 2–3 feet deep.
Ensure drainage holes at the bottom to prevent waterlogging.
Clay or ceramic pots are ideal as they keep the roots cool, but plastic drums and cement tubs also work well.
✔ Preparing the Soil Mix
Chiku thrives in well-drained sandy-loam soil. Prepare the mix as follows:
40% garden soil
30% river sand (for drainage)
20% organic compost (cow dung or vermicompost)
10% cocopeat or coconut husk powder
Add 2–3 handfuls of neem cake powder to prevent root diseases.
✔ Plantation Method
Fill the pot with the prepared soil mix.
Plant a grafted Chiku sapling (avoid seed-grown plants as they take 7–8 years to fruit).
Water lightly after planting.
Place the pot in a sunny location that receives at least 6–8 hours of sunlight.
💧 Watering Schedule
First Year: Water every 2–3 days.
Summer: Water daily or on alternate days.
Winter: Water once every 5–7 days.
During flowering & fruiting: Keep the soil consistently moist but not waterlogged.
⚠️ Overwatering can cause root rot, especially in pots.
🌿 Fertilization for Fruiting
Balanced nutrition is essential for maximum fruit yield in Chiku.
Time
Fertilizer Requirement
Purpose
Every 2 months
1–2 kg organic compost
Improves soil fertility
March–April
50 g neem cake + 50 g bone meal
Prevents root diseases
July–August
50 g urea + 50 g DAP
Boosts vegetative growth
October–November
100 g potash + micronutrients
Enhances flowering & fruiting
👉 Potassium (Potash) is the most important nutrient for fruit development.
🌞 Sunlight & Climate
Chiku requires 6–8 hours of direct sunlight daily.
Ideal temperature: 20–35°C.
Place pots in open, airy spaces such as terraces, balconies, or backyards.
✂️ Pruning & Maintenance
Trim dry, yellow, or diseased leaves regularly.
Maintain 20–25 healthy green leaves for better photosynthesis.
Light pruning every 6–8 months improves branching and fruit set.
Support the plant with a stick if grown in smaller pots.
🍎 Tips to Maximize Fruiting in Pots
Always use grafted Chiku plants instead of seed-grown.
Use a deep pot (30 inches) to allow root expansion.
Spray boron + potash solution during the flowering stage.
Encourage natural pollinators like honeybees or practice hand pollination.
Perform fruit thinning – remove excess small fruits to allow bigger and sweeter fruits to grow.
Use mulching (dry leaves, straw, or coco husk) to retain soil moisture.
Regular neem oil spray keeps pests away naturally.
🐛 Pest & Disease Management
Problem
Symptoms
Solution
Mealybugs
White cotton-like patches on leaves
Neem oil spray every 15 days
Leaf spot
Brown or black spots on leaves
Spray Copper Oxychloride
Fruit fly
Infests and spoils fruits
Cover fruits with net bags
Root rot
Plant turns yellow and weak
Ensure good drainage, use neem cake
🌟 Health Benefits of Eating Chiku
Improves digestion due to high fiber content.
Rich in Vitamin A, supports good eyesight.
Iron content helps fight anemia.
Natural energy booster due to natural sugars.
Strengthens immunity and supports healthy skin.
Excellent for pregnant women and children.
📊 Quick Care Chart for Chiku in Pots
Stage
Care Requirement
Tips
Plantation
22–30 inch pot, sandy loam soil
Use grafted plants
Watering
2–3 days (young), 5–7 days (winter)
Avoid overwatering
Fertilizer
Compost every 2 months, NPK thrice a year
Focus on Potash
Sunlight
6–8 hours daily
South-facing locations best
Fruiting
Starts in 3–4 years (grafted plants)
Thin fruits for quality yield
❓ Frequently Asked Questions (FAQ)
Q1: Can Chiku grow in pots? ✔ Yes, grafted Chiku plants grow well in pots and start fruiting in 3–4 years.
Q2: How long will a potted Chiku plant live? ✔ With proper care, it can live and produce fruits for 12–15 years.
Q3: How much sunlight does a Chiku plant need? ✔ At least 6–8 hours of direct sunlight daily.
Q4: How to get sweeter fruits? ✔ Apply potash-rich fertilizers and maintain consistent watering.
Q5: Can Chiku be grown from seeds in pots? ✔ Yes, but seed-grown plants take 7–8 years to fruit and may not produce quality fruits.
🎯 Conclusion
Growing Chiku (Sapota) in pots is an excellent way for urban gardeners to enjoy fresh, sweet, and healthy fruits at home. With the right soil preparation, proper watering, sunlight, pruning, and fertilization techniques, you can maximize fruiting and enjoy delicious homegrown Chikus for years.
Whether you have a balcony, terrace, or small backyard, a potted Chiku plant can become a long-term fruiting companion that not only provides nutrition but also enhances the beauty of your home garden.
चीकू जिसे अंग्रेज़ी में Sapota या Sapodilla कहा जाता है, एक स्वादिष्ट और पौष्टिक फल है। यह विटामिन A, C, आयरन और फाइबर से भरपूर होता है। आमतौर पर इसे बगीचों और खेतों में लगाया जाता है, लेकिन सही तकनीक से इसे गमले (Container / Pot) में भी सफलतापूर्वक उगाया जा सकता है।
🪴 चीकू को गमले में लगाने की विधि (Plantation in Pots)
✔ सही गमले का चुनाव
कम से कम 22–30 इंच व्यास का गमला चुनें।
गमले में छेद (Drainage Holes) होना ज़रूरी है।
मिट्टी के बड़े गमले, प्लास्टिक ड्रम या सीमेंट के टब भी अच्छे रहते हैं।
✔ मिट्टी की तैयारी
चीकू के लिए मिट्टी का मिश्रण इस प्रकार होना चाहिए –
40% बगीचे की मिट्टी
30% नदी की बालू / रेतीली मिट्टी
20% गोबर की खाद / वर्मीकम्पोस्ट
10% नारियल की भूसी / कोकोपीट
मुट्ठी भर नीमखली पाउडर मिट्टी में मिलाएँ।
✔ पौधा लगाना
गमले में तैयार मिट्टी भरें।
ग्राफ्टेड पौधा (Grafted Plant) लगाएँ (बीज से लगा पौधा देर से फल देता है)।
पौधे को लगाकर हल्की सिंचाई करें।
गमले को धूप वाली जगह रखें।
💧 पानी देने की विधि (Watering Schedule)
पहले वर्ष: हर 2–3 दिन पर हल्का पानी दें।
गर्मी में: रोज़ या एक दिन छोड़कर पानी दें।
सर्दी में: 5–7 दिन में एक बार।
फूल और फल लगने पर: लगातार नमी बनाए रखें। ⚠️ ध्यान रखें – पानी ज्यादा भरकर न रखें, वरना जड़ों में सड़न हो जाएगी।
🌿 खाद और पोषण (Fertilization for Fruiting)
चीकू में संतुलित खाद और पोषण ज़रूरी है।
समय
खाद की मात्रा
विशेष टिप्स
हर 2 महीने
1–2 किलो गोबर की खाद / वर्मी कम्पोस्ट
मिट्टी के ऊपर डालें
मार्च–अप्रैल
50 ग्राम नीमखली + 50 ग्राम बोन मील
जड़ सड़न और कीट से बचाव
जुलाई–अगस्त
50 ग्राम यूरिया + 50 ग्राम डीएपी
पत्तियों की हरी बढ़वार
अक्टूबर–नवंबर
100 ग्राम पोटाश + माइक्रोन्यूट्रिएंट्स
फल बनने की क्षमता बढ़ेगी
👉 पोटाश (Potash) फल बनने में सबसे महत्वपूर्ण है।
🌞 धूप और तापमान (Sunlight & Climate)
चीकू का पौधा पूरी धूप (6–8 घंटे) चाहता है।
तापमान 20–35°C इसके लिए उपयुक्त है।
गमले को हमेशा खुले और हवादार स्थान पर रखें।
✂️ छँटाई और देखभाल (Pruning & Maintenance)
हर 6 महीने में पौधे की हल्की छँटाई करें।
सूखी और पीली पत्तियाँ हटा दें।
गमले के आसपास खरपतवार न उगने दें।
ज़रूरत पड़ने पर पौधे को सहारा दें।
🍎 गमले में अधिक फल पाने के उपाय (Maximizing Fruiting in Pots)
हमेशा ग्राफ्टेड पौधे लगाएँ।
गमले को कम से कम 30 इंच गहरा रखें।
फूल आने पर बोरॉन और पोटाश का स्प्रे करें।
मधुमक्खियों का आकर्षण या कृत्रिम परागण (Artificial Pollination) करें।
फल पतले करना (Fruit Thinning): बहुत अधिक फल होने पर छोटे फल हटा दें, इससे बचे हुए फल बड़े और मीठे बनते हैं।
नियमित रूप से नीम तेल का छिड़काव करें ताकि कीट न लगें।
🐛 रोग और कीट नियंत्रण (Pests & Diseases)
रोग/कीट
लक्षण
समाधान
मिलीबग (Mealy Bug)
पत्तियों पर सफेद परत
नीम तेल का छिड़काव
लीफ स्पॉट
पत्तियों पर धब्बे
कॉपर ऑक्सीक्लोराइड का छिड़काव
फल मक्खी
फल में छेद करके गूदे को खराब करती है
फल को नेट बैग से ढकें
जड़ सड़न
पौधा पीला और कमजोर
पानी निकासी सही रखें
🌟 चीकू खाने के फायदे (Health Benefits of Sapota)
पाचन शक्ति बढ़ाता है।
विटामिन A से आँखों की रोशनी के लिए अच्छा।
आयरन से खून की कमी दूर करता है।
ऊर्जा और ताजगी प्रदान करता है।
बच्चों और गर्भवती महिलाओं के लिए पौष्टिक फल।
📊 Quick Care Chart for Chiku in Pots
स्टेज
देखभाल
टिप्स
पौधा लगाना
22–30 इंच गमला, रेतीली-दोमट मिट्टी
ग्राफ्टेड पौधा चुनें
पानी देना
हर 2–3 दिन (गर्मी), 5–7 दिन (सर्दी)
ओवरवॉटरिंग से बचें
खाद
हर 2 महीने ऑर्गेनिक खाद, साल में 3 बार NPK
पोटाश पर ध्यान दें
धूप
6–8 घंटे
दक्षिण दिशा की धूप सबसे बेहतर
फल पाना
फूल आने पर बोरॉन + पोटाश का स्प्रे
फल पतले करें
❓ अक्सर पूछे जाने वाले प्रश्न (FAQ)
Q1: क्या चीकू गमले में फल देगा? ✔ हाँ, अगर आप ग्राफ्टेड पौधा लगाएँगे और सही देखभाल करेंगे तो 3–4 साल में फल मिलने लगेंगे।
Q2: गमले में चीकू कितने साल तक चल सकता है? ✔ सही मिट्टी और देखभाल से 12–15 साल तक अच्छे फल मिल सकते हैं।
Q3: गमले में चीकू को कितनी धूप चाहिए? ✔ रोज़ाना कम से कम 6–8 घंटे की सीधी धूप।
Q4: अधिक मीठे फल कैसे पाएँ? ✔ पोटाश युक्त खाद दें और समय पर सिंचाई करें।
Q5: क्या बीज से चीकू उगा सकते हैं? ✔ हाँ, लेकिन बीज से पौधा 7–8 साल बाद फल देता है और फल की गुणवत्ता अच्छी नहीं होती।
🎯 निष्कर्ष (Conclusion)
चीकू का पौधा न सिर्फ स्वादिष्ट फल देता है बल्कि घर की सुंदरता भी बढ़ाता है। अगर आप इसे गमले में सही तकनीक से लगाते हैं, पर्याप्त धूप, पानी और खाद देते हैं, तो आप सालों तक मीठे और पौष्टिक चीकू का आनंद घर बैठे ले सकते हैं।
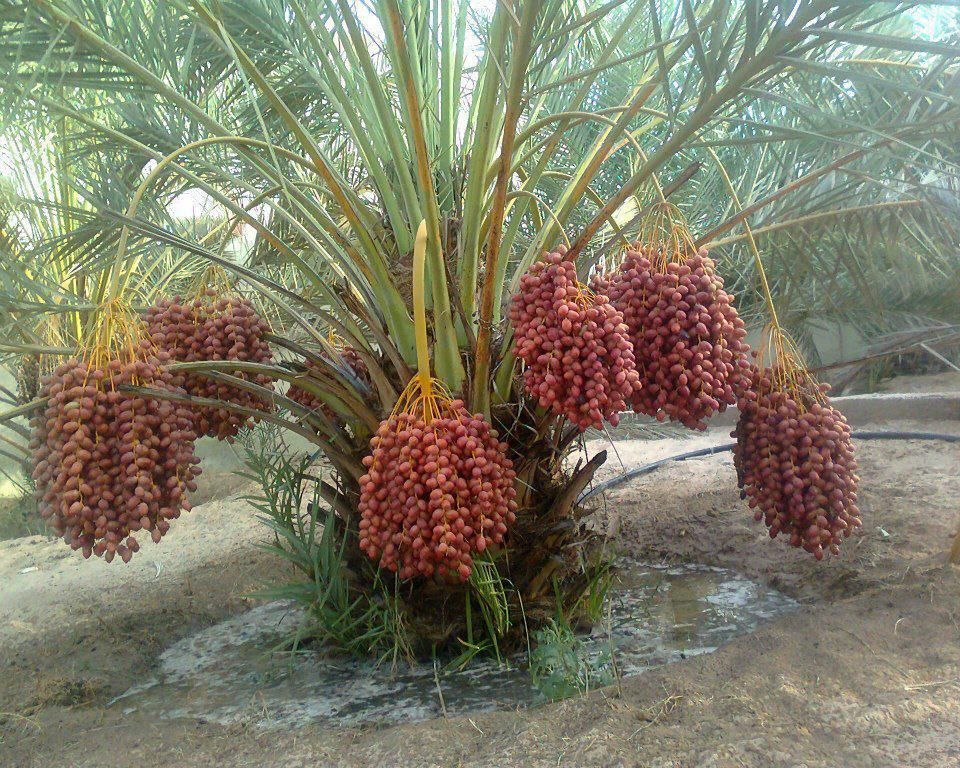
The Date Palm (Khajoor Plant) is one of the oldest cultivated fruit trees in the world. It is highly valued not only for its delicious and nutritious fruits but also for its cultural, medicinal, and economic importance. Many gardeners and farmers wish to grow date palms in their home garden or pots, but often face challenges in getting fruits. The main reason is lack of knowledge about male and female plants, proper pollination techniques, and seasonal care.
🌱 Plantation, Care & Maximizing Fruiting in Date Palm (Khajoor)
🪴 1. How to Do Plantation of Date Palm
✅ Choosing the Right Variety
Select tissue-cultured plants or offshoots (suckers) from healthy female trees.
Popular fruiting varieties: Barhee, Medjool, Halawy, Khalas, Deglet Noor.
✅ Plantation Site
Date palms need hot, dry climate and well-drained sandy soil.
Avoid waterlogged soils – root rot is common in excess moisture.
✅ Planting Time
Best season: February–March or August–September.
Avoid extreme summer and winter for new plantation.
✅ Plantation Method
Dig a pit: 3 ft × 3 ft × 3 ft.
Mix soil with:
15–20 kg cow dung manure
500 g Neem cake
200 g Super phosphate
Place the sapling in the center, cover with soil, and water lightly.
✅ Spacing
For orchard: 8–10 meters apart (about 100–120 plants/acre).
For garden/pots: Use a large drum or 24–30 inch pot with drainage.
🌿 2. How to Take Care of Date Palm
🌞 Sunlight
Requires 6–8 hours of direct sunlight daily.
💧 Watering
Young plants: Water every 3–4 days.
Mature plants: Deep watering once every 7–10 days.
Avoid overwatering during fruit ripening.
🌱 Manuring & Fertilization
Organic: Cow dung, vermicompost, neem cake every 2–3 months.
Chemical:
Urea (N) → 300 g per plant (split dose).
SSP (P) → 200 g per plant.
MOP (K) → 400 g per plant.
Add Micronutrients (Zinc, Boron, Iron) via foliar spray.
✂️ Pruning
Remove old, dry fronds regularly.
Clean the trunk for air circulation.
🐛 Pest & Disease Control
Protect from fruit borers, mites, scale insects.
Use neem oil spray or light pesticides if needed.
Cover fruits with net bags to protect from birds.
🍎 3. Tips to Maximize Fruiting in Date Palm
Male-Female Balance:
Keep 1 male for 15–20 female plants.
Use Artificial Pollination to ensure 70–80% fruit set.
Timely Pollination:
Best within 2–3 days of female flowers opening.
Morning hours are most effective.
Fruit Thinning:
Remove extra fruits from clusters.
Helps remaining fruits grow larger and sweeter.
Fertilizer Boost During Fruiting:
Apply Potash (K) before and after pollination for better fruit size.
Apply Magnesium Sulphate to increase sweetness.
Irrigation Management:
Provide regular watering during flowering & fruit set.
Reduce water when fruits are ripening (to avoid cracking).
Mulching:
Use dry leaves or straw mulch around the base.
Conserves moisture and regulates soil temperature.
Harvest at Right Time:
Dates are ready 5–6 months after pollination.
Harvest when fully colored and soft for maximum sweetness.
📊 Quick Care & Fruiting Tips Table
Factor
Recommendation
Benefit
Plantation Time
Feb–Mar / Aug–Sep
Healthy establishment
Spacing
8–10 m (field) / 24–30 inch pot
Good root growth
Sunlight
6–8 hrs/day
Strong fruiting
Watering
7–10 days (mature)
Avoid root rot
Fertilizer
NPK + Organic + Micronutrients
High yield
Pollination
Artificial within 2–3 days of bloom
2–3× more fruits
Fruit Thinning
Remove excess fruits
Bigger, sweeter dates
Protection
Nets + Neem oil
Save from birds & pests
✅ With proper plantation method, balanced care, and scientific pollination techniques, your Date Palm can yield 20–25 kg of fruits per plant annually in garden conditions, and 100–150 kg per tree in orchards.
🌱 Potted Date Palm (Khajoor) Care Guide – Step by Step
🪴 1. Choosing the Right Pot & Soil
Pot Size: Start with a 24–30 inch diameter pot or drum with drainage holes.
Material: Use clay/ceramic pots for natural cooling, or plastic drums for durability.
Soil Mix:
50% Sandy Soil (for drainage)
30% Organic Compost (cow dung/vermicompost)
20% Garden Soil + Cocopeat
👉 Add 2–3 handfuls of Neem Cake Powder to prevent soil pests.
🌿 2. Plantation in Pots
Fill pot with the prepared soil mix.
Place a tissue-cultured sapling or sucker (offshoot) in the center.
Water lightly after planting.
Keep the pot in a sunny location (balcony/terrace with 6–8 hrs sunlight).
💧 3. Watering Schedule
First Year: Every 3–4 days (light watering).
Mature Plant: Once every 7–10 days (deep watering).
During Fruiting: Maintain consistent moisture.
Avoid: Overwatering → causes root rot in pots.
🌱 4. Fertilization in Pots
Every 2 months: Add 1–2 kg organic compost.
Quarterly (3 months):
50 g Urea (Nitrogen)
50 g Super Phosphate
100 g Muriate of Potash (MOP)
Micronutrients: Foliar spray of Zinc + Boron + Iron once in 2 months.
✂️ 5. Pruning & Cleaning
Remove old, dry, or yellowing leaves regularly.
Keep only 20–25 healthy fronds for better growth.
Clean trunk for neat appearance and airflow.
🌸 6. Pollination in Pots
Keep at least 1 male plant if you have multiple pots.
If space is limited: Borrow pollen from a nearby male tree.
Use Artificial Pollination (brush or hand method) for fruit set.
🍎 7. Fruiting & Yield in Pots
Fruiting starts after 4–5 years in potted plants.
Each mature potted palm can yield 8–15 kg dates annually.
Thin excess fruit clusters for bigger, sweeter dates.
🐛 8. Pest & Disease Care in Pots
Mealybugs / Scale Insects: Use neem oil spray every 20 days.
Fruit Borers: Cover bunches with fruit net bags.
Root Rot: Always ensure proper drainage.
🌟 9. Tips to Maximize Fruiting in Pots
Keep the pot in full sunlight (south-facing terrace/balcony).
Use Potash-rich fertilizer during flowering and fruit set.
Hand pollinate within 2–3 days of female flowers blooming.
Mulch the pot surface with dry leaves or straw to maintain soil moisture.
Re-pot every 3–4 years into a slightly larger pot with fresh soil mix.
📊 Quick Potted Date Palm Guide
Stage
Care Needed
Tips
Plantation
24–30 inch pot, sandy soil mix
Add neem cake for pest prevention
Watering
3–4 days (young), 7–10 days (mature)
Avoid waterlogging
Fertilizer
Organic compost every 2 months, NPK quarterly
Add Potash during fruiting
Sunlight
6–8 hrs daily
South-facing open space best
Pollination
Hand pollination essential
Use male pollen within 2–3 days
Fruiting
8–15 kg/year in pots
Thin clusters for quality fruits
✅ With this step-by-step container care, your readers can grow healthy Date Palms in pots or terraces and enjoy sweet homegrown dates.
🌱 Male and Female Date Palm Identification
Feature
Male Plant 🌸
Female Plant 🌼
Flower Color & Shape
Small, dense, cream/white clusters
Large, loose, yellowish-white clusters
Fragrance
Strong fragrance
Mild or no fragrance
Inflorescence
Compact, short
Long, spreading
Leaves
Slightly stiff, pointed
Broader, softer
Fruit
Never produces fruits
Produces fruits after pollination
Identification Time
3–5 years (after flowering)
3–5 years (after flowering & fruiting)
Use in Cultivation
Used only for pollen
Used for main fruit production
👉 Tip: Maintain a ratio of 5–6 male plants for every 100 female plants for natural pollination.
✋ Artificial Pollination (Step-by-Step Guide)
Step 1: Collecting Pollen from Male Plant
Cut flower clusters (spathes) from the male plant.
Dry them in shade for 1–2 days.
Rub gently to collect pollen powder.
Store in a cool and dry place for up to 2–3 weeks.
Step 2: Identifying Female Flowers
Female flowers appear in large, loose clusters.
They have a visible ovary.
Best pollination time is within 2–3 days of flowering.
Step 3: Hand Pollination
Use a small brush, cotton, or hand to sprinkle pollen on female flowers.
You can also tie a small male flower cluster directly onto a female inflorescence.
Step 4: Aftercare
Within 7–10 days small fruit sets will appear.
Provide light irrigation and potash-rich fertilizer.
Thin out extra fruits for better quality and size.
📊 Quick Pollination Table
Step
Activity
Time
1. Pollen Collection
Collect pollen from male flowers
Feb–March
2. Female Flower Stage
Identify female inflorescence
2–3 days after blooming
3. Pollination
Apply pollen with brush/cotton
Morning time
4. Fruit Set
Fruits appear
7–10 days later
👉 Benefits of Artificial Pollination
Increases fruit yield by 2–3 times.
Produces bigger, sweeter fruits.
Ensures 70–80% flowers convert into fruits (compared to 30–40% in natural pollination).
📅 Annual Care Calendar for Date Palm
🌱 January – February (Winter End)
Tasks: Pruning of old leaves, cleaning.
Fertilizer: Apply 2–3 kg of cow dung manure per plant.
Watering: Very light irrigation.
Note: Plant remains in dormant stage.
🌸 March – April (Flowering Season)
Tasks: Identify male & female flowers, perform pollination.
Fertilizer: Apply DAP or organic compost (1 kg/plant).
Watering: 1–2 times per week.
Note: Critical for fruit setting.
🌞 May – June (Fruit Setting Stage)
Tasks: Fruit thinning for bigger fruits.
Fertilizer: Potash and phosphorus-rich fertilizers.
Watering: Every 4–5 days.
Note: Protect from hot winds using shade nets.
🌴 July – August (Monsoon)
Tasks: Weed removal, root growth management.
Fertilizer: Apply vermicompost (2–3 kg/plant) and micronutrients (Zinc, Boron).
Watering: Ensure good drainage during rains.
🍂 September – October (Fruit Ripening)
Tasks: Protect fruits from birds and insects using nets.
Fertilizer: Apply neem cake or organic manure.
Watering: Light irrigation (avoid overwatering).
Note: Critical fruit maturity stage.
🍎 November – December (Harvesting & Post-Harvest Care)
Tasks: Harvest ripe dates, prune old leaves.
Fertilizer: Apply 2–3 kg cow dung manure after harvest.
Watering: Very light irrigation.
Note: Plant enters dormancy again.
📊 Quick Annual Chart
Month
Main Task
Fertilizer
Irrigation
Jan–Feb
Pruning, cleaning
Cow dung manure
Very light
Mar–Apr
Flowering, Pollination
DAP, organic compost
1–2 times/week
May–Jun
Fruit setting, thinning
Potash, phosphorus
Every 4–5 days
Jul–Aug
Monsoon, root growth
Vermicompost, micronutrients
Drain excess water
Sep–Oct
Fruit ripening
Neem cake, organic manure
Light irrigation
Nov–Dec
Harvesting, pruning
Cow dung manure
Very light
🌟 Bonus Tips for Maximum Yield
Maintain Male-Female Balance: 5–6 male plants per 100 female plants.
Artificial Pollination: Boosts yield by 2–3 times.
Balanced Fertilization: Use organic + chemical fertilizers together.
Avoid Overwatering: Prevents root rot and fruit cracking.
Timely Harvesting: Improves sweetness and fruit quality.
✅ With this step-by-step guide, artificial pollination method, and annual care calendar, you can grow healthy date palm plants in garden or pots and enjoy maximum fruit production.
✅ English FAQs
Q1. How to identify male and female date palm plants? 👉 Male plants have small, dense, fragrant white/cream flowers and never produce fruits, while female plants have large, loose, yellowish-white flowers and bear fruits after pollination.
Q2. How many years does it take for a date palm to bear fruits? 👉 A date palm takes about 4–6 years to start flowering and fruiting after plantation.
Q3. Can date palm be grown in pots? 👉 Yes, dwarf varieties of date palm can be grown in large pots, but regular watering, pruning, and pollination are essential.
Q4. Do date palms need both male and female plants? 👉 Yes, only female plants bear fruits, but they require pollen from male plants for fruiting.
Q5. How many male plants are needed for pollination? 👉 About 1 male plant is sufficient for every 15–20 female plants when artificial pollination is done.
Q6. What is the best fertilizer for date palm? 👉 A combination of organic compost, cow dung manure, and potash-rich fertilizers ensures healthy growth and high yield.
Q7. When is the best time for artificial pollination? 👉 The best time is 2–3 days after the female flowers bloom, preferably in the morning hours.
Q8. How long do date palm trees live? 👉 Date palms can live for 100 years or more under proper care, though commercial fruiting is best between 15–40 years.
Q9. Can date palms survive in Indian climate? 👉 Yes, date palms grow well in hot, dry, and arid regions like Rajasthan, Gujarat, and parts of South India.
Q10. How to increase fruit size and sweetness in date palms? 👉 Regular fertilization, proper thinning of fruits, and timely irrigation help improve fruit size, sweetness, and quality.
फसल के समय NPK (Nitrogen, Phosphorus, Potash) संतुलित मात्रा दें।
फल बनने से पहले पोटाश और फॉस्फेट बढ़ाएँ।
माइक्रोन्यूट्रिएंट (जिंक, आयरन) भी दें।
✂️ छंटाई और देखभाल
सूखी पत्तियाँ समय-समय पर हटा दें।
फूल और फल आने से पहले पौधे को साफ रखें।
गमले वाले पौधे को छोटे आकार में रखने के लिए छंटाई करें।
🐛 रोग और कीट नियंत्रण
रेड पाम वीविल: तने को खोखला करता है → नीम तेल का छिड़काव करें।
लीफ स्पॉट: पत्तों पर धब्बे → कॉपर ऑक्सीक्लोराइड का छिड़काव।
स्केल इंसेक्ट: पत्तों का रस चूसते हैं → कीटनाशक साबुन का प्रयोग करें।
🍎 अधिक फल पाने के उपाय
नर और मादा पौधे दोनों लगाएँ (परागण आवश्यक)।
प्रति 100 मादा पौधों पर 5–6 नर पौधे रखें।
फूल आने पर कृत्रिम परागण (artificial pollination) करें।
धूप और गर्मी ज्यादा मिले।
गमले में पौधे को खुले स्थान पर रखें।
फसल के समय अतिरिक्त पोटाश दें।
🌸 खजूर के फायदे और उपयोग
ऊर्जा और ग्लूकोज से भरपूर।
पाचन में सहायक।
हड्डियों को मजबूत करता है (कैल्शियम से भरपूर)।
खून की कमी (एनीमिया) दूर करता है।
रोग प्रतिरोधक क्षमता बढ़ाता है।
आयुर्वेद में खजूर को बलवर्धक और शुक्राणु वृद्धि हेतु माना गया है।
🪔 धार्मिक और सांस्कृतिक महत्व
इस्लामिक परंपरा में रमजान के समय खजूर खाने का विशेष महत्व।
बाइबल और पुराणों में भी खजूर का उल्लेख।
वास्तु अनुसार घर में खजूर लगाने से समृद्धि और सौभाग्य आता है।
📊 Quick Care Table
पहलू
जानकारी
पौधे का नाम
खजूर (Phoenix dactylifera)
गमला
24–30 इंच
मिट्टी
बलुई दोमट + खाद
धूप
10–12 घंटे
पानी
गर्मी – हर 5–7 दिन, सर्दी – 15–20 दिन
खाद
हर 2–3 महीने
परागण
नर और मादा पौधों से
औषधीय लाभ
पाचन, हड्डियों, रोग प्रतिरोधक क्षमता
आयु
50–70 साल फल देने वाला वृक्ष
खजूर का पौधा (Date Palm – Phoenix dactylifera)द्विलिंगी (dioecious) होता है, यानी नर (Male) और मादा (Female) पौधे अलग-अलग होते हैं। फल केवल मादा पौधे पर आते हैं और नर पौधे पर केवल पराग (pollen) होता है।
👉 लेकिन सबसे बड़ी समस्या यह है कि पौधे की नर और मादा की पहचान तब तक स्पष्ट नहीं होती जब तक कि पौधा फूल न दे। यह सामान्यतः 3–5 साल बाद शुरू होता है।
🌿 नर और मादा पौधे की पहचान
1. फूलों से पहचान
नर पौधा (Male Plant)
फूल: छोटे, सफेद या क्रीम रंग के।
गुच्छे (spikes) छोटे और सघन होते हैं।
इनमें केवल परागकण (pollen) होता है।
इन फूलों से तेज़ सुगंध आती है।
मादा पौधा (Female Plant)
फूल: पीले-सफेद, बड़े और थोड़े ढीले गुच्छों में।
फूलों में अंडाशय (ovary) स्पष्ट दिखता है।
यही फूल बाद में फल (Dates) में बदलते हैं।
2. फल से पहचान
नर पौधा कभी भी फल नहीं देगा।
मादा पौधे पर परागण होने के बाद अंडाकार हरे फल बनते हैं जो पकने पर भूरे या लाल-भूरे हो जाते हैं।
3. वैज्ञानिक तरीकों से पहचान
DNA Marker Testing या Molecular sexing द्वारा 1–2 साल के पौधों की भी पहचान की जा सकती है।
कुछ नर्सरियों में पहले से लैब-टेस्टेड मादा पौधे बेचे जाते हैं।
4. परागण (Pollination) की आवश्यकता
प्राकृतिक वातावरण में कीट और हवा से परागण होता है, लेकिन अधिक उत्पादन के लिए किसान कृत्रिम परागण (hand pollination) करते हैं।
इसके लिए नर पौधे से पराग लेकर मादा पौधे के फूलों पर छिड़कते हैं।
🌴 व्यावहारिक सुझाव
यदि आप 10–12 मादा पौधे लगाते हैं तो 1 नर पौधा पर्याप्त होता है।
छोटे पैमाने पर गमले या बगीचे में लगाने के लिए कम से कम 1 नर + 3 मादा पौधे रखें।
🌴 नर और मादा खजूर पौधों (Date Palm) की पहचान
विशेषता
नर पौधा (Male Plant)
मादा पौधा (Female Plant)
🌸 फूलों का रंग व आकार
सफेद/क्रीम रंग, छोटे और घने (क्लस्टर में)
पीले-सफेद, बड़े और ढीले गुच्छों में
🌼 फूलों की सुगंध
तेज़ सुगंध आती है
हल्की या बहुत कम सुगंध
🌱 गुच्छे (Inflorescence)
छोटे और बहुत सघन
लंबे और फैले हुए
🍃 पत्तियों का रूप
पत्तियों में हल्की कठोरता और अधिक नुकीलापन
पत्तियाँ थोड़ी चौड़ी और नरम दिखती हैं
🍎 फल लगना
कभी फल नहीं लगते
परागण के बाद खजूर के फल (Dates) बनते हैं
🕰️ पहचान का समय
3–5 साल में फूल आने पर पता चलता है
3–5 साल बाद फूल और फल से पहचान
👨🌾 खेती में महत्व
केवल परागण के लिए उपयोगी
मुख्य फल उत्पादन (Dates) देती है
🌞 अतिरिक्त टिप्स
परागण के लिए अनुपात:
हर 100 मादा पौधों पर कम से कम 5–6 नर पौधे रखें।
गमले/छोटे बगीचे में:
3 मादा + 1 नर पौधा पर्याप्त होगा।
Artificial Pollination:
नर फूलों से पराग एकत्रित करके मादा फूलों पर छिड़कें → इससे उत्पादन 2–3 गुना बढ़ जाता है।
🌸 खजूर के पौधों में कृत्रिम परागण (Artificial Pollination) – सम्पूर्ण गाइड
🪴 Step 1: नर पौधे से पराग (Pollen) एकत्र करना
जब नर पौधा फूल देता है, उसके गुच्छों (male spathes) को सावधानी से काट लें।
इन गुच्छों में छोटे-छोटे सफेद/क्रीम रंग के फूल होते हैं।
इन्हें छायादार जगह पर सुखा लें।
सुखाने के बाद फूलों को हल्के हाथ से मसलकर पाउडर जैसे परागकण (pollen) अलग करें।
👉 नोट: पराग 2–3 हफ्ते तक सुरक्षित रहता है यदि सूखी और ठंडी जगह पर रखा जाए।
🌱 Step 2: मादा पौधे के फूल पहचानना
मादा पौधे के फूल बड़े और ढीले गुच्छों में निकलते हैं।
फूलों में अंडाशय (ovary) साफ दिखाई देता है।
फूल खिलने के 2–3 दिन के भीतर परागण करना सबसे प्रभावी होता है।
✋ Step 3: परागण करना (Hand Pollination)
नर पौधे से एकत्रित परागकण लें।
मादा फूलों के गुच्छों को हल्का खोलें।
ब्रश, रूई या हाथ से सीधे मादा फूलों पर परागकण छिड़कें।
चाहें तो नर पौधे के छोटे फूलों का गुच्छा सीधे मादा फूल के बीच बाँध सकते हैं।
💧 Step 4: देखभाल के बाद
परागण के 7–10 दिन बाद फल बनने के संकेत दिखने लगते हैं।
इस समय पौधे को हल्की सिंचाई और पोटाशयुक्त खाद दें।
अनावश्यक या अधिक फल लगे गुच्छों को पतला (thinning) कर दें → इससे बचे हुए फल बड़े और मीठे होंगे।
📊 Quick Pollination Guide Table
स्टेप
क्रिया
समय
1. पराग एकत्र करना
नर पौधे के फूल काटकर पराग निकालना
फूल आने पर (फरवरी–मार्च)
2. मादा फूल पहचानना
बड़े, ढीले, पीले-सफेद फूल
फूल खिलने के 2–3 दिन बाद
3. परागण करना
ब्रश/रूई से मादा फूलों पर पराग डालना
सुबह के समय
4. फल बनना
परागण के बाद 7–10 दिन में प्रारंभ
फल पकने तक 5–6 महीने
🌟 कृत्रिम परागण के फायदे
फल का आकार और मिठास बढ़ती है।
उत्पादन 2–3 गुना तक बढ़ जाता है।
फल अधिक समान और गुणवत्ता वाले होते हैं।
समय पर परागण करने से 70–80% तक फूल फल में बदल जाते हैं, जबकि प्राकृतिक परागण में केवल 30–40%।
📅 खजूर (Date Palm) का सालभर का देखभाल कैलेंडर
🌱 जनवरी – फरवरी (सर्दियों का अंत)
काम:
पुराने सूखे पत्ते हटाएँ।
पौधे की हल्की छंटाई करें।
खाद:
गोबर की खाद (2–3 किलो प्रति पौधा) डालें।
पानी:
यदि ठंड अधिक हो तो पानी कम दें।
नोट: पौधा इस समय आराम की अवस्था (Dormant Stage) में रहता है।
🌸 मार्च – अप्रैल (फूल आने की शुरुआत)
काम:
नर और मादा फूलों की पहचान करें।
कृत्रिम परागण (Artificial Pollination) करें।
खाद:
डीएपी या जैविक खाद (1 किलो प्रति पौधा) डालें।
पानी:
सप्ताह में 1–2 बार हल्की सिंचाई करें।
नोट: यही समय फल बनने की शुरुआत का है।
🌞 मई – जून (गर्मी और फल सेट होना)
काम:
परागण के 7–10 दिन बाद फल सेट हो जाएंगे।
छोटे फल पतले (Thinning) करें ताकि बाकी फल बड़े हों।
खाद:
पोटाश और फॉस्फोरस वाली खाद डालें।
पानी:
हर 4–5 दिन में नियमित पानी दें।
नोट: गर्मी में पौधे को छायादार नेट (Shade Net) से बचाना फायदेमंद है।
🌴 जुलाई – अगस्त (मानसून का समय)
काम:
पौधे के चारों ओर खरपतवार हटाएँ।
नई जड़ों की वृद्धि तेज होती है।
खाद:
वर्मी कम्पोस्ट (2–3 किलो प्रति पौधा)।
माइक्रोन्यूट्रिएंट्स (जिंक, बोरॉन) स्प्रे करें।
पानी:
बारिश हो तो अतिरिक्त पानी निकालने की व्यवस्था करें।
🍂 सितम्बर – अक्टूबर (फल पकना)
काम:
फल तोड़ने की तैयारी करें।
फलों को पक्षियों और कीटों से बचाने के लिए जाल (Net) लगाएँ।
खाद:
फल पकने से पहले 1 किलो नीमखली या जैविक खाद डालें।
पानी:
हल्की सिंचाई करें, अधिक पानी से फल फट सकते हैं।
नोट: फसल का यह सबसे महत्वपूर्ण समय है।
🍎 नवम्बर – दिसम्बर (फल तुड़ाई और पौधे की तैयारी)
काम:
पके हुए खजूर के फल तोड़ें और सुखाएँ।
पौधे की हल्की छंटाई करें।
खाद:
फसल के बाद पौधे को 2–3 किलो गोबर की खाद दें।
पानी:
ठंड के कारण पानी कम दें।
नोट: पौधा धीरे-धीरे आराम की अवस्था (Dormancy) में चला जाता है।
📊 Quick Annual Care Chart
महीना
मुख्य कार्य
खाद
सिंचाई
जनवरी–फरवरी
छंटाई, सफाई
गोबर की खाद
कम
मार्च–अप्रैल
फूल, परागण
डीएपी, जैविक खाद
1–2 बार/सप्ताह
मई–जून
फल सेट, थिनिंग
पोटाश, फॉस्फोरस
4–5 दिन में
जुलाई–अगस्त
मानसून, जड़ वृद्धि
वर्मी कम्पोस्ट, माइक्रो न्यूट्रिएंट्स
जरूरत अनुसार
सितम्बर–अक्टूबर
फल पकना
नीमखली
हल्की
नवम्बर–दिसम्बर
तुड़ाई, छंटाई
गोबर खाद
कम
🌟 बोनस टिप्स
नर और मादा पौधों का संतुलन – 100 मादा पौधों पर 5–6 नर पौधे ज़रूरी।
Artificial Pollination – उत्पादन को 2–3 गुना बढ़ा देता है।
खाद – जैविक + रासायनिक खाद का संतुलित उपयोग करें।
सिंचाई – अधिक पानी से जड़ों में सड़न और फलों में फटना हो सकता है।
फल तोड़ाई – पूरी तरह पकने पर ही करें, इससे स्वाद और मिठास बढ़ती है।
❓ FAQs
Q1. क्या खजूर का पौधा गमले में फल देगा? 👉 हाँ, dwarf variety गमले में फल देती है लेकिन बड़े पैमाने पर बगीचे में बेहतर।
Q2. खजूर के पेड़ को फल आने में कितना समय लगता है? 👉 5–7 साल में फल देना शुरू करता है।
Q3. क्या भारत में खजूर की खेती लाभदायक है? 👉 हाँ, राजस्थान, गुजरात और पंजाब में बड़े पैमाने पर सफल।
Q4. क्या एक पौधे से ही फल मिलेगा? 👉 नहीं, नर और मादा दोनों पौधे चाहिए।
Q5. खजूर को सबसे ज्यादा फायदा किस चीज़ से मिलता है? 👉 गर्म जलवायु, पर्याप्त धूप और उचित परागण से।