कैलिफ़ोर्निया बादाम (California Almond) दुनिया का सबसे प्रसिद्ध और महँगा ड्राई फ्रूट है। बादाम न केवल स्वादिष्ट होता है बल्कि इसमें मौजूद प्रोटीन, कैल्शियम, विटामिन E और फाइबर इसे स्वास्थ्य के लिए बेहद लाभकारी बनाते हैं।
भारत में अब ग्राफ्टेड कैलिफ़ोर्निया बादाम पौधे आसानी से उपलब्ध हैं, जिन्हें सही विधि से लगाकर आप अपने बगीचे या गमले में भी बादाम के पेड़ उगा सकते हैं और अच्छी पैदावार पा सकते हैं।
हमेशा ग्राफ्टेड पौधा लें, बीज से उगाया पौधा देर से और कम फल देता है।
नर्सरी से 1–2 फीट ऊँचा स्वस्थ पौधा खरीदें।
✔ गमले / खेत का चुनाव
खेत में लगाने के लिए 15×15 फीट दूरी पर पौधे लगाएँ।
गमले में लगाने के लिए कम से कम 24–30 इंच चौड़ा और 30 इंच गहरा गमला चुनें।
गमले में जल निकासी के छेद होना आवश्यक है।
✔ मिट्टी की तैयारी
बादाम के लिए दोमट या रेतीली मिट्टी सबसे अच्छी रहती है।
मिट्टी का मिश्रण:
40% बगीचे की मिट्टी
30% नदी की बालू
20% गोबर की खाद / वर्मी कम्पोस्ट
10% कोकोपीट या पत्तों की खाद
100 ग्राम नीमखली पाउडर मिलाएँ
✔ पौधा रोपण (Plantation)
गड्ढा (2×2×2 फीट) खोदें।
उसमें मिट्टी का मिश्रण भरें।
ग्राफ्टेड पौधा लगाकर हल्की सिंचाई करें।
पौधे को धूप वाली जगह पर रखें।
💧 सिंचाई (Watering)
पहले वर्ष: हर 2–3 दिन पर हल्का पानी दें।
गर्मी में: रोज़ाना या एक दिन छोड़कर पानी दें।
सर्दी में: 5–7 दिन में एक बार।
फल बनने पर: मिट्टी में नमी बनाए रखें। ⚠️ ओवरवॉटरिंग से जड़ों में सड़न हो सकती है।
🌿 खाद और पोषण (Fertilization)
समय
खाद की मात्रा
लाभ
हर 2 महीने
1–2 किलो वर्मी कम्पोस्ट / गोबर की खाद
मिट्टी उपजाऊ बनाए
मार्च–अप्रैल
50 ग्राम बोन मील + नीमखली
जड़ों की मजबूती
जुलाई–अगस्त
50 ग्राम यूरिया + 50 ग्राम डीएपी
पत्तियों की बढ़वार
अक्टूबर–नवंबर
100 ग्राम पोटाश + माइक्रोन्यूट्रिएंट्स
फूल और फल बनने में मदद
👉 बादाम में पोटाश और बोरॉन सबसे महत्वपूर्ण पोषक तत्व हैं।
🌞 धूप और तापमान
बादाम का पौधा 6–8 घंटे सीधी धूप चाहता है।
तापमान 15–30°C उपयुक्त है।
ठंडे और शुष्क क्षेत्रों में पैदावार अच्छी मिलती है।
✂️ छँटाई और देखभाल (Pruning & Maintenance)
हर 6 महीने में हल्की छँटाई करें।
सूखी और पीली पत्तियाँ हटा दें।
फल आने से पहले अतिरिक्त शाखाएँ काटें।
3 साल बाद पौधे को आकार दें ताकि हवा और धूप सही तरह से अंदर तक पहुँचे।
🌸 परागण (Pollination)
बादाम के पेड़ में नर और मादा फूल अलग-अलग होते हैं।
मधुमक्खियों द्वारा परागण सबसे अच्छा होता है।
छोटे बगीचों में कृत्रिम परागण (Artificial Pollination) किया जा सकता है।
🍎 अधिक फल पाने के उपाय (Tips for Maximizing Fruiting)
केवल ग्राफ्टेड पौधा लगाएँ।
गमले में लगाने पर हर 3 साल में री-पॉटिंग करें।
फूल आने पर बोरॉन और पोटाश का स्प्रे करें।
समय-समय पर नीम तेल का छिड़काव करें।
फूल गिरने से रोकने के लिए पत्तों पर माइक्रोन्यूट्रिएंट स्प्रे करें।
फल पतले करें (Fruit Thinning) ताकि बड़े और उच्च गुणवत्ता वाले बादाम मिलें।
🐛 रोग और कीट नियंत्रण
रोग/कीट
लक्षण
समाधान
मिलीबग
पत्तियों पर सफेद परत
नीम तेल का छिड़काव
एफिड्स
नई पत्तियों का मुड़ना
साबुन पानी का स्प्रे
लीफ स्पॉट
पत्तियों पर काले धब्बे
कॉपर ऑक्सीक्लोराइड का छिड़काव
जड़ सड़न
पौधा पीला और कमजोर
जल निकासी सही रखें
🌟 बादाम खाने के फायदे (Health Benefits of Almonds)
मस्तिष्क को तेज करता है।
हड्डियों और दाँतों को मजबूत बनाता है।
रक्तचाप और शुगर नियंत्रण में सहायक।
वजन घटाने और ऊर्जा बढ़ाने में मददगार।
दिल की बीमारियों का जोखिम कम करता है।
त्वचा और बालों के लिए फायदेमंद।
📊 Quick Care Chart for Almond Plant
स्टेज
देखभाल
सुझाव
पौधा लगाना
15×15 फीट दूरी (खेत), 24–30 इंच गमला
हमेशा ग्राफ्टेड पौधा चुनें
पानी देना
2–3 दिन (पहले साल), 5–7 दिन (सर्दी)
ओवरवॉटरिंग से बचें
खाद
हर 2 महीने कम्पोस्ट, साल में 3 बार NPK
पोटाश और बोरॉन आवश्यक
धूप
6–8 घंटे
खुली जगह रखें
फल पाना
3–4 साल (ग्राफ्टेड पौधा)
फूल आने पर स्प्रे ज़रूरी
❓ अक्सर पूछे जाने वाले प्रश्न (FAQ)
Q1: क्या बादाम का पौधा गमले में फल देगा? ✔ हाँ, ग्राफ्टेड पौधा गमले में 3–4 साल में फल देना शुरू कर देता है।
Q2: गमले में बादाम कितने साल तक चल सकता है? ✔ सही देखभाल से 12–15 साल तक।
Q3: क्या बीज से बादाम लगाना ठीक है? ✔ बीज से पौधा उगेगा लेकिन 7–8 साल बाद फल देगा और गुणवत्ता अच्छी नहीं होगी।
Q4: अधिक फल कैसे पाएँ? ✔ पोटाश और बोरॉन युक्त खाद दें और फूल आने पर स्प्रे करें।
Q5: क्या बादाम को भारत में उगाया जा सकता है? ✔ हाँ, हिमाचल, कश्मीर और उत्तर भारत के ठंडे क्षेत्रों में और गमले में घर पर भी।
🎯 निष्कर्ष
ग्राफ्टेड कैलिफ़ोर्निया बादाम का पौधा न केवल पौष्टिक फल देता है बल्कि आपके बगीचे और घर की सुंदरता भी बढ़ाता है। यदि आप इसे सही मिट्टी, धूप, खाद और पानी की देखभाल के साथ लगाते हैं, तो आप 3–4 साल में ही अपने घर के बगीचे या गमले से उच्च गुणवत्ता वाले बादाम प्राप्त कर सकते हैं।
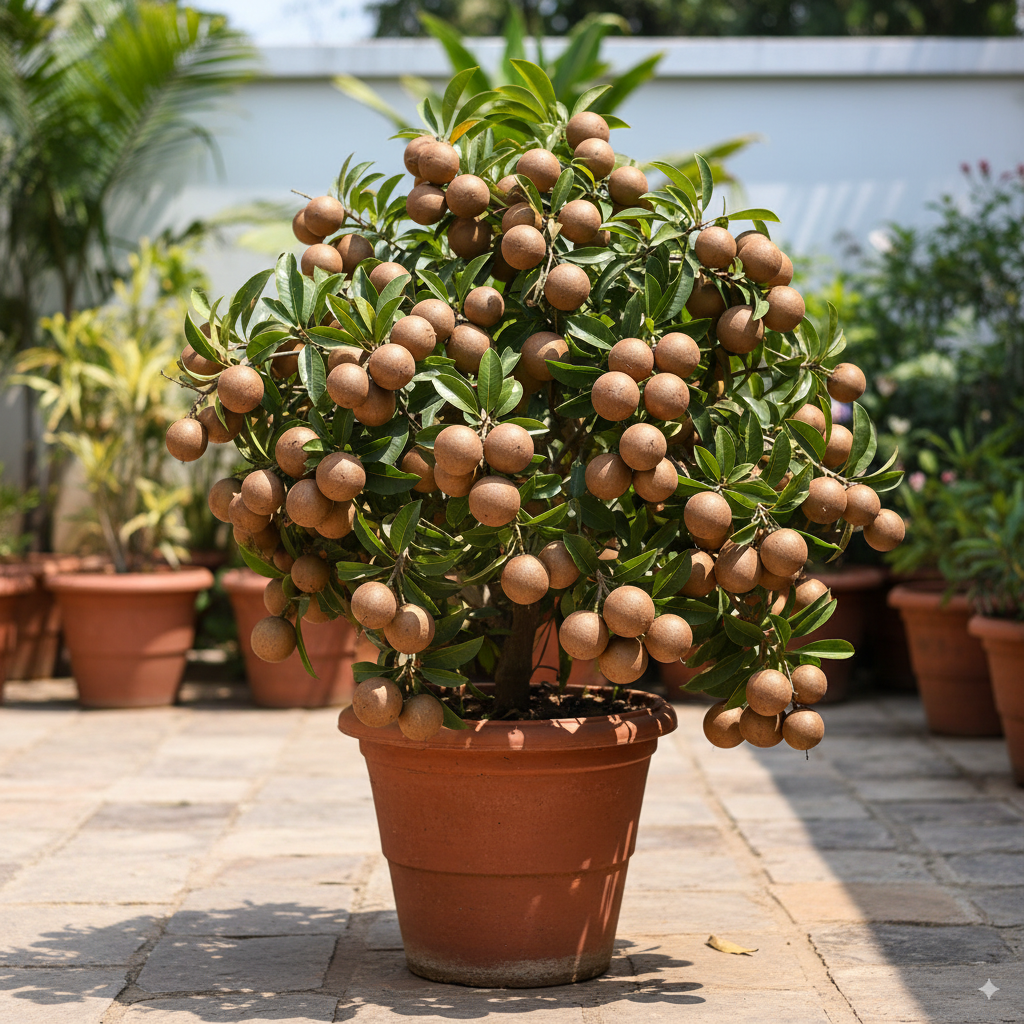
Chiku (also known as Sapota or Sapodilla) is a tropical fruit loved for its sweetness and nutritional benefits. Rich in vitamins A, C, iron, calcium, and dietary fiber, it is considered one of the healthiest fruits for children and adults alike.
While traditionally grown in orchards and farmlands, Chiku can also be successfully cultivated in pots and containers with the right plantation method and care. This makes it possible for urban gardeners and plant lovers to enjoy fresh homegrown Chikus even in balconies and terraces.
Use a pot or drum at least 22–30 inches in diameter and 2–3 feet deep.
Ensure drainage holes at the bottom to prevent waterlogging.
Clay or ceramic pots are ideal as they keep the roots cool, but plastic drums and cement tubs also work well.
✔ Preparing the Soil Mix
Chiku thrives in well-drained sandy-loam soil. Prepare the mix as follows:
40% garden soil
30% river sand (for drainage)
20% organic compost (cow dung or vermicompost)
10% cocopeat or coconut husk powder
Add 2–3 handfuls of neem cake powder to prevent root diseases.
✔ Plantation Method
Fill the pot with the prepared soil mix.
Plant a grafted Chiku sapling (avoid seed-grown plants as they take 7–8 years to fruit).
Water lightly after planting.
Place the pot in a sunny location that receives at least 6–8 hours of sunlight.
💧 Watering Schedule
First Year: Water every 2–3 days.
Summer: Water daily or on alternate days.
Winter: Water once every 5–7 days.
During flowering & fruiting: Keep the soil consistently moist but not waterlogged.
⚠️ Overwatering can cause root rot, especially in pots.
🌿 Fertilization for Fruiting
Balanced nutrition is essential for maximum fruit yield in Chiku.
Time
Fertilizer Requirement
Purpose
Every 2 months
1–2 kg organic compost
Improves soil fertility
March–April
50 g neem cake + 50 g bone meal
Prevents root diseases
July–August
50 g urea + 50 g DAP
Boosts vegetative growth
October–November
100 g potash + micronutrients
Enhances flowering & fruiting
👉 Potassium (Potash) is the most important nutrient for fruit development.
🌞 Sunlight & Climate
Chiku requires 6–8 hours of direct sunlight daily.
Ideal temperature: 20–35°C.
Place pots in open, airy spaces such as terraces, balconies, or backyards.
✂️ Pruning & Maintenance
Trim dry, yellow, or diseased leaves regularly.
Maintain 20–25 healthy green leaves for better photosynthesis.
Light pruning every 6–8 months improves branching and fruit set.
Support the plant with a stick if grown in smaller pots.
🍎 Tips to Maximize Fruiting in Pots
Always use grafted Chiku plants instead of seed-grown.
Use a deep pot (30 inches) to allow root expansion.
Spray boron + potash solution during the flowering stage.
Encourage natural pollinators like honeybees or practice hand pollination.
Perform fruit thinning – remove excess small fruits to allow bigger and sweeter fruits to grow.
Use mulching (dry leaves, straw, or coco husk) to retain soil moisture.
Regular neem oil spray keeps pests away naturally.
🐛 Pest & Disease Management
Problem
Symptoms
Solution
Mealybugs
White cotton-like patches on leaves
Neem oil spray every 15 days
Leaf spot
Brown or black spots on leaves
Spray Copper Oxychloride
Fruit fly
Infests and spoils fruits
Cover fruits with net bags
Root rot
Plant turns yellow and weak
Ensure good drainage, use neem cake
🌟 Health Benefits of Eating Chiku
Improves digestion due to high fiber content.
Rich in Vitamin A, supports good eyesight.
Iron content helps fight anemia.
Natural energy booster due to natural sugars.
Strengthens immunity and supports healthy skin.
Excellent for pregnant women and children.
📊 Quick Care Chart for Chiku in Pots
Stage
Care Requirement
Tips
Plantation
22–30 inch pot, sandy loam soil
Use grafted plants
Watering
2–3 days (young), 5–7 days (winter)
Avoid overwatering
Fertilizer
Compost every 2 months, NPK thrice a year
Focus on Potash
Sunlight
6–8 hours daily
South-facing locations best
Fruiting
Starts in 3–4 years (grafted plants)
Thin fruits for quality yield
❓ Frequently Asked Questions (FAQ)
Q1: Can Chiku grow in pots? ✔ Yes, grafted Chiku plants grow well in pots and start fruiting in 3–4 years.
Q2: How long will a potted Chiku plant live? ✔ With proper care, it can live and produce fruits for 12–15 years.
Q3: How much sunlight does a Chiku plant need? ✔ At least 6–8 hours of direct sunlight daily.
Q4: How to get sweeter fruits? ✔ Apply potash-rich fertilizers and maintain consistent watering.
Q5: Can Chiku be grown from seeds in pots? ✔ Yes, but seed-grown plants take 7–8 years to fruit and may not produce quality fruits.
🎯 Conclusion
Growing Chiku (Sapota) in pots is an excellent way for urban gardeners to enjoy fresh, sweet, and healthy fruits at home. With the right soil preparation, proper watering, sunlight, pruning, and fertilization techniques, you can maximize fruiting and enjoy delicious homegrown Chikus for years.
Whether you have a balcony, terrace, or small backyard, a potted Chiku plant can become a long-term fruiting companion that not only provides nutrition but also enhances the beauty of your home garden.
चीकू जिसे अंग्रेज़ी में Sapota या Sapodilla कहा जाता है, एक स्वादिष्ट और पौष्टिक फल है। यह विटामिन A, C, आयरन और फाइबर से भरपूर होता है। आमतौर पर इसे बगीचों और खेतों में लगाया जाता है, लेकिन सही तकनीक से इसे गमले (Container / Pot) में भी सफलतापूर्वक उगाया जा सकता है।
🪴 चीकू को गमले में लगाने की विधि (Plantation in Pots)
✔ सही गमले का चुनाव
कम से कम 22–30 इंच व्यास का गमला चुनें।
गमले में छेद (Drainage Holes) होना ज़रूरी है।
मिट्टी के बड़े गमले, प्लास्टिक ड्रम या सीमेंट के टब भी अच्छे रहते हैं।
✔ मिट्टी की तैयारी
चीकू के लिए मिट्टी का मिश्रण इस प्रकार होना चाहिए –
40% बगीचे की मिट्टी
30% नदी की बालू / रेतीली मिट्टी
20% गोबर की खाद / वर्मीकम्पोस्ट
10% नारियल की भूसी / कोकोपीट
मुट्ठी भर नीमखली पाउडर मिट्टी में मिलाएँ।
✔ पौधा लगाना
गमले में तैयार मिट्टी भरें।
ग्राफ्टेड पौधा (Grafted Plant) लगाएँ (बीज से लगा पौधा देर से फल देता है)।
पौधे को लगाकर हल्की सिंचाई करें।
गमले को धूप वाली जगह रखें।
💧 पानी देने की विधि (Watering Schedule)
पहले वर्ष: हर 2–3 दिन पर हल्का पानी दें।
गर्मी में: रोज़ या एक दिन छोड़कर पानी दें।
सर्दी में: 5–7 दिन में एक बार।
फूल और फल लगने पर: लगातार नमी बनाए रखें। ⚠️ ध्यान रखें – पानी ज्यादा भरकर न रखें, वरना जड़ों में सड़न हो जाएगी।
🌿 खाद और पोषण (Fertilization for Fruiting)
चीकू में संतुलित खाद और पोषण ज़रूरी है।
समय
खाद की मात्रा
विशेष टिप्स
हर 2 महीने
1–2 किलो गोबर की खाद / वर्मी कम्पोस्ट
मिट्टी के ऊपर डालें
मार्च–अप्रैल
50 ग्राम नीमखली + 50 ग्राम बोन मील
जड़ सड़न और कीट से बचाव
जुलाई–अगस्त
50 ग्राम यूरिया + 50 ग्राम डीएपी
पत्तियों की हरी बढ़वार
अक्टूबर–नवंबर
100 ग्राम पोटाश + माइक्रोन्यूट्रिएंट्स
फल बनने की क्षमता बढ़ेगी
👉 पोटाश (Potash) फल बनने में सबसे महत्वपूर्ण है।
🌞 धूप और तापमान (Sunlight & Climate)
चीकू का पौधा पूरी धूप (6–8 घंटे) चाहता है।
तापमान 20–35°C इसके लिए उपयुक्त है।
गमले को हमेशा खुले और हवादार स्थान पर रखें।
✂️ छँटाई और देखभाल (Pruning & Maintenance)
हर 6 महीने में पौधे की हल्की छँटाई करें।
सूखी और पीली पत्तियाँ हटा दें।
गमले के आसपास खरपतवार न उगने दें।
ज़रूरत पड़ने पर पौधे को सहारा दें।
🍎 गमले में अधिक फल पाने के उपाय (Maximizing Fruiting in Pots)
हमेशा ग्राफ्टेड पौधे लगाएँ।
गमले को कम से कम 30 इंच गहरा रखें।
फूल आने पर बोरॉन और पोटाश का स्प्रे करें।
मधुमक्खियों का आकर्षण या कृत्रिम परागण (Artificial Pollination) करें।
फल पतले करना (Fruit Thinning): बहुत अधिक फल होने पर छोटे फल हटा दें, इससे बचे हुए फल बड़े और मीठे बनते हैं।
नियमित रूप से नीम तेल का छिड़काव करें ताकि कीट न लगें।
🐛 रोग और कीट नियंत्रण (Pests & Diseases)
रोग/कीट
लक्षण
समाधान
मिलीबग (Mealy Bug)
पत्तियों पर सफेद परत
नीम तेल का छिड़काव
लीफ स्पॉट
पत्तियों पर धब्बे
कॉपर ऑक्सीक्लोराइड का छिड़काव
फल मक्खी
फल में छेद करके गूदे को खराब करती है
फल को नेट बैग से ढकें
जड़ सड़न
पौधा पीला और कमजोर
पानी निकासी सही रखें
🌟 चीकू खाने के फायदे (Health Benefits of Sapota)
पाचन शक्ति बढ़ाता है।
विटामिन A से आँखों की रोशनी के लिए अच्छा।
आयरन से खून की कमी दूर करता है।
ऊर्जा और ताजगी प्रदान करता है।
बच्चों और गर्भवती महिलाओं के लिए पौष्टिक फल।
📊 Quick Care Chart for Chiku in Pots
स्टेज
देखभाल
टिप्स
पौधा लगाना
22–30 इंच गमला, रेतीली-दोमट मिट्टी
ग्राफ्टेड पौधा चुनें
पानी देना
हर 2–3 दिन (गर्मी), 5–7 दिन (सर्दी)
ओवरवॉटरिंग से बचें
खाद
हर 2 महीने ऑर्गेनिक खाद, साल में 3 बार NPK
पोटाश पर ध्यान दें
धूप
6–8 घंटे
दक्षिण दिशा की धूप सबसे बेहतर
फल पाना
फूल आने पर बोरॉन + पोटाश का स्प्रे
फल पतले करें
❓ अक्सर पूछे जाने वाले प्रश्न (FAQ)
Q1: क्या चीकू गमले में फल देगा? ✔ हाँ, अगर आप ग्राफ्टेड पौधा लगाएँगे और सही देखभाल करेंगे तो 3–4 साल में फल मिलने लगेंगे।
Q2: गमले में चीकू कितने साल तक चल सकता है? ✔ सही मिट्टी और देखभाल से 12–15 साल तक अच्छे फल मिल सकते हैं।
Q3: गमले में चीकू को कितनी धूप चाहिए? ✔ रोज़ाना कम से कम 6–8 घंटे की सीधी धूप।
Q4: अधिक मीठे फल कैसे पाएँ? ✔ पोटाश युक्त खाद दें और समय पर सिंचाई करें।
Q5: क्या बीज से चीकू उगा सकते हैं? ✔ हाँ, लेकिन बीज से पौधा 7–8 साल बाद फल देता है और फल की गुणवत्ता अच्छी नहीं होती।
🎯 निष्कर्ष (Conclusion)
चीकू का पौधा न सिर्फ स्वादिष्ट फल देता है बल्कि घर की सुंदरता भी बढ़ाता है। अगर आप इसे गमले में सही तकनीक से लगाते हैं, पर्याप्त धूप, पानी और खाद देते हैं, तो आप सालों तक मीठे और पौष्टिक चीकू का आनंद घर बैठे ले सकते हैं।
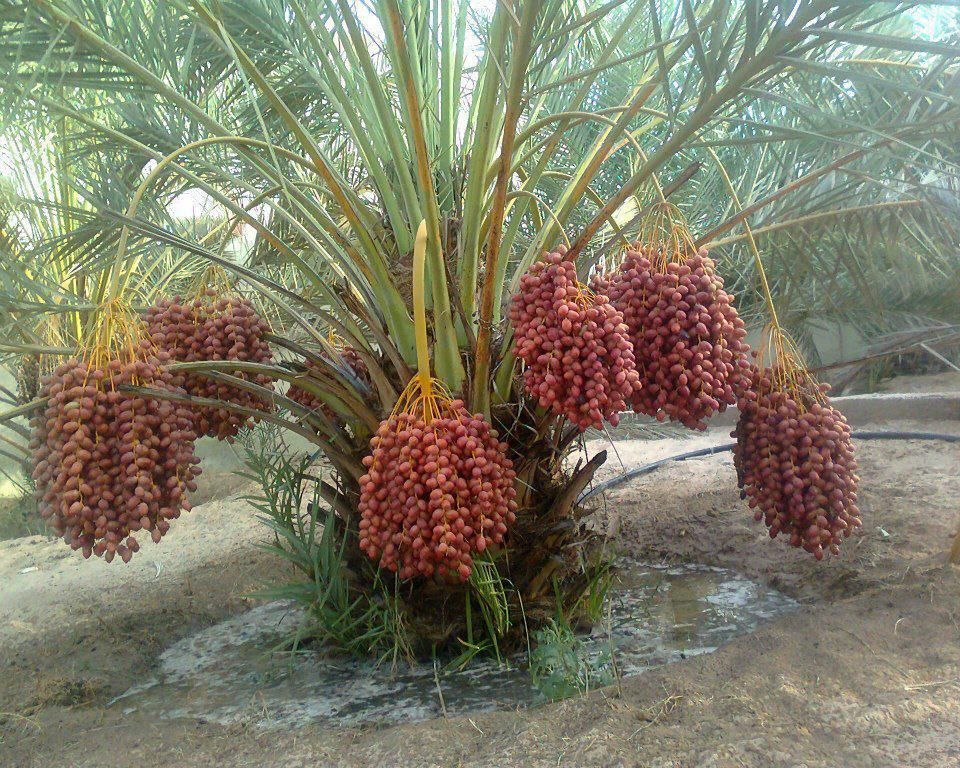
The Date Palm (Khajoor Plant) is one of the oldest cultivated fruit trees in the world. It is highly valued not only for its delicious and nutritious fruits but also for its cultural, medicinal, and economic importance. Many gardeners and farmers wish to grow date palms in their home garden or pots, but often face challenges in getting fruits. The main reason is lack of knowledge about male and female plants, proper pollination techniques, and seasonal care.
🌱 Plantation, Care & Maximizing Fruiting in Date Palm (Khajoor)
🪴 1. How to Do Plantation of Date Palm
✅ Choosing the Right Variety
Select tissue-cultured plants or offshoots (suckers) from healthy female trees.
Popular fruiting varieties: Barhee, Medjool, Halawy, Khalas, Deglet Noor.
✅ Plantation Site
Date palms need hot, dry climate and well-drained sandy soil.
Avoid waterlogged soils – root rot is common in excess moisture.
✅ Planting Time
Best season: February–March or August–September.
Avoid extreme summer and winter for new plantation.
✅ Plantation Method
Dig a pit: 3 ft × 3 ft × 3 ft.
Mix soil with:
15–20 kg cow dung manure
500 g Neem cake
200 g Super phosphate
Place the sapling in the center, cover with soil, and water lightly.
✅ Spacing
For orchard: 8–10 meters apart (about 100–120 plants/acre).
For garden/pots: Use a large drum or 24–30 inch pot with drainage.
🌿 2. How to Take Care of Date Palm
🌞 Sunlight
Requires 6–8 hours of direct sunlight daily.
💧 Watering
Young plants: Water every 3–4 days.
Mature plants: Deep watering once every 7–10 days.
Avoid overwatering during fruit ripening.
🌱 Manuring & Fertilization
Organic: Cow dung, vermicompost, neem cake every 2–3 months.
Chemical:
Urea (N) → 300 g per plant (split dose).
SSP (P) → 200 g per plant.
MOP (K) → 400 g per plant.
Add Micronutrients (Zinc, Boron, Iron) via foliar spray.
✂️ Pruning
Remove old, dry fronds regularly.
Clean the trunk for air circulation.
🐛 Pest & Disease Control
Protect from fruit borers, mites, scale insects.
Use neem oil spray or light pesticides if needed.
Cover fruits with net bags to protect from birds.
🍎 3. Tips to Maximize Fruiting in Date Palm
Male-Female Balance:
Keep 1 male for 15–20 female plants.
Use Artificial Pollination to ensure 70–80% fruit set.
Timely Pollination:
Best within 2–3 days of female flowers opening.
Morning hours are most effective.
Fruit Thinning:
Remove extra fruits from clusters.
Helps remaining fruits grow larger and sweeter.
Fertilizer Boost During Fruiting:
Apply Potash (K) before and after pollination for better fruit size.
Apply Magnesium Sulphate to increase sweetness.
Irrigation Management:
Provide regular watering during flowering & fruit set.
Reduce water when fruits are ripening (to avoid cracking).
Mulching:
Use dry leaves or straw mulch around the base.
Conserves moisture and regulates soil temperature.
Harvest at Right Time:
Dates are ready 5–6 months after pollination.
Harvest when fully colored and soft for maximum sweetness.
📊 Quick Care & Fruiting Tips Table
Factor
Recommendation
Benefit
Plantation Time
Feb–Mar / Aug–Sep
Healthy establishment
Spacing
8–10 m (field) / 24–30 inch pot
Good root growth
Sunlight
6–8 hrs/day
Strong fruiting
Watering
7–10 days (mature)
Avoid root rot
Fertilizer
NPK + Organic + Micronutrients
High yield
Pollination
Artificial within 2–3 days of bloom
2–3× more fruits
Fruit Thinning
Remove excess fruits
Bigger, sweeter dates
Protection
Nets + Neem oil
Save from birds & pests
✅ With proper plantation method, balanced care, and scientific pollination techniques, your Date Palm can yield 20–25 kg of fruits per plant annually in garden conditions, and 100–150 kg per tree in orchards.
🌱 Potted Date Palm (Khajoor) Care Guide – Step by Step
🪴 1. Choosing the Right Pot & Soil
Pot Size: Start with a 24–30 inch diameter pot or drum with drainage holes.
Material: Use clay/ceramic pots for natural cooling, or plastic drums for durability.
Soil Mix:
50% Sandy Soil (for drainage)
30% Organic Compost (cow dung/vermicompost)
20% Garden Soil + Cocopeat
👉 Add 2–3 handfuls of Neem Cake Powder to prevent soil pests.
🌿 2. Plantation in Pots
Fill pot with the prepared soil mix.
Place a tissue-cultured sapling or sucker (offshoot) in the center.
Water lightly after planting.
Keep the pot in a sunny location (balcony/terrace with 6–8 hrs sunlight).
💧 3. Watering Schedule
First Year: Every 3–4 days (light watering).
Mature Plant: Once every 7–10 days (deep watering).
During Fruiting: Maintain consistent moisture.
Avoid: Overwatering → causes root rot in pots.
🌱 4. Fertilization in Pots
Every 2 months: Add 1–2 kg organic compost.
Quarterly (3 months):
50 g Urea (Nitrogen)
50 g Super Phosphate
100 g Muriate of Potash (MOP)
Micronutrients: Foliar spray of Zinc + Boron + Iron once in 2 months.
✂️ 5. Pruning & Cleaning
Remove old, dry, or yellowing leaves regularly.
Keep only 20–25 healthy fronds for better growth.
Clean trunk for neat appearance and airflow.
🌸 6. Pollination in Pots
Keep at least 1 male plant if you have multiple pots.
If space is limited: Borrow pollen from a nearby male tree.
Use Artificial Pollination (brush or hand method) for fruit set.
🍎 7. Fruiting & Yield in Pots
Fruiting starts after 4–5 years in potted plants.
Each mature potted palm can yield 8–15 kg dates annually.
Thin excess fruit clusters for bigger, sweeter dates.
🐛 8. Pest & Disease Care in Pots
Mealybugs / Scale Insects: Use neem oil spray every 20 days.
Fruit Borers: Cover bunches with fruit net bags.
Root Rot: Always ensure proper drainage.
🌟 9. Tips to Maximize Fruiting in Pots
Keep the pot in full sunlight (south-facing terrace/balcony).
Use Potash-rich fertilizer during flowering and fruit set.
Hand pollinate within 2–3 days of female flowers blooming.
Mulch the pot surface with dry leaves or straw to maintain soil moisture.
Re-pot every 3–4 years into a slightly larger pot with fresh soil mix.
📊 Quick Potted Date Palm Guide
Stage
Care Needed
Tips
Plantation
24–30 inch pot, sandy soil mix
Add neem cake for pest prevention
Watering
3–4 days (young), 7–10 days (mature)
Avoid waterlogging
Fertilizer
Organic compost every 2 months, NPK quarterly
Add Potash during fruiting
Sunlight
6–8 hrs daily
South-facing open space best
Pollination
Hand pollination essential
Use male pollen within 2–3 days
Fruiting
8–15 kg/year in pots
Thin clusters for quality fruits
✅ With this step-by-step container care, your readers can grow healthy Date Palms in pots or terraces and enjoy sweet homegrown dates.
🌱 Male and Female Date Palm Identification
Feature
Male Plant 🌸
Female Plant 🌼
Flower Color & Shape
Small, dense, cream/white clusters
Large, loose, yellowish-white clusters
Fragrance
Strong fragrance
Mild or no fragrance
Inflorescence
Compact, short
Long, spreading
Leaves
Slightly stiff, pointed
Broader, softer
Fruit
Never produces fruits
Produces fruits after pollination
Identification Time
3–5 years (after flowering)
3–5 years (after flowering & fruiting)
Use in Cultivation
Used only for pollen
Used for main fruit production
👉 Tip: Maintain a ratio of 5–6 male plants for every 100 female plants for natural pollination.
✋ Artificial Pollination (Step-by-Step Guide)
Step 1: Collecting Pollen from Male Plant
Cut flower clusters (spathes) from the male plant.
Dry them in shade for 1–2 days.
Rub gently to collect pollen powder.
Store in a cool and dry place for up to 2–3 weeks.
Step 2: Identifying Female Flowers
Female flowers appear in large, loose clusters.
They have a visible ovary.
Best pollination time is within 2–3 days of flowering.
Step 3: Hand Pollination
Use a small brush, cotton, or hand to sprinkle pollen on female flowers.
You can also tie a small male flower cluster directly onto a female inflorescence.
Step 4: Aftercare
Within 7–10 days small fruit sets will appear.
Provide light irrigation and potash-rich fertilizer.
Thin out extra fruits for better quality and size.
📊 Quick Pollination Table
Step
Activity
Time
1. Pollen Collection
Collect pollen from male flowers
Feb–March
2. Female Flower Stage
Identify female inflorescence
2–3 days after blooming
3. Pollination
Apply pollen with brush/cotton
Morning time
4. Fruit Set
Fruits appear
7–10 days later
👉 Benefits of Artificial Pollination
Increases fruit yield by 2–3 times.
Produces bigger, sweeter fruits.
Ensures 70–80% flowers convert into fruits (compared to 30–40% in natural pollination).
📅 Annual Care Calendar for Date Palm
🌱 January – February (Winter End)
Tasks: Pruning of old leaves, cleaning.
Fertilizer: Apply 2–3 kg of cow dung manure per plant.
Watering: Very light irrigation.
Note: Plant remains in dormant stage.
🌸 March – April (Flowering Season)
Tasks: Identify male & female flowers, perform pollination.
Fertilizer: Apply DAP or organic compost (1 kg/plant).
Watering: 1–2 times per week.
Note: Critical for fruit setting.
🌞 May – June (Fruit Setting Stage)
Tasks: Fruit thinning for bigger fruits.
Fertilizer: Potash and phosphorus-rich fertilizers.
Watering: Every 4–5 days.
Note: Protect from hot winds using shade nets.
🌴 July – August (Monsoon)
Tasks: Weed removal, root growth management.
Fertilizer: Apply vermicompost (2–3 kg/plant) and micronutrients (Zinc, Boron).
Watering: Ensure good drainage during rains.
🍂 September – October (Fruit Ripening)
Tasks: Protect fruits from birds and insects using nets.
Fertilizer: Apply neem cake or organic manure.
Watering: Light irrigation (avoid overwatering).
Note: Critical fruit maturity stage.
🍎 November – December (Harvesting & Post-Harvest Care)
Tasks: Harvest ripe dates, prune old leaves.
Fertilizer: Apply 2–3 kg cow dung manure after harvest.
Watering: Very light irrigation.
Note: Plant enters dormancy again.
📊 Quick Annual Chart
Month
Main Task
Fertilizer
Irrigation
Jan–Feb
Pruning, cleaning
Cow dung manure
Very light
Mar–Apr
Flowering, Pollination
DAP, organic compost
1–2 times/week
May–Jun
Fruit setting, thinning
Potash, phosphorus
Every 4–5 days
Jul–Aug
Monsoon, root growth
Vermicompost, micronutrients
Drain excess water
Sep–Oct
Fruit ripening
Neem cake, organic manure
Light irrigation
Nov–Dec
Harvesting, pruning
Cow dung manure
Very light
🌟 Bonus Tips for Maximum Yield
Maintain Male-Female Balance: 5–6 male plants per 100 female plants.
Artificial Pollination: Boosts yield by 2–3 times.
Balanced Fertilization: Use organic + chemical fertilizers together.
Avoid Overwatering: Prevents root rot and fruit cracking.
Timely Harvesting: Improves sweetness and fruit quality.
✅ With this step-by-step guide, artificial pollination method, and annual care calendar, you can grow healthy date palm plants in garden or pots and enjoy maximum fruit production.
✅ English FAQs
Q1. How to identify male and female date palm plants? 👉 Male plants have small, dense, fragrant white/cream flowers and never produce fruits, while female plants have large, loose, yellowish-white flowers and bear fruits after pollination.
Q2. How many years does it take for a date palm to bear fruits? 👉 A date palm takes about 4–6 years to start flowering and fruiting after plantation.
Q3. Can date palm be grown in pots? 👉 Yes, dwarf varieties of date palm can be grown in large pots, but regular watering, pruning, and pollination are essential.
Q4. Do date palms need both male and female plants? 👉 Yes, only female plants bear fruits, but they require pollen from male plants for fruiting.
Q5. How many male plants are needed for pollination? 👉 About 1 male plant is sufficient for every 15–20 female plants when artificial pollination is done.
Q6. What is the best fertilizer for date palm? 👉 A combination of organic compost, cow dung manure, and potash-rich fertilizers ensures healthy growth and high yield.
Q7. When is the best time for artificial pollination? 👉 The best time is 2–3 days after the female flowers bloom, preferably in the morning hours.
Q8. How long do date palm trees live? 👉 Date palms can live for 100 years or more under proper care, though commercial fruiting is best between 15–40 years.
Q9. Can date palms survive in Indian climate? 👉 Yes, date palms grow well in hot, dry, and arid regions like Rajasthan, Gujarat, and parts of South India.
Q10. How to increase fruit size and sweetness in date palms? 👉 Regular fertilization, proper thinning of fruits, and timely irrigation help improve fruit size, sweetness, and quality.
फसल के समय NPK (Nitrogen, Phosphorus, Potash) संतुलित मात्रा दें।
फल बनने से पहले पोटाश और फॉस्फेट बढ़ाएँ।
माइक्रोन्यूट्रिएंट (जिंक, आयरन) भी दें।
✂️ छंटाई और देखभाल
सूखी पत्तियाँ समय-समय पर हटा दें।
फूल और फल आने से पहले पौधे को साफ रखें।
गमले वाले पौधे को छोटे आकार में रखने के लिए छंटाई करें।
🐛 रोग और कीट नियंत्रण
रेड पाम वीविल: तने को खोखला करता है → नीम तेल का छिड़काव करें।
लीफ स्पॉट: पत्तों पर धब्बे → कॉपर ऑक्सीक्लोराइड का छिड़काव।
स्केल इंसेक्ट: पत्तों का रस चूसते हैं → कीटनाशक साबुन का प्रयोग करें।
🍎 अधिक फल पाने के उपाय
नर और मादा पौधे दोनों लगाएँ (परागण आवश्यक)।
प्रति 100 मादा पौधों पर 5–6 नर पौधे रखें।
फूल आने पर कृत्रिम परागण (artificial pollination) करें।
धूप और गर्मी ज्यादा मिले।
गमले में पौधे को खुले स्थान पर रखें।
फसल के समय अतिरिक्त पोटाश दें।
🌸 खजूर के फायदे और उपयोग
ऊर्जा और ग्लूकोज से भरपूर।
पाचन में सहायक।
हड्डियों को मजबूत करता है (कैल्शियम से भरपूर)।
खून की कमी (एनीमिया) दूर करता है।
रोग प्रतिरोधक क्षमता बढ़ाता है।
आयुर्वेद में खजूर को बलवर्धक और शुक्राणु वृद्धि हेतु माना गया है।
🪔 धार्मिक और सांस्कृतिक महत्व
इस्लामिक परंपरा में रमजान के समय खजूर खाने का विशेष महत्व।
बाइबल और पुराणों में भी खजूर का उल्लेख।
वास्तु अनुसार घर में खजूर लगाने से समृद्धि और सौभाग्य आता है।
📊 Quick Care Table
पहलू
जानकारी
पौधे का नाम
खजूर (Phoenix dactylifera)
गमला
24–30 इंच
मिट्टी
बलुई दोमट + खाद
धूप
10–12 घंटे
पानी
गर्मी – हर 5–7 दिन, सर्दी – 15–20 दिन
खाद
हर 2–3 महीने
परागण
नर और मादा पौधों से
औषधीय लाभ
पाचन, हड्डियों, रोग प्रतिरोधक क्षमता
आयु
50–70 साल फल देने वाला वृक्ष
खजूर का पौधा (Date Palm – Phoenix dactylifera)द्विलिंगी (dioecious) होता है, यानी नर (Male) और मादा (Female) पौधे अलग-अलग होते हैं। फल केवल मादा पौधे पर आते हैं और नर पौधे पर केवल पराग (pollen) होता है।
👉 लेकिन सबसे बड़ी समस्या यह है कि पौधे की नर और मादा की पहचान तब तक स्पष्ट नहीं होती जब तक कि पौधा फूल न दे। यह सामान्यतः 3–5 साल बाद शुरू होता है।
🌿 नर और मादा पौधे की पहचान
1. फूलों से पहचान
नर पौधा (Male Plant)
फूल: छोटे, सफेद या क्रीम रंग के।
गुच्छे (spikes) छोटे और सघन होते हैं।
इनमें केवल परागकण (pollen) होता है।
इन फूलों से तेज़ सुगंध आती है।
मादा पौधा (Female Plant)
फूल: पीले-सफेद, बड़े और थोड़े ढीले गुच्छों में।
फूलों में अंडाशय (ovary) स्पष्ट दिखता है।
यही फूल बाद में फल (Dates) में बदलते हैं।
2. फल से पहचान
नर पौधा कभी भी फल नहीं देगा।
मादा पौधे पर परागण होने के बाद अंडाकार हरे फल बनते हैं जो पकने पर भूरे या लाल-भूरे हो जाते हैं।
3. वैज्ञानिक तरीकों से पहचान
DNA Marker Testing या Molecular sexing द्वारा 1–2 साल के पौधों की भी पहचान की जा सकती है।
कुछ नर्सरियों में पहले से लैब-टेस्टेड मादा पौधे बेचे जाते हैं।
4. परागण (Pollination) की आवश्यकता
प्राकृतिक वातावरण में कीट और हवा से परागण होता है, लेकिन अधिक उत्पादन के लिए किसान कृत्रिम परागण (hand pollination) करते हैं।
इसके लिए नर पौधे से पराग लेकर मादा पौधे के फूलों पर छिड़कते हैं।
🌴 व्यावहारिक सुझाव
यदि आप 10–12 मादा पौधे लगाते हैं तो 1 नर पौधा पर्याप्त होता है।
छोटे पैमाने पर गमले या बगीचे में लगाने के लिए कम से कम 1 नर + 3 मादा पौधे रखें।
🌴 नर और मादा खजूर पौधों (Date Palm) की पहचान
विशेषता
नर पौधा (Male Plant)
मादा पौधा (Female Plant)
🌸 फूलों का रंग व आकार
सफेद/क्रीम रंग, छोटे और घने (क्लस्टर में)
पीले-सफेद, बड़े और ढीले गुच्छों में
🌼 फूलों की सुगंध
तेज़ सुगंध आती है
हल्की या बहुत कम सुगंध
🌱 गुच्छे (Inflorescence)
छोटे और बहुत सघन
लंबे और फैले हुए
🍃 पत्तियों का रूप
पत्तियों में हल्की कठोरता और अधिक नुकीलापन
पत्तियाँ थोड़ी चौड़ी और नरम दिखती हैं
🍎 फल लगना
कभी फल नहीं लगते
परागण के बाद खजूर के फल (Dates) बनते हैं
🕰️ पहचान का समय
3–5 साल में फूल आने पर पता चलता है
3–5 साल बाद फूल और फल से पहचान
👨🌾 खेती में महत्व
केवल परागण के लिए उपयोगी
मुख्य फल उत्पादन (Dates) देती है
🌞 अतिरिक्त टिप्स
परागण के लिए अनुपात:
हर 100 मादा पौधों पर कम से कम 5–6 नर पौधे रखें।
गमले/छोटे बगीचे में:
3 मादा + 1 नर पौधा पर्याप्त होगा।
Artificial Pollination:
नर फूलों से पराग एकत्रित करके मादा फूलों पर छिड़कें → इससे उत्पादन 2–3 गुना बढ़ जाता है।
🌸 खजूर के पौधों में कृत्रिम परागण (Artificial Pollination) – सम्पूर्ण गाइड
🪴 Step 1: नर पौधे से पराग (Pollen) एकत्र करना
जब नर पौधा फूल देता है, उसके गुच्छों (male spathes) को सावधानी से काट लें।
इन गुच्छों में छोटे-छोटे सफेद/क्रीम रंग के फूल होते हैं।
इन्हें छायादार जगह पर सुखा लें।
सुखाने के बाद फूलों को हल्के हाथ से मसलकर पाउडर जैसे परागकण (pollen) अलग करें।
👉 नोट: पराग 2–3 हफ्ते तक सुरक्षित रहता है यदि सूखी और ठंडी जगह पर रखा जाए।
🌱 Step 2: मादा पौधे के फूल पहचानना
मादा पौधे के फूल बड़े और ढीले गुच्छों में निकलते हैं।
फूलों में अंडाशय (ovary) साफ दिखाई देता है।
फूल खिलने के 2–3 दिन के भीतर परागण करना सबसे प्रभावी होता है।
✋ Step 3: परागण करना (Hand Pollination)
नर पौधे से एकत्रित परागकण लें।
मादा फूलों के गुच्छों को हल्का खोलें।
ब्रश, रूई या हाथ से सीधे मादा फूलों पर परागकण छिड़कें।
चाहें तो नर पौधे के छोटे फूलों का गुच्छा सीधे मादा फूल के बीच बाँध सकते हैं।
💧 Step 4: देखभाल के बाद
परागण के 7–10 दिन बाद फल बनने के संकेत दिखने लगते हैं।
इस समय पौधे को हल्की सिंचाई और पोटाशयुक्त खाद दें।
अनावश्यक या अधिक फल लगे गुच्छों को पतला (thinning) कर दें → इससे बचे हुए फल बड़े और मीठे होंगे।
📊 Quick Pollination Guide Table
स्टेप
क्रिया
समय
1. पराग एकत्र करना
नर पौधे के फूल काटकर पराग निकालना
फूल आने पर (फरवरी–मार्च)
2. मादा फूल पहचानना
बड़े, ढीले, पीले-सफेद फूल
फूल खिलने के 2–3 दिन बाद
3. परागण करना
ब्रश/रूई से मादा फूलों पर पराग डालना
सुबह के समय
4. फल बनना
परागण के बाद 7–10 दिन में प्रारंभ
फल पकने तक 5–6 महीने
🌟 कृत्रिम परागण के फायदे
फल का आकार और मिठास बढ़ती है।
उत्पादन 2–3 गुना तक बढ़ जाता है।
फल अधिक समान और गुणवत्ता वाले होते हैं।
समय पर परागण करने से 70–80% तक फूल फल में बदल जाते हैं, जबकि प्राकृतिक परागण में केवल 30–40%।
📅 खजूर (Date Palm) का सालभर का देखभाल कैलेंडर
🌱 जनवरी – फरवरी (सर्दियों का अंत)
काम:
पुराने सूखे पत्ते हटाएँ।
पौधे की हल्की छंटाई करें।
खाद:
गोबर की खाद (2–3 किलो प्रति पौधा) डालें।
पानी:
यदि ठंड अधिक हो तो पानी कम दें।
नोट: पौधा इस समय आराम की अवस्था (Dormant Stage) में रहता है।
🌸 मार्च – अप्रैल (फूल आने की शुरुआत)
काम:
नर और मादा फूलों की पहचान करें।
कृत्रिम परागण (Artificial Pollination) करें।
खाद:
डीएपी या जैविक खाद (1 किलो प्रति पौधा) डालें।
पानी:
सप्ताह में 1–2 बार हल्की सिंचाई करें।
नोट: यही समय फल बनने की शुरुआत का है।
🌞 मई – जून (गर्मी और फल सेट होना)
काम:
परागण के 7–10 दिन बाद फल सेट हो जाएंगे।
छोटे फल पतले (Thinning) करें ताकि बाकी फल बड़े हों।
खाद:
पोटाश और फॉस्फोरस वाली खाद डालें।
पानी:
हर 4–5 दिन में नियमित पानी दें।
नोट: गर्मी में पौधे को छायादार नेट (Shade Net) से बचाना फायदेमंद है।
🌴 जुलाई – अगस्त (मानसून का समय)
काम:
पौधे के चारों ओर खरपतवार हटाएँ।
नई जड़ों की वृद्धि तेज होती है।
खाद:
वर्मी कम्पोस्ट (2–3 किलो प्रति पौधा)।
माइक्रोन्यूट्रिएंट्स (जिंक, बोरॉन) स्प्रे करें।
पानी:
बारिश हो तो अतिरिक्त पानी निकालने की व्यवस्था करें।
🍂 सितम्बर – अक्टूबर (फल पकना)
काम:
फल तोड़ने की तैयारी करें।
फलों को पक्षियों और कीटों से बचाने के लिए जाल (Net) लगाएँ।
खाद:
फल पकने से पहले 1 किलो नीमखली या जैविक खाद डालें।
पानी:
हल्की सिंचाई करें, अधिक पानी से फल फट सकते हैं।
नोट: फसल का यह सबसे महत्वपूर्ण समय है।
🍎 नवम्बर – दिसम्बर (फल तुड़ाई और पौधे की तैयारी)
काम:
पके हुए खजूर के फल तोड़ें और सुखाएँ।
पौधे की हल्की छंटाई करें।
खाद:
फसल के बाद पौधे को 2–3 किलो गोबर की खाद दें।
पानी:
ठंड के कारण पानी कम दें।
नोट: पौधा धीरे-धीरे आराम की अवस्था (Dormancy) में चला जाता है।
📊 Quick Annual Care Chart
महीना
मुख्य कार्य
खाद
सिंचाई
जनवरी–फरवरी
छंटाई, सफाई
गोबर की खाद
कम
मार्च–अप्रैल
फूल, परागण
डीएपी, जैविक खाद
1–2 बार/सप्ताह
मई–जून
फल सेट, थिनिंग
पोटाश, फॉस्फोरस
4–5 दिन में
जुलाई–अगस्त
मानसून, जड़ वृद्धि
वर्मी कम्पोस्ट, माइक्रो न्यूट्रिएंट्स
जरूरत अनुसार
सितम्बर–अक्टूबर
फल पकना
नीमखली
हल्की
नवम्बर–दिसम्बर
तुड़ाई, छंटाई
गोबर खाद
कम
🌟 बोनस टिप्स
नर और मादा पौधों का संतुलन – 100 मादा पौधों पर 5–6 नर पौधे ज़रूरी।
Artificial Pollination – उत्पादन को 2–3 गुना बढ़ा देता है।
खाद – जैविक + रासायनिक खाद का संतुलित उपयोग करें।
सिंचाई – अधिक पानी से जड़ों में सड़न और फलों में फटना हो सकता है।
फल तोड़ाई – पूरी तरह पकने पर ही करें, इससे स्वाद और मिठास बढ़ती है।
❓ FAQs
Q1. क्या खजूर का पौधा गमले में फल देगा? 👉 हाँ, dwarf variety गमले में फल देती है लेकिन बड़े पैमाने पर बगीचे में बेहतर।
Q2. खजूर के पेड़ को फल आने में कितना समय लगता है? 👉 5–7 साल में फल देना शुरू करता है।
Q3. क्या भारत में खजूर की खेती लाभदायक है? 👉 हाँ, राजस्थान, गुजरात और पंजाब में बड़े पैमाने पर सफल।
Q4. क्या एक पौधे से ही फल मिलेगा? 👉 नहीं, नर और मादा दोनों पौधे चाहिए।
Q5. खजूर को सबसे ज्यादा फायदा किस चीज़ से मिलता है? 👉 गर्म जलवायु, पर्याप्त धूप और उचित परागण से।
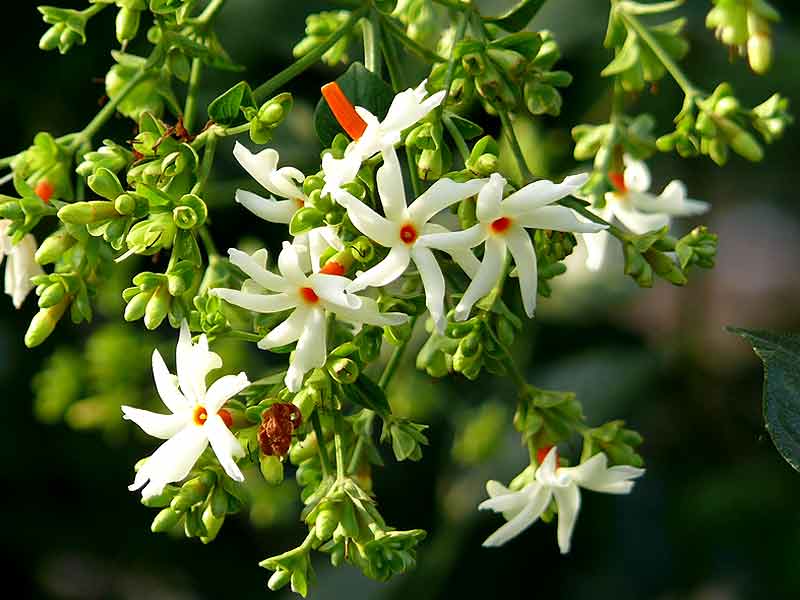
Parijat, also known as Harsingar or Night-Flowering Jasmine, holds a sacred place in Indian culture, Ayurveda, and spiritual practices. Its delicate white flowers with an orange center not only look stunning but also carry a divine fragrance. Beyond beauty, the plant is valued for its religious importance, vastu benefits, and medicinal properties.
📖 Mythological Story – Lord Krishna and Parijat
The legend of the Parijat tree is deeply rooted in Hindu mythology and is mentioned in the Puranas and Mahabharata.
During the great Samudra Manthan (Churning of the Ocean) by the Devas (gods) and Asuras (demons), many celestial treasures emerged. Among them was the Parijat tree, which was planted in Indralok (the abode of Lord Indra). Its divine fragrance and heavenly beauty fascinated everyone.
One day, Lord Krishna’s wife Satyabhama desired the Parijat flower. To fulfill her wish, Lord Krishna went to heaven and requested the tree from Indra. However, Indra refused to part with it. A battle ensued, and Lord Krishna emerged victorious. He then brought the Parijat tree to Earth and planted it in Satyabhama’s garden.
It is believed that this is why Parijat flowers bloom at night and fall to the ground in the morning, symbolizing that they should not be plucked by force but collected as divine blessings from the earth itself.
👉 Hence, Parijat is revered as the “Celestial flower brought to Earth by Lord Krishna.”
हरसिंगार (Parijat) जिसे नाइट फ्लावरिंग जेसमीन या पारिजात भी कहा जाता है, भारतीय संस्कृति, आयुर्वेद और पूजा-पाठ में अत्यंत महत्वपूर्ण स्थान रखता है। इसके सफेद फूल जिनका मध्य भाग केसरिया होता है, न केवल सुंदर और सुगंधित होते हैं बल्कि औषधीय गुणों से भरपूर भी होते हैं। यह पौधा सजावटी, धार्मिक और औषधीय – तीनों ही दृष्टियों से अद्वितीय है।
📖 पौराणिक कथा – भगवान कृष्ण और पारिजात
पारिजात के फूल का उल्लेख पुराणों और महाभारत में मिलता है। कथा के अनुसार, देवताओं और असुरों द्वारा समुद्र मंथन के समय अनेक दिव्य रत्न प्राप्त हुए। इन्हीं में से एक था पारिजात वृक्ष, जो इन्द्रलोक (स्वर्ग) में लगाया गया। इसकी सुंदरता और दिव्य सुगंध ने सबका मन मोह लिया।
भगवान श्रीकृष्ण की पत्नी सत्यभामा ने पारिजात के फूल की चाह की। तब भगवान कृष्ण स्वर्ग गए और इन्द्र से पारिजात वृक्ष मांगा। इन्द्र ने इसे देने से मना कर दिया। तब भगवान कृष्ण ने इन्द्र से युद्ध कर पारिजात वृक्ष को पृथ्वी पर लाया और इसे अपनी पत्नी सत्यभामा के बगीचे में लगा दिया।
माना जाता है कि इसी कारण पारिजात वृक्ष के फूल रात में खिलते हैं और सुबह धरती पर गिर जाते हैं, ताकि कोई भी इसे तोड़े नहीं, बल्कि हर कोई इसे धरती पर बिखरे दिव्य फूल के रूप में प्राप्त करे।
👉 इस कथा के कारण पारिजात को “स्वर्ग से धरती पर उतरा दिव्य पुष्प” कहा जाता है।
Crossostephium chinense, commonly known as Chinese Wormwood or Chinese Lavender, is a versatile ornamental and medicinal plant belonging to the Asteraceae family, the same family as sunflowers, chrysanthemums, and chamomile.
This plant is admired for its silvery foliage, distinct aroma, and therapeutic properties. It is widely cultivated in gardens, balconies, and pots due to its compact growth and decorative appeal.
Leaves: Silvery-gray, spatulate, velvety in texture
Flowers: Small daisy-like flowers with yellow centers
Native Habitat: Coastal regions of China, Taiwan, Japan, Philippines, and Southeast Asia
This unique plant combines aesthetic value with traditional medicinal importance, making it a favorite for both gardeners and herbalists.
🌞 Climate & Light Requirements
Thrives in warm, subtropical, and coastal climates.
Sunlight: Requires at least 5–6 hours of direct sun daily.
Partial Shade: Beneficial during extreme heat.
Drought Tolerance: Can survive with minimal watering, making it a hardy choice.
🌿 Soil Requirements
Type: Well-draining sandy or loamy soil
pH Level: Slightly alkaline is best
Organic Matter: Enrich with compost or cow dung manure for healthy growth
💡 Tip: When growing in pots, use a mix of garden soil (50%), coarse sand (30%), and compost (20%). Add pebbles or cocopeat at the base to prevent waterlogging.
🌱 Planting Methods
1. In Pots
Choose a pot 8–10 inches wide.
Prepare soil mix with garden soil, sand, and compost.
Place the plant in the center and water lightly.
2. In Gardens
Maintain 20–25 cm spacing between plants.
Select a sunny location.
Provide light irrigation after planting.
💧 Watering Schedule
Summer: 2–3 times per week
Winter: Only when soil feels dry
Caution: Avoid overwatering to prevent root rot
🌿 Fertilization & Nutrition
Organic Manure: Apply compost or vermicompost every 30–40 days.
Liquid Fertilizer: Use organic tea or diluted vermicompost solution monthly.
Chemical Fertilizer: Apply mild NPK solution only if necessary.
✂️ Pruning & Maintenance
Regular pruning enhances compact and bushy growth.
Remove dry, yellow, or diseased leaves.
Trimming encourages fresh shoots and keeps the plant in shape.
🐛 Pests & Disease Management
Common Issues
Powdery Mildew: Due to excess moisture
Root Rot: From overwatering
Leaf Yellowing: Nutrient deficiency or poor soil
Solutions
Spray neem oil solution every 15 days.
Maintain controlled watering.
Enrich soil with compost and organic matter.
🌿 Medicinal & Traditional Uses
1. Traditional Chinese Medicine
Relieves coughs and phlegm
Helps regulate menstrual irregularities
Reduces fever
2. Other Uses
Improves digestion
Provides relief from inflammation and pain
Used in treating minor skin conditions
🪴 Ornamental Value
Border Planting: Ideal for decorating garden edges
Rock Gardens: Looks stunning between stones
Balcony Gardening: Compact and attractive in small pots
Silver Foliage Appeal: Adds contrast and brightness to landscapes
🌍 Environmental Importance
Prevents soil erosion in coastal and dry areas
Can grow in poor soils with minimal care
Supports biodiversity by attracting beneficial insects
Crossostephium chinense, जिसे आमतौर पर Chinese Wormwood या Chinese Lavender कहा जाता है, एक आकर्षक और बहुउपयोगी पौधा है। यह पौधा Asteraceae परिवार से संबंधित है, वही परिवार जिसमें सूर्यमुखी, गेंदा और कैमोमाइल जैसे पौधे आते हैं।
यह पौधा अपने चाँदी जैसे पत्तों, हल्की सुगंध, और औषधीय महत्व के कारण बागवानी प्रेमियों और पारंपरिक चिकित्सा पद्धतियों दोनों में खास स्थान रखता है। इसे गमले, बालकनी और गार्डन बॉर्डर में आसानी से उगाया जा सकता है।
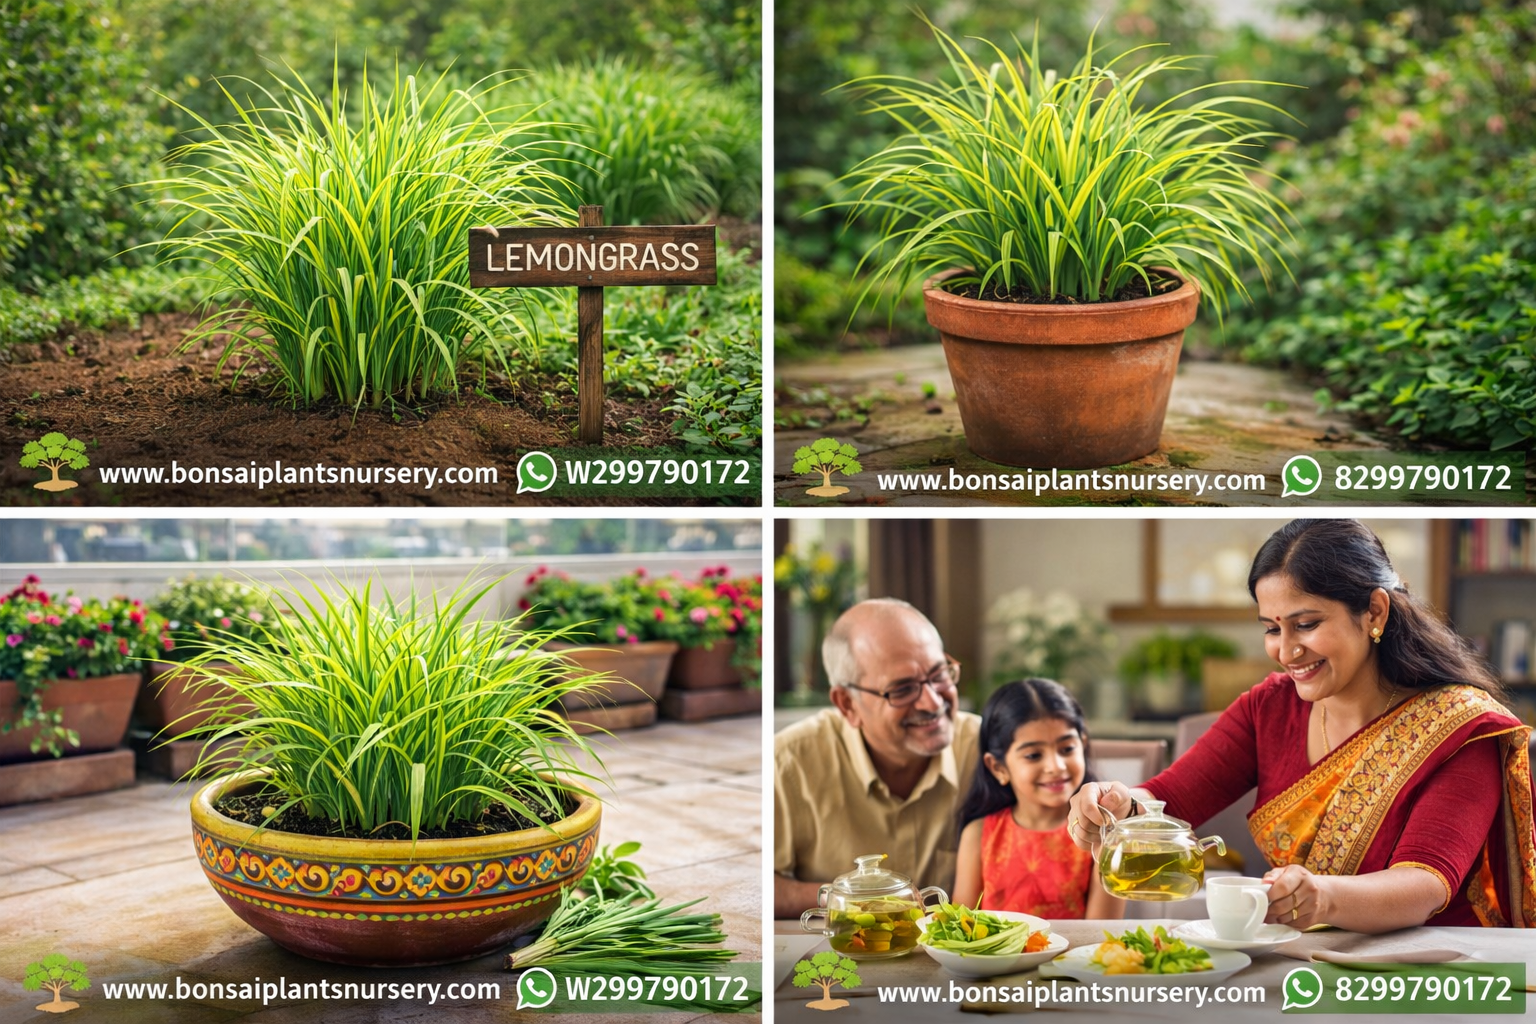
Lemongrass (Cymbopogon citratus) is an aromatic and multipurpose herbal plant that can be easily grown at home, in pots, or in gardens. Its leaves are widely used to make tea, essential oils, and herbal remedies.
Well-draining soil: Loamy or humus-rich soil is ideal.
pH Level: Between 5.0 and 8.0 is optimal.
2. Location (Garden or Pot)
Sunny spot: At least 6 hours of sunlight per day.
Partial shade: Helpful during peak summer.
3. Choosing the Plant
Fresh stems or cuttings: Healthy and disease-free.
Small plants: 15–20 cm length is ideal for transplanting.
4. Planting Method
Fill the pot with 15–20 cm of soil.
Insert the stem or small plant into the soil.
Gently press soil to stabilize the plant.
Water immediately after planting.
💧 Lemongrass Care
1. Watering
Water 2–3 times a week.
During hot weather, water more frequently.
Reduce watering in winter.
2. Fertilization
Compost or cow dung: Every 2 months.
NPK fertilizer: Improves soil fertility and plant growth.
3. Pruning & Harvesting
Cut leaves when they are 30–40 cm tall.
Water lightly after pruning.
Regular trimming promotes bushier growth and healthy plants.
4. Pest & Disease Management
Borer or fungal infections: Use neem extract or organic solutions.
Clean soil: Avoid contaminated soil.
Avoid overwatering: Prevents fungal growth.
🌿 Uses of Lemongrass
1. Tea & Herbal Drinks
Use 1–2 leaves, boil, and strain.
Add honey or lemon for flavor and health benefits.
2. Culinary Uses
Adds freshness to soups, curries, and salads.
Natural flavor enhancer in stir-fry dishes.
3. Oil & Massage
Extracted oil is beneficial for skin and hair.
Useful for massage due to anti-inflammatory properties.
4. Home & Decoration
Adds fragrance to your home when grown in pots.
Acts as a natural insect and mosquito repellent.
🌱 Harvesting & Storage
Harvesting: Cut upper leaves of the stems.
Drying: Dry leaves in shade.
Storage: Store dried leaves in airtight containers.
Oil Extraction: Essential oil can be extracted for massage and cosmetic use.
🌿 Frequently Asked Questions (FAQ)
1. What is Lemongrass?
Lemongrass is an aromatic herbal plant with a lemon-like fragrance. It can be grown at home, in pots, or gardens and is useful for health, herbal tea, and cooking.
2. What are the main benefits of Lemongrass?
Improves digestion, boosts immunity, reduces stress, relieves cold & cough, repels insects, and purifies indoor air.
3. How can Lemongrass be grown at home?
Choose a sunny spot, use well-draining soil, plant fresh stems or small plants, and water and fertilize regularly.
4. How to care for Lemongrass?
Water 2–3 times weekly, fertilize every 2 months, prune regularly, and use natural remedies for pests and diseases.
5. How are Lemongrass leaves used?
Leaves are used to make herbal tea, in soups, curries, salads, and for extracting essential oils for skincare and massage.
6. When should Lemongrass be harvested?
Harvest leaves when the stem reaches 30–40 cm. Regular pruning keeps the plant healthy and bushy.
7. How to store Lemongrass?
Keep fresh leaves in the fridge, dried leaves in airtight containers, and essential oil in small glass bottles.
8. How to prevent pests and diseases in Lemongrass?
Use neem extract or organic methods, maintain clean soil, and avoid overwatering.
9. Can Lemongrass oil be made at home?
Yes, using steam distillation from fresh leaves. Useful for hair, skin, and massage.
10. How much sunlight does Lemongrass need?
At least 6 hours of direct sunlight per day. Partial shade is helpful during extreme heat.
लेमनग्रास (Lemongrass) एक सुगंधित और बहुउपयोगी हर्बल पौधा है, जिसे घर, गमले और बाग़ीचे में आसानी से उगाया जा सकता है। इसके पत्तियों से चाय, तेल और औषधीय उत्पाद बनते हैं। यह पौधा सौंदर्य, स्वास्थ्य और घर की सजावट के लिए बेहद लाभकारी है।
अच्छी जल निकासी वाली मिट्टी: दोहनशील और ह्यूमस वाली मिट्टी।
pH स्तर: 5.0 से 8.0 के बीच उपयुक्त।
2. गमला या बगीचे का स्थान
धूप वाली जगह: कम से कम 6 घंटे प्रतिदिन।
छायादार विकल्प: गर्मियों में हल्की छाया।
3. लेमनग्रास के पौधे चुनना
ताजा तना या स्टेम: बिना रोग के स्वस्थ स्टेम।
छोटे पौधे: 15–20 सेमी की लंबाई वाले।
4. रोपाई की विधि
गमले में 15–20 सेमी मिट्टी भरें।
स्टेम या छोटे पौधे को गमले में लगाएं।
हल्का दबाव डालकर मिट्टी समतल करें।
रोपाई के बाद तुरंत पानी दें।
💧 लेमनग्रास की देखभाल
1. पानी देना
हफ्ते में 2–3 बार पानी।
गर्मियों में मिट्टी सूखने पर अधिक पानी।
सर्दियों में पानी कम करें।
2. खाद और पोषण
कंपोस्ट या गोबर की खाद: हर 2 महीने में।
एनपीके उर्वरक: मिट्टी की उर्वरता बढ़ाने के लिए।
3. छंटाई और कटाई
30–40 सेमी की लंबाई पर पत्तियों को काटें।
कटाई के बाद मिट्टी में हल्का पानी दें।
नियमित छंटाई पौधे को घना और स्वस्थ बनाती है।
4. कीट और रोग प्रबंधन
घुन या फफूंदी: प्राकृतिक उपाय जैसे नीम का अर्क।
रोग मुक्त मिट्टी: गमले और बगीचे में साफ मिट्टी का उपयोग।
🌿 लेमनग्रास के उपयोग
1. चाय और हर्बल ड्रिंक
1–2 पत्तियां काटें, उबालें।
मधु या नींबू डालकर पीएं।
2. खाना पकाने में
सूप, करी, सलाद और स्टिर-फ्राई में ताजगी।
प्राकृतिक फ्लेवर और स्वाद बढ़ाने के लिए।
3. तेल और मसाज
पत्तियों से निकला तेल त्वचा और बालों के लिए।
मसाज में एंटी-इंफ्लेमेटरी लाभ।
4. घर और सजावट
गमले में रखने से खुशबू फैलती है।
कीट और मक्खियों से घर की सुरक्षा।
🌱 लेमनग्रास की कटाई और भंडारण
कटाई: स्टेम के ऊपरी पत्ते काटें।
सुखाने की विधि: छाया में सूखाएं।
भंडारण: एयर-टाइट कंटेनर में रखें।
तेल संग्रहण: पत्तियों से एसेंशियल ऑयल निकालकर स्टोर करें।
🌿 लेमनग्रास (Lemongrass) के बारे में अक्सर पूछे जाने वाले सवाल (FAQ)
1. लेमनग्रास क्या है?
लेमनग्रास एक हर्बल पौधा है, जिसकी खुशबू नींबू जैसी होती है। इसे घर, गमले और बगीचे में उगाया जा सकता है। यह स्वास्थ्य, हर्बल चाय और खाना पकाने में उपयोगी है।
2. लेमनग्रास के प्रमुख फायदे क्या हैं?
पाचन सुधारने में मदद करता है।
इम्यूनिटी बढ़ाता है।
तनाव कम करता है।
खांसी और सर्दी-जुकाम में राहत देता है।
कीट और मक्खियों को भगाता है।
एयर प्यूरीफायर का काम करता है।
3. लेमनग्रास घर में कैसे उगाया जा सकता है?
धूप वाली जगह चुनें।
अच्छी जल निकासी वाली मिट्टी का उपयोग करें।
ताजा स्टेम या छोटे पौधे लगाएं।
नियमित पानी और खाद दें।
4. लेमनग्रास की देखभाल कैसे करें?
हफ्ते में 2–3 बार पानी दें।
हर 2 महीने में गोबर या कंपोस्ट खाद डालें।
पौधे को स्वस्थ रखने के लिए नियमित छंटाई करें।
कीट और फफूंदी से बचाने के लिए नीम का अर्क या प्राकृतिक उपाय अपनाएँ।
5. लेमनग्रास के पत्तों का उपयोग कैसे किया जाता है?
हर्बल चाय बनाने के लिए।
सूप, करी, सलाद और स्टिर-फ्राई में।
पत्तियों से तेल निकालकर मसाज और सौंदर्य उत्पादों में।
6. लेमनग्रास कब काटा जाता है?
पौधे के स्टेम के ऊपरी पत्तों को जब यह 30–40 सेमी लंबा हो जाए।
कटाई के बाद हल्का पानी दें।
नियमित कटाई से पौधा घना और स्वस्थ रहता है।
7. लेमनग्रास को किस तरह स्टोर किया जा सकता है?
ताजगी के लिए पत्तियों को फ्रिज में रखें।
सुखाने के बाद एयर-टाइट कंटेनर में स्टोर करें।
एसेंशियल ऑयल को छोटे कांच के कंटेनर में रखें।
8. लेमनग्रास के कीट और रोग कैसे रोकें?
नियमित निगरानी करें।
नीम का अर्क या जैविक उपाय अपनाएँ।
गमले और मिट्टी को साफ रखें।
अत्यधिक पानी से बचें, इससे फफूंदी की समस्या कम होती है।
9. क्या लेमनग्रास का तेल भी घर पर बनाया जा सकता है?
हाँ, लेमनग्रास के पत्तियों से एसेंशियल ऑयल निकाला जा सकता है। इसे स्टीम डिस्टिलेशन के माध्यम से बनाया जाता है और यह त्वचा, बाल और मसाज के लिए उपयोगी है।
10. लेमनग्रास के पौधे को कितनी धूप चाहिए?
कम से कम 6 घंटे प्रतिदिन सूर्य की रोशनी।
गर्मियों में हल्की छाया पौधे की वृद्धि के लिए लाभकारी।
Growing plants at home or in pots not only makes your space green and vibrant but also provides health benefits, decoration, and medicinal uses. This post lists 100 plants you can easily grow in your home garden or balcony pots.
घर और गमलों में पौधे उगाना न सिर्फ़ आपके घर को हरा-भरा बनाता है, बल्कि स्वास्थ्य, सजावट और आयुर्वेदिक लाभ भी प्रदान करता है। इस पोस्ट में हमने 100 पौधों की सूची दी है जिन्हें आप आसानी से घर में गमलों में उगा सकते हैं।
📊 पौधों की श्रेणियों के अनुसार वितरण
श्रेणी
संख्या
प्रतिशत
फूल वाले पौधे
10
10%
औषधीय पौधे
10
10%
सब्ज़ी वाले पौधे
10
10%
फल वाले पौधे
10
10%
हरे/सदाबहार पौधे
10
10%
खुशबू वाले पौधे
10
10%
बेल वाले पौधे
10
10%
किचन/हर्बल पौधे
10
10%
छोटे सजावटी पौधे
10
10%
अन्य उपयोगी पौधे
10
10%
Chart: (Bar Chart)
X-axis: Categories
Y-axis: Number of Plants
Color: Green tones for visual appeal
🌺 फूलों वाले पौधे
नाम
उपयोग
देखभाल की विधि
गुलाब (Rose)
पूजा, सजावट
धूप वाली जगह, हफ्ते में 2–3 बार पानी
गेंदा (Marigold)
पूजा, सजावट
धूप वाली जगह, नियमित पानी
जैस्मीन (Jasmine)
सुगंध, पूजा
हल्की धूप, नियमित पानी
गुलदाउदी (Chrysanthemum)
सजावटी, एयर प्यूरीफायर
मध्यम धूप, नियमित पानी
हिबिस्कस (Hibiscus)
पूजा, आयुर्वेद
धूप वाली जगह, हफ्ते में 2 बार पानी
पेंस (Pansy)
सजावटी
मध्यम धूप, हल्की मिट्टी
लैवेंडर (Lavender)
सुगंध, सजावट
धूप, कम पानी
सूरजमुखी (Sunflower)
सजावटी, बीज
धूप, नियमित पानी
कैलेंडुला (Calendula)
हर्बल, सजावटी
धूप, हल्की मिट्टी
अमरांथा (Amaranthus)
सजावटी, हरी पत्तियां
धूप, नियमित पानी
🌿 औषधीय पौधे
नाम
उपयोग
देखभाल की विधि
तुलसी (Holy Basil)
सर्दी-जुकाम, हृदय
धूप, नियमित पानी
एलोवेरा (Aloe Vera)
त्वचा रोग, हीलिंग
आधी धूप, कम पानी
नीम (Neem)
रोग प्रतिरोधक, कीट नियंत्रण
धूप, कम पानी
अश्वगंधा (Ashwagandha)
तनाव, थकान
धूप, नियमित पानी
पुदीना (Mint)
पाचन, ताजगी
हल्की धूप, नियमित पानी
अदरक (Ginger)
औषधीय, पाक कला
छायादार, नियमित पानी
हल्दी (Turmeric)
औषधीय, मसाले
छायादार, नियमित पानी
मेथी (Fenugreek)
स्वास्थ्यवर्धक
धूप, हल्की मिट्टी
अंजीर (Fig)
पाचन, सजावटी
धूप, कम पानी
गिलोय (Giloy)
इम्यूनिटी
हल्की धूप, नियमित पानी
🌱 सब्ज़ियों वाले पौधे
नाम
उपयोग
देखभाल की विधि
टमाटर (Tomato)
सलाद, सब्ज़ी
धूप, नियमित पानी
भिंडी (Okra)
सब्ज़ी
धूप, हल्की मिट्टी
बैंगन (Brinjal)
सब्ज़ी
धूप, नियमित पानी
शिमला मिर्च (Capsicum)
सब्ज़ी
धूप, हल्की मिट्टी
खीरा (Cucumber)
सलाद
धूप, बेल सहारा
पालक (Spinach)
पोषण
हल्की धूप, नियमित पानी
लौकी (Bottle Gourd)
सब्ज़ी
धूप, बेल सहारा
करेला (Bitter Gourd)
औषधीय
धूप, बेल सहारा
शलगम (Turnip)
पत्तियाँ और जड़
धूप, नियमित पानी
मूली (Radish)
जड़ वाली सब्ज़ी
धूप, नियमित पानी
🍎 फल वाले पौधे
नाम
उपयोग
देखभाल की विधि
नींबू (Lemon)
ताजा फल, सजावटी
धूप, नियमित पानी
संतरा (Orange)
ताजा फल
धूप, हल्की मिट्टी
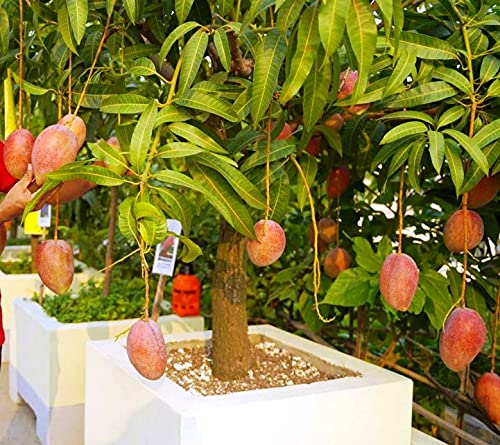
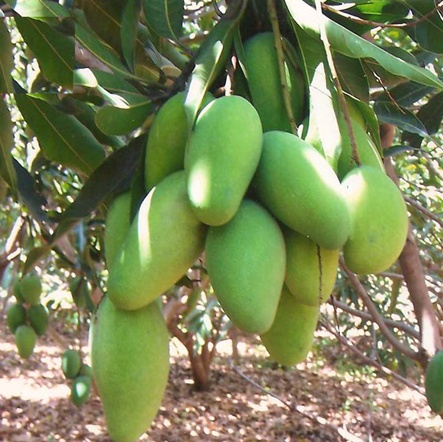
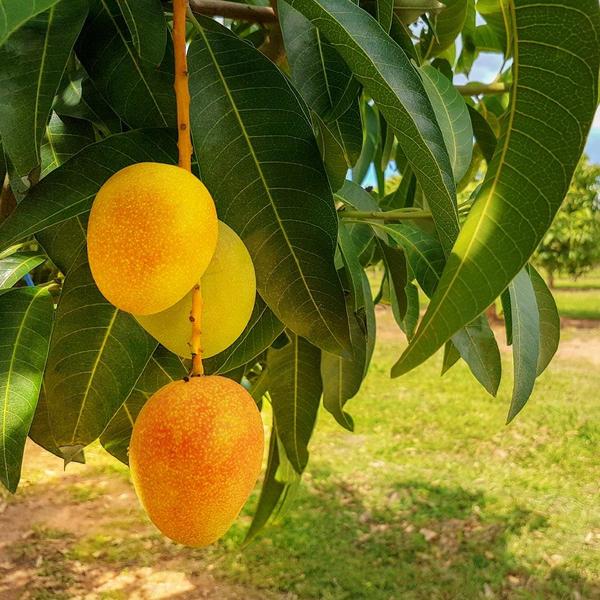
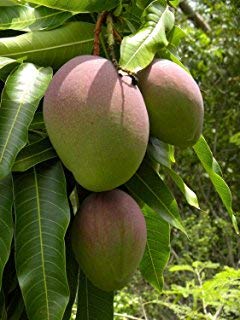
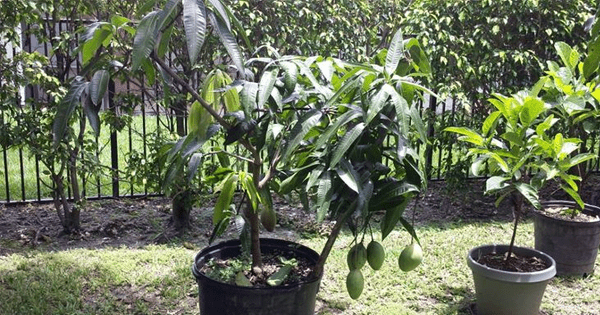
आम (Mango)
फल
छोटे गमले में, धूप
अमरूद (Guava)
फल
धूप, नियमित पानी
स्ट्रॉबेरी (Strawberry)
फल
हल्की धूप, नियमित पानी
पपीता (Papaya)
फल
धूप, नियमित पानी
कीवी (Kiwi)
बेलदार, फल
सहारा, धूप
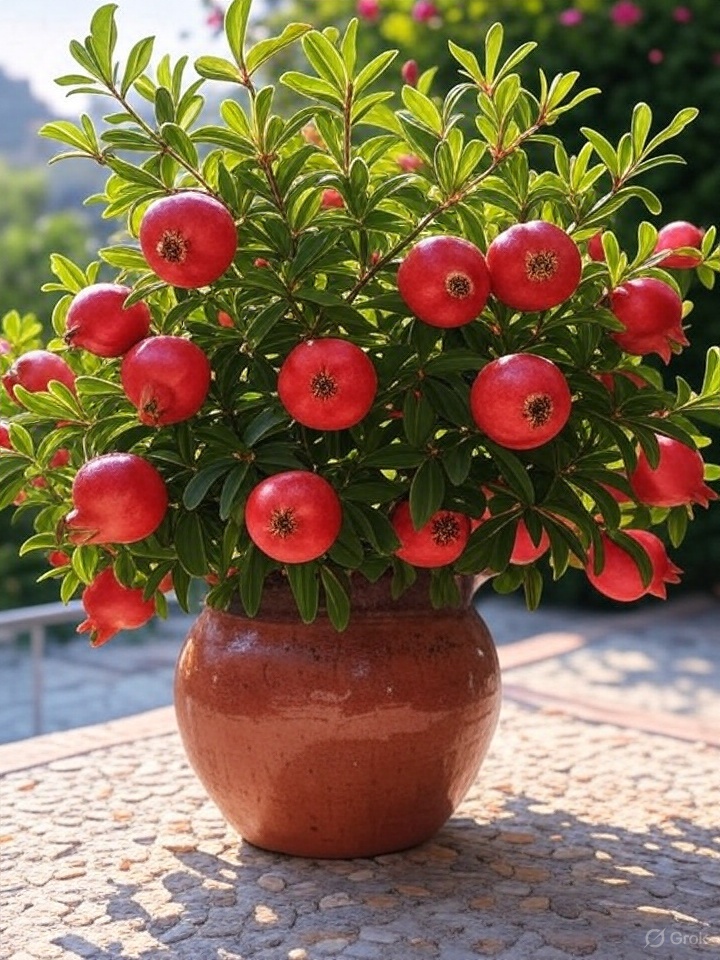
अनार (Pomegranate)
फल
धूप, कम पानी
अंगूर (Grapes)
बेलदार, फल
सहारा, धूप
नाशपाती (Pear)
फल
गमले में छोटे पेड़
🌿 हरे/सदाबहार पौधे
नाम
उपयोग
देखभाल की विधि
स्नेक प्लांट (Snake Plant)
एयर प्यूरीफायर
कम धूप, कम पानी
पॉथोस (Pothos/Devil’s Ivy)
जल्दी बढ़ने वाली बेल
हल्की धूप, नियमित पानी
स्पाइडर प्लांट (Spider Plant)
हरा पौधा
हल्की धूप, नियमित पानी
फर्न (Fern)
सजावटी
छायादार, नियमित पानी
मनी प्लांट (Money Plant)
घर में समृद्धि
हल्की धूप, नियमित पानी
सर्पेंटाइन (ZZ Plant)
कम देखभाल
कम धूप, कम पानी
बोस्टन फर्न (Boston Fern)
सजावटी
छायादार, नियमित पानी
ड्रासिना (Dracaena)
एयर प्यूरीफायर
मध्यम धूप, कम पानी
गोल्डन बैंबू (Lucky Bamboo)
कम धूप में
पानी बदलें, हल्की मिट्टी
कैक्टस (Cactus)
कम पानी में
धूप, कम पानी
🌸 खुशबू वाले पौधे
नाम
उपयोग
देखभाल की विधि
रोज़मेरी (Rosemary)
सुगंध, खाना
धूप, कम पानी
थाइम (Thyme)
हर्बल, मसाला
धूप, कम पानी
लेमनग्रास (Lemongrass)
चाय, सुगंध
धूप, नियमित पानी
कैमोमाइल (Chamomile)
हर्बल चाय
धूप, हल्की मिट्टी
बेसिल (Sweet Basil)
पाक कला
धूप, नियमित पानी
सेंट जॉन’स वॉर्ट
हर्बल
धूप, कम पानी
लैवेंडर (Lavender)
मानसिक शांति
धूप, कम पानी
मैजोरम (Marjoram)
मसाले
धूप, हल्की मिट्टी
कोरियेंडर (Coriander/Cilantro)
सलाद, मसाला
धूप, नियमित पानी
सिट्रस बैक्टीरिया (Lemon Balm)
चाय, सुगंध
धूप, हल्की मिट्टी
🌿 बेल वाले पौधे
नाम
उपयोग
देखभाल की विधि
इपॉमिया (Ipomoea)
तेज़ी से फैलने वाली बेल
धूप, सहारा
मनी प्लांट बेल (Money Plant Vine)
लटकाने के लिए
हल्की धूप, नियमित पानी
जैस्मीन बेल (Jasmine Vine)
सुगंध
धूप, सहारा
हनीसकल (Honeysuckle)
फूल
धूप, सहारा
गुलमोहर बेल (Flame Vine)
सजावटी
धूप, सहारा
क्लाइम्बिंग रोज़ (Climbing Rose)
गमलों में
धूप, सहारा
प्लैटिनम बेल (Plumeria Vine)
फूल
धूप, सहारा
मूलबेर बेल (Mulberry Vine)
फल
धूप, सहारा
थम्बलिना (Thunbergia)
रंगीन फूल
धूप, सहारा
क्लाइम्बिंग हिबिस्कस
सजावटी
धूप, सहारा
🌿 किचन और हर्बल पौधे
नाम
उपयोग
देखभाल की विधि
धनिया (Coriander)
सलाद, मसाला
धूप, नियमित पानी
हरी मिर्च (Green Chili)
सब्ज़ी
धूप, नियमित पानी
अजवाइन (Carom Seeds)
मसाला
धूप, हल्की मिट्टी
सलवेल (Borage)
हर्बल, सजावट
धूप, नियमित पानी
सौंफ (Fennel)
मसाला
धूप, हल्की मिट्टी
बेसिल/तुलसी
पाक कला, हर्बल
धूप, नियमित पानी
मेथी (Fenugreek)
हरी पत्तियां
धूप, हल्की मिट्टी
ओरिगैनो (Oregano)
हर्बल, मसाला
धूप, कम पानी
पार्सले (Parsley)
सलाद
धूप, नियमित पानी
चिव्स (Chives)
सलाद
धूप, नियमित पानी
🌿 छोटे सजावटी और मिनी पौधे
नाम
उपयोग
देखभाल की विधि
बोन्साई (Bonsai)
मिनी पेड़, सजावटी
धूप, नियमित पानी
सक्सुलेंट (Succulent)
कम देखभाल
धूप, कम पानी
क्रासुला (Crassula)
मिनी गार्डन
धूप, कम पानी
एशियाटिक लिली (Asiatic Lily)
छोटे गमले
धूप, नियमित पानी
मनी ट्री (Money Tree/Pachira)
लकी, सजावटी
हल्की धूप, नियमित पानी
हवायन पाम (Hawaiian Palm)
मिनी गमले
हल्की धूप, कम पानी
फिकस बेंजामिना (Ficus Bonsai)
मिनी पेड़
धूप, नियमित पानी
ड्रैगन ब्लड प्लांट
लाल सजावटी
धूप, कम पानी
गोल्डन फिग (Golden Fig)
मिनी पेड़
धूप, नियमित पानी
हाउस प्लांट्स (Spider, Pothos)
सजावटी
हल्की धूप, नियमित पानी
🌿 अन्य उपयोगी पौधे
नाम
उपयोग
देखभाल की विधि
बिट्स (Bitter Leaf)
औषधीय
धूप, हल्की मिट्टी
सिट्रस पौधे
फल
गमले में, धूप
ग्वारपाठा
सजावटी, औषधीय
धूप, नियमित पानी
कैरम (Ajwain)
मसाला
धूप, हल्की मिट्टी
सहजन (Moringa)
पत्तियां
धूप, नियमित पानी
तुअर (Pigeon Pea)
सब्ज़ी
धूप, गमले में
पालक (Spinach)
पोषण
हल्की धूप, नियमित पानी
रोज़मेरी (Rosemary)
हर्बल, सुगंध
धूप, कम पानी
लेमनग्रास (Lemongrass)
सुगंध
धूप, नियमित पानी
केवड़ा (Pandan/Screwpine)
सुगंध, सजावट
धूप, नियमित पानी
1. फूलों वाले पौधे (Ornamental/Flowering Plants)
गुलाब (Rose) – सुगंधित और सुंदर फूल, धार्मिक एवं सजावटी उपयोग।
गेंदा (Marigold) – पूजा और सजावट में प्रयुक्त।
जैस्मीन (Jasmine) – सुगंधित फूल, हवन और पूजा में उपयोग।
गुलदाउदी (Chrysanthemum) – सजावटी और वायुप्रदूषण कम करने में सहायक।
हिबिस्कस (Hibiscus) – पूजा, सजावट और आयुर्वेदिक उपयोग।
पेंस (Pansy) – रंग-बिरंगे फूलों के लिए।
लैवेंडर (Lavender) – सुगंधित फूल, मानसिक शांति और सजावट।
सूरजमुखी (Sunflower) – सजावटी और स्वास्थ्यवर्धक बीज।
कैलेंडुला (Calendula) – हर्बल और सजावटी उपयोग।
अमरनाथ/अमरांथा (Amaranthus) – सजावटी और हरी पत्तियों के लिए।
2. औषधीय पौधे (Medicinal Plants)
तुलसी (Holy Basil) – आयुर्वेद में हृदय, सर्दी-जुकाम में उपयोग।
अलोवेरा (Aloe Vera) – त्वचा रोग, हीलिंग और सजावटी।
नीम (Neem) – रोगप्रतिरोधक, कीट नियंत्रण और औषधि।
अश्वगंधा (Ashwagandha) – तनाव, थकान और स्वास्थ्यवर्धक।
पुदीना (Mint) – पाचन, ताजगी और सजावट।
अदरक (Ginger) – औषधीय और खाना पकाने में उपयोग।
हल्दी (Turmeric) – औषधीय और पाक कला में उपयोग।
मेथी (Fenugreek) – स्वास्थ्यवर्धक और हरी पत्तियों के लिए।
अंजीर (Ficus/ Fig plant) – पाचन, स्वास्थ्यवर्धक और सजावटी।
गिलोय (Giloy) – इम्यूनिटी बढ़ाने के लिए औषधीय।
3. सब्ज़ियों वाले पौधे (Vegetable Plants)
टमाटर (Tomato) – घर में उगाने योग्य, सलाद और सब्ज़ी के लिए।
भिंडी (Okra/Ladyfinger) – गमलों में उगाई जा सकती।
बैंगन (Brinjal/Eggplant) – पौधे बड़े नहीं, लेकिन गमले में उग सकते।
शिमला मिर्च (Capsicum/Bell Pepper) – रंग-बिरंगी सब्ज़ियों के लिए।
खीरा (Cucumber) – बेलों के साथ गमलों में उग सकता।
पालक (Spinach) – जल्दी बढ़ने वाली हरी सब्ज़ी।
लौकी (Bottle Gourd) – लंबी बेलों के लिए गमले में।
करेला (Bitter Gourd) – औषधीय गुणों वाली सब्ज़ी।
शलगम (Turnip) – पत्तियों और जड़ दोनों के लिए।
मूली (Radish) – जल्दी उगने वाली जड़ वाली सब्ज़ी।
4. फल वाले पौधे (Fruit Plants in Pots)
नींबू (Lemon) – छोटे पेड़ गमले में उग सकते।
संतरा (Orange) – मध्यम आकार के पेड़।
आम (Mango) – छोटे डीवारिएंट्स गमलों में उग सकते।
अमरूद (Guava) – गमलों में उगने योग्य।
स्ट्रॉबेरी (Strawberry) – छोटे पौधे, बालकनी में उपयुक्त।
पपीता (Papaya) – ताजा फल के लिए।
कीवी (Kiwi) – बेलदार गमले में उग सकता।
अनार (Pomegranate) – गमले में छोटे पेड़ के रूप में उग सकते।
अंगूर (Grapes) – बेलदार, गमले में प्रशिक्षित।
नाशपाती (Pear) – गमले में छोटे आकार में।
5. सदाबहार और हरे पौधे (Foliage/Indoor Green Plants)
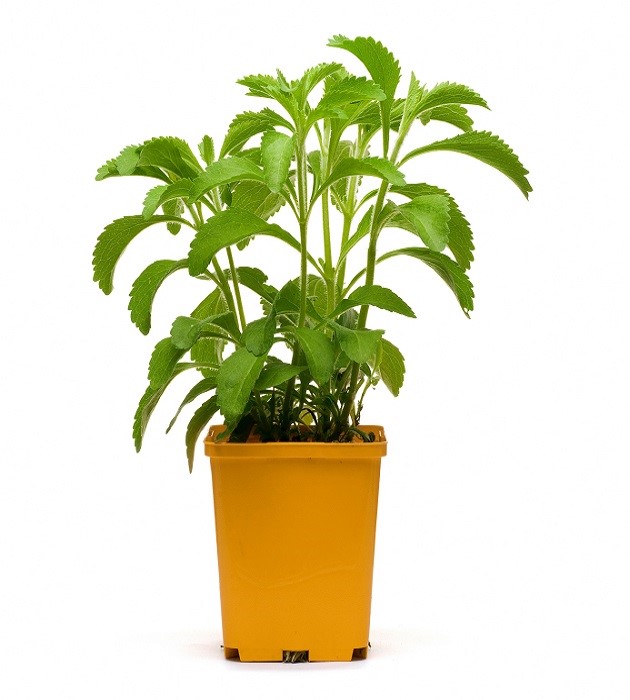
When it comes to natural sweeteners, Stevia (Stevia rebaudiana) stands out as one of the most popular and effective alternatives to sugar. Known as the “Sweet Leaf” or “Sugar Leaf”, Stevia is a green, leafy plant that belongs to the sunflower family (Asteraceae). Its leaves contain natural compounds called steviol glycosides, which are 200–300 times sweeter than table sugar yet contain zero calories.
Stevia originates from South America, particularly Paraguay and Brazil, where indigenous communities have been using it for centuries to sweeten teas and herbal drinks. Over time, its popularity spread across the globe, and today, it is cultivated widely in Asia, Europe, and North America due to its health and commercial benefits.
🍃 Why Stevia is Called “Sweet Leaf”
The plant earned the nickname “Sweet Leaf” because of the remarkable sweetness of its leaves. Unlike sugar, which contributes to obesity, diabetes, and dental problems, Stevia provides a naturally sweet taste without harmful side effects. This makes it a healthy sugar substitute for people of all ages, especially those dealing with diabetes and obesity.
🌍 Growing Popularity Worldwide
In recent years, health awareness has been on the rise. People are moving away from refined sugar and artificial sweeteners due to their negative impact on health. This global trend has placed Stevia at the center of attention. Major food and beverage companies have started using Stevia extracts in products like soft drinks, chocolates, protein powders, teas, and sugar-free desserts.
Countries like Japan were among the first to adopt Stevia commercially, and today it is approved by leading health organizations including the FDA (U.S. Food & Drug Administration) and the European Food Safety Authority (EFSA).
🌟 Importance of Stevia in Modern Lifestyle
For Health-Conscious Individuals: Stevia helps reduce calorie intake, making it an essential part of weight management programs.
For Diabetic Patients: Stevia doesn’t raise blood sugar levels, making it a safe sweetener for diabetes management.
For Everyday Use: Whether in tea, coffee, or homemade sweets, Stevia adds natural sweetness without the harmful effects of sugar.
For the Economy: Stevia farming has become an emerging agricultural business. Many farmers are now cultivating Stevia due to its increasing demand and high market value.
🌱 Why You Should Grow Stevia at Home
Easy to grow in pots, balconies, gardens, or rooftops
Requires minimal care and thrives in warm climates
Provides fresh, chemical-free leaves for daily use
Helps you reduce sugar dependency naturally
Health & General Benefits of Stevia
The demand for natural sugar substitutes has grown rapidly in the last decade, and among them, Stevia is the most trusted option. Known for its zero-calorie sweetness and numerous health benefits, Stevia has been embraced worldwide as a healthy alternative to sugar. Let us explore the various benefits of this magical plant in detail.
🍃 1. Zero Calories – Ideal for Weight Management
One of the biggest advantages of Stevia is that it contains zero calories. Unlike refined sugar, which adds extra calories and contributes to weight gain, Stevia provides sweetness without affecting your daily calorie count.
People trying to lose weight can use Stevia in tea, coffee, juices, or desserts.
Fitness enthusiasts and athletes often prefer Stevia over sugar in their diet plans.
Replacing sugar with Stevia helps prevent obesity and related health issues.
🍃 2. Natural Sweetness Without Side Effects
Artificial sweeteners like saccharin and aspartame are known to cause side effects such as headaches, digestive problems, and even long-term health risks. In contrast, Stevia is a completely natural sweetener.
It is derived directly from plant leaves.
No harmful chemicals are involved in its natural form.
Safe for children, adults, and the elderly (when consumed in moderation).
🍃 3. Helps in Diabetes Management
Stevia is a blessing for diabetic patients. Its glycosides do not increase blood sugar levels, making it safe for people suffering from both Type 1 and Type 2 diabetes.
Regular use of Stevia can help regulate insulin production.
It prevents sudden spikes and drops in blood sugar levels.
Diabetic-friendly desserts and beverages often use Stevia instead of sugar.
🍃 4. Good for Heart Health
High sugar intake is directly linked to heart problems such as high blood pressure, cholesterol imbalance, and obesity. Replacing sugar with Stevia can improve cardiovascular health.
Studies suggest that Stevia helps lower high blood pressure.
It improves blood circulation and reduces strain on the heart.
Regular use may reduce risks of heart attack and stroke.
🍃 5. Dental & Oral Health Benefits
Unlike sugar, which is one of the main causes of tooth decay, cavities, and gum disease, Stevia is safe for oral health.
It does not promote bacterial growth in the mouth.
Helps maintain healthy teeth and gums.
Many toothpastes and mouthwashes now include Stevia extracts as a sweetener.
🍃 6. Aids in Digestion and Gut Health
Stevia has mild anti-inflammatory and anti-bacterial properties that help in maintaining a healthy digestive system.
Prevents acidity and bloating.
Supports a healthy gut microbiome.
Herbal teas with Stevia are known to improve digestion after meals.
🍃 7. Boosts Immunity
Rich in antioxidants, Stevia strengthens the body’s natural defense system.
Regular consumption protects the body from infections and free radicals.
Helps in preventing common illnesses like cold, cough, and seasonal flu.
Supports overall vitality and long-term wellness.
🍃 8. Skin Benefits
The antimicrobial properties of Stevia make it beneficial for skin health.
Stevia extracts help in reducing acne, pimples, and skin irritation.
Homemade face masks with Stevia leaves can promote glowing skin.
Prevents premature aging by fighting oxidative stress.
🍃 9. Safe for All Age Groups
Unlike many artificial sweeteners that are not recommended for children or pregnant women, Stevia in natural form is considered safe.
Children can enjoy Stevia-sweetened treats without risking tooth decay.
Adults can use it in beverages, desserts, and everyday meals.
Pregnant women may also use Stevia but should consult a doctor first.
🍃 10. Eco-Friendly and Sustainable
Beyond health benefits, Stevia also supports environmental sustainability.
It requires less land and water compared to sugarcane cultivation.
Contributes to organic farming practices.
Encourages a shift toward sustainable agriculture.
🌟 Summary of Health Benefits
✅ Zero calories, weight management support
✅ Safe for diabetics – does not raise blood sugar
✅ Improves heart health and regulates blood pressure
✅ Protects teeth and gums from decay
✅ Supports digestion and gut health
✅ Boosts immunity with antioxidants
✅ Improves skin health naturally
✅ Safe and eco-friendly
Planting Method of Stevia
Growing Stevia (Stevia rebaudiana) at home is simple, rewarding, and highly beneficial. Whether you want to use it for personal consumption or on a commercial scale, Stevia can be cultivated successfully with the right method. Below is the complete guide for planting Stevia.
🌱 1. Climate and Season for Planting
Stevia is a subtropical and tropical plant that prefers warm conditions.
Ideal temperature: 20°C to 30°C (68°F to 86°F).
It does not tolerate frost or extreme cold.
Best season for planting in India: February–March and July–August (before monsoon).
In temperate regions, Stevia can be grown indoors in pots throughout the year.
🌱 2. Soil Preparation
Stevia thrives in well-drained, sandy loam soil enriched with organic matter.
pH requirement: Slightly acidic to neutral (6.0–7.5).
Avoid saline or heavy clay soils as they cause root rot.
Enrich soil with compost, cow dung manure, or vermicompost before planting.
Good drainage is essential since Stevia roots are sensitive to waterlogging.
🌱 3. Pot Selection for Home Gardening
If you are growing Stevia at home in pots or containers:
Use a 12–15 inch deep pot with proper drainage holes.
Fill with a mix of 40% garden soil + 40% organic compost + 20% sand.
Place the pot in a sunny balcony, terrace, or garden.
🌱 4. Propagation Methods
Stevia can be grown through seeds or cuttings.
(a) Growing Stevia from Seeds
Seeds are very tiny and have a low germination rate (30–40%).
Use a seed tray filled with light potting mix.
Sprinkle seeds on the surface and cover lightly with soil.
Keep in partial shade and maintain moisture.
Seeds germinate in 7–14 days.
Once seedlings reach 4–5 inches, transplant them into pots or garden beds.
(b) Growing Stevia from Cuttings (Best Method)
Cuttings provide better survival rate and faster growth.
Take 3–4 inch stem cuttings from a healthy Stevia plant.
Remove lower leaves and dip cut end in organic rooting hormone (optional).
Plant in moist soil or cocopeat mix.
Roots develop in 2–3 weeks, after which you can transfer them to pots or open ground.
🌱 5. Spacing and Plantation Layout
For garden or farm cultivation: maintain 30 cm (1 ft) spacing between plants and 45 cm (1.5 ft) between rows.
For pots: plant 1 seedling per pot.
Ensure proper airflow and sunlight access.
🌱 6. Watering Guidelines
Stevia requires regular but light watering.
Keep soil moist but not waterlogged.
In summer, water every 2–3 days.
In winter, reduce watering frequency.
Use mulching (dry leaves, straw, or cocopeat) to retain soil moisture.
🌱 7. Fertilization for Healthy Growth
Stevia prefers organic fertilizers over chemical ones.
Apply vermicompost or cow dung manure once every 20–25 days.
Avoid heavy nitrogen fertilizers as they reduce sweetness in leaves.
Use neem cake powder to improve soil health and prevent pests.
🌱 8. Sunlight Requirements
Stevia loves full sunlight (6–7 hours daily).
Partial shade is acceptable, but it reduces leaf sweetness.
Indoor Stevia plants should be placed near south-facing windows or under grow lights.
🌱 9. Companion Plants
Stevia grows well with:
Tulsi (Holy Basil)
Mint
Lemongrass
Marigold (helps repel insects)
Avoid planting Stevia near large trees that may block sunlight or absorb nutrients.
🌱 10. Harvesting Stevia
First harvest: 3–4 months after planting.
Subsequent harvests: every 3–4 months.
Cut stems just above the base, leaving 3–4 inches for regrowth.
Dry leaves in shade for 2–3 days and store in airtight containers.
🌟 Quick Step-by-Step Summary for Beginners
Choose warm season and sunny spot.
Prepare sandy loam soil with compost.
Use pots (12–15 inch) or plant directly in garden.
Propagate through cuttings (best) or seeds.
Maintain spacing of 30 × 45 cm in garden beds.
Water lightly every 2–3 days.
Fertilize with organic compost every 3–4 weeks.
Provide full sunlight daily.
Harvest after 3–4 months and dry leaves for use.
Care & Maintenance Tips for Stevia Plant
Growing Stevia is simple, but to get healthy, sweet, and long-lasting leaves, proper care and maintenance are essential. Whether you are cultivating Stevia in pots, gardens, or farms, following these tips will ensure maximum growth and yield.
🌞 1. Sunlight Requirements
Stevia is a sun-loving plant.
Needs 6–8 hours of direct sunlight daily.
In cooler climates, place pots indoors near a south-facing window.
If natural light is insufficient, use LED grow lights for at least 12–14 hours.
Avoid full shade, as it reduces sweetness and leaf production.
💧 2. Watering Guidelines
Stevia requires consistent moisture but cannot tolerate waterlogging.
Keep the soil evenly moist but not soggy.
In summer: water every 2–3 days or when topsoil feels dry.
In winter: reduce watering to once every 4–5 days.
Best method: drip irrigation or light watering at soil level.
Avoid splashing water on leaves to prevent fungal infections.
🌱 3. Fertilization Schedule
Stevia grows best with organic fertilizers.
Apply vermicompost, cow dung manure, or compost tea once every 20–25 days.
Avoid excess nitrogen fertilizers as they reduce leaf sweetness.
For better growth, apply liquid seaweed extract or organic foliar spray once a month.
Add neem cake powder to prevent soil-borne diseases and pests.
✂️ 4. Pruning and Pinching
Pruning improves leaf production and keeps the plant bushy.
Pinch off the top 2–3 inches of stems when the plant reaches 6–8 inches tall.
Remove yellow or dry leaves regularly.
Cut back long stems to encourage branching.
After harvesting, leave 3–4 inches of stem for regrowth.
🐛 5. Pest & Disease Management
Stevia is relatively pest-resistant but can sometimes be affected.
Common pests:
Aphids
Whiteflies
Mealybugs
Spider mites
Natural remedies:
Spray neem oil solution (5 ml in 1 liter water) once a week.
Introduce ladybugs in the garden to control aphids naturally.
Use garlic or chili spray for pest control.
Common diseases:
Root rot (due to waterlogging)
Powdery mildew (white fungus on leaves)
Prevention:
Ensure proper drainage in pots.
Avoid overhead watering.
Use organic fungicides like Trichoderma powder if needed.
🍂 6. Seasonal Care Tips
Summer: Protect from extreme heat by using shade nets during mid-day.
Winter: Move potted plants indoors to protect from frost; use grow lights if needed.
🌿 7. Harvesting and Storage
First harvest: 3–4 months after planting.
Best time: just before flowering (leaves are sweetest then).
Cut stems leaving a few inches for regrowth.
Dry leaves in shade for 2–3 days.
Store in airtight containers away from moisture.
Shelf life:
Dried Stevia leaves remain fresh for up to 12 months.
Stevia powder can be stored for 6–8 months.
🌍 8. Indoor vs Outdoor Care
Indoor plants: require artificial light and controlled watering.
Outdoor plants: need protection from heavy rain and pests.
Both require regular pruning and harvesting for continuous growth.
🌟 Quick Care Checklist
✅ Full sunlight (6–8 hrs)
✅ Water lightly, avoid waterlogging
✅ Fertilize every 3–4 weeks with organic compost
✅ Neem oil spray for pest control
✅ Prune regularly for bushy growth
✅ Harvest before flowering for best sweetness
Stevia for Diabetic Patients
Diabetes has become one of the most common health concerns worldwide, and sugar consumption is the primary culprit. People with diabetes must avoid refined sugar, yet many artificial sweeteners available in the market come with their own side effects. Here, Stevia emerges as a natural, safe, and effective solution for diabetic patients.
🍵 Why Stevia is Safe for Diabetics
Stevia contains steviol glycosides, which provide sweetness without increasing blood sugar levels.
It has a zero glycemic index, making it suitable for both Type 1 and Type 2 diabetes.
Unlike artificial sweeteners, Stevia does not interfere with insulin production or sensitivity.
Regular consumption of Stevia may even help in maintaining balanced blood sugar levels.
🍃 Methods of Using Stevia for Diabetic Patients
In Tea and Coffee
Replace sugar with 2–3 dried Stevia leaves or a pinch of Stevia powder in your morning tea or coffee.
Gives the same sweetness without the harmful effects of sugar.
In Herbal Drinks and Decoctions
Stevia leaves can be added while boiling kadha, green tea, or herbal infusions.
Helps in making bitter medicines and herbal teas more palatable.
In Fruits and Salads
Sprinkle crushed Stevia leaves or powder over fruit bowls and salads for mild sweetness.
In Homemade Desserts
Use Stevia powder or drops while preparing puddings, halwa, kheer, or cakes.
Makes desserts diabetic-friendly without compromising taste.
Ready-to-Use Stevia Products
Market products like Stevia tablets, drops, or granules can be used directly in cooking or beverages.
Always check for pure Stevia without added artificial sweeteners.
⚠️ Precautions for Diabetic Patients
Do not consume excessive amounts, as it may cause a slightly bitter aftertaste.
Pregnant women, nursing mothers, and children should use Stevia under medical guidance.
Always prefer natural Stevia leaves or pure extracts instead of mixed products.
Consult your doctor before making Stevia a regular part of your diabetic diet.
🌟 Key Takeaway
Stevia is not just a sugar substitute but a natural ally for diabetic patients. It allows them to enjoy sweet flavors without guilt, keeps blood sugar in check, and promotes a healthier lifestyle. With Stevia, people with diabetes can truly “enjoy sweetness without sugar.”
Medicinal Uses of Stevia
Stevia is often celebrated as a natural sweetener, but beyond sweetness, it has remarkable medicinal properties. Traditional healers and modern researchers both recognize Stevia as a valuable plant for health and wellness. Let’s explore its key medicinal uses:
❤️ 1. Helps in Blood Pressure Regulation
Stevia leaves contain compounds that act as vasodilators, helping to relax blood vessels.
Regular consumption may reduce high blood pressure (hypertension) without side effects.
Unlike chemical medicines, Stevia does not lower blood pressure drastically, making it safe for long-term use.
Herbal teas with Stevia leaves can be a gentle remedy for mild hypertension.
🩺 2. Controls Blood Sugar Levels
Stevia is a boon for Type 1 and Type 2 diabetes patients.
Its steviol glycosides provide sweetness without affecting blood glucose.
Some studies suggest Stevia may even improve insulin sensitivity and help the body regulate sugar naturally.
Daily use in beverages or herbal teas helps maintain balanced glucose levels.
🌱 3. Supports Weight Management
Stevia is zero-calorie, making it an excellent alternative to sugar.
Helps reduce overall calorie intake, assisting in weight loss.
Can be used in desserts, juices, and smoothies to satisfy sweet cravings without adding fat.
Prevents obesity-related issues like high cholesterol and fatty liver.
🦷 4. Improves Dental Health
Unlike sugar, Stevia does not cause cavities or tooth decay.
Its antibacterial properties fight against Streptococcus mutans, the bacteria responsible for dental plaque.
Many natural toothpastes and mouthwashes now include Stevia as a sweetener.
Regular use may reduce gum infections and bad breath.
🌸 5. Promotes Healthy Skin
Stevia’s natural compounds help in reducing acne, dermatitis, and skin inflammation.
Applying Stevia-infused water or paste may soothe eczema and minor wounds.
Its antibacterial and anti-fungal properties keep skin clear and glowing.
Drinking Stevia tea may also help in detoxifying the body for better skin health.
🛡️ 6. Boosts Immunity
Stevia leaves are rich in antioxidants.
Helps fight free radicals that cause aging and chronic diseases.
Strengthens the body’s natural defense against infections.
Regular consumption in tea may reduce chances of seasonal flu and cold.
🧘 7. Improves Digestion
Stevia aids in proper digestion and metabolism.
Helps reduce acid reflux, heartburn, and indigestion.
Mild laxative properties prevent constipation.
Best consumed as Stevia herbal tea after meals.
🧠 8. Reduces Stress & Fatigue
Some studies suggest Stevia may have adaptogenic properties (helping the body adapt to stress).
Consuming Stevia tea relaxes the nerves and promotes a feeling of calmness.
May also improve mental alertness without caffeine dependence.
🌟 Summary of Medicinal Benefits
Regulates blood pressure
Controls blood sugar
Supports weight loss
Prevents dental problems
Improves skin health
Boosts immunity
Aids digestion
Relieves stress and fatigue
Clearly, Stevia is more than just a sweetener—it’s a natural healer.
FAQs About Stevia
When it comes to Stevia, people often have many questions regarding its safety, cultivation, and uses. Here are some of the most commonly asked questions along with clear, research-based answers.
❓ 1. Can Stevia be grown at home?
✅ Yes, Stevia can be easily grown at home in pots, balconies, terraces, or gardens.
It requires 6–8 hours of sunlight, light watering, and organic compost.
With regular pruning, it grows into a bushy plant full of sweet leaves.
❓ 2. Is Stevia safe for diabetic patients?
✅ Absolutely. Stevia is considered one of the best natural sugar substitutes for diabetic patients.
It has zero calories and a zero glycemic index.
Does not spike blood sugar or insulin levels.
Helps patients manage sweet cravings safely.
❓ 3. Can children consume Stevia?
✅ Yes, children can safely consume Stevia in moderate amounts.
It is better than refined sugar for kids’ health and teeth.
Use natural Stevia leaves or powder instead of flavored artificial mixes.
❓ 4. Is Stevia safe during pregnancy?
⚠️ Pregnant and breastfeeding women should use Stevia with medical consultation.
Natural Stevia leaves are generally safe.
Avoid processed Stevia products that may contain other artificial sweeteners.
❓ 5. Does Stevia have any side effects?
Stevia is generally safe when consumed in moderate amounts.
Excessive intake may cause a slightly bitter aftertaste or mild digestive discomfort.
Always prefer natural Stevia leaves or pure extracts.
❓ 6. How many Stevia leaves can be consumed daily?
About 2–3 fresh leaves or half a teaspoon of dried powder per day is enough for sweetness.
For diabetics, dosage should be decided after consulting a doctor.
❓ 7. Can Stevia be used in cooking and baking?
✅ Yes, Stevia can be used in a wide variety of recipes.
Works well in teas, coffees, juices, smoothies, and desserts.
Can also be added to cakes, puddings, and Indian sweets.
Note: Stevia is much sweeter than sugar, so use small amounts.
❓ 8. Does Stevia help in weight loss?
✅ Yes, Stevia helps reduce calorie intake by replacing sugar.
Keeps sweet cravings under control.
Prevents obesity-related health issues.
Works best when combined with a balanced diet and exercise.
❓ 9. Can Stevia attract pests or diseases if grown at home?
Stevia is generally pest-resistant.
May sometimes attract aphids or whiteflies, which can be controlled with neem oil spray.
Good drainage and proper care prevent root rot and fungal infections.
❓ 10. Can Stevia be used daily for a lifetime?
✅ Yes, Stevia is safe for long-term use.
Unlike artificial sweeteners, it does not have harmful side effects.
Many people across the world use Stevia as a daily sugar substitute.
❓ 11. Is Stevia better than jaggery or honey?
Jaggery and honey are natural sweeteners but contain calories and can raise blood sugar.
Stevia, on the other hand, is zero-calorie and does not affect blood sugar.
For diabetics and weight-conscious people, Stevia is the better option.
🌟 Key Takeaway
Stevia answers the needs of people looking for a safe, natural, and healthy sugar alternative. With its ability to grow easily at home and provide numerous health benefits, it has become one of the most trusted medicinal plants worldwide.
Conclusion
Stevia is truly a miracle plant gifted by nature. Known as the “Sweet Herb of Paraguay,” it has traveled across the world to become one of the most popular natural sugar substitutes. What makes Stevia special is not just its ability to add sweetness without calories, but also its wide range of medicinal, nutritional, and economic benefits.
🌟 A Natural Alternative to Sugar
In today’s world, where lifestyle diseases like diabetes, obesity, and hypertension are on the rise, Stevia offers a natural way to enjoy sweetness without guilt. Unlike refined sugar, it does not cause spikes in blood sugar or increase calorie intake. This makes it a safe and reliable sweetener for everyone, especially diabetic and weight-conscious individuals.
🌿 Easy to Grow and Maintain
Another amazing benefit of Stevia is that it is easy to grow at home. Whether in a garden, balcony, or terrace pot, Stevia requires only basic care—sunlight, moderate watering, organic compost, and occasional pruning. With just a little attention, you can enjoy a year-round supply of fresh, sweet leaves right at your doorstep.
💚 More than Just Sweetness
Beyond its role as a sugar substitute, Stevia provides numerous health benefits.
It regulates blood pressure
Controls blood sugar levels
Promotes dental health
Improves digestion and immunity
Supports weight loss and skin health
This makes Stevia a complete medicinal herb, not just a sweetener.
🌱 A Step Toward Sustainable Living
Growing Stevia at home also promotes eco-friendly and sustainable living. Instead of relying on chemical-laden artificial sweeteners, you can harvest your own natural, pesticide-free sweet leaves. It is cost-effective, safe, and supports a healthier lifestyle for the whole family.
🔮 The Future of Stevia
Looking ahead, Stevia is expected to play an even bigger role in healthcare, food industries, and herbal medicine. As more people shift toward organic and natural products, Stevia stands as a strong alternative to sugar, benefiting both health and the environment.
🌟 Final Words
If you want to enjoy sweetness without compromising your health, Stevia is the perfect choice. By planting Stevia at home, you are not only ensuring a natural supply of sweetness but also embracing a healthier, disease-free lifestyle.
So, why depend on sugar when you can have nature’s own sweet gift—Stevia? Start growing it today and take the first step toward a sweeter, healthier future.
स्टीविया एक ऐसा पौधा है जिसे प्राकृतिक मीठा (Natural Sweetener) माना जाता है। इसे “मीठी पत्ती” या “Sugar Leaf” भी कहा जाता है। सामान्य चीनी की तुलना में यह 200 से 300 गुना अधिक मीठा होता है, लेकिन इसमें कैलोरी लगभग शून्य होती है। यही कारण है कि आज पूरी दुनिया में स्टीविया की मांग तेजी से बढ़ रही है।
भारत में भी स्टीविया की खेती अब बड़े पैमाने पर की जा रही है क्योंकि यह स्वास्थ्य, औषधीय और आर्थिक दृष्टिकोण से अत्यंत लाभकारी है।
2. 🌿 स्टीविया पौधे के प्रमुख लाभ (Benefits of Stevia Plant)
(a) स्वास्थ्य संबंधी लाभ
मधुमेह रोगियों के लिए वरदान – यह ब्लड शुगर को नियंत्रित करने में मदद करता है।
लो-कैलोरी स्वीटनर – मोटापा कम करने वालों के लिए बेहतर विकल्प।
ब्लड प्रेशर नियंत्रण – हाई ब्लड प्रेशर वाले मरीजों के लिए लाभकारी।
दांतों के लिए सुरक्षित – इसमें कैविटी उत्पन्न करने वाला तत्व नहीं होता।
एंटीऑक्सिडेंट्स का स्रोत – शरीर को फ्री रेडिकल्स से बचाता है।
(b) औषधीय लाभ
सर्दी-खांसी और गले की खराश में राहत।
लीवर और किडनी स्वास्थ्य को बेहतर बनाने में मदद।
हड्डियों और जोड़ों के दर्द में उपयोगी।
(c) आर्थिक लाभ
कम लागत में अधिक मुनाफा।
पत्तियों की बड़ी मांग – औषधीय कंपनियों, हेल्थ प्रोडक्ट्स और पेय पदार्थों में उपयोग।
प्रति एकड़ से किसान लाखों की आय कर सकते हैं।
3. 🌱 स्टीविया पौधा लगाने की विधि (How to Plant Stevia)
(a) जलवायु
स्टीविया को उष्णकटिबंधीय और उपोष्णकटिबंधीय जलवायु पसंद है।
20°C – 35°C तापमान सबसे अनुकूल।
(b) मिट्टी
दोमट या बलुई मिट्टी सर्वोत्तम।
pH 6.5–7.5 होनी चाहिए।
जल निकास अच्छा होना चाहिए।
(c) पौधा तैयार करना
बीज या कलम दोनों से स्टीविया लगाया जा सकता है।
नर्सरी में पौध तैयार कर खेत या गमले में ट्रांसप्लांट करें।
(d) रोपाई
पौधों के बीच 30 सेमी दूरी रखें।
पंक्तियों के बीच 45 सेमी जगह छोड़ें।
4. 🌿 स्टीविया पौधे की देखभाल (Care & Maintenance)
(a) सिंचाई
गर्मी में 5–7 दिन पर पानी दें।
बरसात में अतिरिक्त पानी से बचाएं।
(b) खाद व उर्वरक
गोबर की खाद या कम्पोस्ट उत्तम।
समय-समय पर जैविक खाद डालें।
(c) रोग व कीट प्रबंधन
पत्तों पर कीड़े लगें तो नीम तेल का छिड़काव करें।
फफूंद रोग से बचाने के लिए समय-समय पर जैविक दवा दें।
(d) छंटाई
अधिक पत्तियां पाने के लिए पौधे की हल्की छंटाई करें।
5. 🌱 स्टीविया से अधिक उत्पादन के उपाय (Tips for Higher Yield)
अच्छी नर्सरी से पौधे लें।
पौधों के बीच उचित दूरी रखें।
जैविक खाद और नीम आधारित कीटनाशक का उपयोग करें।
हर 3–4 महीने में कटाई करें।
6. 🌿 स्टीविया पत्तियों का उपयोग (Uses of Stevia Leaves)
प्राकृतिक चीनी के रूप में चाय, कॉफी और पेय में।
बेकरी प्रोडक्ट्स, कैंडी और आइसक्रीम में।
औषधियों और डायबिटिक उत्पादों में।
वज़न घटाने वाले उत्पादों में।
7. 🌱 स्टीविया की खेती से आर्थिक लाभ (Economic Value of Stevia Farming)
प्रति एकड़ 6–8 टन हरी पत्तियों का उत्पादन।
प्रोसेसिंग के बाद सूखी पत्तियां महंगे दामों पर बिकती हैं।
हेल्थ और न्यूट्रास्यूटिकल कंपनियों से सीधा कॉन्ट्रैक्ट किया जा सकता है।
8. ❓ सामान्य प्रश्न (FAQs)
Q1. क्या स्टीविया को घर में गमले में उगा सकते हैं? 👉 हाँ, यह आसानी से गमले में उगाया जा सकता है।
Q2. क्या स्टीविया चीनी से बेहतर है? 👉 जी हाँ, यह 200 गुना मीठा लेकिन कैलोरी-फ्री है।
Q3. क्या स्टीविया मधुमेह रोगियों के लिए सुरक्षित है? 👉 बिल्कुल, यह ब्लड शुगर नहीं बढ़ाता।
Q4. एक पौधे से कितनी बार पत्तियों की कटाई हो सकती है? 👉 हर 3–4 महीने में पत्तियां काटी जा सकती हैं।
Q5. क्या स्टीविया खेती से मुनाफा होता है? 👉 हाँ, औषधीय व खाद्य कंपनियों में इसकी भारी मांग है।
🍵 मधुमेह (Sugar) रोगियों के लिए स्टीविया का उपयोग (How Diabetic Patients Can Use Stevia)
स्टीविया को डायबिटीज़ रोगियों के लिए वरदान माना जाता है। इसकी सबसे बड़ी विशेषता यह है कि यह ब्लड शुगर लेवल नहीं बढ़ाता और चीनी की तरह कैलोरी भी नहीं देता।
✅ उपयोग के तरीके (Methods of Using Stevia for Diabetic Patients)
चाय और कॉफी में –
सामान्य चीनी की जगह 2–3 सूखी या हरी स्टीविया पत्तियां डालें।
इससे स्वाद भी मिलेगा और शुगर लेवल भी नियंत्रित रहेगा।
काढ़े या हर्बल ड्रिंक में –
डायबिटिक रोगियों के लिए बने हर्बल काढ़े को मीठा करने के लिए स्टीविया का प्रयोग किया जा सकता है।
फलों और सलाद पर –
थोड़ी सी पिसी हुई स्टीविया पत्तियां फलों और सलाद पर डालकर हल्की मिठास लाई जा सकती है।
बेकरी और घर के पकवानों में –
केक, पुडिंग, हलवा या खीर में चीनी की जगह स्टीविया पाउडर मिलाएँ।
रेडी-टू-यूज़ स्टीविया पाउडर/ड्रॉप्स –
बाजार में उपलब्ध स्टीविया पाउडर या लिक्विड ड्रॉप्स को डॉक्टर की सलाह अनुसार उपयोग करें।
⚠️ सावधानियां (Precautions)
अधिक मात्रा में प्रयोग न करें, क्योंकि इससे स्वाद थोड़ा कड़वा लग सकता है।
गर्भवती महिलाएं और छोटे बच्चे डॉक्टर से पूछकर ही इस्तेमाल करें।
किसी भी औषधीय उपयोग से पहले अपने चिकित्सक की सलाह अवश्य लें।
🌿 स्टीविया के औषधीय उपयोग (Medicinal Uses of Stevia Plant)
स्टीविया को “स्वीट हर्ब” या “मीठी पत्ती” कहा जाता है। इसमें पाए जाने वाले प्राकृतिक ग्लाइकोसाइड्स (Stevioside, Rebaudioside) इसे औषधीय पौधों की श्रेणी में शामिल करते हैं।
✅ प्रमुख औषधीय उपयोग (Main Medicinal Uses of Stevia)
मधुमेह नियंत्रण (Diabetes Management)
स्टीविया का सबसे बड़ा औषधीय उपयोग ब्लड शुगर लेवल को नियंत्रित करना है।
यह पैनक्रियाज को सक्रिय कर इंसुलिन के कार्य में सहायक होता है।
वजन घटाने में सहायक (Weight Loss Aid)
इसमें कैलोरी नहीं होती और यह मीठा स्वाद देता है।
चीनी की जगह स्टीविया लेने से मोटापा नियंत्रित करने में मदद मिलती है।
रक्तचाप नियंत्रण (Blood Pressure Regulation)
रिसर्च में पाया गया है कि स्टीविया हाई ब्लड प्रेशर वाले मरीजों के लिए फायदेमंद है।
यह रक्त प्रवाह को संतुलित करता है और हृदय को स्वस्थ रखता है।
दांत और मसूड़ों की रक्षा (Dental & Oral Health)
चीनी दांतों को नुकसान पहुँचाती है, लेकिन स्टीविया से कैविटी और मसूड़ों की समस्या नहीं होती।
टूथपेस्ट और माउथवॉश में इसका उपयोग किया जाता है।
त्वचा संबंधी रोगों में उपयोग (Skin Benefits)
स्टीविया के एंटीबैक्टीरियल और एंटी-फंगल गुण एक्ने, पिंपल्स और स्किन इंफेक्शन में लाभकारी हैं।
इसका पेस्ट बनाकर त्वचा पर लगाया जा सकता है।
पाचन तंत्र में सुधार (Improves Digestion)
स्टीविया चाय या पत्तियों का सेवन पेट के रोग, एसिडिटी और अपच में राहत देता है।
प्रतिरोधक क्षमता बढ़ाना (Boosts Immunity)
स्टीविया में मौजूद एंटीऑक्सीडेंट्स शरीर की इम्यूनिटी को मजबूत बनाते हैं।
नियमित सेवन से शरीर को संक्रमणों से लड़ने की शक्ति मिलती है।
9. 📌 निष्कर्ष (Conclusion)
स्टीविया पौधा स्वास्थ्य और आर्थिक दृष्टि से बेहद उपयोगी है। यह न केवल मधुमेह रोगियों के लिए चीनी का बेहतरीन विकल्प है, बल्कि किसानों और बागवानी प्रेमियों के लिए भी आय का बड़ा स्रोत है। यदि आप घर की छत, बालकनी या खेत में इसे लगाते हैं और सही देखभाल करते हैं तो यह वर्षों तक पत्तियां देता रहेगा।
👉 इसलिए, यदि आप स्वास्थ्य, मिठास और मुनाफे तीनों चाहते हैं तो स्टीविया पौधा अवश्य लगाएँ।
आम — “फलों का राजा” सिर्फ एक काव्यात्मक उपाधि नहीं, बल्कि भारतीय संस्कृति, भोजन और अर्थव्यवस्था में इसकी अहमियत का साक्ष्य है। पौराणिक काल से आज तक आम ने हमारे उत्सवों, रीति-रिवाजों और रोज़मर्रा के खाने दोनों में एक विशेष स्थान बनाया हुआ है। भारत में आम का पेड़ हर आँगन, खेत और माली के बगीचे की शान माना जाता है — चाहे वह गाँव का पुराना कटा हुआ बरगद हो या शहर की छत पर रखा एक छोटा गमला।
सांस्कृतिक पहचान: भारत में आम का जश्न, आम की माला और आम के पत्तों से बनी सजावट अनेक उत्सवों और परम्पराओं का हिस्सा है। शादी-विवाह, पूजा-पाठ और त्योहारों में आम के फूल व आम की रसयुक्त मिठास का विशेष स्थान होता है।
स्वाद और विविधता: अमर प्रतिज्ञा नहीं; आम की तरह स्वाद में विविधता शायद ही किसी और फल में मिले — मीठे, कुरकुरे, खट्टे-मीठे, सुगंधित और रेशेदार से लेकर बियाबान-रसदार तक। यही वजह है कि आम के सैकड़ों स्थानीय और अंतरराष्ट्रीय किस्में मौजूद हैं।
पोषण का स्रोत: आम विटामिन-A (बेटा-कैरोटीन), विटामिन-C, फाइबर और एंटीऑक्सिडेंट्स का अच्छा स्रोत है। यह इम्यूनिटी बढ़ाने, त्वचा-स्वास्थ्य सुधाने और पाचन में मदद करने वाला फल माना जाता है।
किफायती ऊर्जा: पका हुआ आम तुरंत ऊर्जा देता है — गर्मी के महीनों में शरीर को ठंडक प्रदान करने वाले शरबत और ठंडाई के रूप में भी आम का उपयोग पुरातन काल से होता आया है।
भारत और दुनिया में इसकी लोकप्रियता (Popularity in India & Worldwide)
भारत का ही नहीं, विश्व का प्रिय फल: भारत में कई क्षेत्रीय किस्में पैदा होती हैं — महाराष्ट्र के अल्फांसो से लेकर बिहार-उत्तर प्रदेश की दशहरी और चौसा तक — परन्तु इनकी लोकप्रियता सीमाओं से परे है। विश्वबाजार में भारतीय हापुस, केसर व अन्य किस्मों की मांग बड़ी रहती है।
निर्यात व प्रसंस्करण: पल्प, कैन, जूस, अचार, मुरब्बा व ड्राइड-फ्लैक्स जैसे उद्योग आम पर आधारित हैं। इससे छोटे किसान से लेकर बड़े प्रोसेसर तक कई लोगों की रोज़रोटी जुड़ी होती है।
कृषि और रोजगार: आम की खेती रोजगार उत्पन्न करती है — बागवानी, पैकिंग, प्रसंस्करण और लॉजिस्टिक्स तक। खासकर ग्रामीण क्षेत्रों में आम की खेती लंबे समय में स्थायी आय का स्रोत बन सकती है।
पौष्टिक और आर्थिक महत्व (Nutritional & Economic Importance)
पोषण: एक मध्यम आकार का आम विटामिन-A और C का अच्छा योगदान देता है, साथ ही फाइबर और आवश्यक सूक्ष्मपोषक भी प्रदान करता है। बच्चों और बुजुर्गों दोनों के लिए यह पौष्टिक स्नैक माना जाता है।
आर्थिक लाभ: उच्च गुणवत्ता वाली किस्मों की खेती से किसान लंबी अवधि में अच्छा रिटर्न पा सकते हैं — ग्राफ्टेड पौधे जल्दी फल देते हैं और निर्यात-योग्य किस्मों का भाव बाजार में उच्च रहता है। साथ ही डेली-प्रोसेसिंग इंडस्ट्री (जूस, पल्प, अचार) किसानों के लिए वैकल्पिक आय स्रोत खोलती है।
🥭 भारत और दुनिया की 11 बेहतरीन आम की किस्में
आम की सैकड़ों किस्में हैं लेकिन उनमें से कुछ खास किस्में स्वाद, सुगंध और लोकप्रियता की वजह से पूरी दुनिया में मशहूर हैं। आइए जानते हैं सबसे अच्छी 11 किस्मों के बारे में विस्तार से।
1. दशहरी आम (Dasheri Mango)
प्रमुख क्षेत्र: उत्तर प्रदेश (मलिहाबाद, लखनऊ)
स्वाद और विशेषता: बेहद मीठा, बिना रेशों वाला और सुगंधित आम।
मौसम: जून से जुलाई।
पैदावार: एक पेड़ से 200–300 आम आसानी से मिल जाते हैं।
विशेष बात: इसे “आम का नायक” कहा जाता है और यह भारतीय परिवारों में सबसे लोकप्रिय है।
6. मल्चिंग और इंटरक्रॉपिंग (Mulching & Intercropping)
गर्मी में पौधे के चारों ओर सूखी पत्तियाँ, भूसा या नारियल की छाल बिछाएँ।
इससे नमी बनी रहती है और खरपतवार भी नहीं उगते।
शुरुआती सालों में आम के साथ दालें, सब्ज़ियाँ या हल्दी- अदरक जैसी फसलें लगाई जा सकती हैं।
7. गमले वाले पौधों की देखभाल (Care of Potted Mango Plants)
हर 15 दिन में तरल खाद (Vermiwash, Compost Tea) डालें।
धूप वाले स्थान पर रखें।
साल में एक बार मिट्टी बदलकर नई खाद डालें।
नियमित pruning करें ताकि पौधा ज्यादा बड़ा न हो।
📌 सही देखभाल से आपका आम का पेड़ 3–4 साल में फल देना शुरू कर देगा और 40–50 साल तक लगातार स्वादिष्ट फल देता रहेगा।
🍋 अधिक फल पाने के आसान उपाय (Tips for Higher Yield of Mango Tree)
आम का पेड़ लगाना आसान है, लेकिन भरपूर और मीठे फल पाना तभी संभव है जब सही तकनीक अपनाई जाए। यहाँ कुछ महत्वपूर्ण उपाय दिए जा रहे हैं:
1. सही किस्म और पौधा चुनें
अगर आप जल्दी फल चाहते हैं तो ग्राफ्टेड पौधा (कलमी आम) ही लगाएँ।
dwarf varieties जैसे आम्रपाली, नीलम, अल्फांसो गमले या छोटे बगीचे के लिए उपयुक्त हैं।
अच्छी नर्सरी से स्वस्थ पौधा ही लें।
2. फूल आने के समय देखभाल
फरवरी–मार्च में आम में बौर (फूल) आते हैं।
इस समय पौधे को बहुत पानी न दें।
फूल आने पर हल्का पोटाश और फॉस्फोरस वाली खाद डालें।
फूल झड़ने से बचाने के लिए जैविक स्प्रे (छाछ + नीम तेल + गोमूत्र) का छिड़काव करें।
3. जैविक स्प्रे और पोषण
नीम तेल स्प्रे (5ml/L पानी): कीट रोकने में मदद करता है।
जैविक टॉनिक: छाछ, गोमूत्र, वर्मीवॉश का मिश्रण फूल और फल बढ़ाता है।
पोटाश युक्त खाद: फल के आकार और मिठास को बढ़ाती है।
4. छंटाई और canopy management
हर साल फूल और फल आने के बाद सूखी टहनियों को काटें।
पेड़ की छतरी गोल रखें ताकि धूप और हवा अच्छी तरह पहुँच सके।
छंटाई के बाद Bordeaux mixture का छिड़काव करें।
5. High Density Plantation (HDP)
आधुनिक खेती में 5 × 5 मीटर की दूरी पर पौधे लगाए जाते हैं।
HDP से एक एकड़ में ज्यादा पेड़ आते हैं और उपज 2–3 गुना बढ़ जाती है।
drip irrigation और नियमित छंटाई जरूरी है।
6. मल्चिंग और पानी प्रबंधन
गर्मी में पेड़ के चारों ओर सूखी पत्तियाँ और भूसा बिछाएँ।
इससे नमी बनी रहती है और जड़ों को ठंडक मिलती है।
पानी की सही मात्रा दें — न ज्यादा, न कम।
7. ग्राफ्टिंग और टॉपवर्किंग तकनीक
पुराने पेड़ पर नई किस्म का ग्राफ्ट लगाने से पैदावार और गुणवत्ता दोनों बढ़ते हैं।
इससे एक पेड़ पर अलग-अलग किस्म के आम भी उगाए जा सकते हैं।
8. फूल और फल झड़ने से बचाव
NAA (Naphthalene Acetic Acid – 20–30 ppm) का छिड़काव करें।
जैविक विकल्प के रूप में नीम तेल + गोमूत्र का छिड़काव करें।
संतुलित उर्वरक डालें, खासकर पोटाश और जिंक।
9. रोग और कीट नियंत्रण
पाउडरी मिल्ड्यू: फूल आने पर गंधक या जैविक छिड़काव।
फ्रूट फ्लाई: trap लगाएँ, पके फल समय पर तोड़ें।
डाइबैक रोग: प्रभावित टहनियाँ काटकर Bordeaux paste लगाएँ।
10. समय पर तुड़ाई (Harvesting at the Right Time)
फल को जब 75–80% पकने की स्थिति में हो, तभी तोड़ें।
जल्दी तोड़ने से स्वाद कम होता है, देर से तोड़ने पर फल सड़ सकता है।
तुड़ाई के बाद फलों को छाया में रखें।
📌 इन उपायों को अपनाकर किसान भी अपनी पैदावार बढ़ा सकते हैं और घर के बागवानी प्रेमी भी अपने आम के पेड़ से हर साल भरपूर मीठे फल पा सकते हैं।
❓ आम के बारे में अक्सर पूछे जाने वाले सवाल (FAQs on Mango Tree)
1. आम का पेड़ कितने साल में फल देना शुरू करता है?
अगर आपने ग्राफ्टेड (कलमी) पौधा लगाया है तो यह 3–4 साल में फल देना शुरू कर देता है।
बीज से उगाया गया पौधा 7–10 साल बाद फल देता है।
2. क्या गमले में आम लगाया जा सकता है?
हाँ, dwarf varieties जैसे आम्रपाली, नीलम और अल्फांसो को गमले में आसानी से उगाया जा सकता है।
इसके लिए कम से कम 24 इंच का गमला चुनें और पौधे को धूप वाली जगह रखें।
3. कौन सा आम सबसे मीठा होता है?
अल्फांसो (हापुस) और दशहरी आम को सबसे मीठा और स्वादिष्ट माना जाता है।
मियाज़ाकी आम भी बेहद मीठा है लेकिन यह दुनिया का सबसे महंगा आम है।
4. एक आम का पेड़ कितने साल तक फल देता है?
आम का पेड़ 40–50 साल तक नियमित फल देता है।
अच्छी देखरेख से यह 80–100 साल तक भी जीवित रह सकता है।
5. मियाज़ाकी आम इतना महंगा क्यों है?
इसका गहरा लाल रंग, खास मिठास और पौष्टिकता इसे खास बनाते हैं।
इसकी खेती बहुत सीमित क्षेत्र में होती है और उत्पादन कम मिलता है।
जापान से यह गल्फ और यूरोप में निर्यात होता है, जहाँ इसकी कीमत लाखों रुपये तक पहुँच जाती है।
6. क्या आम की खेती से अच्छा मुनाफा हो सकता है?
जी हाँ, आम की खेती भारत में सबसे लाभकारी फसलों में से एक है।
एक हेक्टेयर में सही किस्म और HDP तकनीक से ₹3–5 लाख सालाना तक की आमदनी संभव है।
मियाज़ाकी जैसे प्रीमियम आम और निर्यात-योग्य किस्में और भी ज्यादा लाभ देती हैं।
📌 निष्कर्ष (Conclusion)
आम न केवल भारत का राष्ट्रीय फल है बल्कि हमारी संस्कृति और परंपरा का भी हिस्सा है। सही किस्म का चुनाव, उचित देखभाल और आधुनिक तकनीकों के प्रयोग से हम अपने बगीचे या खेत में भरपूर, मीठे और उच्च गुणवत्ता वाले आम पा सकते हैं।
अगर आप घर के लिए आम लगाना चाहते हैं तो आम्रपाली, दशहरी, अल्फांसो जैसी किस्में उपयुक्त हैं।
किसानों के लिए HDP और ग्राफ्टिंग तकनीक अपनाकर कम जगह में ज्यादा पैदावार लेना संभव है।
गमले में dwarf varieties लगाकर भी बालकनी और छत पर स्वादिष्ट आम उगाए जा सकते हैं।
👉 कुल मिलाकर, आम लगाना केवल स्वाद और स्वास्थ्य के लिए ही नहीं, बल्कि यह आर्थिक और सांस्कृतिक दृष्टि से भी बेहद लाभकारी है।