Posted on Leave a comment

जानें पौधों के विकास के लिए जरुरी पोषक तत्व के बारे में।

Buy Now
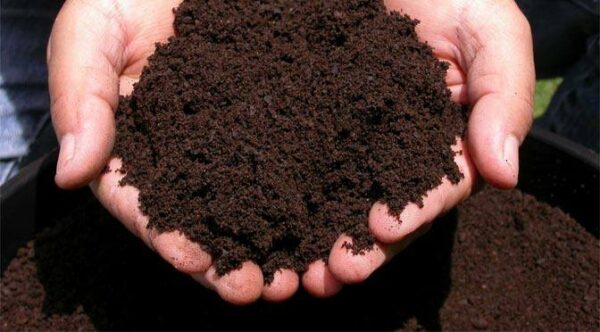
BPN 100% organic Fertilizer to Boost Fruiting and Flowering

जिस प्रकार इंसानो को संतुलित आहार, पोषक तत्वों की जरुरत होती है उसी प्रकार पौधों को भी अपनी वृद्धि, प्रजनन और विभिन्न जैविक क्रियाओं के लिए कुछ पोषक तत्वों की जरुरत होती है। अगर पौधों को वो जरुरी पोषक तत्त्व न मिलें तो उनकी वृद्धि रुक जाती है। अगर वो जरुरी पोषक तत्व पौधों को निश्चित अवधि तक न मिलें तो पौधों की मृत्यु भी हो सकती है। 

पौधे भूमि से जल और खनिज-लवण शोषित करके वायु से कार्बन डाई-ऑक्साइड प्राप्त करके सूर्य के प्रकाश की उपस्थिति में अपने लिए भोजन का निर्माण करते हैं। पौधों को 17 तत्वों की आवश्यकता होती है, जिनके बिना पौधों की वृद्धि-विकास और प्रजनन आदि क्रियाएँ संभव नहीं हैं लेकिन इनमें से कुछ मुख्य तत्त्व इस प्रकार है। 

कार्बन 

हाइड्रोजन 

ऑक्सीजन 

नाइट्रोजन 

फास्फोरस 

पोटाश 

इनमें से प्रथम 3 तत्त्व पौधे वायुमंडल से ग्रहण कर लेते हैं। 

पोषक तत्वों को पौधों की आवश्यकतानुसार निम्न प्रकार वर्गीकृत किया गया है –

मुख्य पोषक तत्व :- नाइटोजन, फॉस्फोरस, पोटाश 

गौण पोषक तत्व :- कैल्शियम, मैग्नीशियम, सल्फर 

सूक्ष्म पोषक तत्त्व :- ज़िंक, मैग्नीज, बोरान 

Buy Now
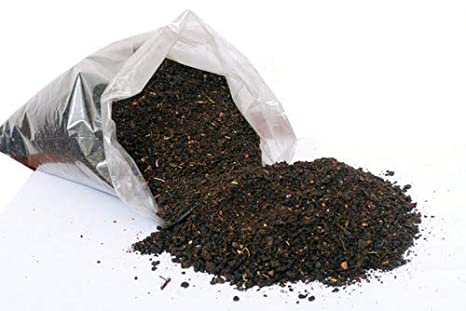
BPN Neem Khali

नाइट्रोजन 

  • नाइट्रोजन से प्रोटीन बनती है, जो जीव द्रव्य का अभिन्न अंग है। यह पर्ण हरित के निर्माण में भी भाग लेती है। नाइटोजन का पौधों की विकास और वृद्धि में बहुत योगदान होता है। 
  • यह पौधों को गहरा हरा रंग प्रदान करता है। 
  • वानस्पतिक वृद्धि को बढ़ावा मिलता है। 
  • अनाज तथा चारे वाली फसलों में प्रोटीन की मात्रा को बढ़ाता है।   
  • यह दानों के बनने में मदद करता है। 
  • सभी जीवित ऊतकों यानि जड़, तना, पत्ती की वृद्धि और विकास में सहायक है। 
  • क्लोरोफिल, प्रोटोप्लाज्मा प्रोटीन और न्यूक्लिक अम्लों का एक महत्वपूर्ण अवयव है। 
  • पत्ती वाली सब्जियों की गुणवत्ता में सुधार करता है। 

नाइट्रोजन – कमी के लक्षण 

  • पौधों में प्रोटीन की कमी होना व हल्के रंग का दिखाई पड़ना। निचली पत्तियाँ सड़ने लगती हैं, जिसे क्लोरोसिस कहते हैं। 
  • पौधे की बढ़वार का रुकना, कल्ले कम बनना, फूलों का कम आना। 
  • फल वाले वृक्षों से फलों का गिरना। पौधों का बौना दिखाई पड़ना। फसल का जल्दी पक जाना। 

फॉस्फोरस 

  • फॉस्फोरस की उपस्थिति में कोशा विभाजन शीघ्र होता है। यह न्यूक्लिक अम्ल, फास्फोलिपिड्स वफाइटीन के निर्माण में सहायक है। प्रकाश संश्लेषण में सहायक है। 
  • यह कोशा की झिल्ली, क्लोरोप्लास्ट तथा मैट्रोकांड्रिया का मुख्य अवयव है। 
  • फास्फोरस मिलने से पौधों में बीज स्वस्थ पैदा होता है तथा बीजों का भार बढ़ना, पौधों में रोग व कीटप्रतिरोधक क्षमता बढ़ती है। 
  • फास्फोरस के प्रयोग से जड़ें तेजी से विकसित तथा सुदृढ़ होती हैं। पौधों में खड़े रहने की क्षमता बढ़ती है। 

फास्फोरस – कमी के लक्षण  

  • पौधे छोटे रह जाते हैं, पत्तियों का रंग हल्का बैगनी या भूरा हो जाता है। फॉस्फोरस गतिशील होने के कारण पहले ये लक्षण पुरानी(निचली) पत्तियों पर दिखते हैं। 
  • दाल वाली फसलों में पत्तियाँ नीले हरे रंग की हो जाती हैं। 
  • पौधों की जड़ों की वृद्धि व विकास बहुत कम होता है। कभी – कभी जड़ें सूख भी जाती हैं। 
  • अधिक कमी में तने का गहरा पीला पड़ना। फल व बीज का निर्माण सही न होना। 

पोटेशियम 

  • जड़ों को मजबूत बनाता है एवं सूखने से बचाता है। फसल में कीट व रोग प्रतिरोधकता बढ़ाता है। पौधे को गिरने से बचाता है। 
  • स्टार्च व शक्कर के संचरण में मदद करता है। पौधों में प्रोटीन के निर्माण में सहायक है। 
  • अनाज के दानों में चमक पैदा करता है। फसलों की गुणवत्ता में वृद्धि करता है। आलू व अन्य सब्जियों के स्वाद में वृद्धि करता है। सब्जियों के पकने के गुण को सुधारता है। मिटटी में नाइट्रोजन के कुप्रभाव को कम करता है। 
  • एंजाइमों की क्रियाशीलता बढ़ाता है। 
  • ठण्डे और बादलयुक्त मौसम में पौधों द्वारा प्रकाश के उपयोग में वृद्धि करता है ,जिससे पौधों में ठंडक और अन्य प्रतिकूल परिस्थितियों को सहन करने की क्षमता बढ़ जाती है। 

पोटैशियम – कमी के लक्षण 

  • पत्तियाँ भूरी व धब्बेदार हो जाती हैं तथा समय से पहले ही गिर जाती हैं। 
  • पत्तियों के किनारे व सिरे झुलसे दिखाई पड़ते हैं। 
  • इसकी कमी से मक्का के भुट्टे छोटे, नुकीले व किनारों पर दाने कम पड़ते हैं। आलू के कंद छोटे तथा जड़ों का विकास कम हो जाता है। 
Buy Now
BPN- NPK All Purpose Plant Feed
 

Posted on Leave a comment

जानें चीकू की खेती करने का बेहतरीन तरीका और फायदे।

Sapota | Sapota Tree Planting Information
Buy Now Chiku Plant

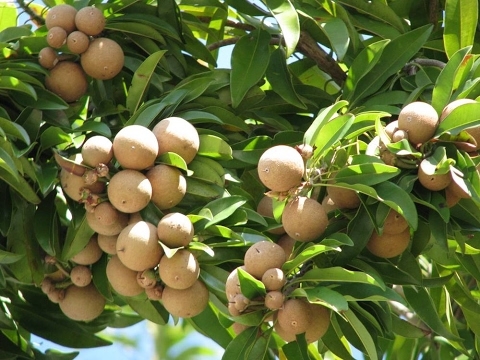
चीकू (Chiku) या सपोटा ( सपोटा ), सैपोटेसी कुल का पौधा है। भारत में चीकू अमेरिका के उष्ण कटिबंधीय भाग से लाया गया था। चीकू का पक्का हुआ फल स्वादिष्ट होता है। चीकू के फलों का छिलका मोटा व भूरे रंग का होता है। इसका फल छोटे आकार का होता है जिसमें 3 – 5 काले चमकदार बीज होते हैं।

 चीकू की खेती फल उत्पादन तथा लेटेक्स उत्पादन के लिए की जाती है। चीकू के लेटेक्स का उपयोग चुइंगम तैयार करने के लिए किया जाता है। भारत में चीकू की खेती मुख्यतः फलों के लिए की जाती है। चीकू फल का प्रयोग खाने के साथ – साथ जैम व जैली आदि बनाने में किया जाता है।

चीकू फल के लाभ 

चीकू में विटामिन A, ग्लूकोज, टैनिन, जैसे तत्व पाये जाते हैं जो कब्ज, एनीमिया, तनाव, बवासीर और जख्म को ठीक करने के लिए सहायक होते हैं। चीकू में कुछ खास तत्व पाए जाते हैं जो श्वसन तंत्र से कफ और बलगम निकाल कर पुरानी खाँसी में राहत देता है। चीकू में लेटेक्स अच्छी मात्रा में पाया जाता है इसीलिए यह दांत की कैविटी को भरने के लिए भी इस्तेमाल किया जाता है। 

चीकू की व्यावसायिक खेती 

भारत के गुजरात, महाराष्ट्र, कर्नाटक तथा तमिलनाडु राज्यों में इसकी बड़े क्षेत्रफल में खेती की जाती है। इस फल को उपजाने के लिए बहुत ज्यादा सिंचाई और अन्य रख – रखाव की जरुरत नहीं है। थोड़ी खाद और बहुत कम पानी से ही इसके पेंड फलने-फूलने लगते हैं।

भूमि व जलवायु 

इसकी खेती के लिए गर्म व नम मौसम की आवश्यकता होती है। गर्मी में इसके लिए उचित पानी की व्यवस्था का होना भी आवश्यक है। इसे मिटटी की कई किस्मों में उगाया जा सकता है लेकिन अच्छे निकास वाली गहरी जलोढ़, रेतीली दोमट और काली मिटटी चीकू की खेती के लिए उत्तम रहती है। चीकू की खेती के लिए मिटटी की PH मान 6 – 8 उपयुक्त होती है। चिकनी मिटटी और कैल्शियम की उच्च मात्रा युक्त मिटटी में इसकी खेती न करें।

चीकू का प्रवर्धन

चीकू की व्यावसायिक खेती के लिए शीर्ष कलम तथा भेंट कलम विधि द्वारा पौधा तैयार किया जाता है। पौधा तैयार करने का सबसे उपयुक्त समय मार्च – अप्रैल है। चीकू लगाने का सबसे उपयुक्त समय वर्षा ऋतु है।

पौधे की रोपाई 

चीकू की खेती के लिए, अच्छी तरह से तैयार जमीन की आवश्यकता होती है। मिटटी को भुरभुरा करने के लिए 2 – 3 बार जोताई करके जमीन को समतल करें। रोपाई के लिए गर्मी के दिनों में ही 7 – 8 मीटर की दूरी पर वर्गाकार विधि से 90 x 90 सेमी आकार के गड्डे तैयार कर लेना चाहिए। 
गड्ढा भरते समय मिटटी के साथ लगभग 30 किलो गोबर की अच्छी तरह सड़ी खाद, 2 किलो करंज की खली एवं 5 – 7 किलो हड्डी का चुरा प्रत्येक गड्डे के दल में मिलाकर भर देना चाहिए। एक बरसात के बाद पौधे को गड्डे के बीचों – बीच लगा दें तथा रोपने के बाद चारों ओर की मिटटी अच्छी तरह दबा कर थावला बना दें।

चीकू के पौधे को शुरुआत में दो – तीन साल तक विशेष रख – रखाव की जरुरत होती है।

चीकू की किस्में

देश में चीकू की कई किस्में प्रचलित हैं। उत्तम किस्मों के फल बड़े, छिलके पतले, चिकने, गुदा मीठा और मुलायम होता है। क्रिकेट बॉल, काली पत्ती, भूरी पत्ती, P K M – 1, D S H – 2 झुमकिया आदि किस्में अति उपयुक्त हैं। 

काली पत्ती :- यह किस्म 2011 में जारी की गयी थी। यह अधिक उपज वाली और अच्छी गुणवत्ता वाली किस्म है। इसके फल अंडाकार और कम बीज वाले होते हैं जैसे 1 – 4 बीज प्रति फल में होते हैं। इसकी औसतन पैदावार 166 किलो प्रति वृक्ष होती है। फल मुख्यतः सर्दियों में पकते हैं।

क्रिकेट बाल :- यह किस्म भी 2011 में जारी की गयी थी। इसके फल बड़े, गोल आकार के होते है तथा गुदा दानेदार होता है। ये फल ज्यादा मीठे नहीं होते हैं। इसकी औसतन पैदावार 157 किलो प्रति वृक्ष होती है।

बारामासी :- इस किस्म के फल मध्यम व गोलाकार होते हैं।

चीकू फसल में सिंचाई 

बरसात के मौसम में सिंचाई की आवश्यकता नहीं पड़ती है लेकिन गर्मी में 7 दिन व ठंडी में 15 दिनों के अंतर पर सिंचाई करने से चीकू में अच्छी फलन एवं पौध वृद्धि होती है।

टपक सिंचाई करने से लगभग 40 प्रतिशत तक पानी बचता है। शुरूआती अवस्था में पहले दो वर्षों के दौरान, वृक्ष से 50 सेमी के फासलें पर 2 ड्रिपर लगाएं और उसके बाद 5 वर्षों तक वृक्ष से 1 मीटर के फासले पर 4 ड्रिपर लगाएं।

खाद एवं उर्वरक 

पेड़ों में प्रति वर्ष आवश्यकतानुसार खाद डालते रहना चाहिए जिससे उनकी वृद्धि अच्छी हो और उनमें फलन अच्छी रहे। रोपाई के एक वर्ष बाद से प्रति पेंड 2 – 3 टोकरी गोबर की खाद, 2 – 3 किलो अरण्डी / करंज की खली एवं N P K की आवश्यक मात्रा प्रति पौधा प्रति वर्ष डालते रहना चाहिए। यह मात्रा 10 वर्ष तक बढ़ाते रहना चाहिए।  

चीकू में अंतरफसली

सिंचाई की उपलब्धता और जलवायु के आधार पर अनानास और कोकोआ, टमाटर, बैंगन, फूलगोभी, मटर, कद्दू, केला और पपीता को अंतरफसली के तौर पर उगाया जा सकता है।

चीकू फसल का रख – रखाव

चीकू के पौधे को शुरुआत में दो – तीन साल तक विशेष रक् – रखाव की जरुरत होती है। इसके बाद वर्षों तक इसकी फसल मिलती रहती है। जाड़े एवं ग्रीष्म ऋतू में उचित सिंचाई एवं पाले से बचाव के लिए प्रबंधन करना चाहिए।

छोटे पौधे को पाले से बचाने के लिए पुआल या घास के छप्पर से इस प्रकार ढक दिया जाता है कि वे तीन तरफ ढके रहते हैं और दक्षिण – पूर्व दिशा धुप एवं प्रकाश के लिए खुला रहता है। चीकू का सदाबहार पेंड बहुत सुंदर दिखाई पड़ता है।

इसका तना चिकना होता है और उसमें चारों ओर लगभग सामान अंतर से शाखाएँ निकलती हैं जो भूमि के सामानांतर फैल जाती हैं। प्रत्येक शाखा में उनके छोटे – छोटे प्ररोह होते हैं, जिन पर फल लगते हैं। ये फल उत्तपन्न करने वाले प्ररोह प्राकृतिक रूप से ही उचित अंतर पर पैदा होते हैं और उनके रूप एवं आकार में इतनी सुडौलता होती है कि उनको काट – छाँट की आवश्यकता नहीं होती।

चीकू के पेंड की काट – छाँट

पौधे की रोपाई करते समय मूलवृन्त पर निकली हुई टहनियों को काटकर साफ कर देना चाहिए। पेंड का क्षत्रक भूमि से 1 मी. ऊंचाई पर बनने देना चाहिए। जब पेंड बड़ा होता जाता है, तब उसकी निचली शाखाएँ झुकती चली जाती हैं और अंत में भूमि को छूने लगती हैं तथा पेंड की ऊपर की शाखाओं से ढक जाती है।

इन शखाओं में फल लगने भी बंद हो जाते हैं। इस अवस्था में इन शाखाओं को छाँटकर निकाल देना चाहिए।

फूल कब तक आते हैं 

वानस्पतिक विधि द्वारा तैयार चीकू के पौधों में दो वर्षों बाद फूल तथा फल आना आरम्भ हो जाता है इसमें फल साल में दो बार आता है, पहला फरवरी से जून तक और दूसरा सितम्बर से अक्टूबर तक।

फूल लगने से लेकर फल पककर तैयार होने में लगभग चार महीने लग जाते हैं। चीकू में भी फल गिरने की एक गंभीर समस्या है। फल गिरने से रोकने के लिए पुष्पन के समय फूलों पर जिब्रेलिक अम्ल के 50 से 100 PPM अथवा फल लगने के तुरंत बाद प्लैनोफिक्स 4 मिली/ली. पानी के घोल का छिड़काव करने से फलन में वृद्धि एवं फल गिरने में कमी आ जाती है।

चीकू के कीटों की रोकथाम 

चीकू के पौधों पर रोग एवं कीटों का आक्रमण कम होता है। लेकिन कभी – कभी उपेछित बागों में पर्ण दाग रोग तथा काली बेधक, पत्ती लपेटक एवं मिलीबग आदि कीटों का प्रभाव देखा जाता है।

पत्ते का जाला

इससे पत्तों पर गहरे भूरे रंग के धब्बे पड़ जाते हैं। जिससे पत्ते सूख जाते हैं और वृक्ष की टहनियाँ भी सूख जाती हैं।

उपचार :- नयी टहनियाँ बनने के समय या फलों की तुड़ाई के समय कार्बरील 600 ग्राम या क्लोरपाइरीफास 200 मिली या कविन्लफास 300 मिली को 150 लीटर पानी में मिलाकर 20 दिनों के अंतराल पर स्प्रे करें।

कली की सुंडी 

इसकी सुंडिया वनस्पति कलियों को खाकर उन्हें नष्ट करती हैं।

उपचार :- कुविन्लफास 300 मिली या फेम 20 मिली को 150 लीटर पानी में मिलाकर प्रति एकड़ में स्प्रे करें।

बालों वाली सुंडी 

ये कीट नयी टहनियों और पौधों को अपना भोजन बनाकर नष्ट कर देते हैं।

उपचार :- कुविन्लफास 300 मिली को 150 लीटर पानी में मिलाकर प्रति एकड़ में स्प्रे करें।

चीकू के रोग

पत्तों पर धब्बा रोग

गहरे जामुनी भूरे रंग के धब्बे जो कि मध्य में से सफेद रंग के होते हैं देखे जा सकते हैं। फल के तने और पंखुड़ियों पर लम्बे धब्बे देखे जा सकते हैं।

उपचार :- कॉपर ऑक्सीक्लोराइड 400 ग्राम को प्रति एकड़ में स्प्रे करें।

तने का गलना

यह एक फंगस वाली बीमारी है जिसके कारण तने और शाखाओं के मध्य में से लकड़ी गल जाती हैं।

उपचार :- कार्बेन्डाजिम 400 ग्राम या डायथेन जेड – 78 को 400 ग्राम को 150 ली. पानी में डालकर प्रति एकड़ में स्प्रे करें।

एन्थ्रक्नोस 

तने और शाखाओं पर कैंकर के गहरे धंसे हुए धब्बे देखे जा सकते हैं और पत्तों पर भूरे रंग के धब्बे पड़ जाते हैं।

 उपचार :- कॉपर आक्सीक्लोराइड या M – 45, 400 ग्राम को 150 ली. पानी में मिलाकर स्प्रे करें।

चीकू फलों की तुड़ाई 

चीकू के फलों की तुड़ाई जुलाई – सितम्बर महीने में की जाती है। किसानों को एक बात का ध्यान रखना चाहिए कि अनपके फलों की तुड़ाई न करें। तुड़ाई मुख्यतः फलों के हल्के संतरी या आलू रंग के होने पर जब फलों में कम चिपचिपा दूधिया रंग हो तब की जाती है।  फलों को वृक्ष से तोडना आसान होता है।

चीकू में रोपाई के दो वर्ष बाद फल मिलना प्रारम्भ हो जाता है। जैसे – जैसे पौधा पुराना होता जाता है। उपज में वृद्धि होती जाती है। मुख्य्तः 5 – 10 वर्षों का वृक्ष 250 – 1000 फल देता है। एक 30 वर्ष के पेंड से 2500 से 3000 तक फल प्रति वर्ष प्राप्त हो जाते हैं।

चीकू फल का भण्डारण

तुड़ाई के बाद, छंटाई की जाती है और 7 – 8 दिनों के लिए 20 डिग्री सेल्सियस पर स्टोर किया जाता है। भण्डारण के बाद लकड़ी के डिब्बों में पैकिंग की जाती है और लम्बी दूरी वाले स्थानों पर भेजा जाता है।  

चीकू की खेती करने के लिए सभी प्रकार की निःशुल्क सहायता, सुझाव और पौधे खरीदने के लिए हमसे संपर्क करें। 

फोन – 8299790172 

Chat On Whatsapp

Contact us for free help and suggestion to cultivate Chiku . 

Phone no . – 8299790172

Posted on Leave a comment

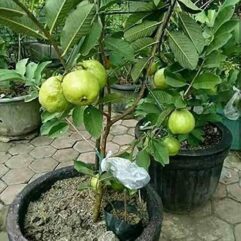
जानें Taiwan Pink Guava की खेती, खासियत और फायदे के बारे में।

Buy Taiwan Pink Guava Plant

हमारे देश भारत में युवा पीढ़ी अधिकतर डॉक्टर या इंजीनियर बनते हैं और वर्तमान में अब युवाओं की रूचि खेती बाड़ी की तरफ भी जाने लगा है। इसीलिए बहुत से युवा अब किसान बन रहें हैं। बता दें इस काम को करके वह लाखों रुपये तक की कमाई भी कर रहे हैं। ऐसे ही सफल किसानों की बहुत लम्बी सूचि है। जिन्होंने ताइवान पिंक अमरुद की जैविक और आधुनिक खेती करके समाज में एक ऐसी मिसाल कायम की है जो अन्य लोगों के लिए भी काफी उपयोगी साबित हो सकती है। आज के इस आर्टिकल में हम जानेंगे कि उन्होंने किस तरह ताइवान पिंक अमरुद की खेती की।

कैसे तैयार होते हैं पौधे 

ताइवान अमरुद के पौधे जितेंद्र बैंगलोर में स्थित टिश्यू कल्चर से तैयार करवाये जाते है। जहाँ पर इन्हे बनवाने के लिए कम से कम 6 माह पहले ही उस डिपार्टमेंट को बताना होता है ताकि समय पर पौधे मिल सकें। यहाँ तकरीबन हर साल 40 हजार पौधे तैयार करवाये जाते हैं। इस सब में तकरीबन एक से डेढ़ लाख तक खर्चा आता है। 

फल 6 महीनों में आने लगते हैं। 

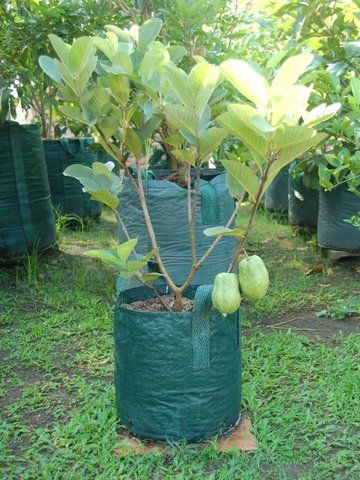
यहां आपको जानकारी के लिए बता दें कि अगर 1 एकड़ जमीन में ताइवानी अमरुद के पौधे लगाए जायेंगे तो उसमें लगभग 800 पौधे लग जाते हैं। यह पौधे तकरीबन 6 महीने से लेकर एक साल के अंदर ही फल देना शुरू कर देते हैं। बता दें कि पहले वर्ष में ही हर पौधा 8 से 10 किलो तक फल देता है और इस प्रकार पहले ही साल में ही एक एकड़ जमीन पर 8 से 10 टन फलों का उत्पादन हो जाता है। इसी प्रकार दूसरे साल में प्रत्येक पौधे 20 से 25 किलो तक फल देते हैं जिसके कारण उत्पादन 25 टन पहुँच जाता है। 

खेती की तैयार और समय 

इस ताइवान अमरुद की खेती करने के लिए सर्वप्रथम खेत की अच्छी तरह से गहरी जुताई करनी चाहिए। उसके बाद खेत में पकी हुई गोबर की खाद डालने के आलावा उसमें बायो प्रोडक्ट्स भी डालें। फिर अपने ट्रैक्टर से एक पाल बनाये और इस बात का विशेषकर ध्यान रखें कि हर कतार से 9 फ़ीट तक की दूरी होना अनिवार्य है। इसी प्रकार से एक पौधे की दूरी दूसरे पौधे से 5 फीट तक होना आवश्यक है। इसके आलावा पौधे को बोने की गहराई आधा फ़ीट तक होनी चाहिए। साथ ही यह भी जान लीजिये की अगर आप ताइवान अमरुद के पौधे अपने खेतों में लगाना चाहते हैं, तो उसके लिए सबसे उचित समय जुलाई और अगस्त  का महीना है जिस समय बरसात का मौसम होता है। 

सिंचाई 

बता दें कि इसकी सिंचाई गर्मी के दिनों में 5 से 7 दिन में लगभग डेढ़ – दो घंटे तक करनी चाहिए। लेकिन आम दिनों में इसकी रेगुलर सिंचाई की जाती है। 

कब तक आते हैं फल 

यहां जानकारी के लिए बता दें कि ताइवान अमरुद की खेती में कम से कम 3 बार फल लगते हैं, परन्तु वह इसकी फसल को केवल नवम्बर के महीने में ही लेते हैं। साथ ही उन्होंने यह भी बताया कि उनकी फसल में जुलाई तक फल आ जाते हैं जो कि नवम्बर तक पाक जाते हैं और वह आगे फरवरी या मार्च तक चलता है। 

कीटों से बचाव 

अपने फलों को कीटों से बचाने और मक्खी नियंत्रण करने के लिए जितेंद्र फोरमैन ट्रैप और स्टिकी ट्रैप का इस्तेमाल करते हैं। फोरमैन ट्रैप से एक प्रकार की गंध निकलती है जो मक्खियों को आकर्षित करती है, और स्टिकी ट्रैप में एक चिपचिपा सा पदार्थ लगा हुआ होता है जिससे अगर कीट उनसे चिपकते हैं तो वह फिर मर जाता है। 

ताइवान अमरुद की खासियत 

1. यह फल अगर आप तोड़ कर रख लेंगे तो 8 दिनों तक भी खराब नहीं होता है। 

2. ताइवान अमरुद की खेती से 6 महीने से 12 महीने पश्चात ही फल मिलने लग जाते हैं। 

3. यह खाने में बहुत स्वादिष्ट होता है और इसका रंग अंदर से हल्का गुलाबी होता है। 

4. साथ ही बता दें की इसका वजन 300 ग्राम से लेकर 800 ग्राम तक हो जाता है। 

5. बरसात के मौसम में दूसरे अन्य फल पकने लगते हैं लेकिन बारिश होने पर भी यह फल पकता नहीं है। 

आमदनी कितनी होती है। 

मौजूदा समय में ताइवानी अमरुद की मांग दिल्ली के आलावा उत्तर प्रदेश और अन्य दूसरे राज्यों में भी काफी अधिक बढ़ गयी है। सीजन में यह 40 रुपये किलो के भाव से बिकता है। लेकिन जब इसका सीजन चला जाता है तो फिर यह 25 रुपये किलो से 30 रुपये किलो के भाव से बिकता है।

Taiwan Pink Guava की खेती करने के लिए सभी प्रकार की निःशुल्क सहायता, सुझाव और पौधे खरीदने के लिए हमसे संपर्क करें। 

फोन – 8299790172

Chat on WhatsApp

Contact us for free help and suggestion to cultivate Taiwan Pink Guava

Phone no . – 8299790172

Posted on 3 Comments

जाने क्यों लगाया जाता है घरों में गिलोय का पौधा, होता है शुभ।

Buy Giloy Plant

कोरोना काल में रोग प्रति-रोधक क्षमता बढ़ाने के लिए औषधीय पौधे का इस्तेमाल तेजी से बढ़ा है। ‘एनबीटी जड़ी-बूटी ‘ अभियान में ऐसे औषधीय पौधों की पूरी जानकारी मिलेगी, ताकि आप इनका आसानी से इस्तेमाल कर सकें और अपनी प्रतिरोधक क्षमता बढ़ा सकें। इसके तहत आज गिलोय से जुड़ी हर जानकारी आपको मिलने वाली है। 

गिलोय, एक औषधीय पौधा है जो इन दिनों कोरोना की वजह से ज्यादा चर्चा में है और लोग इसका इस्तेमाल भी अभी खूब कर रहे हैं। इम्यून सिस्टम को स्ट्रांग करने और लिवर से जुड़ी बीमारियों में काफी असरदार गिलोय के बारे में हर घर में बाते हो रही हैं। जब से कोरोना का संक्रमण फैला है और इससे बचाव के लिए काढ़ा भी लाभकारी बताया गया है, तब से गिलोय का सेवन हर कोई कर रहा है। न केवल आयुष मंत्रालय बल्कि पीएम मोदी जी ने भी काढ़ा पीने की अपील की है और गिलोय का काढ़ा में इस्तेमाल भी खूब हो रहा है। इसीलिए आज हम आपको इस मेडिसिनल प्लांट से जुड़ी हर जानकारी उपलब्ध करा रहे हैं। आप अपने किचन गार्डन और बालकनी के गमले में इसे लगा सकते हैं और रोजगार की इच्छा रखते हैं तो इसकी खेती भी कर सकते हैं। 

गिलोय क्या है। ( What is Giloy )

गिलोय का वानस्पतिक नाम टोनोस्पोरा कार्डियोफेलिया है, जिसे आयुर्वेद में गिलोय के नाम से जाना जाता है। संस्कृत में इसे अमृता कहा जाता है, क्योंकि यह कभी नहीं मरता है। गिलोय भारतीय मूल की बहुवर्षीय बेल है। इसके बीज काली मिर्च की तरह होते हैं। इसे मई और जून में बीज या कटिंग के रूप में बोया जा सकता है। मानसून के वक्त यह तेजी बढ़ता है। इसे बहुत धूप की जरुरत नहीं होती है। कई प्रदेशों में इसकी खेती होती है।

गिलोय का इस्तेमाल (use of Giloy )

कोविड- 19 से बचाव के लिए रोग प्रतिरोधक क्षमता बढ़ाने के लिए गिलोय का इस्तेमाल हो रहा है। लोग पाउडर, जूस और काढ़े के रूप में इसका इस्तेमाल कर रहें हैं। इसके पत्ते और तना दोनों का इस्तेमाल किया जाता है। इसे घर के गमलों, किचन गार्डन, टेरेस गार्डन और बगीचे में आसानी से लगाया जा सकता है। इन सभी जगहों पर गिलोय की बेल आसानी से फैल सकती है। इसका तना ऊँचा चढ़ता है तथा हवा से नमी लेता है। फसल के तौर पर इसे तैयार होने में करीब 10 महीने लगते हैं। एक हेक्टेयर में इसकी खेती कर 60 से 70 हजार का मुनाफा हो सकता है। 

गुणों की खान है गिलोय 

  • गिलोय की खासियत के कारण इसके कई नाम हैं। मसलन, अमृता, गुडची, गुणबेल
  • यह एंटी बैक्टीरियल, एंटी एलर्जिक, एंटी डायबिटीज़ और दर्द निवारक होता है। 
  • इसके तने को जूस, पाउडर, टेबलेट,काढ़े या अमृतारिष्ट के रूप में लेने से रोग प्रतिरोधक क्षमता बढ़ती है। 
  • जिन लोगो की इम्युनिटी कम हो, उन्हें गिलोय का सेवन करने की सलाह दी जाती है। 
  • यह ऑटो इम्यून डिसार्डर, बुखार, हाथ पैर की जलन, शरीर दर्द, डायबिटीज, लाइफ स्टाइल डिसार्डर और पेशाब की जुड़ी समस्याएँ दूर करने में काम आती हैं। 
  • गिलोय का रोजाना इस्तेमाल बीमारियों से दूर रखता है। कोई बीमारी हो भी जाये तो इलाज के दौरान भी इसका सेवन ज्यादा प्रभावकारी होता है। 

फाइबर और प्रोटीन भी

गिलोय में 15.8 % फाइबर होता है। इसके साथ 4.2 से 11.2 % तक प्रोटीन, 60 फीसदी कार्बोहाइड्रेड और 3 फीसदी से कम फैट मिलता है। इसके आलावा पोटैशियम, आयरन और कैल्शियम भी होते हैं।

कैसे करें इस्तेमाल 

  • आयुर्वेद के मुताबिक, गिलोय के तने का इस्तेमाल करना चाहिए। इसके लिए 5 से 6 इंच लम्बा और अंगूठे के बराबर मोटा तना लें। पानी मिलाकर इसे कूटें और रस निकल लें। इस रस को रोजाना 10 से 20 मिली इस्तेमाल किया जा सकता है। 
  • काढ़े के इस्तेमाल के लिए तने को चार गुने पानी लेकर उबाल लें। काढ़ा आधा या चौथाई रह जाये तो उसे छान कर पी लें। 
  • पाउडर के तौर पर इस्तेमाल के लिए गिलोय के तने छाँव में सूखा लें। फिर कूट लें। इसके बाद मिक्सर में पाउडर बना लें और कपड़े से छान लें। 
  • बाजार में गिलोय की गोलियाँ भी मिलती हैं। वैद्य या चिकित्सक की सलाह पर इनका सेवन कर सकते हैं। 
  • बाजार में अमृतारिष्ट भी आता है। इसे भोजन के बाद आधा कप पानी के साथ ले सकते हैं। इसके अलावा अमृतादि गुग्गुल का भी फार्मुलेशन मिलता है। 

लागत 15 से 20 हजार

गिलोय को अमूमन फलों के बाग में उगाया जाता है। खेतों में उगाने पर लागत थोड़ी बढ़ जाती है। सहफसली के तौर पर एक हेक्टेयर में 15 से 20 हजार और खेत में 30 से 40 हजार की लागत लगती है। एक हेक्टेयर खेत में करीब 2500 कटिंग की जरुरत पड़ती है। इसकी कटिंग 3 मीटर की दूरी पर लगनी चाहिए और गोबर की खाद या वर्मीकम्पोस्ट का ही इस्तेमाल करना चाहिए। मई जून में कटिंग लगाने के बाद फरवरी मार्च में इसके तने इस्तेमाल के लायक हो जाते हैं। एक हेक्टेयर में 10 से 8 कुन्टल तना मिलता है। इसकी कीमत 23 से 30 रुपये प्रति किलोग्राम होती है। दिल्ली की नर्सरी में आमतौर पर गिलोय उगाया जाता है। दिल्ली सरकार की नर्सरी में गिलोय निःशुल्क लिया जा सकता है जबकि आमतौर पर गिलोय की बेल गमले में लगाने के लिए लगभग 30 से 50 रुपये में मिल जाती है। कोरोना काल में खुदरा मार्केट में यह कहीं-कहीं 100 रुपये तक भी बिक रहा है। इसकी मांग लगभग दो गुनी हो चुकी है।

बीज बोएं तो 2 से 3 इंच का फासला रखें

गिलोय के बीज एक घंटा पानी में भिगो दें। थाली जैसे किसी बर्तन में, मिटटी, खाद और मौरंग के मिश्रण की 2 से 3 इंच मोटी परत लगायें। बीज बोयें और 2 से 3 इंच का फासला रखें।  फिर हल्के पानी का छिड़काव कर दें। पौधा निकल आये तो दूसरे गमले में लगा दें।

कटिंग वही रोपें, जहाँ गांठ हो 

कटिंग रोपने के लिए पेंसिल के बराबर मोठे तने का इस्तेमाल करें, जिसमें गांठें हो। एक तने की लम्बाई एक बालिश तक लें। ऊपर से तिरछा और नीचे से गोल रखें। कटिंग को गोल वाले हिस्से को जमीन, गमले या थैले में दबा दें। गांठ से नए कल्ले निकल आएंगे। 

गिलोय सत्व से भी अच्छी कमाई 

बाजार में गिलोय सत्व की भी खूब डिमांड है। ऐसे में यह भी कमाई का अच्छा जरिया बन सकता है। सत्व निकालने के 20 किलो गिलोय का तना इकट्ठा करें। इसके छोटे-छोटे टुकड़े करें। एक बार पानी में साफ कर दुबारा इसका पानी निकाल लें। छाने गए पानी को रात भर छोड़ दें। नीचे स्टार्च जमा हो जायेगा। अगले दिन ऊपर का पानी हटा दें। फिर नीचे जमा सत्व को सूखा लें। लगभग 5 किलो गिलोय में 100 ग्राम सत्व निकलता है। बाजार में इसकी कीमत करीब 8000 रुपये किलो तक है।   

Posted on Leave a comment

जानें Soil Booster का उपयोग और फायदे।

Buy Soil Booster

Soil Booster क्या है। (What is Soil Booster)

Soil Booster एक आर्गेनिक फ़र्टिलाइज़र होता है। यह पूरी तरह केमिकल फ्री (Chemical Free ) होता है। Soil Booster को सभी प्रकार की मिटटी में use किया जा सकता है। 

Soil Booster को 

नीम खली 

सरसों खली 

बोनेमिक्स 

कोको पिट 

वर्मी कम्पोस्ट 

Chicken Manure 

आदि गुणकारी चीजों से मिलाकर बनाया जाता है। 

प्रयोग/use 

बड़े गमले में 100 ग्राम व छोटे गमले में 50 ग्राम प्रति पौधे व जमीन में पौधों की उम्र के हिसाब से प्रयोग करना चाहिए। Soil Booster को मिटटी में मिलाकर तुरन्त पानी देना चाहिए ताकि Soil Booster मिटटी में अच्छी तरह मिल जाये।

फायदे/Benefits 

1. Soil Booster मिटटी की उर्वरा शक्ति को बढ़ा देता है। 

2. Soil Booster मिटटी की प्रतिरोधक शक्ति को बढ़ा देता है। 

3. Soil Booster मिलाने से पौधों की ग्रोथ अच्छी तरह होती है। 

4. Soil Booster को मिटटी में मिलाने से मिटटी के रोग खत्म हो जाते हैं। 

5. Soil Booster पौधों में लगने वाले रोगों से पौधे की रक्षा करता है। 

Posted on Leave a comment

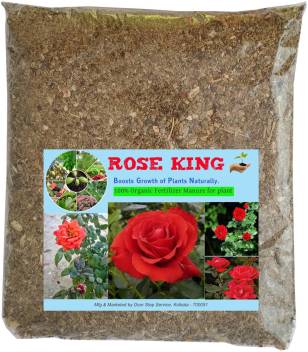
अब Rose King से होगी गुलाबों के फूलों की बरसात।

Gulab Climbing Rose Flower | Buy in India's Largest Plant Nursery Store
Buy Rose Plant

Rose King क्या है। ( What is Rose King )

Rose King एक आर्गेनिक फर्टिलाइज़र है। Rose King को DAP, वर्मी कम्पोस्ट, बूनमिल और अन्य सामग्री को मिलाकर तैयार किया जाता है। Rose King को आप गुलाब के साथ-साथ अन्य सभी प्रकार के फूलों व पौधों के विकास के लिए भी इस्तेमाल कर सकते हैं। 

प्रयोग विधि ( Use )

Rose King का इस्तेमाल बहुत ही आसान है। Rose King के 2 चम्मच प्रति पौधा, एक चम्मच प्रति छोटा पौधा तथा कांट – छांट के समय भी डाल सकते हैं। जब पौधे में नयी पत्तियाँ निकल रहीं हों तब Rose King का इस्तेमाल करना बहुत ही फायदेमंद रहता है। Rose King को मिटटी में मिलाकर तुरंत पानी दें ताकि मिटटी में मिलकर अधिक गुणकारी हो सके। Rose King को 15 दिनों की अवधि पर फिर डाला जा सकता है। 

फायदे ( Benefits )

1. Rose King को मिटटी में मिलाने से मिटटी के रोग ख़त्म हो जाते है। हानिकारक कीटाणु नष्ट हो जाते हैं। 

2. Rose King के प्रयोग से पौधा और उसकी पत्तियां चमक जाती हैं। 

3. Rose King पौधे की प्रति-रोधक क्षमता को बढ़ाने में सहायक होता है। 

4. Rose King के प्रयोग से पौधा कीटाणु मुक्त होकर अधिक फल-फूल देता है। 

5. Rose King के प्रयोग से पौधा मजबूत और टिकाऊ हो जाता है।  

Posted on Leave a comment

नीम खली के 10 बेहतरीन फायदे और प्रयोग विधि जानें।

नीम खली क्या है। ( What is Neem Khali )

Neem Khali

नीम खली एक आर्गेनिक फर्टिलाइज़र होती है। जो आपको कही भी आसानी से मिल जाएगी। नीम खली ऐसी फर्टिलाइज़र है, जिसमे NPK, नाइट्रोज़न, फॉस्फोरस, पोटैशियम, ज़िंक, कॉपर, सल्फर,कैल्शियम, मैग्नीशियम, ऑयरन और माइक्रो नुट्रिसिएंश पाए जाते हैं। नीम खली में NPK के आलावा

नाइट्रोज़न             5 %

फॉस्फोरस            1 %

पोटैशियम             2 %

कैल्शियम             3 %

ज़िंक                    60 PPM ( PARTS PER MILLION )

कॉपर                   20 PPM

 सल्फर                  3 %

मैग्नीशियम             1 %

ऑयरन                 1200 PPM 

मात्रा में पाये जाते हैं 

उपयोग/Use

बड़े गमले में 100 ग्राम व छोटे गमले में 50 ग्राम प्रति पौधे व जमीन में पौधों की उम्र के हिसाब से प्रयोग कर पौधों के तने से 2 व 3 इंच की दूरी छोड़कर हल्की गोड़ाई करने से नीम खली मिटटी में अच्छी तरह से मिल जाता है। इसके उपरान्त हल्के पानी का प्रयोग करें। 

फायदे/Benefits  

 1. नीम खली के प्रयोग से पौधों की पत्तियों एवं तनों में चमक आती है। 

2. इसके प्रयोग से पौधे कीटाणु मुक्त होकर फल – फूल देने लगते हैं। 

3. यह पौधे के विकास में अत्यंत उपयोगी है। 

4. नीम खली के प्रयोग से पौधे मजबूत और टिकाऊ होते हैं तथा बहुत दिनों तक जीवित रहते हैं।

5.  नीम खली को शोभाकार पौधों के अतिरिक्त खेतों में भी डाला जा सकता है।

6. नीम खली के प्रयोग से पौधों में चीटियाँ एवं फन्गस नहीं लगते हैं। 

7. नीम खली के प्रयोग से पौधों में एमिनो एसिड का लेवल बढ़ता है। जो क्लोरोफिल का लेवल बढ़ाती है। जिस वजह से पौधा हरा भरा दिखता है।

8. नीम खली के प्रयोग से जमीन में उगने वाला घास-फूस व तिनके खत्म हो जाते हैं।

9. नीम खली जमीन के रोगों को खत्म कर उसकी फर्टिलिटी को बढाती है और बंजर भूमि को भी उपजाऊ बना देती है।

10. नीम खली के प्रयोग से पौधों की जड़ में जो गाँठ वाली बीमारी हो जाती है वो नहीं होती है और गाँठो को बढ़ाने वाले कीटाणुओं को नष्ट कर देती है।  

Neem Khali
Posted on Leave a comment

जानें Taiwan Red Lady 786 Papaya की खेती कैसे की जाती है।

इस महीने कर सकते हैं पपीते की खेती, मिलेगी बढ़िया पैदावार
Buy Taiwan Red lady 786 Papaya

Taiwan Red Lady 786 Papaya की सबसे खास बात यह है कि इसकी फसल बहुत कम समय में ज्यादा मुनाफा देती है। आप इसकी खेती करके एक एकड़ में 4 लाख तक की कमाई कर सकते हैं। 

ऐसे करें खेती। …. 

पपीते की खेती के लिहाज से भारत एक उपयुक्त जलवायु वाला देश है। इसे अधिकतम 38 से 44 डिग्री सेल्सियस तक तापमान होने पर भी उगाया जा सकते हैं। ऐसा तापमान लगभग पुरे भारत में पाया जाता है। 

पपीता फार्मिंग के लिए जलवायु या उचित वातावरण। …. 

पपीते की खेती के लिए न्यूनतम तापमान 5 डिग्री होना चाहिए। मतलब आप इसे पहाड़ों से सटे इलाकों में भी आसानी से उगा सकते हैं। इस लिहाज से आप भारत के किसी भी कोने में रहते हो तो आप पपीते की खेती कर सकते हो। पिछले कुछ वर्षों में पपीते की खेती की तरफ किसानों का रुझान बढ़ रहा है।

पैदावार की दृष्टि से यह हमारे देश का पाँचवाँ लोकप्रिय फल है। 

यह बारहों महीने होता है, लेकिन यह फरवरी-मार्च से मई से अक्टूबर के मध्य विशेष रूप से पैदा होता है, क्योंकि इसकी सफल खेती के लिए 10 डिग्री से. से 40 डिग्री से. तापमान उपयुक्त है। 
पपीता विटामिन A और C का अच्छा स्रोत होता है। 

विटामिन के साथ पपीते में पपेन नामक एंजाइम पाया जाता है जो शरीर की अतरिक्त चर्बी को कम करता है।

स्वास्थ्य के लिए लाभकारी होने के साथ ही पपीता सबसे कम दिनों में तैयार होने वाले फलों में से एक है जो कच्चे और पके दोनों ही रूप में उपयोगी है। 

इसका आर्थिक महत्व ताजे फलों के अतिरिक्त पपेन के कारण भी है, जिसका प्रयोग बहुत से औद्योगिक कामों ( जैसे कि फ़ूड प्रोसेसिंग, कपडा उद्योग आदि ) में होता है। 

पपीता फार्मिंग के लिए जमीन/भूमि 

बलुई दोमट मिट्टी में मिलेगी अच्छी उपज पपीते की खेती के लिए बलुई दोमट प्रकार की मिट्टी सर्वोत्तम है। पपीते के खेतों में यह ध्यान रखना होगा की जल का भराव न होने पाये। पपीते के लिहाज से मिट्टी की PH मान 6 से 7 तक होना चाहिए। 

बीज या पौधा लगाने से पहले भूमि की ठीक प्रकार से गहरी जुताई के साथ खर-पतवार को निकाल देना जरुरी होता है। 

किस्मों का चयन 

रेड लेडी 786 
लाल परी – यूनाइटेड जेनेटिक्स (united genetics )
विनायक – वी एन आर सीड्स ( VNR Seeds )
सपना – ईस्ट वेस्ट इंटरनेशनल ( East West International )

इन संकर बीजों की पैकिंग का आकार 50 बीज, 1 ग्राम, 5 ग्राम, 10 ग्राम, 500 बीज में होता है। उपरोक्त सभी वेराइटी पर्थेनोकार्पिक हैं अतः नर पौधों की कोई संभावना नहीं होगी। सभी पौधे मादा होते हैं और लगभग 1 क्विंटल प्रति पौधा होता है। 

अपनी जलवायु के हिसाब से करें किस्मों का चयन पपीते के किस्मों का चुनाव खेती के उद्देश्य के अनुसार करना जैसे कि अगर औद्योगिक प्रयोग के लिए वे किस्में जिनसे पपेन निकाला जाता है, पपेन किस्में कहलाती हैं। इस वर्ग की महत्वपूर्ण किस्में O – 2 AC O – 5  और C.  O – 7 है। 

इसके साथ दूसरा महत्वपूर्ण वर्ग है फूड वेराइटी जिन्हे हम अपने घरों में सब्जी के रूप में या काट कर खाते हैं। इसके अंतर्गत परम्परागत पपीते की किस्में ( जैसे बड़वानी लाल, पीला वाशिंगटन, मधुबिंदु, कुर्ग हनीड्यू, को – 1 एंड 3 ) और नयी संकर किस्में जो उभयलिंगी होती हैं।

For Example :- पूसा नन्हा, पूसा डिलिशियस, CO – 7, पूसा मैजेस्टी आदि ) आती हैं। 

नर्सरी क्यारियों में लगाएं

एक एकड़ के लिए 30 ग्राम बीज काफी हैं। एक एकड़ में तकरीबन 1200 पौधे ठीक रहते हैं।

उन्नत किस्म के चयन के बाद बीजों को क्यारियों में नर्सरी बनाने के लिए बोना चाहिए, जो जमीं सतह से 15 सेंटीमीटर ऊँची व 1 मीटर चौड़ी तथा जिनमें गोबर की खाद, कम्पोस्ट या वर्मी कम्पोस्ट को अच्छी मात्रा में मिलाया गया हो।

पौधे को जड़ गलन रोग से बचाने के लिए क्यारियों को फॉर्मलीन के 1 : 40 के घोल से उपचारित करके बोना चाहिए। 1/2′ गहराई पर 3′ X 6′ के फासले पर पंक्ति बनाकर उपचारित बीज बोयें और फिर 1/2′ गोबर की खाद से ढक कर लकड़ी से दबा दें ताकि बीज ऊपर न रह जाएँ।

नमी बनाये रखने के लिए (Mulching)

नमी बनाये रखने के लिए क्यारियों को सूखी घास या पुआल से ढकना एक सही तरीका है।

सुबह शाम पानी देते रहने से, लगभग 15 – 20 दिन भीतर बीज जम( Germination ) जाते हैं। पौधे की ऊंचाई जब 15 सेंटीमीटर हो तो साथ ही 0.3 % फफूंदीनाशक घोल का छिड़काव कर देना चाहिए। 

जब इन पौधों में 4 – 5 पत्तियाँ और ऊँचाई 25 CM हो जाये तो 2 महीने बाद खेत में प्रतिरोपण करना चाहिए, प्रतिरोपण से पहले गमलों को धूप में रखना चाहिए। 

पौधों के रोपण के लिए खेत को अच्छी तरह तैयार करके 2 x 2 मीटर की दूरी पर 50 x 50 x 50 सेमी आकार के गड्डे मई के महीने में खोद कर 15 दिनों के लिए खुले छोड़ देने चाहिए। अधिक तापमान व धूप, मिट्टी में उपस्थित हानिकारक कीड़े-मकोड़े, रोगाणु इत्यादि नष्ट कर देती है।

पौधे लगाने के बाद गड्डे को मिट्टी और गोबर की खाद 50 ग्राम एल्ड्रिन (कीटनाशक ) मिलाकर इस प्रकार भरना चाहिए कि वह जमीन से 10 – 15 सेमी ऊँचा रहे। इससे दीमक का प्रकोप नहीं रहता। 
रोजाना दोपहर के बाद हलकी सिंचाई करनी चाहिए। खाद व उर्वरक का रखें खास ख्याल खाद और उर्वरक के प्रभाव में पपीते के पौधे अच्छी वृद्धि करते हैं।

पौधा लगाने से पहले गोबर की खाद मिलाना एक अच्छा उपाय है, साथ ही 200 ग्राम यूरिया, 200 ग्राम DAP और 400 ग्राम पोटाश प्रति पौधा डालने से पौधे की उपज अच्छी होती है। इस पुरे उर्वरक की मात्रा को 50 से 60 दिनों के अंतराल में विभाजित कर लेना चाहिए और कम तापमान के समय इसे डालें।

पौधे के रोपण के 4 महीने बाद ही उर्वरक का प्रयोग करना उत्तम परिणाम देगा। पपीते के पौधे 90 से 100 दिनों के अंदर फूलने लगते हैं और नर फूल छोटे-छोटे गुच्छों में लम्बे डंठल युक्त होते हैं।

नर पौधे पर पुष्प 1 से 1.3 मीटर के लम्बे तने पर झूलते हुए और छोटे होते हैं। प्रति 100 मादा पौधों के लिए 5 से 10 नर पौधे छोड़ कर शेष नर पौधों को उखाड़ देना चाहिए।

मादा पुष्प पीले रंग के 2.5 सेमी लम्बे और तने के नजदीक होते हैं। गर्मियों में 6 से 7 दिनों के अंतराल पर तथा सर्दियों में 10 से 12 दिनों के अंतराल पर सिंचाई के साथ खरपतवार प्रबंधन, कीट और रोग प्रबंधन करना चाहिए। 

पपीते के पौधे में रोग नियंत्रण। …. 

मोजैक लीफ कर्ल, डिस्टोसर्न, रिंगस्पॉट, जड़ व तना सड़ना, एन्थ्रेक्नोज, और कली व पुष्प वृंत का सड़ना आदि रोग लगते हैं।

इनके नियंत्रण में ( बोर्डोे मिश्रण बनाने के लिए एक किलो ग्राम अनबुझा चूना, 1 किलो नीला थोथा एवं 100 लीटर पानी 1 -1 -100 रखा जाता है। बोर्डोे मिश्रण बनाने के लिए सर्वप्रथम नीला थोथा व चुना को अलग-अलग प्लास्टिक के बर्तनों में घोला जाता है जब मिश्रण घुल जाये तब दोनों को एक बर्तन में डाल दिया जाता है।  मिश्रण के परीक्षण के लिए छोटे से लोहे के टुकड़े को मिश्रण में डुबाकर 5 मिनट तक रखकर परीक्षण किया जाता है जब लोहे में रंग आ जाये तब मिश्रण सही नहीं बना है इसको सही करने के लिए पुनः थोड़ा चुना मिला लिया जाता है।  )

5 : 5 : 20 के अनुपात का पेड़ों की सड़न गलन को खरोच कर लेप करना चाहिए। अन्य रोग के लिए  बलाइटोक्स 3 ग्राम या ड्राईथेन M – 45, 2 ग्राम प्रति लीटर अथवा मैंकोजेब या जिनेव 0.2 % से 0.25 % का पानी में घोल बनाकर छिड़काव करना चाहिए अथवा कॉपर आक्सीक्लोराइड 3 ग्राम या व्रासीकाल 2 ग्राम प्रति लीटर पानी में मिलाकर छिड़काव करना चाहिए।

पपीते के पौधे को कीटों से नुकसान पहुँचता है फिर भी कीड़ें लगते हैं जैसे माहू, रेड स्पाइडर माइट, निमेटोड आदि हैं। नियंत्रण के लिए डाइमेथोएड 30 ई. सी. 1. 5 मिली लीटर या फास्फोमिडान 0.5 मिली लीटर प्रति लीटर पानी में मिलाकर छिड़काव करने से माहू आदि का नियंत्रण होता है। निमेटोड पपीते को बहुत नुकसान पहुँचाता है और पौधे की वृद्धि को प्रभावित करता है। इथीलियम डाइब्रोमाइड 3 किग्रा प्रति हे. का प्रयोग करने से इस बिमारी को नियंत्रित किया जा सकता है। साथ ही अंत्रश्य गेंदा का पौधा लगाने से निमेटोड की वृद्धि को रोका जा सकता है।

9 से 10 महीने में तैयार हो जाती है। …. 

पपीते की फसल 9 से 10 महीने के बाद फल तोड़ने  जाती है। जब फलों का रंग हरे से बदलकर पीला होने लगे एवं फलों पर नाखून लगने से दूध की जगह पानी तथा तरल निकलने लगे, तो फलों को तोड़ लेना चाहिए।

फलों के पकने पर चिड़ियों से बचाना अति आवश्यक है अतः फल पकने से पहले ही तोड़ लेना चाहिए।

फलों को तोड़ते समय किसी प्रकार के खरोच या दाग-धब्बे से बचाना चाहिए वरना उसके भण्डारण से ही सड़ने  सम्भावना होती है। 

Best Papaya Haybrid Seeds in India …..

रेड लेडी 786 ताइवान पपीता की खेती करने के लिए सभी प्रकार की निःशुल्क सहायता, सुझाव और पौधे खरीदने के लिए हमसे संपर्क करें। 

फोन – 8299790172 

Chat on WhatsApp :- 8299790172

Contact us for free help and suggestion to cultivate Red Lady 786 Taiwan Papaya 

Phone no . – 8299790172

Click here to Buy original F1 Red Lady 786 Taiwan Papaya Seeds online

Posted on Leave a comment

घर की छत पर सब्जियाँ उगाने के सबसे सरल तरीके और लाभ

Buy Kitchen Garden Seeds

साग-सब्जियों का हमारे दैनिक भोजन में महत्वपूर्ण स्थान है क्योंकि ये विटामिन, खनिज लवण, कार्बोहाइड्रेड, वसा व प्रोटीन के अच्छे स्रोत होते हैं। बाजार में आज कल सभी प्रकार की सब्जियाँ उपलब्ध हैं पर यह जरुरी नहीं की वह ताजी हों। 

विशेष तौर पर शाकाहारियों के लिए आज के दौर में शुद्ध सब्जी मिलना बहुत मुश्किल हो गया है। इसीलिए आप अपने घर के आँगन में, घर की छत पर या आपके पास कोई खली जमीन हो तो आप आसानी से सब्जी बगीचा  (किचन गार्डन) बना सकते हैं। इससे आपको शुद्ध सब्जियाँ भी मिलेंगी और साथ ही इन्हे बेचकर आप कुछ पैसे भी कमा सकते हैं। भोजन शास्त्रियों एवं वैज्ञानिकों के अनुसार संतुलित भोजन के लिए एक व्यस्क व्यक्ति को प्रतिदिन 85 ग्राम फल एवं 300 ग्राम सब्जियों का सेवन करना चाहिए। जिसमे लगभग 125 हरी पत्तेदार सब्जियाँ, 100 ग्राम जड़ वाली सब्जियाँ और 75 ग्राम अन्य प्रकार की सब्जियों का सेवन करना चाहिए। परन्तु वर्तमान में इनकी उपलब्धता मात्र 190 ग्राम है। 

इसमें जगह का चुनाव, किस्मो का चयन स्थिति के आधार पर ही सुनिश्चित किया जाता है। सब्जी बगीचा का आकर भूमि की उपलब्धता एवं व्यक्तियों की सँख्या पर निर्भर करती हैं। सामान्यतः चार से पाँच व्यक्तियोँ वाले परिवार के लिए 200-300 वर्ग मीटर भूमि पर्याप्त होती है और कम पड़े तो भी निराश होने की जरुरत नहीं है। अपने पास उसके लिए और भी कई विकल्प हैं। ….. 

घर पर सब्जियां कहा-कहा लगा सकते हैं। …….  

घर के आस-पास खली पड़ी जमीन पर :- हमारे घर के आस-पास ऐसी बहुत खाली जगह पड़ी होती है। जिसका उपयोग सब्जी उगाने के लिए किया जा सकता है। यदि वहाँ की मिट्टी ठोस हो तो उसे खुदाई करके खेत जैसा बना लें और संभव हो सके तो उसमें किसी तालाब की उपजाऊ मिट्टी या गोबर की खाद डालकर अच्छी तरह जुताई कर लें। उसके बाद उसमें छोटी-छोटी क्यारियाँ बना कर, उसमें आप अपनी मन पसंद की सब्जियाँ ऊगा सकते हैं। यदि आपको सिंचाई के पानी की कमी हो तो किचन से निकले व्यर्थ पानी को आप पाइप के द्वारा सब्जियों की सिंचाई कर सकते हैं।

गमले और प्लास्टिक ट्रे में :- गमले में सब्जी उगाने के लिए आपको ज्यादा जगह  जरुरत नहीं पड़ती है, बालकनी या ऐसी थोड़ी सी भी जगह जहाँ गमले रख सकते हैं वहाँ बहुत आसानी से सब्जियाँ उगा सकते हैं। गमला मिटटी का हो तो बहुत अच्छा होता है। इसके आलावा आप अपने घर पर पड़ी ख़राब बाल्टियों, तेल के पीपे, लकड़ी की पटरियाँ आदि उपयोग कर सकते हैं। बस उनके नीचे 2 – 3 छेद करके पानी की निकासी जरूर कर दें। गमलों में टमाटर, बैंगन, गोभी जैसी सब्जियाँ आसानी से उगाई जा सकती हैं। टिन या प्लास्टिक ट्रे जिसमे 2 या 3 इंच मिट्टी आती हो उसमें हम हरा धनिया, मेथी, पुदीना आदि सब्जियाँ उगा सकते हैं। 

 घर की छत पर :- सब्जियां लगाने से पहले छत पर एक मोटी प्लास्टिक की चादर बिछा दें फिर ईंटों या लकड़ी के पट्टों से चार दीवारी बना लें उसमें सामान सामान रूप से मिट्टी बिछा दें और पानी की निकासी भी रखे। छत पर सब्जियां लगाने से गर्मी के दिनों में आपका घर भी ठंडा रहता है जिससे आपको काफी राहत मिलेगी। 

घर में कौन-कौन सी सब्जी लगा सकते हैं। ….

रबी के मौसम की सब्जियाँ :- रबी में सब्जियाँ सितम्बर-अक्टूबर में लगा सकते हैं जैसे फूल गोभी, पत्तगोभी, शलजम, बैंगन, मूली, गाजर, टमाटर, मटर, सरसों, प्याज, लहसुन, पालक, मेथी आदि।

खरीफ के मौसम की सब्जियाँ :- खरीफ में लगाने का समय जून-जुलाई है। इस समय भिंडी, मिर्च, लोबिया, अरबी, टमाटर, करेला, लौकी, तरोई, शकरकंद आदि सब्जियों को उगा सकते हैं।

जायद की सब्जियाँ :- जायद में सब्जियां फरवरी, मार्च या अप्रैल में लगाई जाती है। इसमें टिंडा, खरबूजा, तरबूज, खीरा,ककड़ी, टेगसी, करेला, लौकी, तरोई, भिंडी जैसी सब्जियां लगा सकते हैं।

सब्जी बगीचे के लाभ :- 

1 . घर के चारों ओर खाली भूमि और व्यर्थ पानी व कूड़ा-करकट का सदुपयोग हो जाता है। 
2 . मनपसंद सब्जियों की प्राप्ति होती है। 
3 . साल भर स्वास्थ्यवर्धक, गुणवत्ता युक्त  व सस्ती सब्जी, फल व फूल प्राप्त होते रहते हैं। 
4 . परिवार के सदस्यों का मनोरंजन व व्यायाम का अच्छा साधन है, जिससे शरीर स्वस्थ रहता है।
5 . पारिवारिक व्यय में बचत होती है। 
6 . सब्जी खरीदने के लिए अन्यत्र जाना नहीं पड़ेगा।

सब्जी बगीचा लगाने हेतु ध्यान देने योग्य बातें :- 

1 . घर के पिछले हिस्से में ऐसी जगह का चयन करें जहाँ सूरज की रोशनी पहुँचती हो क्योंकि सूरज की रोशनी से ही पौधे का विकास संभव है। पौधों को रोज 5 – 6 घंटे की धुप मिलना जरुरी होता है। इसीलिए बगीचा छाया वाली जगह पर न बनायें।

2 . सब्जी बगीचे के एक किनारे पर खाद का गड्डा बनायें जिसमें घर का कचरा, पौधों का अवशेष डाला जा सके जो बाद में सड़कर खाद के रूप में इस्तेमाल किया जा सके। 

3 . बगीचे की सुरक्षा के लिए कंटीले झांडी व तार से बाड़ लगाएं, जिसमे लता वाली सब्जियां लगाएं। 

4 . सब्जियों व पौधों की देखभाल एवं आने-जाने के लिए छोटे-छोटे रास्ते बनायें।  

5 . आवश्यकतानुसार सब्जियों के लिए छोटी-छोटी क्यारियां और क्यारियों के सिंचाई हेतु नालियाँ बनाये। 

6 . फलदार वृक्षों को पश्चिम दिशा में किनारों पर लगाएं जिससे छाया का प्रभाव अन्य पौधों पर न पड़ें। 

7 . मनोरंजन के लिए उपलब्ध भूमि के हिसाब से मुख्य मार्ग पर लॉन(हरियाली ) लगाएं। 

8 . फूलों को गमलों में लगाएं एवं रास्तों के किनारे पर रखें। 

9 जड़ वाली सब्जियों को मेड़ों पर उगायें। 

10 . समय-समय पर निराई – गुड़ाई एवं सब्जियों और फल-फूलों के तैयार होने पर तुड़ाई करते रहें। 

11 . सब्जियों का चयन इस प्रकार करें की साल भर उपलब्धता बानी रहे। 

12 . कीटनाशकों व रोगनाशक रसायनों का प्रयोग कम से कम करें यदि फिर भी उपयोग जरुरी हो तो तुड़ाई के बाद एवं  प्रभाव वाले रसायनों का प्रयोग करें। 

Posted on Leave a comment

Top 7 Herbal Plant you must have in Kitchen Garden

Buy Herbal Plants

What is Herb?
Any seed-bearing plant which does not have a woody stem and dies down to the ground after flowering. Usually aromatic plants, such as tulsi, ginger, bay leaf, black pepper, curry patta, lavender and mint.

Tulsi
Tulsi, also known as holy basil, is a medicinal herb used in Ayurveda, a form of alternative medicine that originated in India.

Ginger
Growing your own ginger is easy and rewarding. Once planted, the ginger needs nothing but water and patience to mature into a delicious, spicy ingredient. This guide focuses on the edible species, but most flowering ornamental ginger plants grow in similar conditions.

Bay Leaf
Bay Leaf plants are slow growing trees with leaves that are used as seasoning in cooking. It is also known as bay laurel. If you enjoy growing herbs, this is a great one to try, since it has a very aromatic flavor.

Black Pepper
Black Pepper is the dried fruit of the Black Pepper plant. Each fruit contains a single seed, and that seed will germinate if the fruit is planted in fertile soil that maintains the required temperature until the seed sprouts. Black Pepper found in grocery stores should not be planted.While there is a small possibility they could germinate if planted properly, it is very unlikely. So it is advisable to avoid using culinary black pepper and instead obtain seeds meant for growing.

Curry Patta
Growing curry leaf tree in the home garden is only advisable in areas without freezes. Curry leaf plant is frost tender but it can be grown indoors. Plant the tree in a well drained pot with good potting mix and place in a sunny area. Feed it weekly with a diluted solution of seaweed fertilizer and trim the leaves as needed.

Lavender
Lavender repels many harmful insect pests, making it especially useful when planted as a border around the vegetable garden. It is a great companion plant for a variety of other plants. For example, lavender is highly effective in repelling cabbageworms that infest vegetables.

Mint
You can find mint growing outdoors in a pot of soil or even in a bottle of water. For starters, you need a container with adequate drainage for healthy plant growth. Pot up your mint plant with a good potting mix, either a regular commercial type or one with equal amounts of sand, peat, and perlite mixed in.

Posted on Leave a comment

How to get Bigger Fruits Using Organic Fertilizer

Do you want to grow size of fruits on your plant? Bonsai Plants Nursery Got an Ultimate Organic way To increase Fruit Size on Any Plant. By using Amratras Liquid fertilizer Farmers increased the size of fruits in their garden and earned extra. farmers say thanks to Amratras for adding extra money to their pocket. Order Amratras liquid fertilizer using this link now https://bonsaiplantsnursery.com/product/amrutras-liquid-organic-ferlizer-250-ml/

Amrutras means World’s best liquid organic ferlizer developed with
advanced technology which nourishes and protects all farm products

Specializaon of Amrutr on of Amrturas:

  • India’s first patented product(Liquid Organic Ferlizer).
  • Saves 25-30% of nitrogen, phosphorous and
    potassium ferlizers.
  • Enriched with 21 important nutrients for crops.
    Necessary for healthy nursery plants.
  • Easy to use.
  • Suitable for both drip and sprinkle methodology.
  • 15-45% increase in producon.
  • Suits green house.
  • Proven results on all types of crops.

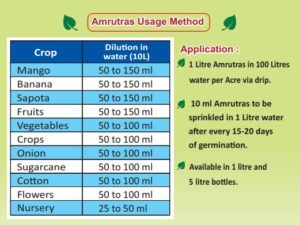
Application :

  • 1 Litre Amrutras in 100 Litres
    water per Acre via drip.
  • 10 ml Amrutras to be
    sprinkled in 1 Litre water
    aer every 15-20 days
    of germinaon.

Things to take care while using Amrutras:

  • Do not mix any kind of chemical pescide or spreader with Amrutras.
  • Sprinkle Amrutras preferably early morning or in evening for best results
  • Store away from sunlight
  • Shake bole well before use.
  • If chemical ferlizer is already been used,
    kindly maintain a gap of atleast one week prior using Amrutras.

Advantages of Amrutr es of Amrutras :

  • Not only retains ferlity but also enriches soil and makes healthy plants.
  • It transforms non ferle land into nutrients enriched ferle land.
  • Amrutras slowly destroys poisonous substances from soil.
  • Amrutras reverses negave impact of chemical ferlizers on soil by
    enriching it with nutrients.
  • Use of Amrutras substanally increases producon/yield.
  • Amrutras helps crops/fruits retain their original color and taste.

Download user Guide

Posted on Leave a comment

How to Treat Unhealthy Plants – How to Save a plant thats about to die

Buy Fast Growing Quality Plants- https://bonsaiplantsnursery.com/ How to Treat Unhealthy Plants Plants, like people and animals, can develop a number of diseases. Whether you see it in your houseplants or out in the garden, diseases can destroy your greenery quickly if not treated, prevented, or destroyed Whenever plants begin to drop their leaves, it is certain that their health has been injured; this maybe due to over-potting, over-watering, over-heating, too much cold, or the application of such stimulants as guano, or to some other cause which has destroyed the fine rootlets by which the plant feeds, and induced disease that may lead to death. Natural Remedies Many of these treatments involve making and using a spray. It is best to use the spray in the early morning or in the evening. Do not spray when it is too hot, or it may burn your plant’s leaves. Before trying any spray, you would be wise to test it on one leaf first Apple cider vinegar Dilute one tablespoon of vinegar in one gallon of water and use to treat fungal infection on any type of plant. It can also help treat black spot on aspen trees and on roses. Baking soda Another fungicidal spray is made with baking soda. Mix one tablespoon of soda with two and a half tablespoons of vegetable oil and add to a gallon of water. Shake the mixture well and add to it one half teaspoon of castile soap. Chive spray. This mixture is useful for treating downy mildew on vegetables like pumpkins, squash, and cucumber. To make it, steep a large bunch of chopped chives in boiling water. Strain the chives out and use the liquid to treat the vegetables. It can also help prevent apple scab. Garlic To prevent fungal infections in any plants that you feel are susceptible to them, you can use this effective spray. To make it, you need, clematis leaves, and the papery outer covering of garlic. Chop them up together in a blender or food processor with water. Strain the liquid and use it as a spray. Pruning the Infected Area Once infection is noted in the plant. Its important to pruned it immediately.Pruning cuts should be cuts 12 inches below any discolored this is because discoloration is a chemical response of plants. Watering Regularly The amount of water may vary from species to species. Find out the average moisture needs of your particular plant and then get a moisture gauge. Monitoring Plant

Article Sources: https://chestofbooks.com/gardening-horticulture/Gardening-Pleasure/Chapter-XX-Unhealthy-Plants-The-Remedy.html

Treating Plant Diseases Naturally

Posted on Leave a comment

Rooftop Vegetable Gardening – Grow Vegetable at Home

Buy Fast Growing Quality Plants online at https://bonsaiplantsnursery.com/

Posted on Leave a comment

How to Make Homemade Fertilizer for Flowers and Fruit Plants

Buy fertilizer for plants here https://bonsaiplantsnursery.com/produ… How to Make Homemade Fertilizer for Flowers and Fruit Plants What is Organic Fertilizer? Organic fertilizers comprise a variety of plant-derived materials that range from fresh or dried plant material to animal manures and litters to agricultural by-products 7 Best Homemade Fertilizer for Flowers and Fruit Plants Grass Clippings If you have an organic lawn or rake, make sure to collect your grass clippings to use on your gardens. Half an inch to an inch of grass clippings makes a great weed-blocking mulch, and it is also rich in nitrogen, which is an essential nutrient for most plants. Manure Manure comes from a variety of sources — cows, horses, chickens, and even bats. Each type of manure is high in nitrogen and other nutrients, but you’ll need to use it carefully. Raw manure is highly acidic and may actually have more nutrients than your plants need, so too much can burn your plants. It’s best to use composted manure. Coffee Grounds Coffee grounds come with a lot of uses, but one of their best is as a fertilizer. Lots of plants, such as blueberries, rhododendron, roses, and tomatoes, thrive best in acidic soil. Recycle your coffee grounds to help acidify your soil. Eggshells Egg shells are something else that you probably have tons of throughout the week and typically just throw out. The shells contain a lot of calcium which helps with cellular growth in your plants. Calcium deficient soil can lead to blossom end rot on tomatoes and various other garden catastrophes. This egg shell fertilizer will help to end that. Just crush up used egg shells and then bury them in the soil. Banana Peels We eat bananas for their potassium, and roses love potassium too. Simply bury peels in a hole alongside the rose bush so they can compost naturally. As the rose grows, bury the peels into the soil’s top layer. Fireplace Ash Fertilizer Fireplace ash provides calcium carbonate and potassium to plants. All you need to do is add the ash to the garden bed and then massage it into the soil. It may be best to do this right before planting so that you don’t risk knocking your plants over or harming them while massing the ash into the soil. Onion Skin Fertilizer Don’t throw away the onion skins, use them to create organic potassium-rich fertilizer for all your plants growing indoors or outdoors. Using it will increase their disease resistance, growth, strong stems, and productivity. Use the leftover onion skins for mulching. The dry peels will decompose soon and enrich your soil with potassium and calcium.

Article Sources: https://www.sciencedirect.com/topics/agricultural-and-biological-sciences/organic-fertilizer

https://www.farmersalmanac.com/8-homemade-garden-fertilizers-24258

https://www.farmersalmanac.com/8-homemade-garden-fertilizers-24258

Posted on Leave a comment

How to Get Epic Amount of Fruit from Grape Plant

Buy Best Quality Fast Growing Fruit plant only at https://bonsaiplantsnursery.com/shop/ How to Get Epic Amount of Fruit from Grape Plant Grapes are versatile fruits used in a wide range of popular foods — from raisins to jelly to wine. Grape vines not only produce sweet and versatile fruits, they add an element of drama to a garden or landscape. They are vigorous growers. Where To Plant Grapes Your location needs to be prepared with a support well in advance. You can use a trellis, an arbor, or any number of other types of support structure, but it needs to be there when you plant your vine. How To Plant Grapes Bare root grapes should be soaked in water for at least 2 hours prior to planting. Potted grapes should be watered well the day before to reduce transplant shock. Begin by digging a hole that is a minimum of a foot wide and deep. Add four inches of good topsoil to the bottom of the hole, then examine your plant’s roots. Trim off any which are broken or damaged. Support Grapevines need some type of support or they will trail along the ground. The support can be an arbor covering a patio for shade, or can be as simple as a post in the ground to support the trunk of the vine. Growth Of Grape Plants Bud Break In the early spring as the vine comes out of dormancy, it begins with “bleeding” of vines which were pruned during the winter months. As the soil warms, water will ooze out of places where the cane was cut. One vine can “bleed” up to almost a gallon and a half of water. Flowering Stage During the flowering stage is when pollination occurs. While most commercially-grown grapevines are self-pollinating, wild ones are not and require insects to pollinate the flowers. In addition, this stage is when fertilization and seed-set occurs, forming tiny dots that will become seed. Caring for Grape Plant to Ensure the Good Quality Yield Watering Apply water only to the root zone. Avoid getting grape foliage wet as this can encourage many grape diseases. Reduce watering young vines in the fall to encourage the plant to harden-off its canes to prepare for winter. Feeding and Mulching Do not fertilize in the first year unless you have problem soil. Fertilize lightly in the second year of growth. Use mulch to keep an even amount of moisture around the vines. A mesh net is useful in keeping birds away from budding fruit. Weeding Keep grass and other plants from growing under grapevines. This allows the soil to heat up early in the spring and maintain higher soil temperatures to encourage growth. Pruning Pruning grapes depends on how you decide to grow them in your garden and how much space you have. Heavy pruning provides the best fruit. Light pruning results in large yields of poor-quality fruit. Very heavy pruning produces too much leafy growth and very little or no fruit. Harvesting The best way to tell if grapes are ripe is to taste a few. Many varieties turn color before they are ripe. Clip full clusters off the vine with pruning shears or heavy scissors. Handle clusters carefully. Remove any discolored, injured, or undesirable berries. Cool them as soon as they are picked.

Article Sources: https://www.epicgardening.com/growing-grapes/

https://www.almanac.com/plant/grapes

https://www.smithsonianmag.com/science-nature/quest-grow-first-great-american-wine-grape-science-180969207/

https://www.livescience.com/54581-grapes-nutrition.html

Posted on Leave a comment

How to Bonsai Fruit Plant Step by Step

Buy best quality fruit plants online at https://bonsaiplantsnursery.com/shop/ How to Bonsai Fruit Plant Step by Step Process What is a Bonsai Tree? Bonsai is not a genetically altered plant to create a dwarf like-version of a full-size species. Rather through careful cultivation, pruning, and wiring of the branches, tree to stay under 4 feet (a generally accepted height), and still bear flowers and fruits if desired. Step 1: Choosing Your Bonsai Fruit Plant Bonsai can be grown with a number of different plants and trees. People have made bonsai out of bushy shrubs and fruit trees. Step 2: Potting Your Bonsai Fruit Tree If you’re starting your own bonsai and not buying a pregrown one from a nursery, you’ll need a good pot. Ideally, it should be shallow and small so that the tree’s roots don’t spread out too far, causing it to get too big. Step 3: Styling Your Bonsai Fruit Tree It’s important that the style is sympathetic to the matches plant that you have selected. Once you have settled on a preferred style, it’s time to get pruning and shaping. Step 4: Wiring Your Bonsai Fruit Tree If you’re not happy with how some of your branches are growing, you can use a technique called wiring. For this technique, you will need quality gardening wire. You’ll need to be gentle and wrap tightly. This will force the branch to move every few weeks. Once your Bonsai has achieved the desired shape, you can remove the wiring. Step 5: Caring For Your Bonsai Fruit Tree Now that you’ve planted, potted, and styled your Bonsai, you need to ensure that proper ongoing care is given. Each individual type of fruit plant will have its own needs. Basic Care Tips For Bonsai Fruit Gardeners Watering Wait until the soil is slightly dry to water your Bonsai and avoid overwatering. Temperature Be sure to keep your bonsai out of direct sunlight when the temperature is hot outdoors. Repotting It is likely you will need to repot your Bonsai over a few years until it gets to the size you’d like. If the leaves look yellow, or the roots dried, the pot should be changed to a larger one Maintenance Once your Bonsai has grown into your desired shape, you’ll need to prune it a little every year. Be careful to not remove any additional branches when you are pruning.

Articles Source:https://thewhoot.com/whoot-news/diy/how-to-make-a-bonsai

Bonsai Apple Trees: A Guide to Compact Fruit Tree Care

Posted on Leave a comment

आपका गुलाब का पौधा फूलों से लद जायेगा, जानें 3 बेहतरीन तरीके।

क्या आपके घर में लगे गुलाब के पौधे में फूल नहीं आ रहे या आना बंद हो गए हैं, तो आपको घबराने की बिल्कुल जरुरत नहीं है। आज आपको ऐसे अचूक तरीके पता चलेंगे। जिन्हें आप अपने गुलाब के पौधे पर आजमा कर अपने गुलाब के पौधे से पुनः ढेर सारे गुलाब पा सकते हैं। 

तरीका न. – 1 

अगर आपका गुलाब का पौधा 2 साल पुराना हो चूका है और उसमें फूल नहीं आ रहे हैं तो आप समझ जाइये की आपको अपने गुलाब के पौधे की रिपौटिंग करने का समय आ गया है। 

क्या होता हैं न की पौधा अधिक दिनों तक एक ही गमले में रहने से उसकी जड़ें पूरे गमले में अपना कब्जा कर लेती हैं और फिर स्थान की कमी होने पर उसकी जड़ें अच्छे से ग्रोथ नहीं कर पाती हैं। जिस वजह से गुलाब में फूलों की कमी आ जाती है। तो आपको फिर से उस गुलाब के पौधे से फूल पाने के लिए उपाय यह करना है कि उस गुलाब के पौधे को गमले से निकालकर उसकी जड़ों में लगी सारी मिट्टी को निकालकर उसकी जड़ को साफ पानी में रख दें। उसके बाद आप गमले को साफ करके नयी मिटटी लेकर उसमे गुलाब का पौधा लगा दें। आप पुराने गमले के जगह कोई नया और उससे बड़ा गमला भी ले सकते है। ऐसा करने से आपके गुलाब के पौधे में पहले से अधिक फूल आने लगेंगे। 

नोट :- पौधे की रिपोटिंग करते समय गुलाब की पुरानी शाखाओं को काट देना चाहिए और मिटटी में वर्मीकम्पोस्ट को मिला लेना चाहिए। 

तरीका न. – 2 

गुलाब के पौधे में जब पहला फूल आये तो उसे तोड़ लें। उस फूल को तोड़ने का भी एक तरीका होता है। आपको फूल के नीचे एक साथ तीन पत्तियाँ जहाँ तक दिखें और जहाँ से पाँच पत्तियाँ दिखनी सुरु हो जाये। तो जहाँ से तीन पत्तियाँ दिखना शुरू हो जाये तो वहाँ से उस हिस्से को फूल सहित काट दें। 

तरीका न. – 3 

जिस गमले में गुलाब लगा हो उसकी मिटटी में आयोडीन नमक या मैगनीशियम सल्फेट का एक-एक चम्मच डाल दें। इसके साथ ही आधा चम्मच पोटाश भी डाल दें। 

ध्यान रहे की ये चीजें आप पौधे के तने के पास बिल्कुल न डालें। गमले के किनारे पर डालें। 

आप आयोडीन नमक, मैगनीशियम सल्फेट और पोटाश की उतनी ही मात्रा लेकर उसको पानी में मिलाकर। आप गुलाब के पौधे की पत्तियों पर स्प्रे भी कर सकते हैं। इससे पौधे को सीधे पत्तियों से पोषण मिलता है। 

आप अपने गुलाब के पौधे में गोबर की खाद डाल सकते हैं और ब्लूम बड़ी नामक खाद भी मिला सकते हैं। जो आपको आसानी से मार्केट में मिल जायेगी। 

नोट :- आप अपने गुलाब के पौधे में Amrutras liquid organic fertilizer डालने से आपका गुलाब का पौधा पहले और अधिक फूल देने लगेगा। आपको यह मार्केट से बहुत आसानी से मिल जायेगा। अगर नहीं मिलता है तो आप इसे ऑनलाइन भी आर्डर कर सकते हैं 

Posted on 2 Comments

How to Care for Adenium Bonsai Plant

Buy best Adenium plant for home garden

Desert Rose Plant Info: Caring For Desert Rose Plants Plant lovers are always looking for easy to grow, unique plants with a fun aspect. Adenium desert rose plants are perfect specimens for the intrepid or novice gardener.These East African and Arabian natives are wonderful in the interior container garden or as warm climate additions to the patio display. Caring for desert rose plants requires a full sun location and well-drained soil. Properly mimicking their native regional conditions will garner plenty of rose-like blooms on an architectural marvel of a plant. Desert Rose Plant Info Desert rose has become a popular ornamental garden plant in United States Department of Agriculture zones 10 to 11. The rest of us in cooler zones will have to resort to growing Adenium indoors, giving the plant a vacation in the summer on the patio or deck. Desert rose plant care can be difficult and requires some knowledge of the life cycle of the species. Adeniums are succulent, tropical plants. They are distinctive among the class because they develop a caudex, or swollen trunk. All succulent plants have some sort of water storage system, be it leaves, stems or roots. In desert rose, the trunk swells to conserve moisture for times of drought. A nice fat trunk is an indicator of plant health. A skinny stem can indicate that the plant requires more moisture. An interesting bit of desert rose plant info is its natural resemblance to a bonsai plant, with a short stature when mature, and tidy canopy perched atop the graduated stem. Many growers seem to have trouble caring for desert rose plants, but these can truly be easy to maintain if you keep in mind the water, temperature and lighting needs of Adenium. Adenium Desert Rose Growing Tips First, remember that Adenium plants are native to regions with poor, gritty soil and hot, sunny climates. You can’t expect the plant to thrive in overly moist soil, in a site with limited light. They are also not frost tolerant and will succumb to a freeze if exposed. The plant will not survive long if exposed to temperatures below 40 degrees F (4 C) but will thrive in temperatures reaching up to 90 degrees F (32 C). Desert rose succulents like bright light, so a southern window exposure provides enough sun for the plants to flourish and bloom. In the garden, choose a sunny location that has some protection from noonday sun, as this can scorch the foliage. Soil is very important. Adenium plants should have a mixture of cactus soil with gritty sand or lava rocks for good drainage. Desert Rose Plant Care The one thing that will kill these plants quickly is improper watering. They are succulents but are used to rainy periods during which they grow, followed by a dormant, dry period. Match your watering practices to these needs for best success. Keep soil moderately moist in spring and summer, but reduce watering in fall and especially winter when the plant is dormant. Fertilize with a dilution by half of a 20-20-20 liquid plant food once per month when the plant is actively growing. Do not feed the desert rose during winter. The most common pests are scale, mealybugs and spider mites. Use cotton balls soaked in alcohol to wipe away these insect rogues. Be cautious, as Adenium desert rose is in the Dogbane family, with all species bleeding a poisonous sap that can irritate skin and mucous membranes.

source link: https://www.gardeningknowhow.com/ornamental/flowers/desert-rose/caring-for-desert-rose-plants.htm

Posted on Leave a comment

Tips about Getting a lot of flowers from Mogra or Jasmine Plant

Buy Best Quality Mogra Plant Online

How to Plant and Care for Mogra or Jasmine Plant Mogra plant is dwarf growing shrub with almost stalkless leaves and wavy margins. The plant can be grown as a short climber too. The heavy scented white flowers are borne in clusters of 3 to 12 and may be single, semi-double or perfectly double. The plant flowers mainly in the summer and rainy seasons, but several other flushes during other parts of the year are quite common. Rest Period for Blooms Outdoor jasmine with no blooms can be covered with a dark, lightweight landscape covering, or even a sheet, but be sure to remove it when the sun comes up. The jasmine with no blooms will still need light during the day. Water the non blooming jasmine on a limited basis during this rest period. Withhold fertilization for the four to five week period. Keep temperatures at 40-50 F. (4-10 C.) during the resting time for the jasmine flowers that are not blooming. Gardening Practices for Mogra Plant Watering: Moderate Watering is good for Mogra plant. It is essential in the flowering season. Mogra cannot withstand water logging and plants will be killed in the waterlogged soil in no time. Watering is stopped during November to enable the plants to rest. Defoliation: Once the watering is stopped, the plants shed the leaves. If it does not happen, all the leaves on the plant should be removed by hand. Pruning: Defoliation is followed by a light pruning of stems. Branches are pruned one-third of their length. If than at the right time it will encourage more and bigger blooms. Manuring: Plenty of well-rotted farmyard manure is added to the potting soil after pruning a plant, along with NPK fertilizers. Resumption of Watering: After application of manures, irrigation should commence slowly, and the frequency of watering is increased after the appearance of flower buds. Pests and Diseases Jasmines are tropical plants, one of the most common issues related to them is rust and blight. These two conditions cause damage to the leaves; it can affect the coloration of the foliage, make the leaves wilt, and it can even pass to younger stems or cutting offspring that is taken from the mature plant. Getting Rid of Diseases The best way to get rid of most pests that can affect your Jasmine plants is to create a soapy solution that you can apply to the leaves of the plant. If you know what the pest is, then you can target it specifically with an insecticide spray. Harvesting Mogra flowers The plant begins to flower second year onwards after planting. The flowers are harvested in bud stage either in the evening or early in the morning by handpicking. Flower buds are used for garland making, adorning hair, worshipping, decoration, and extraction of perfume. Article Sources:https://www.gardeningknowhow.com/ornamental/flowers/jasmine/non-flowering-jasmine.htm

Posted on Leave a comment

Correct and complete way to do Air Layering – Developing a new plant within 30 days

Buy Fast Growing Quality Plants Online – Bonsai Plants Nursery

How to Do Air Layering of Any Fruit Plant

Air layering is a useful method of producing roots on the stem of indoor landscape plants that have become “leggy” through the loss of their lower foliage.

This method, believed to have been developed centuries ago by the Chinese. It has been used successfully as a mean of propagating some of the more difficult-to-root plants. Because it required excessive care and patience.

The procedure was to wound the stem or branch of a plant and enclose the wounded stem with moist sphagnum moss or similar rooting medium until roots develop from the wounded area. Success was dependent upon the ability of the propagator to keep the rooting medium moist until the roots were formed and large enough to support the new plant. Only since the development of polyethylene film has air layering become a practical method of propagation for the home gardener and amateur horticulturist.

Steps for Making a Successful Air Layering

Step 1
With a sharp knife, make two parallel cuts about 1 1/2 inches apart around the stem and through the bark and cambium layer. Connect the two parallel cuts with one long cut and remove the ring of bark, leaving the inner woody tissue exposed.

Step 2
Apply a handful of damp sphagnum moss so that it envelopes the wounded portion of the stem. Tying the moss in place with string helps keep it in position while completing the process. The sphagnum moss should be soaked several hours to insure that it is thoroughly moist. Squeeze out surplus water before using, since excessive moisture will result in decay and deterioration of the plant tissue.

Step 3
Using a sheet of polyethylene film approximately 6″ X 12″ or 8″ X 12″, depending upon the size of the plant stem, wrap the ball of sphagnum moss using the butchers fold to secure a tight seal where the two ends of the sheet are joined.

Step 4
Draw the upper end of the film snugly around stem making sure that none of the moss is exposed. Fasten securely with electricians tape, taking care that the tape extends beyond the film and adheres to the stem. Repeat the procedure on the lower end, again making sure there is a snug fit. Moisture must not escape and excess moisture must not enter when watering or syringing the plants. Support the plant with stake or splint to prevent breakage at the wounded area.

Step 5
After the new roots have penetrated the moss ball and are visible on all sides, the rooted branch may be removed from the parent plant. The rooting time will vary with plant variety as well as the season in which it is performed.

Step 6
Remove the newly rooted plant from the parent plant with a sharp knife or pruning shears, making the cut just below the ball of moss and roots. Carefully remove the polyethylene film. Without disturbing the roots or removing the ball of moss, plant in a container using a good potting mixture or plant in a well-prepared soil bed.

Step 7
Placing a polyethylene tent over the newly potted plant for 4 to 8 days until the root system is well established. It is helpful as it will aid in preventing excessive loss of moisture. Keep the plant under a light shade and avoid direct sunlight until the new root system is well developed.

Many plants are lost in the final stage of the process because the root system is not sufficiently developed to sustain the top portion of the new plant. By keeping the new plant in a humid environment, it is possible to develop a good root system on rather large cuttings. Once the plant is well established, it is best to harden off the foliage by gradually exposing it to normal atmosphere.

Source:
https://aggie-horticulture.tamu.edu/earthkind/landscape/air-layering/