Posted on Leave a comment

🍎 Hariman 99 Summer Zone Apple (Hot Climate Apple) Planting Guide, Care, and Tips for Higher Yield – Complete Information

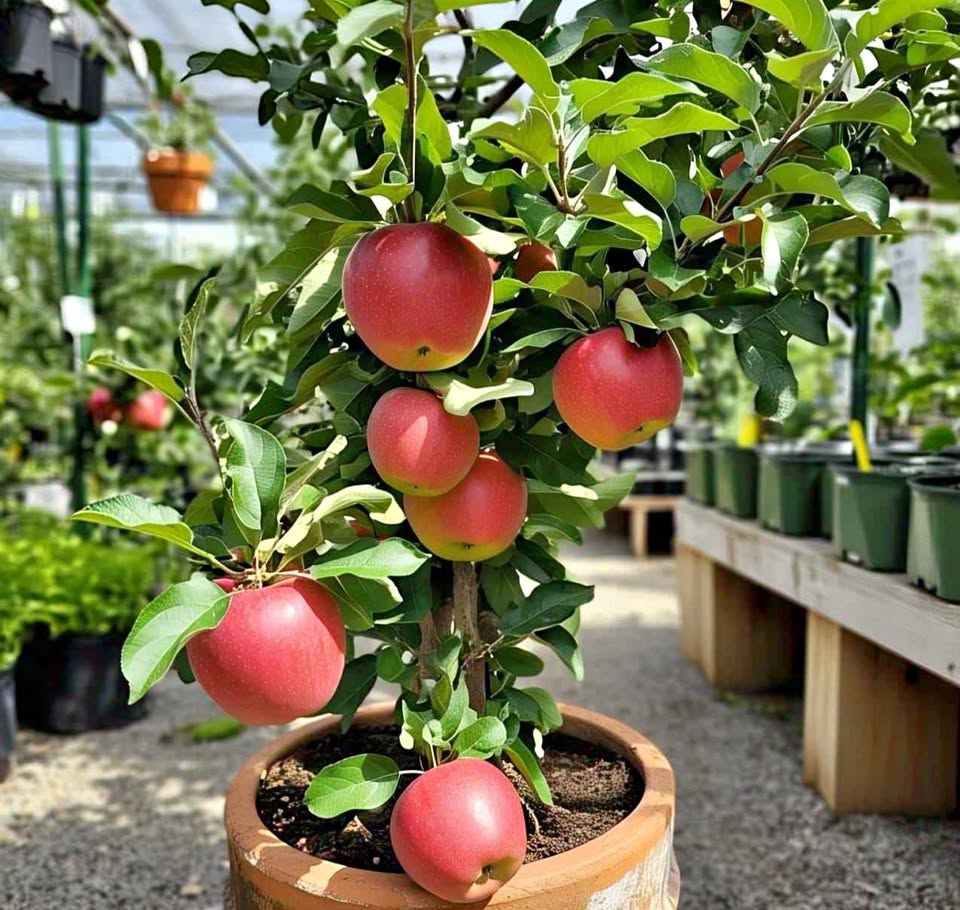
🌱 Introduction – What is Hariman 99 Summer Zone Apple?

Traditionally, apple cultivation in India was limited to the cold regions like Himachal Pradesh, Jammu & Kashmir, and Uttarakhand. But now, with the development of Hariman 99 (Hot Climate Apple), apple farming is possible even in the plains and hot regions of India.

hariman_99_summer_zone_apple_plant


  • This is a low-chill apple variety, meaning it requires fewer chilling hours to initiate flowering and fruiting.

  • It can grow well in tropical and subtropical climates like Uttar Pradesh, Rajasthan, Madhya Pradesh, Maharashtra, Gujarat, and even parts of South India.

  • With proper care and management, this apple tree starts bearing fruits within 3–4 years.

👉 Hariman 99 Apple is therefore considered a revolutionary variety for both farmers and home gardeners.


🌤️ 1. Suitable Climate for Hariman 99 Apple

  • Thrives in warm and subtropical climates.

  • Ideal temperature: 15°C to 35°C.

  • Can tolerate up to 40°C heat with proper irrigation and mulching.

  • Protect young plants from frost and cold winds.


🌍 2. Choosing the Right Location

  • Requires 6–7 hours of direct sunlight daily.

  • For field cultivation, choose elevated land to avoid waterlogging.

  • For home gardening, place pots in balconies, terraces, or open sunny areas.


🌱 3. Soil Preparation for Hariman 99 Apple

  • Grows best in loamy or sandy-loam soil.

  • Soil pH should be between 6.0–7.5.

  • Soil must be well-drained to prevent root rot.

Potting Mix for Containers:

  • 40% garden soil

  • 30% cow dung compost or vermicompost

  • 20% river sand

  • 10% cocopeat


🌳 4. Planting Methods for Hariman 99 Apple

(A) Field Plantation

  1. Dig a pit of 2 ft × 2 ft × 2 ft.

  2. Mix topsoil with compost and neem cake.

  3. Place the sapling upright and fill the pit.

  4. Water immediately after planting.

  5. Maintain 12–15 feet spacing between plants.

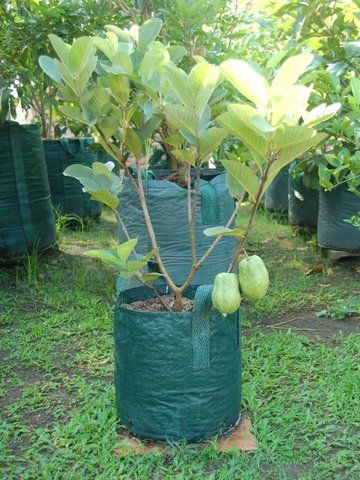
(B) Container Plantation

  • Select pots of 18–20 inches depth.

  • Place broken bricks or pebbles at the bottom.

  • Fill with potting mix and plant the sapling.

  • Keep in a sunny spot.


💧 5. Irrigation (Watering)

  • Water lightly after planting.

  • In summer: every 2–3 days.

  • In winter: once every 7–10 days.

  • Avoid overwatering.

  • Drip irrigation is best for commercial farming.


🌿 6. Fertilizers and Nutrition Management

Organic Fertilizers

  • 10–15 kg cow dung compost per plant (twice a year).

  • Vermicompost.

  • Neem cake.

Chemical Fertilizers (If Needed)

  • NPK 10:10:10 twice a year.

  • During fruiting, increase phosphorus and potassium.

  • Foliar spray of zinc, iron, and boron improves fruit quality.


✂️ 7. Pruning and Training

  • Light pruning during the first year to shape the plant.

  • Remove diseased, dry, or weak branches.

  • Best time: after the rainy season.

  • Proper pruning ensures better sunlight and airflow.


🐛 8. Pest and Disease Management

Common Diseases:

  • Powdery mildew (white patches on leaves).

  • Fruit rot during ripening.

  • Leaf spot disease.

Pests:

  • Aphids.

  • Fruit flies.

  • Mites.

👉 Solutions:

  • Spray neem oil (5 ml/litre water).

  • Use bio-fungicides like Trichoderma.

  • Remove infected leaves and branches.


🍏 9. Flowering and Fruiting

  • Starts fruiting in 3–4 years.

  • Flowering season: January–February.

  • Harvest season: June–July.

  • Yield: 30–50 kg per mature tree (with good care).


📈 10. Tips for Higher Yield of Hariman 99 Apple

  1. Apply balanced fertilizers on time.

  2. Provide light irrigation during flowering.

  3. Encourage pollination by attracting bees.

  4. Mulch with straw or leaves to retain soil moisture.

  5. Regular pruning for sunlight penetration.

  6. Remove diseased flowers and branches.


🏡 11. Benefits of Growing Hariman 99 Apple at Home

  • Fresh, organic fruits at home.

  • Grows well in terraces and home gardens.

  • Enhances greenery and aesthetics.

  • Eco-friendly fruit tree for warm regions.

  • Educational and fun for children.


💪 12. Health Benefits of Eating Apples

  • Rich in Vitamin C and antioxidants.

  • Boosts immunity and digestion.

  • Controls cholesterol and blood pressure.

  • Supports weight management.

  • Strengthens bones and teeth.


❓ 13. Frequently Asked Questions (FAQs)

Q1. How many years does Hariman 99 Apple take to bear fruits?
👉 Around 3–4 years.

Q2. Can it grow in hot climates?
👉 Yes, it tolerates up to 40°C if properly managed.

Q3. How much yield from one tree?
👉 On average 30–50 kg fruits per tree.

Q4. Can it be grown in pots?
👉 Yes, with large containers (18–20 inches deep) and proper care.


🏁 Conclusion

The Hariman 99 Summer Zone Apple (Hot Climate Apple) is a breakthrough variety that allows apple cultivation in plains and warmer regions where traditional apples cannot grow.

By following the correct:

  • Soil preparation,

  • Irrigation and fertilization,

  • Pruning and pest control,

  • Mulching and pollination techniques

👉 You can achieve a high yield of quality apples in your garden or farm.

This variety is not only profitable for farmers but also perfect for home gardeners who dream of growing apples in warm climates.

Hariman 99 apple plant – Summer Zone Apple


Posted on Leave a comment

🌱 Hariman 99 Summer Zone Apple (Hot Climate Apple) का पौधा लगाने का सही तरीका, देखरेख और अधिक फल पाने के उपाय

🍎 परिचय – Hariman 99 Summer Zone Apple क्या है?

भारत में सेब की खेती पारंपरिक रूप से हिमाचल, उत्तराखंड और कश्मीर जैसे ठंडे इलाकों में होती थी। लेकिन अब Hariman 99 Apple किस्म (जिसे Summer Zone Apple या Hot Climate Apple भी कहा जाता है) विकसित की गई है, जो कम chilling requirement वाली किस्म है और गर्म इलाकों में भी उगाई जा सकती है।

hariman_99_summer_zone_apple_plant


  • इसे उत्तर भारत के मैदानी इलाकों, राजस्थान, मध्य प्रदेश, महाराष्ट्र, गुजरात, और यहां तक कि दक्षिण भारत में भी लगाया जा सकता है।

  • यह किस्म गर्म जलवायु में भी अच्छे से बढ़ती है और फल देती है।

  • सही देखभाल और प्रबंधन से यह पौधा 3–4 साल में फल देना शुरू कर देता है

👉 इसलिए यह किसानों और घरेलू बागवानी प्रेमियों के लिए एक क्रांतिकारी किस्म है।


🌤️ 1. Hariman 99 Apple के लिए उपयुक्त जलवायु

  • यह पौधा गर्म और उपोष्णकटिबंधीय क्षेत्रों में भी उगाया जा सकता है।

  • आदर्श तापमान: 15°C से 35°C

  • 40°C तक की गर्मी सहन कर सकता है यदि पौधे को पर्याप्त सिंचाई और मल्चिंग मिले।

  • ठंडी हवाओं और तेज़ पाले से पौधे की रक्षा करनी होती है।


🌍 2. Hariman 99 Apple के लिए सही स्थान का चयन

  • पौधे को प्रतिदिन 6–7 घंटे धूप मिलनी चाहिए।

  • खेत में लगाने के लिए ऊँची ज़मीन चुने जहाँ पानी न रुके।

  • घर पर गमले में लगाते समय छत या बगीचे का धूपदार कोना चुनें।


🌱 3. Hariman 99 Apple के लिए मिट्टी की तैयारी

  • यह पौधा दोमट या बलुई दोमट मिट्टी में अच्छा फलता-फूलता है।

  • मिट्टी का pH: 6.0 से 7.5 होना चाहिए।

  • पानी निकासी वाली मिट्टी आवश्यक है।

गमले के लिए मिट्टी मिश्रण:

  • 40% बगीचे की मिट्टी

  • 30% गोबर की खाद या वर्मीकम्पोस्ट

  • 20% नदी की रेत

  • 10% कोकोपीट


🌳 4. Hariman 99 Apple पौधा लगाने की विधि

(A) खेत में लगाना

  1. गड्ढा 2ft × 2ft × 2ft आकार का खोदें।

  2. गड्ढे में मिट्टी + गोबर की खाद + नीम की खली डालें।

  3. पौधे को सीधा लगाकर हल्की सिंचाई करें।

  4. पौधों के बीच 12–15 फीट की दूरी रखें।

(B) गमले में लगाना

  • 18–20 इंच गहरा गमला चुनें।

  • नीचे टूटी ईंट या कंकड़ डालें।

  • ऊपर से मिट्टी का मिश्रण भरकर पौधा लगाएँ।

  • गमले को धूप वाली जगह रखें।


💧 5. सिंचाई (Irrigation) व्यवस्था

  • पौधा लगाने के तुरंत बाद हल्की सिंचाई करें।

  • गर्मियों में हर 2–3 दिन में पानी दें।

  • सर्दियों में 7–10 दिन में एक बार पर्याप्त है।

  • ड्रिप इरिगेशन व्यावसायिक खेती के लिए सबसे अच्छा तरीका है।


🌿 6. खाद और पोषण प्रबंधन

जैविक खाद:

  • प्रति पौधा साल में दो बार 10–15 किलो गोबर की खाद।

  • वर्मीकम्पोस्ट।

  • नीम की खली।

रासायनिक उर्वरक (यदि आवश्यक हो):

  • एनपीके (NPK) 10:10:10 अनुपात में साल में दो बार।

  • फल बनने के समय पोटाश और फास्फोरस बढ़ाएँ।

  • जिंक और आयरन की कमी होने पर फोलियर स्प्रे करें।


✂️ 7. छंटाई और प्रशिक्षण (Pruning & Training)

  • पहले साल पौधे को आकार देने के लिए हल्की छंटाई करें।

  • सूखी और रोगग्रस्त शाखाएँ हटाएँ।

  • हर साल मानसून के बाद छंटाई करना सबसे अच्छा है।

  • इससे पेड़ में हवा और धूप का प्रवाह सही होता है।


🐛 8. रोग और कीट प्रबंधन

आम बीमारियाँ:

  • पाउडरी मिल्ड्यू (सफेद धब्बे)।

  • फल सड़न रोग।

  • पत्तियों पर धब्बे।

कीट:

  • एफिड (Aphids)।

  • फल मक्खी।

  • माइट्स।

👉 नियंत्रण:

  • नीम तेल का छिड़काव (5ml प्रति लीटर पानी)।

  • ट्राइकोडर्मा जैसे जैविक फफूंदनाशी।

  • संक्रमित पत्तियाँ व शाखाएँ हटाएँ।


🍏 9. फूल और फल बनने की प्रक्रिया

  • पौधा 3–4 साल में फल देना शुरू करता है।

  • फूल आने का समय: जनवरी–फरवरी

  • फल पकने का समय: जून–जुलाई

  • एक परिपक्व पेड़ से औसतन 30–50 किलो फल मिल सकते हैं।


📈 10. अधिक फल पाने के विशेष उपाय

  1. सही समय पर छंटाई करें।

  2. फूल आने के समय हल्की सिंचाई करते रहें।

  3. परागण के लिए मधुमक्खियों की उपस्थिति बढ़ाएँ।

  4. संतुलित उर्वरक का प्रयोग करें।

  5. मल्चिंग से नमी बनाए रखें।

  6. रोगग्रस्त शाखाएँ तुरंत काटें।


🏡 11. घर पर Hariman 99 Apple उगाने के फायदे

  • घर की छत पर भी सेब की फसल।

  • रासायनिक मुक्त ताजे फल।

  • सजावटी और छायादार पेड़।

  • बच्चों के लिए सीखने का अच्छा साधन।


💪 12. Hariman 99 Apple खाने के स्वास्थ्य लाभ

  • विटामिन C और एंटीऑक्सीडेंट से भरपूर।

  • पाचन तंत्र मजबूत करता है।

  • कोलेस्ट्रॉल और ब्लड प्रेशर नियंत्रित करता है।

  • वजन घटाने में सहायक।

  • हड्डियों और दांतों को मजबूत करता है।


❓ 13. अक्सर पूछे जाने वाले प्रश्न (FAQs)

Q1. Hariman 99 Apple पौधा कितने साल में फल देता है?
👉 लगभग 3–4 साल में।

Q2. क्या यह पौधा गर्म इलाकों में उग सकता है?
👉 हाँ, यही इसकी विशेषता है। यह 40°C तक की गर्मी सहन कर सकता है।

Q3. एक पेड़ से कितनी उपज मिलती है?
👉 औसतन 30–50 किलो फल।

Q4. क्या इसे गमले में उगा सकते हैं?
👉 हाँ, लेकिन बड़े गमले और सही खाद–सिंचाई जरूरी है।


🏁 निष्कर्ष

Hariman 99 Summer Zone Apple एक ऐसी क्रांतिकारी किस्म है जिसे आप मैदानी और गर्म क्षेत्रों में भी आसानी से उगा सकते हैं।

  • सही जलवायु और मिट्टी का चयन,

  • समय पर सिंचाई और खाद,

  • नियमित छंटाई,

  • और रोग–कीट प्रबंधन

👉 इन सबका ध्यान रखकर आप घर या खेत में आसानी से अधिक और गुणवत्तापूर्ण सेब की पैदावार ले सकते हैं।

यह पौधा किसानों के लिए व्यावसायिक रूप से लाभकारी है और घरेलू बागवानों के लिए गर्व का विषय।

Hariman 99 apple plant – Summer Zone Apple


Posted on Leave a comment

🌳 How to Plant Lychee Tree, Proper Care, and Tips for Higher Yield – Complete Guide

Introduction – Why Lychee is a Special Fruit?

Lychee (Litchi chinensis) is one of the most delicious and juicy tropical fruits in India and worldwide. Known for its unique sweet flavor, refreshing juice, and nutritional benefits, it is highly popular during summer.

  • India is one of the largest producers of lychee.

  • Bihar is often called the “Lychee Capital of India” because it contributes the maximum production.

  • With proper planting and care techniques, lychee trees can also be grown in home gardens and large containers.

👉 In this detailed guide, you will learn everything from planting a lychee tree to proper care, pest management, and methods to boost fruit production.

Lychee live plant at bonsai plants nursery

1. Best Time to Plant Lychee

  • February–March and August–September are the best months for planting lychee.

  • These months provide moderate temperatures which help young plants establish well.

  • In containers, planting can be done in any season with controlled environment care.


2. Suitable Climate for Lychee Trees

  • Lychee thrives in tropical and subtropical climates.

  • Ideal temperature: 20–35°C.

  • Hot and dry winds can cause fruit drop.

  • Severe frost and extreme cold can damage young plants.


3. Selecting the Right Location

  • Lychee requires 5–6 hours of direct sunlight daily.

  • Choose a location with good air circulation.

  • Avoid waterlogged areas.

  • For container plantation, place pots in an open sunny spot or terrace.


4. Soil Preparation for Lychee Trees

Lychee trees prefer deep, fertile, and well-drained soil.

Ideal Soil

  • Loamy or sandy-loam soil is best.

  • Soil pH should be between 6.0–7.5.

Potting Mix for Containers

  • 40% garden soil

  • 30% well-decomposed cow dung compost or vermicompost

  • 20% river sand

  • 10% cocopeat

👉 Ensure proper drainage holes in pots to avoid water stagnation.


5. Methods of Planting Lychee

(A) From Seeds

  • Easy to grow, but fruiting takes 7–8 years.

  • Seeds must be sown immediately after extraction as they lose viability quickly.

  • Sow seeds 2–3 cm deep and water lightly.

(B) Grafting or Air Layering (Best Method)

  • Commercially and domestically preferred method.

  • Grafted or air-layered plants start fruiting in 3–4 years.

  • Best time for air layering is February–March or August–September.

(C) Nursery Plants

  • Buy healthy grafted plants from a certified nursery.

  • Dig a pit of size 2 ft × 2 ft × 2 ft, fill with compost + soil, and plant carefully.


6. Spacing Between Plants

  • In fields: Maintain 8–10 meters spacing between two plants.

  • In containers: Use at least 18–20 inch deep pots.


7. Watering System (Irrigation)

  • Water immediately after planting.

  • Summer: Irrigate every 2–3 days.

  • Winter: Once a week is sufficient.

  • Avoid overwatering as it causes root rot.

👉 Drip irrigation system is best for lychee cultivation.


8. Fertilizer and Nutrition Management

Organic Fertilizers

  • 10–15 kg cow dung manure per plant (twice a year).

  • Vermicompost.

  • Neem cake.

Chemical Fertilizers (If Needed)

  • Apply NPK fertilizer depending on plant age.

  • During fruiting, increase phosphorus and potassium.

  • Foliar spray of micronutrients (zinc, iron, boron) improves fruit quality.


9. General Care of Lychee Trees

  • Apply mulching (straw, dry leaves, or plastic mulch) around the tree base.

  • Regularly remove weeds.

  • Spray neem oil (5 ml/litre water) for pest prevention.

  • Protect young plants from strong winds and frost.


10. Pruning of Lychee Trees

  • Remove dry, diseased, and weak branches.

  • Maintain tree height and shape for better sunlight penetration.

  • Best time for pruning: After the rainy season.


11. Common Pests and Diseases in Lychee

Diseases

  • Leaf Blight – leaves turn brown and dry.

  • Fruit Rot – fruits rot before maturity.

  • Root Rot – due to water stagnation.

Pests

  • Lychee mites.

  • Aphids.

  • Fruit flies.

👉 Solutions:

  • Spray neem oil or organic fungicides like Trichoderma.

  • Remove infected leaves and branches.

  • Maintain proper drainage and spacing.


12. Harvesting and Yield

  • Grafted plants start bearing fruits in 3–4 years.

  • Seed-grown plants may take 7–8 years.

  • Harvesting season: May–June in India.

  • An average tree yields 100–150 kg of lychees, while large trees may produce up to 200 kg.

👉 Harvest when fruits turn bright red and soft.


13. Tips to Increase Lychee Fruit Yield

  1. Apply balanced fertilizers at the right stages.

  2. Provide light irrigation during flowering.

  3. Encourage pollination by attracting bees.

  4. Remove diseased flowers and branches.

  5. Prune regularly to maintain plant health.

  6. Apply organic compost after harvesting to restore nutrients.


14. Benefits of Growing Lychee at Home

  • Fresh and chemical-free fruits.

  • Provides shade and greenery.

  • Enhances home garden beauty.

  • Eco-friendly and beneficial for environment.

  • A fun and educational activity for children.


15. Health Benefits of Eating Lychee

  • Rich in Vitamin C – boosts immunity.

  • Improves digestion.

  • Good for skin and hair health.

  • Supports heart health.

  • Helps in weight management.


16. Frequently Asked Questions (FAQs)

Q1. How long does a lychee tree live?
Ans: With proper care, a lychee tree can live and bear fruits for 40–50 years.

Q2. Can lychee be grown in pots?
Ans: Yes, but only grafted plants are suitable for containers. Choose large pots (18–20 inches deep).

Q3. How much yield does one tree give?
Ans: On average, a tree yields 100–150 kg of fruits; older trees may give up to 200 kg.

Q4. How often should I fertilize a lychee tree?
Ans: Apply organic compost 2–3 times a year and supplement with NPK as needed.


Conclusion

Lychee tree cultivation is rewarding if you follow the correct planting method, soil preparation, watering, and care practices. Home-grown lychee trees not only provide tasty fruits but also beautify your garden.

👉 For commercial cultivation, use high-quality grafted plants, maintain proper spacing, apply drip irrigation, and adopt mulching techniques for better yield.

With patience and care, a single lychee tree can serve your family with delicious fruits for decades.

Lychee Live Plant (lychee ka paudha) for Home and Garden


Posted on Leave a comment

🌳 लीची का पौधा लगाने का सही तरीका, देखभाल और अधिक फल पाने के उपाय – संपूर्ण जानकारी

परिचय – लीची का पौधा क्यों खास है?

लीची (Litchi chinensis) भारत का एक लोकप्रिय, स्वादिष्ट और रसीला फल है। इसकी गिनती उष्णकटिबंधीय (Tropical) फलों में होती है। ग्रीष्म ऋतु में लीची का मीठा और रसीला स्वाद बच्चों से लेकर बुजुर्गों तक सबको पसंद आता है।

  • लीची की खेती मुख्य रूप से बिहार, झारखंड, उत्तर प्रदेश, पश्चिम बंगाल और असम में होती है।

  • भारत में बिहार को “लीची का घर” (Hub of Litchi) कहा जाता है क्योंकि यहां देश का सबसे ज्यादा उत्पादन होता है।

  • सही देखभाल और तकनीक अपनाकर इसे घर के बगीचे और गमलों में भी लगाया जा सकता है।

👉 इस लेख में हम आपको लीची के पौधे की रोपाई से लेकर देखभाल और अधिक उत्पादन पाने तक की पूरी जानकारी देंगे।

Lychee live plant at bonsai plants nursery

1. लीची लगाने का सही समय

  • लीची का पौधा फरवरी से मार्च या अगस्त से सितंबर में लगाना सबसे अच्छा माना जाता है।

  • इस समय मौसम न ज्यादा गर्म और न ज्यादा ठंडा होता है, जिससे पौधा जल्दी जड़ पकड़ लेता है।

  • गमले में लगाने के लिए कोई भी मौसम चुन सकते हैं, बस वातावरण को नियंत्रित करना होगा।


2. लीची के लिए उपयुक्त जलवायु

  • लीची पौधे के लिए उष्णकटिबंधीय और उपोष्णकटिबंधीय जलवायु सबसे बेहतर है।

  • इसे 20–35 डिग्री सेल्सियस तापमान पसंद है।

  • अत्यधिक गर्म और शुष्क हवाएं फल झड़ने का कारण बनती हैं।

  • अधिक ठंड और पाला भी पौधे को नुकसान पहुंचाते हैं।


3. लीची लगाने के लिए सही स्थान का चुनाव

  • धूप और हल्की छांव वाली जगह चुनें।

  • पौधे को दिन में 5–6 घंटे धूप मिलनी चाहिए।

  • गमले में लगाने पर गमले को खुले स्थान या छत पर रखें।

  • खेत में लगाते समय ऊँची और पानी निकासी वाली जमीन चुनें।


4. लीची पौधे के लिए मिट्टी की तैयारी

लीची के पौधे को गहरी, उपजाऊ और जैविक तत्वों से भरपूर मिट्टी की आवश्यकता होती है।

उपयुक्त मिट्टी

  • दोमट मिट्टी (Loamy soil)

  • बलुई दोमट (Sandy loam)

  • मिट्टी का pH स्तर 6.0–7.5 होना चाहिए।

पॉटिंग मिक्स (गमले के लिए)

  • 40% बगीचे की मिट्टी

  • 30% गोबर की सड़ी खाद या वर्मी कम्पोस्ट

  • 20% नदी की रेत

  • 10% कोकोपीट

👉 ध्यान दें: मिट्टी में जल निकासी की व्यवस्था होनी चाहिए।


5. लीची पौधा लगाने की विधि

(A) बीज से पौधा

  • बीज से पौधा उगाना आसान है, लेकिन फल आने में 7–8 साल लगते हैं।

  • बीज को तुरंत बोना चाहिए क्योंकि यह जल्दी खराब हो जाता है।

  • बीज को मिट्टी में 2–3 सेमी गहराई में दबाकर हल्का पानी दें।

(B) कलम या ग्राफ्टिंग

  • व्यावसायिक और घरेलू दोनों स्तर पर यह सबसे अच्छा तरीका है।

  • ग्राफ्टेड पौधे 3–4 साल में फल देना शुरू कर देते हैं।

  • कलम लगाने का काम फरवरी–मार्च या अगस्त–सितंबर में करें।

(C) पौधा खरीदकर लगाना

  • नर्सरी से तैयार ग्राफ्टेड पौधा खरीदें।

  • गड्ढा (2ft x 2ft x 2ft) खोदकर उसमें गोबर की खाद और मिट्टी का मिश्रण भरें।

  • पौधा लगाकर हल्का पानी दें।


6. पौधों के बीच दूरी

  • खेत में पौधा लगाते समय 8–10 मीटर की दूरी रखें।

  • गमले के लिए कम से कम 18–20 इंच गहरा गमला चुनें।


7. पानी देने का सही तरीका (Irrigation)

  • पौधा लगाने के तुरंत बाद हल्का पानी दें।

  • गर्मियों में हर 2–3 दिन पर पानी दें।

  • सर्दियों में सप्ताह में एक बार पानी पर्याप्त है।

  • पानी कभी भी जड़ों में रुका नहीं रहना चाहिए।

👉 टपक (Drip Irrigation) प्रणाली लीची के लिए सबसे उपयुक्त है।


8. खाद और उर्वरक प्रबंधन

लीची पौधे को उचित पोषण देना जरूरी है।

जैविक खाद

  • गोबर की खाद (10–15 किलो प्रति पौधा साल में 2 बार)

  • वर्मी कम्पोस्ट

  • नीम खली

रासायनिक खाद (यदि आवश्यक हो)

  • पौधे की उम्र के अनुसार NPK खाद का प्रयोग करें।

  • फल बनने के समय पोटाश और फास्फोरस की मात्रा बढ़ाएं।

  • पत्तियों पर माइक्रोन्यूट्रिएंट स्प्रे (जिंक, आयरन, बोरॉन) करें।


9. लीची पौधे की देखभाल

  • पौधे के चारों ओर मल्चिंग करें (पुआल, पत्तियाँ, प्लास्टिक शीट)।

  • खरपतवार को नियमित रूप से हटाते रहें।

  • समय-समय पर रोग और कीट प्रबंधन के लिए नीम का तेल छिड़कें।


10. लीची पौधे की छंटाई (Pruning)

  • सूखी और रोगग्रस्त शाखाओं को काट दें।

  • पौधे की ऊँचाई संतुलित रखने के लिए छंटाई करें।

  • छंटाई बरसात के बाद करना सबसे अच्छा है।


11. लीची में लगने वाले रोग और कीट

रोग

  • पत्ती झुलसा रोग (Leaf Blight)

  • फल सड़न (Fruit Rot)

  • जड़ सड़न (Root Rot)

कीट

  • लीची माइट्स

  • एफिड्स (Aphids)

  • फल मक्खी

👉 समाधान:

  • नीम का तेल 5 ml/लीटर पानी में मिलाकर छिड़कें।

  • रोगग्रस्त पत्तियों और शाखाओं को हटा दें।

  • जैविक फफूंदनाशी (Trichoderma) का प्रयोग करें।


12. लीची की फसल और उत्पादन

  • पौधा लगाने के 3–4 साल बाद फल आना शुरू होता है।

  • बीज से लगाए पौधे में 7–8 साल लग सकते हैं।

  • एक पेड़ औसतन 100–150 किलो तक फल दे सकता है।

  • फल तोड़ने का सही समय मई से जून है।

👉 फल पूरी तरह लाल और नरम होने पर ही तोड़ें।


13. अधिक फल पाने के उपाय

  1. पौधे को संतुलित खाद दें।

  2. फूल आने के समय हल्की सिंचाई करें।

  3. मधुमक्खियों को आकर्षित करें (परागण के लिए)।

  4. रोगी शाखाओं और सूखे फूलों को हटाएं।

  5. सही समय पर छंटाई करें।

  6. फसल के बाद पौधे को पोषण दें।


14. घर पर लीची उगाने के फायदे

  • ताजे और रसायन-मुक्त फल मिलते हैं।

  • पेड़ छांव और ऑक्सीजन देता है।

  • घर का वातावरण हरा-भरा और सुंदर बनता है।

  • बच्चों को प्रकृति से जोड़ने का अवसर।


15. लीची खाने के स्वास्थ्य लाभ

  • विटामिन C से भरपूर, रोग प्रतिरोधक क्षमता बढ़ाता है।

  • पाचन तंत्र को मजबूत करता है।

  • त्वचा और बालों के लिए फायदेमंद।

  • दिल की सेहत में सहायक।

  • वजन नियंत्रित करने में मददगार।


16. सामान्य प्रश्न (FAQs)

Q1. लीची का पौधा कितने साल तक फल देता है?
उत्तर: सही देखभाल पर लीची का पेड़ 40–50 साल तक फल दे सकता है।

Q2. क्या लीची गमले में उगाई जा सकती है?
उत्तर: हाँ, लेकिन इसके लिए ग्राफ्टेड पौधा चुनें और बड़े गमले का इस्तेमाल करें।

Q3. एक पेड़ से कितनी लीची मिल सकती है?
उत्तर: औसतन 100–150 किलो, जबकि बड़े पेड़ों से 200 किलो तक भी फल मिल सकता है।

Q4. लीची पौधे को कितनी बार खाद देना चाहिए?
उत्तर: साल में 2–3 बार जैविक खाद देना जरूरी है।


निष्कर्ष

लीची का पौधा लगाना और उसकी देखभाल करना आसान है, यदि आप सही मिट्टी, खाद, पानी और देखरेख का ध्यान रखें। घर पर लगाया गया लीची का पौधा न सिर्फ स्वादिष्ट फल देगा बल्कि आपके बगीचे की शोभा भी बढ़ाएगा।

👉 व्यावसायिक स्तर पर लीची की खेती करने के लिए उच्च गुणवत्ता वाले पौधे, उचित दूरी, मल्चिंग और टपक सिंचाई का प्रयोग जरूर करें।

Lychee Live Plant (lychee ka paudha) for Home and Garden


Posted on Leave a comment

🍓 How to Plant Strawberry, Care Guide, and Tips for Maximum Fruit Production – Complete Information

Introduction – Importance of Strawberry Plants

Strawberry (Fragaria × ananassa) is one of the most popular and attractive fruits in the world. Its bright red color, sweet-sour taste, and health benefits make it loved by children and adults alike.

order strawberry plant


Strawberries are grown both commercially and in home gardens. In India, states like Himachal Pradesh, Uttarakhand, Jammu & Kashmir, and Maharashtra (Mahabaleshwar) are famous for strawberry cultivation. But with proper care, anyone can grow strawberries in pots, grow bags, balconies, or small gardens.


Key Features of Strawberry Plant

  • Perennial in nature (lives and fruits for several years).

  • Grows up to 15–20 cm tall.

  • Has shallow roots, prefers loose and well-drained soil.

  • One plant can yield 250–500 grams of fruit, sometimes up to 1 kg with proper care.


1. Best Time to Plant Strawberries

  • In India, the best planting seasons are October to December and February to March.

  • Ideal temperature: 15–25°C.

  • Avoid hot summers; provide shade if growing in containers.


2. Choosing the Right Spot

  • Requires at least 6 hours of sunlight daily.

  • Good air circulation is necessary.

  • Avoid waterlogging or heavy rainfall-prone areas.

  • A semi-shaded spot is best in hot regions.


3. Soil Preparation for Strawberry Plants

Strawberries need light, fertile, and well-drained soil.

Ideal Potting Mix

  • 40% garden soil

  • 30% compost or vermicompost

  • 20% river sand

  • 10% cocopeat or leaf compost

👉 Soil pH should be 5.5–6.5.


4. Methods of Planting Strawberries

(A) Using Runners

  • Strawberries produce runners (horizontal shoots).

  • Bury runners lightly in soil; new roots will develop.

  • Once established, separate and replant them.

(B) Buying Nursery Plants

  • Buy healthy plants from a nursery.

  • Plant them so that the crown (central bud) stays above the soil level.

(C) Growing from Seeds

  • A slow method, usually for hobby growers.

  • Keep seeds refrigerated for 2–3 weeks before sowing.

  • Germination may take 3–4 weeks.


5. Plant Spacing

  • In pots: Use a 12-inch deep pot per plant.

  • In fields: Keep 2 feet between rows and 1 foot between plants.


6. Watering System

  • Strawberries require consistent moisture.

  • In summer: Light watering daily.

  • In winter: 2–3 times per week is sufficient.

  • Avoid overwatering; roots may rot.

👉 Best method: Drip irrigation for balanced moisture.


7. Fertilizer and Nutrition Management

Organic Fertilizers

  • Vermicompost

  • Cow dung compost

  • Neem cake

  • Bone meal

Chemical Fertilizers (if required)

  • Use NPK 10:10:10 or 19:19:19 every 20–25 days.

  • During fruiting, increase phosphorus and potassium.


8. Strawberry Plant Care Tips

  • Mulching with straw, leaves, or plastic helps maintain soil moisture and keeps fruits clean.

  • Weed regularly to prevent nutrient competition.

  • Spray neem oil (5 ml/litre water) to prevent pests.


9. Common Diseases and Pests

  • Powdery Mildew – white powder on leaves.

  • Leaf Spot – brown/black spots on foliage.

  • Root Rot – caused by overwatering.

  • Insects: Aphids, thrips, mites.

👉 Prevention & Cure:

  • Neem oil spray every 15 days.

  • Remove infected leaves.

  • Ensure proper drainage and spacing.


10. Pruning Strawberry Plants

  • Remove old and dry leaves.

  • Trim excess runners to focus energy on fruits.

  • Light pruning after fruiting improves plant health.


11. Harvesting Strawberries

  • Ready for harvest in 3–4 months after planting.

  • Pick when fruits turn bright red and shiny.

  • Harvest in early morning or late evening.

  • A single plant yields up to 500 grams to 1 kg of fruit.


12. Tips for Higher Strawberry Yield

  1. Provide balanced sunlight and moisture.

  2. Apply organic compost before flowering.

  3. Encourage pollination by attracting bees.

  4. Use mulching to keep soil cool.

  5. Remove diseased leaves and excess runners.

  6. Timely pruning and fertilizer application.


13. Benefits of Growing Strawberries at Home

  • Fresh, chemical-free fruits.

  • Decorative and aesthetic plants.

  • Fun gardening activity for kids and families.

  • Saves money compared to buying expensive strawberries.


14. Health Benefits of Eating Strawberries

  • Rich in Vitamin C and antioxidants.

  • Boosts immunity.

  • Good for heart health.

  • Improves skin and hair.

  • Helps in weight management.


15. Frequently Asked Questions (FAQs)

Q1. Can strawberries grow in hot climates?
Yes, but provide shade and maintain soil moisture. Containers make it easier.

Q2. Can strawberries grow well in pots?
Absolutely! Use at least a 12-inch deep pot or grow bag.

Q3. How long does a strawberry plant live?
Usually 2–3 years of good fruiting. After that, replant new ones.

Q4. How often should I fertilize strawberry plants?
Apply light organic fertilizer every 20–25 days.


Conclusion

Growing strawberries is not difficult if you follow the right planting method, soil preparation, watering, and care. With little effort, you can enjoy homegrown fresh strawberries that are tastier and healthier than store-bought ones.

👉 For commercial growers, techniques like mulching, drip irrigation, and selecting high-quality varieties are essential for higher profits.

Strawberry Live Plant (Strawberry ka Paudha)


Posted on Leave a comment

स्ट्रॉबेरी का पौधा लगाने का सही तरीका, देखभाल और अधिक फल पाने के आसान उपाय

परिचय – स्ट्रॉबेरी पौधे का महत्व

स्ट्रॉबेरी (Strawberry) ek ऐसी फल वाली बेलनुमा झाड़ी है जो अपने स्वाद, रंग और स्वास्थ्यवर्धक गुणों के लिए पूरी दुनिया में प्रसिद्ध है। यह फल दिखने में आकर्षक और खाने में मीठा-खट्टा होता है। स्ट्रॉबेरी के पौधे घर की किचन गार्डनिंग, गमलों, ग्रीन हाउस और खेतों में बड़े पैमाने पर लगाए जाते हैं।

order strawberry plant


भारत में हिमाचल प्रदेश, उत्तराखंड, महाराष्ट्र (महाबलेश्वर), जम्मू-कश्मीर और कुछ ठंडी जगहों पर इसकी व्यावसायिक खेती की जाती है। लेकिन यदि सही तरीका अपनाया जाए तो आप अपने घर पर भी स्ट्रॉबेरी का पौधा आसानी से उगा सकते हैं।


स्ट्रॉबेरी पौधे की खास बातें

  • स्ट्रॉबेरी पौधा बहुवर्षीय (Perennial) होता है, यानी एक बार लगाने के बाद कई साल तक फल देता है।

  • इसकी जड़ें उथली होती हैं, इसलिए इसे ढीली और उपजाऊ मिट्टी की जरूरत होती है।

  • पौधा सामान्यतः 15–20 सेमी ऊँचा होता है।

  • एक पौधा लगभग 250–500 ग्राम तक फल दे सकता है, यदि सही देखभाल की जाए।


1. स्ट्रॉबेरी का पौधा लगाने का सही समय

भारत में स्ट्रॉबेरी लगाने का सही समय अक्टूबर से दिसंबर और फरवरी से मार्च माना जाता है।

  • ठंडी जलवायु (15–25 डिग्री तापमान) पौधे के विकास और फलन के लिए सबसे अच्छी होती है।

  • गर्मी में पौधे को सीधी धूप से बचाना जरूरी है।

👉 यदि आप गमले या ग्रो बैग में लगा रहे हैं तो किसी भी मौसम में इसे नियंत्रित किया जा सकता है, बस तापमान और नमी का ध्यान रखना होगा।


2. स्ट्रॉबेरी लगाने के लिए सही जगह का चुनाव

  • स्ट्रॉबेरी पौधा ऐसी जगह लगाना चाहिए जहां धूप और छांव का संतुलन मिले।

  • कम से कम 6 घंटे की धूप जरूरी है।

  • हवा का अच्छा आवागमन होना चाहिए।

  • अधिक बारिश या पानी रुकने वाली जगह से बचें।


3. स्ट्रॉबेरी पौधे के लिए मिट्टी की तैयारी

स्ट्रॉबेरी पौधा हल्की, उपजाऊ और अच्छी जल निकासी वाली मिट्टी में ही अच्छा पनपता है।

मिट्टी का मिश्रण (पॉटिंग मिक्स)

  • 40% बगीचे की मिट्टी

  • 30% गोबर की सड़ी हुई खाद / वर्मी कम्पोस्ट

  • 20% रेत (रेतीली दोमट मिट्टी सबसे अच्छी)

  • 10% कोकोपीट या पत्तों की खाद

👉 pH स्तर 5.5 से 6.5 होना चाहिए।


4. स्ट्रॉबेरी पौधा लगाने की विधि

स्ट्रॉबेरी को तीन तरीकों से लगाया जा सकता है:

(A) धावक (Runner) से पौधा तैयार करना

  • स्ट्रॉबेरी पौधे से निकलने वाले धावक (runners) से नए पौधे तैयार किए जाते हैं।

  • इन धावकों को हल्की मिट्टी में दबा दें, कुछ दिनों में नई जड़ें निकल आती हैं।

  • फिर इन्हें अलग करके गमले या खेत में लगा सकते हैं।

(B) पौधा खरीदकर लगाना

  • नर्सरी से तैयार पौधा खरीदकर गमले या खेत में लगाएं।

  • पौधा लगाते समय ध्यान रखें कि जड़ पूरी मिट्टी में दबे लेकिन मुकुट (crown) बाहर रहे।

(C) बीज से पौधा उगाना

  • बीज से पौधा उगाना थोड़ा कठिन और समय लेने वाला होता है।

  • बीज को 15–20 दिन ठंडे तापमान (फ्रिज में) में रखने के बाद मिट्टी में बोएं।

  • अंकुरण में 3–4 हफ्ते लग सकते हैं।


5. गमले या खेत में पौधा लगाने की दूरी

  • गमला: कम से कम 12 इंच गहराई और चौड़ाई वाला गमला लें।

  • खेत: पौधों की कतार से कतार की दूरी 2 फीट और पौधे से पौधे की दूरी 1 फीट रखें।


6. सिंचाई (पानी देना)

  • स्ट्रॉबेरी पौधे को नियमित नमी की जरूरत होती है।

  • गर्मियों में रोज हल्का पानी दें।

  • सर्दियों में हफ्ते में 2–3 बार सिंचाई पर्याप्त है।

  • पानी की अधिकता से जड़ सड़ सकती है, इसलिए जल निकासी का ध्यान रखें।

👉 टपक (Drip) सिंचाई प्रणाली स्ट्रॉबेरी के लिए सबसे अच्छी मानी जाती है।


7. खाद और उर्वरक (Fertilizer Management)

स्ट्रॉबेरी पौधे को संतुलित पोषण देने से अधिक और मीठे फल मिलते हैं।

जैविक खाद

  • गोबर की सड़ी खाद

  • वर्मी कम्पोस्ट

  • नीम खली

  • बोन मील

रासायनिक खाद (यदि आवश्यक हो)

  • NPK (10:10:10) या (19:19:19) का हल्का घोल हर 20–25 दिन पर।

  • फल आने के समय पोटाश और फास्फोरस अधिक दें।


8. स्ट्रॉबेरी पौधे की देखभाल

  • खरपतवार (Weeds) को समय-समय पर हटाते रहें।

  • पौधे के चारों ओर मल्चिंग (सूखी पत्तियां या प्लास्टिक शीट) करें ताकि नमी बनी रहे और फल साफ रहें।

  • रोग और कीटों से बचाव के लिए नीम का छिड़काव करें।


9. रोग और कीट प्रबंधन

स्ट्रॉबेरी पौधे में कुछ सामान्य रोग और कीट लग सकते हैं:

  • पाउडरी मिल्ड्यू (Powdery mildew): सफेद पाउडर जैसा पदार्थ पत्तियों पर।

  • पत्तियों का धब्बा रोग (Leaf spot): छोटे भूरे-काले धब्बे।

  • जड़ सड़न (Root rot): अधिक पानी से जड़ खराब होना।

  • कीट: एफिड्स (aphids), थ्रिप्स और माइट्स।

👉 समाधान:

  • नीम का तेल 5ml/लीटर पानी में मिलाकर छिड़कें।

  • रोगी पत्तियों को हटा दें।

  • संतुलित पानी और खाद दें।


10. स्ट्रॉबेरी की छंटाई (Pruning)

  • पुराने और सूखे पत्तों को काट दें।

  • अधिक धावक (runners) को हटा दें ताकि पौधे की ऊर्जा फल पर केंद्रित हो।

  • फल आने के बाद पौधे को हल्की छंटाई दें।


11. स्ट्रॉबेरी की फसल कब और कैसे लें?

  • पौधा लगाने के 3–4 महीने बाद फल तोड़ने योग्य हो जाते हैं।

  • जब फल लाल और चमकीला दिखने लगे तो तोड़ें।

  • सुबह या शाम के समय फल तोड़ना बेहतर है।

👉 एक पौधा 250–500 ग्राम तक फल देता है, जबकि अच्छी देखभाल पर 1 किलो तक भी फल मिल सकता है।


12. स्ट्रॉबेरी से अधिक फल पाने के उपाय

  1. पौधों को धूप और नमी संतुलित मात्रा में दें।

  2. फूल आने के समय हल्की जैविक खाद डालें।

  3. परागण (Pollination) के लिए मधुमक्खियों को आकर्षित करें।

  4. मल्चिंग का प्रयोग करें।

  5. रोगी पत्तियों और अतिरिक्त धावकों को हटा दें।

  6. समय पर छंटाई और देखभाल करें।


13. घर पर स्ट्रॉबेरी उगाने के फायदे

  • ताजे और बिना केमिकल के फल मिलते हैं।

  • गार्डनिंग का शौक पूरा होता है।

  • बच्चों और परिवार के लिए हेल्दी स्नैक्स।

  • पौधे सजावटी भी दिखते हैं।


14. स्ट्रॉबेरी खाने के स्वास्थ्य लाभ

  • विटामिन C और एंटीऑक्सीडेंट से भरपूर।

  • रोग प्रतिरोधक क्षमता बढ़ाती है।

  • दिल के लिए फायदेमंद।

  • त्वचा और बालों के लिए अच्छी।

  • वजन कम करने में सहायक।


15. सामान्य प्रश्न (FAQs)

प्रश्न 1: क्या स्ट्रॉबेरी का पौधा गर्म जगहों पर भी उगाया जा सकता है?
उत्तर: हाँ, लेकिन इसे धूप से बचाने और नमी बनाए रखने की जरूरत होगी। गमले में लगाकर ठंडी जगह रखें।

प्रश्न 2: क्या स्ट्रॉबेरी गमले में अच्छी होती है?
उत्तर: जी हाँ, 12–14 इंच गहरे गमले या ग्रो बैग में स्ट्रॉबेरी आसानी से उगाई जा सकती है।

प्रश्न 3: एक पौधा कितने साल तक फल देता है?
उत्तर: सामान्यतः 2–3 साल तक लगातार फल मिलता है। उसके बाद नया पौधा लगाना बेहतर होता है।

प्रश्न 4: स्ट्रॉबेरी के पौधे को कितनी बार खाद डालनी चाहिए?
उत्तर: हर 20–25 दिन पर हल्की जैविक खाद डालना सबसे अच्छा है।


निष्कर्ष

स्ट्रॉबेरी का पौधा लगाना और उसकी देखभाल करना बहुत कठिन काम नहीं है, बस आपको सही मिट्टी, समय पर पानी, खाद और धूप का ध्यान रखना होगा। यदि पौधे को समय-समय पर देखभाल दी जाए तो आप आसानी से घर पर ही ढेर सारी स्वादिष्ट और ताजी स्ट्रॉबेरी उगा सकते हैं।

👉 यदि आप व्यावसायिक स्तर पर स्ट्रॉबेरी की खेती करना चाहते हैं तो गुणवत्ता वाले पौधे, टपक सिंचाई और मल्चिंग का प्रयोग जरूर करें।

Strawberry Live Plant (Strawberry ka Paudha)


Posted on Leave a comment

🌿 Guava (Amrud) Plant Growing Method, Care, and Tips for Maximum Fruit Yield – Complete Guide

🌱 Introduction

Guava (Psidium guajava), popularly known as Amrud in Hindi, is one of the most loved and beneficial fruits in India. Often called the “apple of the poor”, guava is loaded with vitamin C, dietary fiber, and antioxidants. It is not only delicious but also extremely healthy.

Taiwan pink guava plant for home garden

Guava trees are easy to grow, require less maintenance, and are highly profitable for commercial cultivation. With the right care, a guava tree can bear fruits twice a year and continue to yield for 20–25 years.

In this article, you will learn in detail:

  • Importance and characteristics of guava

  • Best time and place to plant guava

  • Growing methods (from seeds, grafting, and pots)

  • Soil, water, fertilizers, and pruning tips

  • Disease and pest control methods

  • Tips for getting maximum fruit yield

  • Varieties of guava and their benefits

  • Nutritional and medicinal values of guava


🌿 Importance and Characteristics of Guava

✅ Scientific Classification

  • Scientific Name: Psidium guajava

  • Family: Myrtaceae

✅ Characteristics of Guava Tree

  • Medium-sized evergreen tree.

  • Height: 5–10 meters.

  • Leaves: Broad, green, and leathery.

  • Flowers: White, fragrant.

  • Fruits: Green on the outside with white or pink pulp inside.

✅ Nutritional Value

  • Rich in Vitamin C, Vitamin A, potassium, and antioxidants.

  • Contains soluble fiber that improves digestion.

  • Strengthens immunity and improves skin health.

✅ Economic Value

  • Low-cost and high-profit fruit crop.

  • Yield: 20–25 tons per hectare.

  • Export potential due to high demand.


🌱 Best Time and Place for Planting Guava

✅ Best Season

  • Ideal Time: Rainy season (July–September).

  • Can also be planted in February–March with proper care.

✅ Suitable Location

  • Plant in an open sunny area.

  • Avoid waterlogged places.

  • Can be grown in gardens, fields, or large pots.

✅ Soil Requirement

  • Loamy or sandy loam soil is best.

  • pH: 5.0 to 7.5.

  • Adding organic compost improves fertility and drainage.


🌿 Methods of Planting Guava

1. Growing from Seeds

  • Extract seeds from ripe guava fruits.

  • Dry for 1–2 days and soak in water for 24 hours.

  • Sow seeds in nursery beds or pots with a soil + sand + compost mix.

  • Germination takes 15–20 days.

2. Planting Grafted Plants

  • Grafted plants start fruiting within 2–3 years.

  • Buy quality grafts from a reliable nursery.

  • Dig a pit (2×2 feet) and fill with soil + manure mix.

  • Plant the sapling and water lightly.

3. Growing in Pots

  • Choose a large pot (18–24 inches).

  • Ensure drainage holes at the bottom.

  • Fill with soil + compost + sand mix.

  • Plant the sapling and water regularly.


🌱 Care of Guava Plant

✅ Watering

  • Water every 2–3 days in summer.

  • During monsoon, water only if needed.

  • In winter, once or twice a week is sufficient.

✅ Fertilization

  • Add cow dung manure or vermicompost every 2–3 months.

  • Apply organic fertilizers before flowering and fruiting.

  • Avoid excess chemical fertilizers.

✅ Pruning

  • Remove dry and diseased branches.

  • Prune overcrowded branches for better sunlight penetration.

  • Proper pruning increases flowering and fruit yield.

✅ Sunlight and Climate

  • Requires 5–6 hours of direct sunlight daily.

  • Grows best in tropical and subtropical climates.

  • Tolerates mild frost but not severe cold.


🌿 Disease and Pest Management

  • Fruit Fly: Use neem oil spray or organic traps.

  • Leaf Spot and Fungal Infections: Apply bio-fungicides.

  • Root Rot: Avoid waterlogging.

  • Aphids and Thrips: Neem-based organic sprays work well.


🌱 Tips for Getting Maximum Fruit Yield

  • Use grafted plants instead of seedlings for quicker yield.

  • Apply organic manure before flowering season.

  • Keep the base weed-free to ensure proper nutrient absorption.

  • Practice mulching to retain soil moisture in summer.

  • Prune regularly to promote healthy growth.

  • Provide balanced watering – neither too much nor too little.


🌿 Popular Varieties of Guava

  • Allahabadi Safeda – Sweet, soft pulp.

  • Lucknow 49 – High yielding and disease resistant.

  • Banarasi – Juicy, excellent flavor.

  • Red Fleshed (Lal Falishi) – Attractive pink pulp.

  • Hybrid Varieties – Taiwan pink, VNR Bihi.


🌱 Benefits of Commercial Guava Farming

  • A single tree can yield 50–70 kg of fruits per year.

  • One hectare accommodates 400–500 trees.

  • Annual earning potential in lakhs with proper care.

  • High demand in both domestic and international markets.


🌿 Health Benefits of Guava

  • Boosts immunity due to high Vitamin C.

  • Controls blood sugar levels.

  • Improves heart health.

  • Aids digestion and weight management.

  • Enhances skin glow and prevents aging.


🌱 FAQ (Frequently Asked Questions)

Q1. How many years does guava take to bear fruits?
👉 Seed-grown plants: 4–5 years; Grafted plants: 2–3 years.

Q2. Can guava be grown in pots?
👉 Yes, in large pots with proper soil and care.

Q3. How long does a guava tree live?
👉 Around 25–30 years with continuous fruiting.

Q4. Which guava variety is the best?
👉 Allahabadi Safeda and Lucknow 49 are most popular.

Q5. How to make guava fruits sweeter?
👉 Provide timely watering, organic manure, and pruning.


🌿 Conclusion

Guava (Amrud) is not just a tasty fruit but also a powerhouse of nutrition and a source of income for farmers. With proper planting methods, organic care, and disease management, you can get maximum yield from your guava tree for many years.

Whether in your garden, pot, or farmland, growing guava is highly rewarding both for health and wealth.

Start planting guava today and enjoy fresh, organic, and sweet fruits right at home.

Taiwan pink guava for pot and garden


Posted on Leave a comment

🌿 अमरूद (Guava) का पौधा लगाने का तरीका, देखभाल और अधिक से अधिक फल पाने के उपाय विस्तारपूर्वक

🌱 परिचय

अमरूद (Guava) भारत में सबसे लोकप्रिय और लाभकारी फलों में से एक है। इसे “गरीबों का सेब” भी कहा जाता है क्योंकि इसमें सेब से भी अधिक विटामिन-C पाया जाता है। अमरूद न सिर्फ़ स्वादिष्ट होता है बल्कि सेहत के लिए भी अत्यंत लाभकारी है।

Taiwan pink guava plant for home garden

भारत के लगभग हर राज्य में अमरूद की खेती की जाती है। इसे छोटे बगीचे, खेत, यहाँ तक कि गमले में भी लगाया जा सकता है। सही तकनीक और देखभाल के साथ, अमरूद का पेड़ साल में दो बार फल देता है और 20–25 साल तक निरंतर उत्पादन करता है।

इस लेख में हम विस्तारपूर्वक जानेंगे:

  • अमरूद का महत्व और विशेषताएँ

  • पौधा कहाँ और कब लगाना चाहिए

  • बीज और कलम से अमरूद लगाने की विधि

  • मिट्टी, खाद, पानी और देखभाल के उपाय

  • रोग और कीट नियंत्रण

  • अधिक फल और बेहतर गुणवत्ता प्राप्त करने के टिप्स

  • घरेलू और व्यावसायिक खेती के लाभ


🌿 अमरूद का महत्व और विशेषताएँ

✅ अमरूद का वैज्ञानिक नाम

  • वैज्ञानिक नाम: Psidium guajava

  • परिवार: Myrtaceae

✅ अमरूद वृक्ष की विशेषताएँ

  • मध्यम आकार का सदाबहार पेड़।

  • ऊँचाई: 5–10 मीटर।

  • पत्तियाँ हरी और मोटी।

  • फूल: सफेद और सुगंधित।

  • फल: हरे रंग का, अंदर से सफेद या गुलाबी गूदा।

✅ पौष्टिक महत्व

  • विटामिन-C, A, B, पोटेशियम, फाइबर और एंटीऑक्सीडेंट्स से भरपूर।

  • रोग प्रतिरोधक क्षमता को बढ़ाता है।

  • पाचन तंत्र और त्वचा के लिए लाभकारी।

✅ आर्थिक महत्व

  • अमरूद की खेती कम लागत और अधिक लाभ वाली है।

  • एक हेक्टेयर में 20–25 टन तक उत्पादन संभव है।

  • यह भारत के प्रमुख निर्यात फलों में से एक है।


🌱 अमरूद का पौधा कहाँ और कब लगाएँ

✅ सही मौसम

  • सबसे अच्छा समय: बरसात का मौसम (जुलाई से सितंबर)।

  • फरवरी–मार्च में भी पौधा लगाया जा सकता है।

✅ उपयुक्त स्थान

  • खुले और धूप वाले क्षेत्र में पौधा लगाएँ।

  • पानी भराव वाली जगह न हो।

  • बगीचे, खेत और बड़े गमले सभी उपयुक्त हैं।

✅ उपयुक्त मिट्टी

  • दोमट और रेतीली दोमट मिट्टी सबसे अच्छी।

  • मिट्टी का pH 5 से 7.5 होना चाहिए।

  • जैविक खाद से मिट्टी को उपजाऊ बनाना ज़रूरी।


🌿 अमरूद का पौधा लगाने की विधि

1. बीज से पौधा लगाना

  • पके हुए अमरूद से बीज निकालकर 2 दिन सुखाएँ।

  • बीज को पानी में 24 घंटे भिगोकर रखें।

  • नर्सरी की ट्रे या पॉलिथीन बैग में मिट्टी + रेत + खाद भरकर बीज बोएँ।

  • अंकुरण 15–20 दिन में हो जाता है।

2. कलम/ग्राफ्टिंग से पौधा

  • ग्राफ्टेड पौधा जल्दी फल देता है (2–3 साल में)।

  • नर्सरी से उत्तम गुणवत्ता का पौधा लें।

  • गड्ढा (2×2 फीट) खोदें और उसमें मिट्टी + गोबर की खाद डालें।

  • पौधे को लगाकर हल्का पानी दें।

3. गमले में पौधा

  • कम से कम 18–24 इंच का गमला लें।

  • नीचे छेद होना चाहिए ताकि पानी रुके नहीं।

  • मिट्टी + रेत + कम्पोस्ट का मिश्रण भरें।

  • पौधा लगाकर रोज़ाना हल्का पानी दें।


🌱 पौधे की देखभाल (Care Tips)

✅ सिंचाई (Watering)

  • गर्मी में 2–3 दिन पर पानी दें।

  • बरसात में आवश्यकता अनुसार।

  • सर्दियों में सप्ताह में 1–2 बार पर्याप्त है।

✅ खाद (Fertilizer)

  • हर 2–3 महीने पर गोबर की खाद डालें।

  • वर्मी कम्पोस्ट और नीम खली अत्यंत लाभकारी।

  • फल आने से पहले जैविक खाद डालना ज़रूरी है।

✅ छँटाई (Pruning)

  • सूखी और रोगग्रस्त शाखाएँ हटा दें।

  • झाड़ीनुमा शाखाओं को काटकर पौधे को खुला रखें।

  • सही छँटाई से पेड़ में अधिक फूल और फल आते हैं।

✅ धूप और वातावरण

  • प्रतिदिन 5–6 घंटे सीधी धूप मिले।

  • ठंडी और शुष्क जलवायु में अमरूद की गुणवत्ता बेहतर होती है।


🌿 रोग और कीट नियंत्रण

  • फल मक्खी: नीम तेल का छिड़काव करें।

  • पत्तों पर फफूंदी: जैविक फफूंदनाशक का प्रयोग करें।

  • जड़ सड़न: पानी भराव से बचाएँ।

  • थ्रिप्स और एफिड्स: नीम का घोल छिड़कें।


🌱 अधिक फल प्राप्त करने के उपाय

  • ग्राफ्टेड पौधा लगाएँ, जल्दी और अधिक फल देगा।

  • समय पर सिंचाई और खाद डालें।

  • पौधे की उचित छँटाई करें।

  • खरपतवार हटाएँ ताकि पौधे को पर्याप्त पोषण मिले।

  • फूल आने से पहले गोबर की खाद और राख डालें।

  • गर्मियों में पौधे के आसपास घास या मल्चिंग करें।


🌿 अमरूद की उन्नत किस्में (Varieties)

  • इलाहाबादी सफेदा

  • लखनऊ 49

  • बनारसी

  • लाल फलेशी

  • हाईब्रिड किस्में (Taiwan pink, VNR Bihi)


🌱 व्यावसायिक खेती के लाभ

  • एक पौधा साल में 50–70 किलो फल दे सकता है।

  • एक हेक्टेयर में 400–500 पौधे लगाए जा सकते हैं।

  • सालाना लाखों रुपये की कमाई संभव।

  • कम लागत, अधिक उत्पादन और निर्यात योग्य।


🌿 अमरूद के स्वास्थ्य लाभ

  • रोग प्रतिरोधक क्षमता बढ़ाता है।

  • ब्लड शुगर नियंत्रित करता है।

  • हृदय रोगों से बचाव करता है।

  • वजन घटाने और पाचन शक्ति बढ़ाने में सहायक।

  • त्वचा को स्वस्थ और चमकदार बनाता है।


🌱 FAQ (अक्सर पूछे जाने वाले प्रश्न)

Q1. अमरूद का पौधा कितने साल में फल देता है?
👉 बीज वाला पौधा 4–5 साल में, ग्राफ्टेड पौधा 2–3 साल में।

Q2. क्या गमले में अमरूद उग सकता है?
👉 हाँ, बड़े गमले में नियमित देखभाल के साथ।

Q3. अमरूद के पेड़ की उम्र कितनी होती है?
👉 लगभग 25–30 साल तक निरंतर फल देता है।

Q4. अमरूद की सबसे अच्छी किस्म कौन-सी है?
👉 इलाहाबादी सफेदा और लखनऊ 49।

Q5. अधिक मीठे फल पाने के लिए क्या करें?
👉 समय पर सिंचाई, खाद और छँटाई करें।


🌿 निष्कर्ष

अमरूद का पौधा न केवल स्वादिष्ट और पौष्टिक फल प्रदान करता है बल्कि यह आर्थिक रूप से भी लाभकारी है। सही समय पर पौधा लगाना, मिट्टी का चुनाव, उचित खाद और देखभाल से आप अधिक से अधिक मीठे और रसीले फल पा सकते हैं।

घर के आँगन, गमले या खेत – कहीं भी अमरूद का पौधा लगाया जा सकता है। यह न सिर्फ़ आपकी सेहत सुधारेगा बल्कि आय का अच्छा स्रोत भी बनेगा।

Taiwan pink guava for pot and garden


Posted on Leave a comment

🌳 Jamun (Blackberry) Plant – Plantation, Care & Tips to Get Maximum Fruits

✨ Introduction

Jamun (Syzygium cumini), also known as Blackberry, Java Plum, Indian Black Plum, or Malabar Plum, is one of the most popular fruits in India. It is valued for its unique tangy-sweet taste, medicinal properties, and cultural importance.

Jamun (Blackberry) Plant


Jamun fruit has been widely used in Ayurveda, Unani, and traditional medicine systems for treating diabetes, digestion issues, blood purification, and heart diseases. The tree is evergreen, long-living, and can grow up to 30–40 meters in height under suitable conditions.

In this article, we will cover in detail:

  • Ideal climate and soil for Jamun

  • Plantation techniques in fields and pots

  • Irrigation, fertilization, and care schedule

  • Pruning and plant management

  • Tips for maximizing fruiting and sweetness

  • Pest and disease control

  • Medicinal and health benefits

  • Vastu and cultural significance


🌱 Suitable Climate and Soil for Jamun

  • Climate: Jamun grows well in tropical and subtropical regions.

  • Temperature: 25°C to 35°C is ideal.

  • Rainfall: Annual rainfall of 500–2500 mm supports healthy growth.

  • Soil Requirements:

    • Sandy loam or loamy soil is best.

    • Soil pH: 6.0–7.5.

    • Proper drainage is essential to avoid root rot.


🪴 Plantation Methods

✔ In Garden or Farm

  1. Pit Preparation: Dig pits of 3x3x3 feet.

  2. Soil Mixture: Fill with garden soil + farmyard manure + river sand + neem cake.

  3. Planting: Always use grafted (budded) plants for early fruiting.

  4. Spacing: Keep 8–10 meters between plants.

  5. Irrigation: Light watering after plantation.

✔ In Pots/Containers

  • Pot Size: Minimum 20–24 inches deep and wide.

  • Soil Mix:

    • 40% garden soil

    • 30% organic compost/vermicompost

    • 20% river sand

    • 10% cocopeat + neem cake powder

  • Ensure good drainage holes in the container.


💧 Irrigation Management

  • Summer: Water every 7–10 days.

  • Winter: Every 15–20 days.

  • Fruiting Stage: Maintain consistent soil moisture.

  • Precaution: Avoid waterlogging, especially in pots.


🌿 Fertilizer and Nutrition Schedule

Season Fertilizer Quantity Purpose
Every 3 months Farmyard manure/Vermicompost 5–10 kg Improves soil fertility
Feb–March Nitrogen (Urea) 200 g Boosts new shoots & leaves
June–July DAP + Potash 200–250 g Helps in flowering & fruit set
Aug–Sept Micronutrients (Zinc, Boron) Foliar spray Enhances fruit size & sweetness

👉 Potassium and Zinc are essential for fruit quality and sweetness.


🌞 Sunlight and Temperature

  • Jamun requires 6–8 hours of direct sunlight daily.

  • Avoid shady places as they reduce fruiting.

  • Protect young plants from frost in colder regions.


✂️ Pruning and Maintenance

  • Remove dry, diseased, or broken branches regularly.

  • Light pruning helps in giving a balanced shape to the tree.

  • For potted plants, perform repotting every 2–3 years with fresh soil mix.


🌸 Flowering and Fruiting

  • Seed-grown plants start fruiting after 6–8 years.

  • Grafted/budded plants bear fruits within 4–5 years.

  • Flowering Season: March–April.

  • Harvesting Season: June–July.

  • Fruits are oval-shaped, purple-black, and have a unique flavor.


🍇 Tips to Maximize Fruiting

  1. Always plant grafted plants for early and better yield.

  2. Apply Zinc and Boron sprays during flowering.

  3. Use Potash-rich fertilizers to reduce flower/fruit drop.

  4. Keep the base area weed-free.

  5. Ensure timely irrigation and fertilization.

  6. Thin excess fruits for better quality and size.


🐛 Pest and Disease Management

Pest/Disease Symptoms Control
Leaf Spot Yellow/black patches on leaves Spray Bordeaux mixture
Fruit Drop Immature fruits falling Foliar spray of Zinc + Boron
Termites Weakening of roots Apply neem cake & neem oil
Fruit Fly Holes and rotting fruits Cover fruits with net bags

🌟 Medicinal and Health Benefits of Jamun

  • Diabetes Management: Jamun seeds are used in Ayurvedic medicine for regulating blood sugar levels.

  • Digestion: Improves gut health and relieves diarrhea.

  • Bone Health: Rich in calcium and phosphorus.

  • Heart Health: Maintains blood pressure and cholesterol.

  • Skin Benefits: Purifies blood and helps in skin disorders.


🏡 Vastu and Cultural Importance

  • Planting Jamun at home brings positivity, prosperity, and good health.

  • Considered sacred in Indian traditions and associated with Lord Krishna.

  • Jamun is also part of Panchavati trees along with Neem, Peepal, and Banyan.


📊 Quick Care Guide

Stage Care Tip
Plantation Use grafted plants Keep 8–10 m spacing
Watering Summer: 7–10 days, Winter: 15–20 days Avoid waterlogging
Fertilization Organic compost every 3 months Increase Potash at fruiting
Sunlight 6–8 hrs daily Avoid shade
Fruiting Starts in 4–5 years (grafted) Spray micronutrients

❓ Frequently Asked Questions (FAQ)

Q1: Can Jamun grow in pots?
✔ Yes, grafted plants can grow well in large pots (20–24 inches).

Q2: How many years does Jamun take to bear fruits?
✔ Seed-grown: 6–8 years, Grafted: 4–5 years.

Q3: Which fertilizer is best for Jamun?
✔ Organic compost + Potash + Micronutrient sprays.

Q4: What is the lifespan of Jamun tree?
✔ A healthy Jamun tree can live and fruit for 50–60 years.

Q5: Is Jamun farming profitable?
✔ Yes, Jamun is highly valued for its medicinal and commercial demand.


🎯 Conclusion

Jamun is not just a delicious seasonal fruit but also a treasure of health benefits and cultural values. By planting a Jamun tree at home or farm, you can enjoy both its shade and fruits for decades.

With proper planting, irrigation, nutrition management, and pest control, you can ensure heavy harvests of sweet and medicinally rich Jamun fruits. Whether in a large farm or in a pot on your terrace, Jamun is a tree worth growing.

Grafted Blackberry Live Plant/Jaamun ka Podha for Home and Garden

Posted on Leave a comment

🌳 जामुन (Blackberry) का पौधा लगाने की विधि, देखभाल और अधिक फल पाने के उपाय

✨ परिचय

जामुन (Syzygium cumini) भारत का एक अत्यंत लोकप्रिय और औषधीय महत्व वाला फल है। इसे ब्लैकबेरी, जावा प्लम, या इंडियन ब्लैक प्लम भी कहा जाता है। जामुन का स्वाद खट्टा-मीठा होता है और इसमें कई प्रकार के औषधीय गुण पाए जाते हैं। आयुर्वेद में जामुन को शुगर रोगियों, पाचन तंत्र और हृदय रोगों के लिए बेहद उपयोगी माना गया है।

Jamun (Blackberry) Plant


भारत में जामुन के पेड़ आमतौर पर गर्म और उपोष्णकटिबंधीय जलवायु में पाए जाते हैं। यह पेड़ 30–40 मीटर तक ऊँचा हो सकता है और साल में एक बार फल देता है।

इस लेख में हम विस्तार से जानेंगे:

  • जामुन पौधे के लिए सही जलवायु और मिट्टी

  • गमले और खेत में जामुन लगाने की विधि

  • पौधे की देखरेख और खाद-पानी का प्रबंधन

  • रोग और कीट नियंत्रण

  • अधिक फल और मिठास पाने के घरेलू उपाय

  • औषधीय और स्वास्थ्य लाभ

  • वास्तु और धार्मिक महत्व


🌱 जामुन के लिए उपयुक्त जलवायु और मिट्टी

  • जलवायु: जामुन का पौधा उष्णकटिबंधीय और उपोष्णकटिबंधीय क्षेत्रों में अच्छा पनपता है।

  • तापमान: 25°C से 35°C सर्वोत्तम है।

  • वर्षा: 500–2500 मिमी वार्षिक वर्षा उपयुक्त रहती है।

  • मिट्टी:

    • बलुई दोमट (sandy loam) सबसे अच्छी मानी जाती है।

    • pH मान: 6.0 से 7.5।

    • जलभराव से बचाना जरूरी है।


🪴 जामुन पौधा लगाने की विधि

✔ खेत में रोपाई

  1. गड्ढे की तैयारी: 3x3x3 फीट के गड्ढे खोदें।

  2. मिट्टी भरना: गड्ढे में मिट्टी + गोबर की खाद + बालू + नीमखली मिलाएँ।

  3. पौधा लगाना: ग्राफ्टेड या कलमी पौधा लगाएँ।

  4. दूरी: पेड़ों के बीच 8–10 मीटर की दूरी रखें।

  5. सिंचाई: रोपाई के बाद हल्की सिंचाई करें।

✔ गमले में रोपाई

  • गमला आकार: 20–24 इंच गहरा और चौड़ा।

  • मिट्टी मिश्रण:

    • 40% बगीचे की मिट्टी

    • 30% गोबर की खाद/वर्मी कंपोस्ट

    • 20% नदी की रेत

    • 10% कोकोपीट + नीमखली

  • ड्रैनेज: गमले में निकास छेद अवश्य हों।


💧 सिंचाई प्रबंधन

  • गर्मी में हर 7–10 दिन पर पानी दें।

  • बरसात के समय अतिरिक्त पानी से बचाएँ।

  • फल बनने के समय नियमित नमी बनाए रखें।

  • गमले में पौधों को हल्का लेकिन नियमित पानी दें।


🌿 खाद और पोषण प्रबंधन

समय खाद/उर्वरक मात्रा उद्देश्य
हर 3 माह गोबर की खाद/वर्मी कंपोस्ट 5–10 किलो मिट्टी उपजाऊ बनाए
फरवरी–मार्च नत्रजन (Urea) 200 ग्राम नई कोंपलें और पत्ते
जून–जुलाई डीएपी + म्यूरिएट ऑफ पोटाश 200–250 ग्राम फूल और फल सेटिंग
अगस्त–सितंबर सूक्ष्म पोषक तत्व (जिंक, बोरॉन) स्प्रे फल का आकार और मिठास

👉 जामुन के अच्छे फलन के लिए पोटाश और जिंक अत्यधिक आवश्यक हैं।


🌞 धूप और तापमान

  • जामुन का पौधा पूर्ण सूर्यप्रकाश में लगाएँ।

  • रोजाना कम से कम 6–8 घंटे धूप जरूरी है।

  • ठंड से पौधे को बचाएँ, खासकर शुरुआती वर्षों में।


✂️ छंटाई और रख-रखाव

  • सूखी, टूटी और रोगग्रस्त शाखाएँ काटें।

  • पौधे को संतुलित आकार देने के लिए हल्की छंटाई करें।

  • गमले में हर 2–3 साल बाद रिपॉटिंग करें।


🌸 फूल और फलन

  • जामुन का पौधा 6–8 साल बाद फल देना शुरू करता है (बीज वाला)।

  • ग्राफ्टेड/कलमी पौधा 4–5 साल में फल देने लगता है।

  • फूल आने का समय: मार्च–अप्रैल।

  • फल पकने का समय: जून–जुलाई।


🍇 अधिक फल पाने के उपाय

  1. ग्राफ्टेड पौधे का चुनाव करें।

  2. समय-समय पर जिंक और बोरॉन का स्प्रे करें।

  3. फूल गिरने से रोकने के लिए पोटाश दें।

  4. पौधे के आसपास खरपतवार न होने दें।

  5. सिंचाई और खाद का नियमित पालन करें।

  6. छोटे-छोटे फलों को छाँटकर बड़े फलों को विकसित होने दें।


🐛 रोग और कीट प्रबंधन

रोग/कीट लक्षण समाधान
पत्तियों पर धब्बे पत्तियों का पीला/काला होना बोर्डो मिश्रण का छिड़काव
फूल और फल झड़ना फूल और छोटे फल गिरना जिंक + बोरॉन स्प्रे
दीमक जड़ों का कमजोर होना नीमखली और नीम तेल
फल मक्खी फलों में छेद और सड़न फलों को जाल बैग से ढकें

🌟 जामुन के औषधीय लाभ

  • डायबिटीज रोगियों के लिए उपयोगी।

  • पाचन तंत्र मजबूत करता है।

  • हड्डियों और दाँतों को मजबूत बनाता है।

  • रक्तचाप और हृदय रोगों में सहायक।

  • खून को शुद्ध करता है और त्वचा रोगों में लाभकारी।


🏡 वास्तु और धार्मिक महत्व

  • जामुन का पेड़ घर में लगाने से सकारात्मक ऊर्जा और समृद्धि आती है।

  • इसे भगवान कृष्ण से भी जोड़ा जाता है।

  • पीपल, नीम और जामुन को पवित्र वृक्ष माना गया है।


📊 जामुन पौधे की त्वरित देखभाल सारणी

चरण देखभाल मुख्य टिप्स
रोपाई ग्राफ्टेड पौधे लगाएँ 8–10 मीटर दूरी रखें
पानी गर्मी में 7–10 दिन पर जलभराव से बचाएँ
खाद हर 3 माह जैविक खाद फल आने पर पोटाश बढ़ाएँ
धूप 6–8 घंटे रोजाना छाँव से बचाएँ
फलन 4–5 साल बाद शुरू फूल गिरने से रोकें

❓ अक्सर पूछे जाने वाले प्रश्न (FAQ)

Q1: क्या जामुन गमले में उग सकता है?
✔ हाँ, बड़े गमले में ग्राफ्टेड पौधा लगाकर अच्छे फल पाए जा सकते हैं।

Q2: जामुन का पौधा कितने साल में फल देता है?
✔ बीज वाला पौधा 6–8 साल में, ग्राफ्टेड 4–5 साल में फल देता है।

Q3: कौन सी खाद जामुन के लिए सबसे अच्छी है?
✔ गोबर की खाद, वर्मी कंपोस्ट और पोटाश आधारित उर्वरक।

Q4: जामुन की आयु कितनी होती है?
✔ 50–60 साल तक पौधा फल देता है।

Q5: क्या जामुन का व्यावसायिक खेती लाभकारी है?
✔ हाँ, यह औषधीय और बाजार मूल्यवान फल है।


🎯 निष्कर्ष

जामुन का पौधा लगाना न केवल स्वादिष्ट फलों के लिए लाभकारी है, बल्कि यह औषधीय, धार्मिक और पर्यावरणीय दृष्टि से भी अत्यंत महत्वपूर्ण है। यदि आप समय पर रोपाई, खाद-पानी और देखभाल करते हैं, तो जामुन से भरपूर और मीठे फल प्राप्त कर सकते हैं, चाहे पौधा गमले में हो या खेत में।

Grafted Blackberry Live Plant/Jaamun ka Podha for Home and Garden