Posted on Leave a comment

ग्राफ्टिंग क्या होती है और ग्राफ्टेड पौधे लगाने के फायदे।

What is Grafting of plants? (Advantages, Videos)

ग्राफ्टिंग क्या है। ( What is Grafting )

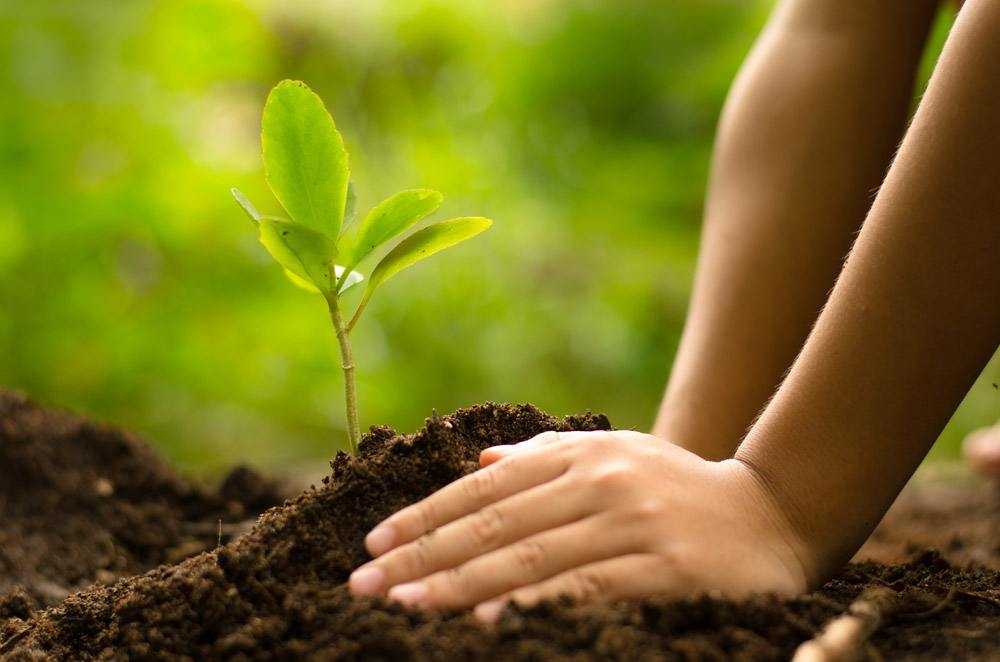
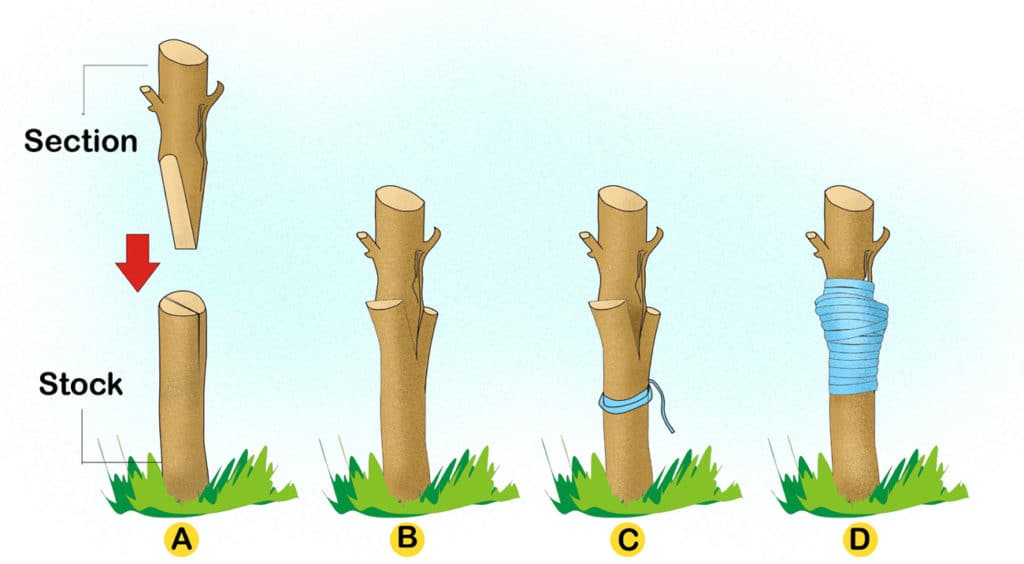
ग्राफ्टिंग तकनीक वह विधि है जिसमें दो अलग – अलग पौधों के कटे हुए तनों को लेते हैं। जिसमें एक जड़ सहित और दूसरा बिना जड़ वाला होता है। दोनों तनों को इस प्रकार एक साथ लगाया जाता कि दोनों तने आपस में संयुक्त हो जाते हैं और एक ही पौधे के रूप में विकसित हो जाता है। इस नए पौधे में दोनों पौधों की विशेषताएँ होती हैं। जड़ वाले पौधे के कटे हुए तने को स्टॉक और दूसरे जड़ रहित पौधे के कटे हुए तने को सायन कहा जाता है। यह पोषक तत्वों को बढ़ाकर तथा उपयुक्त रुट स्टॉक्स के साथ मिटटी जनित रोगों के प्रतिरोधक विकसित करके पौधों की वृद्धि करता है। ग्राफ्टिंग का उपयोग विभिन्न प्रकार के पौधों जैसे – आम, जामुन, सेब, कटहल आदि में किया जाता है। 

ग्राफ्टेड पौधे लगाने के फायदे ( Benefits of planting grafted plants )

  1. ग्राफ्टेड पौधे सामान्य पौधों की अपेक्षा बीमारियों और प्रतिकूल परिस्थितियों के लिए अधिक प्रतिरोध विकसित करते है। ग्राफ्टेड पौधों की प्रतिरोधक क्षमता ज्यादा होती है। 
  2. ग्राफ्टेड पौधे सामान्य पौधों की तुलना में कम समय में ही फल और फूल देने लगते हैं। 
  3. ग्राफ्टेड पौधों में प्रतिरोधक क्षमता ज्यादा होने के कारण ये स्वस्थ रहते हैं। इन्हे ज्यादा खाद – पानी की जरुरत नहीं होती। अतः कम लागत में ही ग्राफ्टेड पौधों की देखभाल की जा सकती है। 
  4. ग्राफ्टेड पौधों की गुणवत्ता अधिक होती है। इनमें फल, पत्तियों और फूलों में पाए जाने वाले अधिकांश गुण बरकरार रहते हैं जबकि ये गुण कभी – कभी उन पौधों में खो जाते हैं जो एक बीज से उगाये जाते हैं। 
  5. ग्राफ्टेड पौधों का आकार छोटा होता। अतः ग्राफ्टेड पौधे आकार में छोटे होने के कारण भी जल्दी फल – फूल देने लगते हैं। अतः इनके फल या फूल के आकार में सामान्य पौधों के फल या फूल के आकार से भिन्नता होती है। 
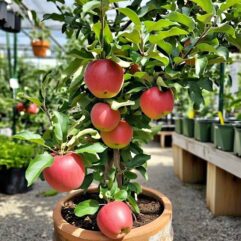
  6. ग्राफ्टेड पौधों का सबसे बड़ा लाभ यह होता है कि आप इन पौधों को गमले में लगाकर इनसे फल – फूल प्राप्त कर सकते हैं। 
  7. सामान्य पौधे केवल अपना सीजन आने पर ही फल देते हैं जबकि ग्राफ्टेड पौधे बारामास ( साल भर ) फल देते हैं। 
Posted on Leave a comment

गमले में लगे लाल अमरुद के पौधे की देखभाल करने के 10 बेहतरीन तरीके।

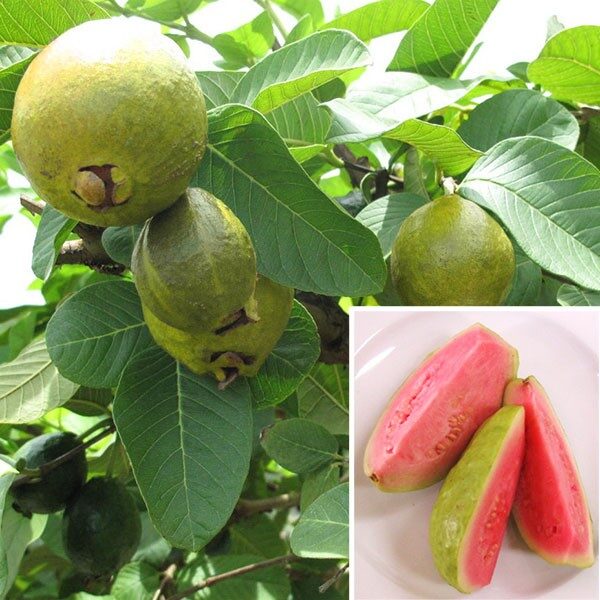
Red Guava Plant For Pot

  1. आप अगर Plants lover हैं, तो आप को हमेशा कलमी ( ग्राफ्टेड ) पौधा ही लगाना चाहिए क्योंकि कलमी पौधे के अलग ही फायदे होते हैं। अतः आप जब भी लाल अमरुद का पौधा लगायें तो कलमी पौधा ही लगायें। 
  2. अगर आपके लाल अमरुद के फलों में फल बेधक कीट लग जाये तो प्रभावित फलों को एकत्र कर नष्ट करें। प्रकोप से बचने के लिए कार्बोरील (0.2 % ) या इथोफेनप्रोक्स ( 0.05 % ) का फल बनने की प्रारंभिक अवस्था में छिड़काव करें। छिड़काव के 15 दिन तक फल न तोड़ें। 
  3. लाल अमरुद में रस चूषक व पत्ती खाने वाले कीट लग जाते हैं। इसकी रोकथाम के लिए डाइमिथोएट 2 मिली प्रति लीटर पानी में मिलाकर छिड़काव करें। 
  4. पट्टी खाने वाली लट का प्रकोप होने पर क्यूनालफॉस 2 मिली प्रति लीटर पानी में मिलाकर छिड़काव कर सकते हैं। 
  5. अगर आपके लाल अमरुद पर लगे फल सड़ जाते हैं या रुई के समान फफूँदी की वृद्धि दिखाई देती है तो इसके लिए 2 ग्राम मेंकोजेब 1 लीटर पानी में घोलकर छिड़काव करना चाहिए। 
  6. अगर आपके गमले में लगे लाल अमरुद के पौधे पर फल – फूल नहीं आ रहे हैं, तो आप उसकी किसी दूसरे बड़े गमले में रिपोटिंग कर सकते हैं। 
  7. लाल अमरुद के पौधे को पानी की अधिक आवश्यकता होती है, अतः उसे गर्मियों में सुबह – शाम दोनों समय पानी देना चाहिए। 
  8. समय – समय पर गमले की मिटटी की गुड़ाई करते रहे, खर – पतवार को निकालकर फेंकते रहें और जो टहनियाँ सूख जाएँ उन्हें काटकर फेंक दें। 
  9. लाल अमरुद के पौधे को धूप की अधिक आवश्यकता होती है, अतः उसे ऐसी जगह पर रखें जहाँ पर्याप्त मात्रा में धूप आती हो। 
  10.  आपको पौधे के ऊपर कभी भी रासायनिक कीटनाशक का प्रयोग नहीं करना चाहिए। वही एक तरफ तो पौधे को लाभ पहुंचाते हैं तो दूसरी तरफ इसके बहुत सारे बुरे प्रभाव भी होते हैं। आपको जैविक खाद का ही प्रयोग करना चाहिए। 

नोट :- अगर आप पेंड – पौधे लगाने के शौकीन हैं लेकिन आप अपने पौधों को चाहते हुए भी समय न दे पा रहें हैं या किसी भी कारण वश आप इन उपायों को नहीं कर पा रहे हैं। आप चाहते हैं कि मेरे पौधे कम देखभाल में ही अच्छे परिणाम दें तो इसका भी उपाय है। जी हाँ आपने बिल्कुल सही समझा। 

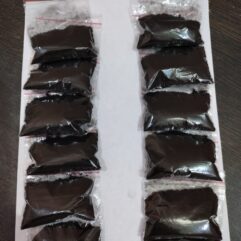
ऊपर दिए गए चित्र में आप 12 पाउच को देख सकते हैं जो की 12 महीनों के लिए हैं। हर महीने में एक पाउच का इस्तेमाल करना है। इस आर्गेनिक फ़र्टिलाइज़र का नाम है। 

Organic BOM all purpose Plant Growth Booster – 120 gram ( 12 pouch of 10 gram )

ये आर्गेनिक फ़र्टिलाइज़र आपको बहुत की उचित कीमत पर दिया जा रहा। यह आपको मात्र 365 Rs में मिलेगा। नीचे दिए गए वीडियो में इस आर्गेनिक फ़र्टिलाइज़र के बारे में विस्तृत जानकारी दी गयी। इसकी होम डिलीवरी से लेकर इसके उपयोग तक की सारी जानकारी आपको इस वीडियो में मिल जाएगी। 

Posted on Leave a comment

गमले में लगे कटहल के पौधे की देखभाल करने के 10 आसान तरीके।

Grafted Jackfruit Plant

Know what Vastu Shashtra has to says about House gardening - Plant & Our  Culture - NurseryLive Wikipedia
  1. अगर आप के घर के गमले में लगे कटहल के पौधे से अधिक फल पाना चाहते हैं तो आप उसकी प्रूनिंग कर सकते हैं। 
  2. आप जब भी कटहल का पौधा लगाये तो हमेशा ग्राफ्टेड पौधा ही लगाएं क्योंकि ग्राफ्टेड पौधा बहुत ही कम समय और देखभाल में फल देना प्रारंभ कर देता हैं। 
  3. अक्सर कटहल के तने व पत्तियों पर सफेद रंग के कीट लग जाते हैं तो आप उन पर नीम के पानी का छिड़काव कर सकते हैं। 
  4. कटहल के पेंड में तना छेदक नामक एक कीट लग जाता है जो तने के जीवित भाग को खाकर पूरी खोखला बना देती है। इसकी रोकथाम के लिए रुई या सूती कपडे को डीजल या केरोसीन में डुबोकर पेंड के तने में लगा दें और साथ ही चिकनी मिटटी भी लगा देनी चाहिए। 
  5. राइजोपस आर्टकारपाई नामक कवक जो की कटहल के फलों को सड़ा देता है। इसका प्रकोप छोटे फलों में ज्यादा होता है जो की सड़ कर गिरने लगते हैं। इसके रोकथाम के लिए एक लीटर पानी में 2 ग्राम कॉपर अक्सीक्लोराइड मिलाकर 12 से 15 दिन के अंतराल पर छिड़काव करते रहें। 
  6. मिली बिग नामक कीट जो कटहल के फल व फूलों से रस चूसते हैं जिनकी वजह से फल व फूल गिर जाते हैं। अतः इसके रोकथाम के लिए 3 मिली इंडोसल्फान प्रति लीटर पानी में मिलाकर छिड़काव करना चाहिए। 
  7. कटहल के पौधे को धूप की आवश्यकता होती है अतः उसे ऐसी जगह लगाएं जहाँ पर्याप्त मात्रा में धूप मिलती रहे। 
  8. गमले में लगे कटहल के पौधे को गर्मियों में सुबह – शाम दोनों समय पानी देना चाहिए। सर्दियों के दिनों में एक बार पानी देना चाहिए। जब कटहल में फूल आ रहें हो तो 2 – 3 दिन के अंतराल पर पानी देना चाहिए। 
  9. अधिक दिनों से लगे गमले में कटहल का पौधा अगर मुरझाया – मुरझाया लगने लगे, फल देना बंद कर दे या उसकी जड़ें गमले में बहुत अधिक फैल गयी हों तो आपको उसकी किसी बड़े गमले में रिपोटिंग कर देनी चाहिए। 
  10. आपको समय – समय पर कटहल के पौधे की काट – छाँट करते रहना चाहिए। हर 15 दिन के अंतराल पर मिटटी की हल्की गुड़ाई करते रहें। 

नोट :- अगर आप पेंड – पौधे लगाने के शौकीन हैं लेकिन आप अपने पौधों को चाहते हुए भी समय न दे पा रहें हैं या किसी भी कारण वश आप इन उपायों को नहीं कर पा रहे हैं। आप चाहते हैं कि मेरे पौधे कम देखभाल में ही अच्छे परिणाम दें तो इसका भी उपाय है। जी हाँ आपने बिल्कुल सही समझा। 

ऊपर दिए गए चित्र में आप 12 पाउच को देख सकते हैं जो की 12 महीनों के लिए हैं। हर महीने में एक पाउच का इस्तेमाल करना है। इस आर्गेनिक फ़र्टिलाइज़र का नाम है। 

Organic BOM all purpose Plant Growth Booster – 120 gram ( 12 pouch of 10 gram )

ये आर्गेनिक फ़र्टिलाइज़र आपको बहुत की उचित कीमत पर दिया जा रहा। यह आपको मात्र 365 Rs में मिलेगा। नीचे दिए गए वीडियो में इस आर्गेनिक फ़र्टिलाइज़र के बारे में विस्तृत जानकारी दी गयी। इसकी होम डिलीवरी से लेकर इसके उपयोग तक की सारी जानकारी आपको इस वीडियो में मिल जाएगी। 

Posted on Leave a comment

गमले में लगे हुए संतरे के पौधे की देखभाल करने के 10 आसान तरीके और पायें ढेर सारे संतरे के फल।

advancedestore Live Dwarf Orange Plant Tangerine (Santra) origin  Darjeeling: Amazon.in: Garden & Outdoors
  1. संतरे के पौधे को धूप की ज्यादा जरुरत होती है। अतः आप संतरे के पौधे को ऐसी जगह रखें जहाँ उसे 6 से 8 घंटे की पर्याप्त धूप मिल सके। 
  2. आप अपने संतरे के पौधे की प्रूनिंग कर सकते हैं और पहले की अपेक्षा अधिक मात्रा में संतरे भी आने लगेंगे।
  3. अगर आपको लगता है कि आपका संतरा का पौधा मुरझाया – मुरझाया रहता है या उसकी जड़ें गमले में बहुत अधिक फैल गयी हैं तो आप उसकी रिपोटिंग कर सकते हैं। 
  4. संतरे के पौधे को पानी की आवश्यकता होती है, अतः इसे सुबह – शाम दोनों समय पर्याप्त मात्रा में पानी देना चाहिए। 
  5. जब संतरे पर फूल आ रहे हों तो संतरे को अधिक पानी नहीं देना चाहिए। इतना पानी दें की उसकी मिटटी नम हो जाये बस। अगर फ्लॉवरिंग के समय ज्यादा पानी दिया गया तो सारे फूल झड़ जायेंगे। 
  6. संतरे के पौधे की समय – समय पर काट – झाँट करते रहें। 
  7. संतरे के पौधे पर रासायनिक खाद का उपयोग नहीं करना चाहिए। 
  8. संतरे के पौधे को महीने में दो बार हल्की गुड़ाई करके वर्मी कम्पोस्ट या गोबर की खाद देते रहे। 
  9. आप जब भी संतरे का पौधा लगाएं तो ग्राफ्टेड संतरे का ही पौधा लगाएं। ग्राफ्टेड पौधे कम समय में ही फल देना प्रारंभ कर देते हैं। 
  10. अगर संतरे के पौधे पर कीट लग जाये तो उस पर नीम के पानी का छिड़काव करना चाहिए। 

नोट :- अगर आप पेंड – पौधे लगाने के शौकीन हैं लेकिन आप अपने पौधों को चाहते हुए भी समय न दे पा रहें हैं या किसी भी कारण वश आप इन उपायों को नहीं कर पा रहे हैं। आप चाहते हैं कि मेरे पौधे कम देखभाल में ही अच्छे परिणाम दें तो इसका भी उपाय है। जी हाँ आपने बिल्कुल सही समझा। 

ऊपर दिए गए चित्र में आप 12 पाउच को देख सकते हैं जो की 12 महीनों के लिए हैं। हर महीने में एक पाउच का इस्तेमाल करना है। इस आर्गेनिक फ़र्टिलाइज़र का नाम है। 

Organic BOM all purpose Plant Growth Booster – 120 gram ( 12 pouch of 10 gram )

ये आर्गेनिक फ़र्टिलाइज़र आपको बहुत की उचित कीमत पर दिया जा रहा। यह आपको मात्र 365 Rs में मिलेगा। नीचे दिए गए वीडियो में इस आर्गेनिक फ़र्टिलाइज़र के बारे में विस्तृत जानकारी दी गयी। इसकी होम डिलीवरी से लेकर इसके उपयोग तक की सारी जानकारी आपको इस वीडियो में मिल जाएगी। 

Posted on Leave a comment

गर्मियों में बगीचे के पौधों की देखभाल करने के 10 बेहतरीन तरीके।

गर्मियों में बगीचे की देखभाल कैसे करें।
  1.  अगर आप Plant Lover हैं तो आपको अपने बगीचे तथा बगीचे के पौधों को बहुत अच्छी तरह से जान लेना चाहिए। यह जानकारी आपको पौधों की देखभाल करने में मददगार साबित होगी।
  2. गर्मियों के दिनों में तेज धूप के कारण मिटटी बहुत सूख जाती है। जिस वजह से पौधों को उचित मात्रा में पोषण नहीं मिल पाता है। अतः गर्मियों के दिनों में आपको सुबह – शाम दोनों समय पौधों को पानी देना चाहिए। 
  3. गर्मियों में बगीचे के पौधों को कीटों से दूर रखने के लिए आपको प्राकृतिक कीटनाशक का उपयोग करना चाहिए क्योंकि एक कीट लगा पौधा पुरे बगीचे को नुकसान पहुँचा सकता है। 
  4. कुछ पौधे ऐसे होते हैं जिन्हें ज्यादा धूप की जरुरत नहीं होती है, तो आप उन पौधों को छाया वाली जगह या जहाँ कम धूप आती हो वहाँ रख सकते हैं। 
  5. पौधों को धूप से बचाने के लिए आप अपने बगीचे को Green Net से ढक सकते हैं। 
  6. गर्मी के मौसम में पौधों को पानी उस समय दें जब धूप न हो यानि सुबह और शाम सूरज निकलने से पहले और शाम को सूरज डूबने के बाद ध्यान रहे पौधे के आस – पास पानी ठहरना नहीं चाहिए। शाम के समय आप पौधों को पानी की फुहार से नहला भी देना चाहिए। 
  7. गर्मियों में आप अपने पौधों में रासायनिक खाद न डालें तो ज्यादा बेहतर होगा क्योंकि रासायनिक खाद पौधों को जला सकती है। 
  8. गर्मियों में आप जैविक खाद या गोबर की खाद पौधों को महीने में दो बार देना चाहिए। लगभग 20 – 50 ग्राम खाद प्रति पौधा दे सकते हैं। ध्यान रहे आप जब भी पौधों को खाद दें तो मिटटी में नमी होनी चाहिए। आपको कभी भी खाद सूखी मिटटी होने की अवस्था में कतई नहीं देना चाहिए। 
  9. पौधों की सूखी टहनियां या सूखा भाग तुरंत काट देना चाहिए और नियमित रूप से मिटटी की गुड़ाई करते रहे। घास – फूस को निकालते रहिये। 
  10. पौधों पर Flowering होने के बाद आप Buds को काट दें। जिससे पौधों की एनर्जी पौधों की ग्रोथ में काम आएगी। Grafted पौधों में अगर कोई extra टहनी Graft एरिया के अलग भाग में निकल रही हो तो उसे तुरंत काट दें। वह केवल और केवल जंगली Branch ही बनेगी। उस पर कोई फल – फूल नहीं आएगा।
Posted on Leave a comment

गमले में लगे गुड़हल पर ज्यादा फूल पाने के 10 आसान उपाय।

The Secrets to Growing Hibiscus Indoors | Laidback Gardener
  1. आप जब भी कोई पौधा लगाएं तो कलमी ( Grafted ) पौधा ही लगाएं क्योंकि ग्राफ्टेड पौधे कम समय में ही फल – फूल देने लगते हैं। तो आप जब भी गुड़हल का पौधा लगाए तो ग्राफ्टेड पौधा ही लगाएं। 
  2. अगर आपके गुड़हल के पौधे में फूल नहीं आ रहें हैं तो उसकी आप 2G या 3G कटिंग कर सकते हैं।
  3. आपने जिस भी गमले में गुड़हल का पौधा लगाया है। उस गमले की मिटटी की समय – समय पर गुड़ाई करने से आपका गुड़हल का पौधा अधिक फूल देने लगता है। 
  4. समय – समय पर आप गुड़हल के पौधे की काट – छाँट करते रहें। जो टहनियाँ सूख जाएँ उन्हें काट कर अलग कर देना चाहिए। 
  5. गुड़हल के पौधे को धूप की अधिक आवश्यकता होती है। अतः उसे ऐसे स्थान पर रखें जहाँ से गुड़हल का पौधा 7 से 8 घंटे की धूप पा सके। 
  6. गुड़हल के पौधे को गर्मियों में सुबह – शाम दोनों वक्त पानी देना चाहिए। 
  7. अगर आप दो हफ्ते के अंतराल पर मिटटी की हल्की सी गुड़ाई करके उसमे 50 ग्राम वर्मी कम्पोस्ट डालते हैं तो आपका गुड़हल का पौधा पुनः फूल देना प्रारम्भ कर देगा। 
  8. कभी – कभी गुड़हल पर फूल न आने का कारण होता है, उसे पर्याप्त जगह न मिल पाना। अगर आपने गुड़हल का पौधा किसी गमले में लगाया है और फूल नहीं आ रहें तो आप उसकी रिपोटिंग कर सकते हैं। 
  9. अगर आप अपने गुड़हल को हल्का गुनगुना पानी (35 डिग्री सेल्सियस ) देते हैं तो यह आपके गुड़हल के पौधे के लिए बहुत ही लाभकारी साबित होगा। हफ्ते में केवल 3 से 4 बार गुनगुना पानी दें। 
  10. कभी भी आपको गुड़हल के पौधे में केमिकल फ़र्टिलाइज़र नहीं डालना चाहिए। आप इसमें जैविक खाद का उपयोग करे जो की पौधे के लिए लाभकारी होता है।  

नोट :- अगर आप पेंड – पौधे लगाने के शौकीन हैं लेकिन आप अपने पौधों को चाहते हुए भी समय न दे पा रहें हैं या किसी भी कारण वश आप इन उपायों को नहीं कर पा रहे हैं। आप चाहते हैं कि मेरे पौधे कम देखभाल में ही अच्छे परिणाम दें तो इसका भी उपाय है। जी हाँ आपने बिल्कुल सही समझा। 

ऊपर दिए गए चित्र में आप 12 पाउच को देख सकते हैं जो की 12 महीनों के लिए हैं। हर महीने में एक पाउच का इस्तेमाल करना है। इस आर्गेनिक फ़र्टिलाइज़र का नाम है। 

Organic BOM all purpose Plant Growth Booster – 120 gram ( 12 pouch of 10 gram )

ये आर्गेनिक फ़र्टिलाइज़र आपको बहुत की उचित कीमत पर दिया जा रहा। यह आपको मात्र 365 Rs में मिलेगा। नीचे दिए गए वीडियो में इस आर्गेनिक फ़र्टिलाइज़र के बारे में विस्तृत जानकारी दी गयी। इसकी होम डिलीवरी से लेकर इसके उपयोग तक की सारी जानकारी आपको इस वीडियो में मिल जाएगी। 

Posted on Leave a comment

How to do a Banana Commercial Farming

How to do a Banana Commercial Farming

Importance of Banana in India:
Banana is one of the major and economically important fruit crops of India. Banana occupies 20% of the area among the total area under crop in India. Most of Banana is grown by planting suckers. The technology development in agriculture is very fast, it results in developing a Tissue Culture Technique. Banana is the oldest and common fruit known to the mankind. It is one of the important fruits, and constitutes second largest fruit industry in India.

Agro-Climatic Conditions for Banana Plantation:
Banana, basically a tropical crop, grows well in a temperature range of 15°C – 35°C with a relative humidity of 75-85%. It prefers tropical humid lowlands and is grown from the sea level to an elevation of 2000m above msl. In India, this crop is being cultivated in climate ranging from humid tropical to dry mild subtropics through a selection of appropriate varieties. Chilling injury occurs at a temperature below 12°C. The high velocity of wind which exceeds 80 km /hr damages the crop. Four months of monsoon with an average 650-750 mm rainfall is most important for vigorous vegetative growth of banana. At higher altitudes, banana cultivation is restricted to a few varieties like ‘hill banana”.

Deep, rich loamy soil with a pH between 6.5 – 7.5 is most preferred for banana farming. Soil for banana should have good drainage, adequate fertility, and moisture. Saline solid, calcareous soils are not suitable for banana cultivation. A soil which is neither too acidic nor too alkaline, rich in organic material with high nitrogen content, adequate phosphorus level and plenty of potash is good for a banana.

Suitable Soil Type for Banana Plantation:
In Banana Farming, Soil for banana should have good drainage, adequate fertility, and moisture. Deep, rich loamy soil with pH between 6-7.5 are most preferred for banana cultivation. Ill drained, poorly aerated and nutritionally deficient soils are not suitable for the banana. Saline solid, calcareous soil is not suitable for Banana cultivation. Avoided soil of low lying areas, very sandy and heavy black cotton with ill drainage. A soil that is not too acidic and not too alkaline, rich in organic material with high nitrogen content, adequate phosphorus level and plenty of potash are good for the banana.

Banana Varieties:
In India, banana is grown under diverse conditions and production systems. In your banana farming, selection of varieties, therefore, is based on a large number of varieties catering to various kinds of needs and situations. However, around 20 cultivars namely, Dwarf Cavendish, Robusta, Monthan, Poovan, Nendran, Red banana, Nyali, Safed Velchi, Basarai, Ardhapuri, Rasthali, Karpurvalli, Karthali, and Grandnaine etc.

Grandnaine is gaining popularity and may soon be the most preferred variety due to its tolerance to biotic stresses and good quality bunches. Bunches have well-spaced hands with a straight orientation of figures, bigger in size. Fruit develops attractive uniform yellow color with better shelf life and quality than other cultivars.

Land Preparation for Banana Planting:
Prior to planting banana, grow the green manuring crop like daincha, cowpea, etc. and bury it in the soil. The land can be plowed 2-4 times and leveled. Use rotavator or harrow to break the clod and bring the soil to a fine tilth. During soil preparation, a basal dose of farmyard manure is added and thoroughly mixed into the soil.

A pit size of 45cm x 45cm x 45cm is normally required. The pits are to be refilled with topsoil mixed with 10 kg of farmyard manure, 250 gm of neem cake and 20 gm of conbofuron. Prepared pits are left to solar radiation helps in killing the harmful insects, is effective against soil-borne diseases and aids aeration. In saline-alkali soil where pH is above 8 Pit mixture is to be modified to incorporate organic matter.

Addition of organic matter helps in reducing salinity while the addition of purlite improves, porosity and aeration. An alternative to planting in pits is planting in furrows. Depending on soil strata one can choose an appropriate method as well as spacing and depth at which plant is required to be planted.

Planting Material of Banana Crop:
About 70% of the farmers are using suckers as planting material while the rest 30% of the farmers are using tissue culture seedlings. Sword suckers with well-developed rhizome, conical or spherical in shape having actively growing conical bud and weighing approximately 450-700 gm are commonly used as propagating material.

In Banana Farming, suckers generally may be infected with some pathogens and nematodes. Similarly, due to the variation in age and size of the sucker, the crop is not uniform, harvesting is prolonged and management becomes difficult. Therefore, in-vitro clonal propagation, Tissue culture plants are recommended for planting. They are healthy, disease free, uniform in growth and early yielding.

The Best Planting Season of Banana:
Planting of tissue culture Banana can be done throughout the year except when the temperature is too low or too high. The facility of a drip irrigation system is important. There are two important seasons in Maharashtra, India;
Mrig Baug (Kharif) Month of planting June – July. Kande Baug (Rabi) Month of planting October – November.

Banana Planting Methods:
Pit planting is commonly followed in the garden system of cultivation. A pit size of 0.5 x 0.5 x 0.5m is normally required. Small pits are dug in case of ridges and furrows. The pits are to be refilled with topsoil mixed with 10 kg of FYM (well decomposed), 250 gm of neem cake and 20 gm of carbofuran. Prepared pits are left open for 15-20 days for solar radiation to kill all the insects, soil-borne diseases and for aeration before refilling. In saline-alkali soil where the pH is above 8, pit mixture is to be modified incorporating organic matter and gypsum.

The suckers are planted in the center of the pit and soil around is compacted. Plants are planted in the pits keeping pseudostem 2cm below the ground level. The soil around the plant is gently pressed. Deep planting should be avoided. The field is irrigated immediately after planting.

Irrigation Management of Banana Orchard:
Banana, a water-loving plant, requires a large quantity of water for maximum productivity. But Banana roots are the poor withdrawal of water. Therefore under Indian condition banana production should be supported by an efficient irrigation system like drip irrigation. Water requirement of banana has been worked out to be 2000mm per Annum. Application of drip irrigation and mulching technology has reported improved water use efficiency. There is saving of 56% of water and increasing yield by 23-32% under the drip.

Irrigate the plants immediately after planting. Apply sufficient water and maintain field capacity. Excess irrigation will lead to root zone congestion due to the removal of air from soil pores, thereby affecting plant establishment and growth. And hence drip method is a must for proper water management in Banana.

Application of Manure and Fertilizers for Banana Plants:
Banana requires a high amount of nutrients, which are often supplied only in part by the soil. The nutrient requirement has been worked out on all India basis is to be 20 kg FYM, 200gm N; 60-70gm P; 300gm K/plant. Banana requires heavy nutrition. The banana crop requires 7-8 Kg N, 0.7- 1.5 Kg P and 17-20 Kg K per metric tonne yield. Banana responds well to the application of nutrients. Traditionally farmers use more of urea and less of phosphorous and potash.

In order to avoid loss of nutrients from conventional fertilizers, loss of N through leaching, volatilization, evaporation, and loss of P and K by fixation in the soil, application of water-soluble or liquid fertilizers through drip irrigation is encouraged. A 25-30% increase in yield is observed using fertigation. Moreover, it saves labor and time and the distribution of nutrients is uniform.

Intercultural operations in Banana Crop:
The Root system of banana is superficial and easily damaged by cultivation, use of intercrop which is not desirable. However short durational crops like mung, cowpea, dhaincha are to be considered as green manuring crops. Crops from the cucurbitaceous family should be avoided as these carry viruses.

Weeding of Banana Plants:
Spraying of Glyphosate before planting at the rate of 2 lit/ha is carried out to keep the plantation weed free. One or two manual weedings are necessary.

Banana Harvesting Procedure:
Banana should be harvested at the physiological maturity stage for better postharvest quality. The fruit is climacteric and can reach the consumption stage after ripening operation.

  • Maturity indices: These are established on the basis of fruit shape, angularity, grade or diameter of the median figure of the second hand, starch content and number of days that have elapsed after flowering. Market preferences can also affect the decision for harvesting a slight or fully mature fruit.
  • Removal of the bunch: The bunch should be harvested when figures of second hand from the top are 3/4 rounded with the help of sharp sickle 30cm above the first hand. Harvest may be delayed up to 100-110 days after the opening of the first hand. The harvested bunch should generally be collected in a well-padded tray or basket and brought to the collection site. Bunches should be kept out of light after harvest since this hastens to ripen and soften. For local consumption, hands are often left on stalks and sold to retailers. For export, hands are cut into units of 4-16 fingers, graded for both length and girth, and carefully placed in poly-lined boxes to hold different weight depending on export requirements.

Post-harvest management of Banana farming:
At the collection site injured and over-mature fruits are discarded and for a local market, bunches should be delivered through lorries or wagons. However, for more sophisticated and export market where the quality is predominant, bunches should be dehanded, fruits are cleared in running water or dilute sodium hypochlorite solution to remove the latex and treated with thiabendazole; air dried and graded on the basis of size of fingers as already stated, packed in ventilated CFB boxes of 14.5 kg capacity or as per requirement with polythene lining and pre-cooled at 13-15°C temperature and at 80-90% RH.
Such material should then be sent under cool chain at 13°C for marketing

The yield of Banana:
The planted crop gets ready for harvest within 11-12 months of planting. First ratoon crop would be ready by 8-10 month from the harvesting of the main crop and second ratoon by 8-9 months after the second crop.

Thus over a period to 28-30 months, it is possible to harvest three crops i.e. one main crop and two ratoon crops. Under drip irrigation combined with Fertigation yield of Banana as high as 100 T/ha can be obtained with the help of tissue culture technique, even similar yield in the ratoon crops can be achieved if the crop is managed well.

Bottom Line:
Banana Farming is Fun and Profitable provided if climatic conditions support.

Article Source:
https://www.agrifarming.in/banana-farming

Posted on Leave a comment

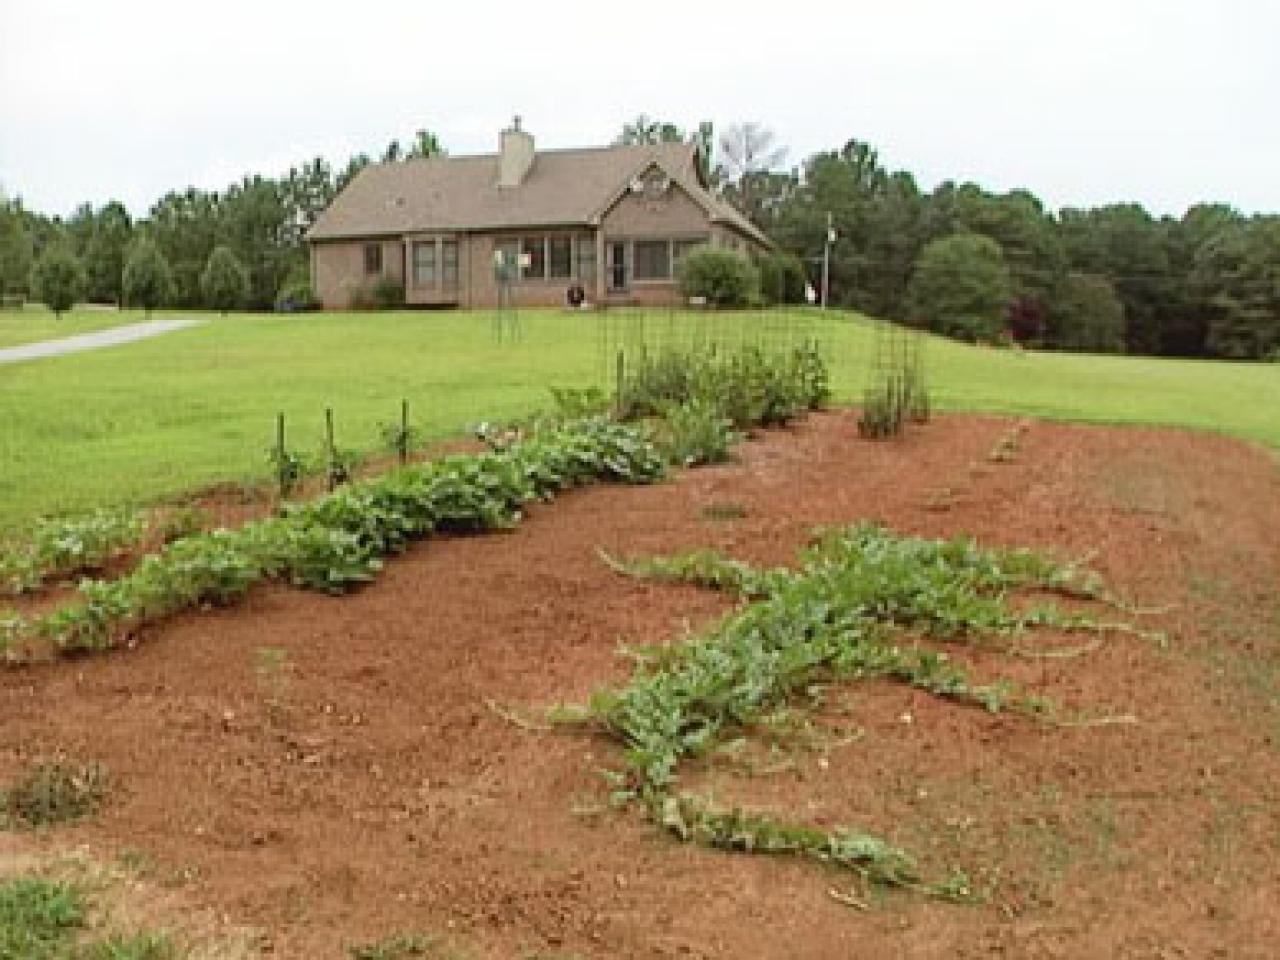
All information needed for Watermelon Cultivation

It is a sweet, edible fruit that has a green rind on the outside and edible red-colored flesh with black-colored seeds on the inside. The color of the flesh varies from pink to red. There are some varieties of watermelon that have yellow flesh. According to botanists, this cool fruit has its origins in the African deserts about five thousand years ago. Some of its wild varieties are still found growing here. They found their way up north through Egypt and people began cultivating it during the Roman Era.

Information on Watermelon Plant
Botanically, watermelon is called Citrullus lanatus and it belongs to Cucurbitaceae family. All the different types of gourds are classified under Cucurbitaceae family. The melons grow on a vine that can reach a length of 3 meters. It is an annual plant, it can only survive in one growing season. The vines are covered with tiny hairs; they are thin and have groves in them. The flowers are yellow-colored. The specialty of this plant is that male and female flowers are produced separately on the same plant. The fruit varies in shape from oblong to spherical. The fleshy fruit is encased in a thick rind while the seeds are encased inside the flesh.

Ideal Conditions for Watermelon Farming
Watermelons need warm climate for growth. It can be grown all through the year in places like Tamil Nadu, Karnataka, Andhra Pradesh, Orissa, West Bengal and Rajasthan. It is however very sensitive to frost. Hence it can be only cultivated after the frost in places like Haryana. Otherwise, these must be grown in greenhouses that have adequate protection from frosts.

Climate for Water Cultivation
Being a warm season crop, the plant requires ample sunshine and dry weather for production of fruits. In case they are grown in places where winter is prevalent, then they must be provided with adequate protection from cold and frost. They are extremely sensitive to the slightest of frost and hence care must be taken to keep the frost away from the crop. 24-27°C is ideal for the seed germination and growth of watermelon plants. A cool night would ensure ample development of sugars in the fruit.

Watermelon Seasons in India
In India, since the climate is mostly tropical, all seasons are suitable for watermelon cultivation. However, watermelon is sensitive to cold and frost. Therefore, in parts of the country where winter is severe, watermelons are cultivated after the frost has passed. In places like Tamil Nadu, Maharashtra, Andhra Pradesh, etc. watermelon cultivation is possible almost any time of the year.

Soil for Watermelon Farming
Watermelons grow best in sandy loam soil that drains easily. It also grows well in black soil and sandy soil. However, they must have a good amount of organic content and must not withhold water. Water must easily drain off from the soil else the vines are likely to develop fungal infections.

pH for Watermelon Cultivation
The pH of the soil must be between 6.0 and 7.5. Acidic soil would result in withering away of the seeds. While soil with a neutral pH is preferred, it can also grow well even if the soil is slightly alkaline.

Irrigation for Watermelon Growing
Watermelon is a dry season crop and it must be planted with irrigation. The watermelon beds are irrigated two days prior to sowing and then again 5 days after sowing the seeds. As the plant grows, irrigation is done on a weekly basis. Attention must be paid to water stress at the time of irrigation since it can lead to fruit cracking. While irrigating, water must be restricted to the root zone of the plant. Wetting of vines or other vegetative parts must be avoided especially during flowering or fruiting time as wetting can lead to withering away of the flowers, fruits or even the plant as a whole. In addition, wetting of the vegetative parts can also lead to development of fungal diseases. Moisture must be maintained near the roots so that the plants develop taproot system. As the fruits near maturity, irrigation frequency is reduced and it is completely stopped during the harvesting stage. This helps in developing flavor and sweetness in the fruit.

Watermelon Varieties in India
Watermelons grow from seeds. However, it is advisable to sow the seeds of watermelons bought from trusted place. There are different varieties of watermelon in India yielding a good harvest such as Vandana, Kiran, Sugar Baby, Watermelon Sultan, Improved Shipper, Madhubala, Arjun, Asahi Yamato, Special No.1, Arka Jyoti, Arka Manik, Durgapura Meetha, Durgapura Kesar

There are a few exotic varieties like Watermelon Hybrid Yellow Doll and Watermelon Hybrid Red Doll from China and Mardi gras, Royal Flush, Dumara, Celebration, Paradise, Sangria, Oasis, Star Bright, Baron, Samos, Arriba, etc. from America.

Land Preparation and Planting Watermelon Seeds
The land is ploughed until the soil becomes very fine tilth. The land is then prepared according to the type of sowing to be done. Watermelons are generally seeded directly in the farms. However, in case it has to be protected from frosts, then it is seeded in nurseries or greenhouses and later transplanted into the main field.

It is sowed during the months of February to March in North India and then during November to January in west and North East India. The seeds are sown at a depth of 2-3 cm from the top soil. The spacing method during sowing varies according to the type of sowing being followed.

Solarisation
Solarisation of soil is generally not necessary if watermelon cultivation is being done during dry season. However, solarisation can rid the soil of unwanted moisture content and even pests.

Pollination in Watermelon Farming
This is a very important step in watermelon cultivation. Unlike most other crops, flowers on watermelon plants cannot develop into fruits on their own. As mentioned earlier, male and female flowers grow on the same plant, but, separately. The male flowers are smaller in size and appear first while female flowers are huge and appear later. The female flowers have a small fruit at the base. In case it shrivels, it means there would be no pollination. In nature, bees carry the pollen while hopping from flower to flower gathering nectar. Therefore, setting up an artificial beehive in the watermelon field is a good idea. One hive per acre of watermelon field is more than enough.

Weed Control in Watermelon Farming
Weeding is needed only in the initial stages of watermelon growth. Being a vine, use of herbicides must be done very carefully else the healthy plants may get affected. The first weeding is done about 25 days after sowing. Subsequently, weeding is done once a month. Once the vines begin to spread, weeding is not necessary as the vines take care of the weeds.

Diseases and Plant Protection in Watermelon Farming
Watermelon is affected by numerous diseases such as aphids, thrips, anthracnose, mildew, wilt, Alternaria Leaf Spot, Fusarium Wilt, Bud Necrosis, etc.

Harvesting Watermelon
Watermelons are ready for harvest when:

The tendrils near the stem start drying
The white colored part of the fruit touching the ground turn yellowish
A thudding sound is produced when the melons are thumped (a dense sound is produced from immature fruits).
Fruits only mature when they are attached to the vine. Hence immature fruits must be left untouched. For harvesting ripe fruits, the stem is cut about an inch away from the fruits with the help of a knife. Upon harvesting, the fruits are graded according to their sizes. Then they can be stored at 15°C for maximum two weeks. However, they must not be stored with apples or bananas since the latter lose the flavor.

Watermelon farm attracts some pests and diseases but proper farm management can give exceptional profits from watermelon cultivation.

Article Source:
https://www.farmingindia.in/watermelon-cultivation/

Posted on Leave a comment

आम की फसल पर लगने वाले कीटों व रोगों की रोकथाम करें।

Mango Plant

फलों का राजा आम हमारे देश का सबसे महत्वपूर्ण फल है। आम की खेती उत्तर प्रदेश, बिहार, आंध्र प्रदेश, पश्चिम बंगाल, तमिलनाडु, उड़ीसा, महाराष्ट्र और गुजरात में व्यापक स्तर पर की जाती है। जनवरी महीने से आम के पेड़ों में बौर आना शुरू हो जाता है। इसलिए किसानों को अच्छा उत्पादन पाने के लिए अभी से इसकी देखभाल करनी होगी क्योंकि जरा सी चूक से रोग और कीट पूरी फसल को बर्बाद कर सकते हैं। “फसल के शुरू होने से पहले ही किसानों को बाग में सिंचाई कर देनी चाहिए, जिससे नमी बनी रहे। किसानों को इस समय पेड़ों पर कीटनाशकों का छिड़काव कर देना चाहिए। इसके बाद दूसरा छिड़काव जब फल चने के बराबर हो जाएँ तब करना चाहिए। जिस समय पेड़ों पर बौर लगा हो उस समय किसी भी कीटनाशक का छिड़काव नहीं करना चाहिए क्योंकि इसका परागण हवा या मक्खियों द्वारा होता है। अगर कीटनाशक का छिड़काव कर दिया तो मक्खियाँ मर जाएँगी और बौर पर नमी होने के कारण परागण नहीं हो पायेगा, जिससे फल बहुत कम आ सकते है।”

आम की फसल में इस समय हॉपर कीट लगने का खतरा रहता है। यह कीट पत्तियों और बौर से रस चूसता रहता है, इसका असर अगर ज्यादा हो गया तो पेंड में फल नहीं आता है। इसलिए समय पर कीटनाशकों का प्रयोग करें।

आम पर लगने वाले कीट 

गुठली का घुन (स्टोन वीविल) :- यह कीट आम की गुठली में छेद करके घुस जाता है और उसके अंदर ही अपना भोजन बनाता रहता है। कुछ दिनों बाद यह गूदे में पहुँच जाता है और उसे हानि पहुँचाता है। इसकी वजह से कुछ देशों ने इस कीट से ग्रसित बागों से आम का आयात पूरी तरह प्रतिबंधित कर दिया था। 

रोकथाम :- इस कीड़ें को नियंत्रित करना थोड़ा कठिन होता है इसलिए जिस भी पेंड से फल नीचे गिरे उस पेंड की सूखी पत्तियों और शाखाओं को नष्ट कर देना चाहिए। इससे कुछ हद तक कीड़े की रोकथाम हो जाती है। 

जाला कीट (टेन्ट केटरपिलर) :- प्रारंभिक अवस्था में यह कीट पत्तियों की ऊपरी सतह को तेजी से खाता है। उसके बाद पत्तियों को जाल या टेन्ट बनाकर उसके अन्दर छिप जाता है और पत्तियों को खाना जारी रखता है। 

रोकथाम :- पहला उपाय तो यह है कि एजाडिरेक्टिन 3000 पीपीएम ताकत का 2 मिली लीटर को पानी में घोलकर छिड़काव करें। दूसरा संभव उपाय यह है कि जुलाई के महीने में कुइनोलफास 0.05 % या मोनोक्रोटोफास 0.05 % का 2 – 3 बार छिड़काव करें। 

दीमक :- दीमक सफेद, चमकीले और मिट्टी के अंदर रहने वाले कीट हैं। यह जड़ को खाता है। उसके बाद सुरंग बनाकर ऊपर की ओर बढ़ता जाता है। यह तने के ऊपर कीचड़ का जमाव करके अपने आप को सुरक्षित करता है। 

रोकथाम :- तने के ऊपर से कीचड़ के जमाव को हटाना चाहिए। तने के ऊपर 1.5 % मेलाथियान का छिड़काव करें। दीमक से छुटकारा मिलने के बाद पेंड के तने को मोनोक्रोटोफास (1 मिली / लीटर ) से मिटटी पर छिड़काव करें। 

भुनगा कीट :- यह कीट आम की फसल को सबसे अधिक नुकसान पहुँचाते हैं। इस कीट के लार्वा एवं वयस्क कीट कोमल पत्तियों और पुष्पक्रमों का रस चूसकर हानि पहुँचाते हैं। इसकी मादा 100 – 200 तक अंडे नयी पत्तियों एवं प्ररोह में देती हैं और उनका जीवनचक्र 12 – 22 दिनों में पूरा हो जाता है। इसका प्रकोप जनवरी – फरवरी से शुरू हो जाता है। 

रोकथाम :- इस कीट से बचने के लिए बिवेरिया बेसिआना फफूँद के 0.5% घोल का छिड़काव करें। नीम तेल 3000 पीपीएम प्रति 2 मिली प्रति लीटर पानी में मिलाकर, घोल का छिड़काव करके भी निजात पाया जा सकता है। इसके आलावा कार्बोरील 0.2 % या कुइनोलफास 0.063 % का घोल बनाकर छिड़काव करने से भी राहत मिल जाएगी।

आम पर लगने वाले रोग व उनसे बचाव के उपाय 

सफेद चूर्णी रोग (पॉवडरी मिल्ड्यू) :- बौर आने की अवस्था में यदि मौसम बदली वाला हो या बरसात हो रही हो तो यह बीमारी लग जाती है। इस बीमारी के प्रभाव से रोगग्रस्त भाग सफेद दिखाई पड़ने लगता है। इसकी वजह से मंजरियां और फूल सूखकर गिर जाते हैं। इस रोग के लक्षण दिखाई देते ही आम के पेड़ों पर 5 % वाले गंधक के घोल का छिड़काव करें। इसके आलावा 500 लीटर पानी में 250 ग्राम कैराथेन घोलकर छिड़काव करने से भी बीमारी पर काबू पाया जा सकता है। जिन क्षेत्रों में बौर आने के समय मौसम असामान्य रहा हो वहाँ हर हालत में सुरक्षात्मक उपाय के आधार पर 0.2 % वाले गंधक के घोल का छिड़काव करें एवं आवश्यकतानुसार दोहराएं। 

कालवूणा ( एन्थ्रेक्नोस ) :- यह बीमारी अधिक नमी वाले क्षेत्रों में अधिक पायी जाती है। इसका आक्रमण पौधों के पत्तों, शाखाओं और फूलों जैसे मुलायम भागों पर अधिक होता है। प्रभावित हिस्सों में गहरे भूरे रंग के धब्बे आ जाते हैं। 0.2 % जिनैब का छिड़काव करें। जिन क्षेत्रों में इस रोग की सम्भावना अधिक हो वहाँ सुरक्षा के तौर पर पहले ही घोल का छिड़काव करें। 

ब्लैक टिप ( कोएलिया रोग ) :- यह रोग ईंट के भट्टों के आसपास के क्षेत्रों में उससे निकलने वाली गैस सल्फर डाई ऑक्साइड के कारण होता है। इस बीमारी में सबसे पहले फल का आगे का भाग काला पड़ने लगता है इसके बाद ऊपरी हिस्सा पीला पड़ता है। इसके बाद गहरा भूरा और अंत में काला हो जाता है। यह रोग दशहरी किस्म में ज्यादा होता है। इस रोग से फसल बचाने का सबसे अच्छा उपाय यह है कि ईंट के भट्टों की चिमनी आम के पूरे मौसम के दौरान लगभग 50 फुट ऊँची रखी जाएँ। इस रोग के लक्षण दिखाई देते ही बोरेक्स 10  ग्राम/लीटर पानी की दर से बने घोल का छिड़काव करें। फलों के बढ़वार की विभिन्न अवस्थाओं के दौरान आम के पेड़ों पर 0.6 % बोरेक्स के दो छिड़काव फूल आने से पहले और जब फल मटर के दाने के बराबर हो जाएँ तो 15 दिन के अंतराल पर तीन छिड़काव करने चाहिए। 

गुच्छा रोग :- इस बीमारी का मुख्य लक्षण यह है कि इसमें पूरा बौर नपुंसक फलों का एक ठोस गुच्छा बन जाता है। बीमारी का नियंत्रण प्रभावित बौर और शाखाओं को तोड़कर किया जा सकता है। अक्टूबर माह में 200/10 लक्षांश वाले नेप्थलीन एसिटिक एसिड का छिड़काव करना और कलियाँ आने की अवस्था में जनवरी के महीने में पेंड बौर तोड़ देना भी लाभदायक रहता है क्योंकि इससे न केवल आम की उपज बढ़ जाती है बल्कि इस बीमारी के आगे फैलने की संभावना भी कम हो जाती है। 

पत्तों का जलना :- उत्तर भारत में आम के कुछ बागों में पोटेशियम की कमी से एवं क्लोराइड की अधिकता से पत्तों के जलने की गंभीर समस्या पैदा हो जाती हैं। इस रोग से ग्रसित वृक्ष के पुराने पत्ते दूर से ही जले हुए जैसे दिखाई देते हैं। इस समस्या से फसल को बचाने हेतु पौधों पर 5% पोटेशियम सल्फेट के छिड़काव की सिफारिश की जाती है। यह छिड़काव उसी समय करें जब पौधों पर नयी पत्तियाँ आ रही हों। ऐसे बागों में पोटेशियम क्लोराइड उर्वरक प्रयोग ंन करने की सलाह भी दी जाती है। 0.1 % मेलाथिऑन का छिड़काव भी प्रभावी होता है। 

डाई बैक :- इस रोग में आम की टहनी ऊपर से नीचे की ओर सूखने लगती है और धीरे – धीरे पूरा पेंड सूख जाता है। यह फफूंद जनित रोग होता है, जिससे तने की जलवाहिनी में भूरापन आ जाता है और वाहिनी सूख जाती है और जल ऊपर नहीं चढ़ पाता है इसकी रोकथाम के लिए रोग ग्रसित टहनियों के सूखे भाग को 15 सेमी नीचे से काट कर जला दें। कटे स्थान पर बोर्डो पेस्ट लगाएं तथा अक्टूबर माह में कॉपर ऑक्सी क्लोराइड का 0.3 % घोल का छिड़काव करें।   

Posted on Leave a comment

आप सर्दियों में अपने गार्डन में लगा सकते हैं ये 6 टेस्टी फल।

अगर आप सर्दियों में अपने घर में टेस्टी फल पाना चाहते हैं तो आज मैं आपको ऐसे फल के पौधों के बारे में बताऊँगा जिन्हें आप अपने घर के गार्डन में भी लगा सकते हैं और आप सर्दियों में भी फल पा सकते हैं। अब आप यह सोंच रहें होंगे कि घर में अगर जगह नहीं है तो यह कैसे होगा लेकिन अब इसकी चिंता करने की कोई जरुरत नहीं है क्योंकि आप इन फल के पौधों को गमलों में भी लगा सकते हैं। बस समय पर इन्हे जरुरी खाद और पानी देते रहें। क्योंकि इन पौधों की ज्यादा देखभाल की जरुरत होती है। तो आईये जाने कुछ ऐसे ही फल जिन्हे आप अपने घर में लगा सकते हैं।

अंगूर ( Grapes Plant )

Buy Grapes Live Plant

अंगूर एक बहुत ही रसीला और खट्टा मीठा फल होता है। इसे आप सर्दियों में अपने घर में ऊगा सकते हैं क्योंकि यह बेल की तरह उगता है इसलिए इसे सहारे की जरुरत पड़ती है। 

नीम्बू ( Lemon Plant )

Buy lemon live plant

नीम्बू का पेंड लगाना बहुत कठिन काम है, क्योंकि इसके लिए आपको बहुत समय और जगह की जरुरत पड़ती है। इसलिए इसे लगाने से पहले इसकी पूरी जानकारी हासिल कर लें। 

पपीता ( Papaya Plant )

Buy papaya live plant

पपीता बहुत ही स्वास्थ्य वर्धक फल है, इसमें विटामिन A अच्छी मात्रा में पाया जाता है। इसे काफी ज्यादा पानी और सूरज की किरणों की जरुरत पड़ती है, इस पेंड को ज्यादा देखभाल की जरुरत नहीं होती है। 

संतरा ( Orange Plant )

Buy orange live plant

संतरा नारंगी रंग का फल होता है, इसे आप अपने घर में आसानी से लगा सकते हैं। बस समय – समय पर इसमें खाद और पानी डालते रहें। 

अनार ( Pomegrant Plant )

Buy Anar live plant

अनार काफी स्वास्थ्यवर्धक फल है, अगर आप के पास टाइम और संसाधन है तो ही इसे लगाये क्योंकि इस पेंड को देखभाल की जरुरत पड़ती है। 

स्ट्रॉबेरी ( Strawberry Plant )

Strawberry Plant Buy Strawberry Plant for best price at INR 55 / Piece(s) (  Approx )
Buy Strawberry live plant

 स्ट्रॉबेरी का नाम सुनते ही हम सबके मुँह में पानी आ जाता है, इसमें विटामिन – C काफी मात्रा में पाया जाता है। इसे आप अपने घर में लगा सकते हैं। बस एक बात का ध्यान रखें कि इसे सूरज की पर्याप्त रोशनी मिलती रहे।